色々と調べていたら、
FirstPersonControls を使うと、ゲームっぽい1人称視点で操作ができると言う噂を聞きつけてやってみました。
OrbitControls
まず、
FirstPersonControlsを使わずに、
OrbitControlsで、カメラを動かす場合、
コード
<html>
  <head>
    <meta charset="utf-8" />
    <script type="importmap">
      {
        "imports": {
          "three": "https://cdn.jsdelivr.net/npm/three@0.164.1/build/three.module.js",
          "three/addons/": "https://cdn.jsdelivr.net/npm/three@0.164.1/examples/jsm/"
        }
      }
    </script>
    <script type="module">
      import * as THREE from "three";
      import { OrbitControls } from "three/addons/controls/OrbitControls.js";
      import { FirstPersonControls } from "three/addons/controls/FirstPersonControls.js";

      var clock = new THREE.Clock();

      // サイズを指定
      const width = 960;
      const height = 540;

      // レンダラーを作成
      const canvasElement = document.querySelector("#myCanvas");
      const renderer = new THREE.WebGLRenderer({
        canvas: canvasElement,
      });
      renderer.setSize(width, height);

      // シーンを作成
      const scene = new THREE.Scene();

      // カメラを作成
      const camera = new THREE.PerspectiveCamera(45, width / height);
      // カメラの初期座標を設定
      camera.position.set(0, 0, 1000);

      // カメラコントローラーを作成
      const controls = new OrbitControls(camera, canvasElement);

      /*
      const controls = new FirstPersonControls(camera, renderer.domElement); //
      controls.movementSpeed = 100;  //移動速度
      //controls.lookVertical = true; //default true

      // true でマウスによる方向転換の操作を許可する
      //controls.activeLook = false;  //default true
      // マウスによる方向転換の速度
      controls.lookSpeed = 0.02;
      */

      // 形状とマテリアルからメッシュを作成します
      const geometry = new THREE.BoxGeometry(100, 300, 50);
      const material = new THREE.MeshNormalMaterial();
      const mesh = new THREE.Mesh(geometry, material);
      scene.add(mesh);

      const geometry2 = new THREE.BoxGeometry(200, 50, 100);
      const box2 = new THREE.Mesh(geometry2, material);
      //場所を変える
      box2.position.x = 400;
      box2.position.z = 400;
      scene.add(box2);

      const geometry3 = new THREE.BoxGeometry(50, 100, 200);
      const box3 = new THREE.Mesh(geometry3, material);
      box3.position.z = -1000;
      scene.add(box3);

      const geometry4 = new THREE.BoxGeometry(100, 200, 50);
      const box4 = new THREE.Mesh(geometry4, material);
      box4.position.z = 400;
      scene.add(box4);

      const box5 = new THREE.Mesh(geometry3, material);
      box5.position.x = -400;
      scene.add(box5);

      const box6 = new THREE.Mesh(geometry, material);
      box6.position.x = -400;
      box6.position.z = 400;
      scene.add(box6);

      const box7 = new THREE.Mesh(geometry, material);
      box7.position.x = 400;
      box7.position.z = -1000;
      scene.add(box7);

      const box8 = new THREE.Mesh(geometry, material);
      box8.position.x = 400;
      scene.add(box8);

      const box9 = new THREE.Mesh(geometry, material);
      box9.position.x = -400;
      box9.position.z = -500;
      scene.add(box9);

      const box10 = new THREE.Mesh(geometry2, material);
      //box9.position.x = -400;
      box10.position.z = -500;
      scene.add(box10);

      const box11 = new THREE.Mesh(geometry3, material);
      box11.position.x = 550;
      box11.position.z = -500;
      scene.add(box11);

      //軸を追加する。
      const axesHelper = new THREE.AxesHelper( 1000 );
      scene.add( axesHelper );

      //グリッドを追加する。
      const gridHelper = new THREE.GridHelper(2000, 50,0xffff00)
      scene.add(gridHelper);

      tick();

      // 毎フレーム時に実行されるループイベントです
      function tick() {
        // レンダリング
        renderer.render(scene, camera);
        requestAnimationFrame(tick);
        //controls.update(clock.getDelta());
      }
    </script>
  </head>
  <body>
    <canvas id="myCanvas"></canvas>
  </body>
</html>
画面表示
こんな感じで、箱を配置。
CodePen
See the Pen three.js 入門 7_1 by sasuke (@vhmbdiog-the-flexboxer) on CodePen.
俯瞰視点で見ると、こんな感じの状況です。
FirstPersonControls
次に、同じ空間を、
FirstPersonControlsを使って1人称視点で、視点移動する。
コード
上記コードの、OrbitControls の部分を、FirstPersonControlsに変更する。
      // カメラコントローラーを作成
      //const controls = new OrbitControls(camera, canvasElement);

      const controls = new FirstPersonControls(camera, renderer.domElement); //
      controls.movementSpeed = 100;  //移動速度
      //controls.lookVertical = true; //default true

      // true でマウスによる方向転換の操作を許可する
      //controls.activeLook = false;  //default true
      // マウスによる方向転換の速度
      controls.lookSpeed = 0.02;
レンダリング部分のコードを追加する。
      // 毎フレーム時に実行されるループイベントです
      function tick() {
        // レンダリング
        renderer.render(scene, camera);
        requestAnimationFrame(tick);
        controls.update(clock.getDelta());  //この行を追加。FirstPersonControls.js で使う。
      }
あと、
var clock = new THREE.Clock();
を何処か上のほうで宣言しておく。
コード全体
<html>
  <head>
    <meta charset="utf-8" />
    <script type="importmap">
      {
        "imports": {
          "three": "https://cdn.jsdelivr.net/npm/three@0.164.1/build/three.module.js",
          "three/addons/": "https://cdn.jsdelivr.net/npm/three@0.164.1/examples/jsm/"
        }
      }
    </script>
    <script type="module">
      import * as THREE from "three";
      import { OrbitControls } from "three/addons/controls/OrbitControls.js";
      import { FirstPersonControls } from "three/addons/controls/FirstPersonControls.js";

      var clock = new THREE.Clock();

      // サイズを指定
      const width = 960;
      const height = 540;

      // レンダラーを作成
      const canvasElement = document.querySelector("#myCanvas");
      const renderer = new THREE.WebGLRenderer({
        canvas: canvasElement,
      });
      renderer.setSize(width, height);

      // シーンを作成
      const scene = new THREE.Scene();

      // カメラを作成
      const camera = new THREE.PerspectiveCamera(45, width / height);
      // カメラの初期座標を設定
      camera.position.set(0, 0, 1000);

      // カメラコントローラーを作成
      //const controls = new OrbitControls(camera, canvasElement);


      const controls = new FirstPersonControls(camera, renderer.domElement); //
      controls.movementSpeed = 200;  //移動速度
      //controls.lookVertical = true; //default true

      // true でマウスによる方向転換の操作を許可する
      //controls.activeLook = false;  //default true
      // マウスによる方向転換の速度
      controls.lookSpeed = 0.08;


      // 形状とマテリアルからメッシュを作成します
      const geometry = new THREE.BoxGeometry(100, 300, 50);
      const material = new THREE.MeshNormalMaterial();
      const mesh = new THREE.Mesh(geometry, material);
      scene.add(mesh);

      const geometry2 = new THREE.BoxGeometry(200, 50, 100);
      const box2 = new THREE.Mesh(geometry2, material);
      //場所を変える
      box2.position.x = 400;
      box2.position.z = 400;
      scene.add(box2);

      const geometry3 = new THREE.BoxGeometry(50, 100, 200);
      const box3 = new THREE.Mesh(geometry3, material);
      box3.position.z = -1000;
      scene.add(box3);

      const geometry4 = new THREE.BoxGeometry(100, 200, 50);
      const box4 = new THREE.Mesh(geometry4, material);
      box4.position.z = 400;
      scene.add(box4);

      const box5 = new THREE.Mesh(geometry3, material);
      box5.position.x = -400;
      scene.add(box5);

      const box6 = new THREE.Mesh(geometry, material);
      box6.position.x = -400;
      box6.position.z = 400;
      scene.add(box6);

      const box7 = new THREE.Mesh(geometry, material);
      box7.position.x = 400;
      box7.position.z = -1000;
      scene.add(box7);

      const box8 = new THREE.Mesh(geometry, material);
      box8.position.x = 400;
      scene.add(box8);

      const box9 = new THREE.Mesh(geometry, material);
      box9.position.x = -400;
      box9.position.z = -500;
      scene.add(box9);

      const box10 = new THREE.Mesh(geometry2, material);
      //box9.position.x = -400;
      box10.position.z = -500;
      scene.add(box10);

      const box11 = new THREE.Mesh(geometry3, material);
      box11.position.x = 550;
      box11.position.z = -500;
      scene.add(box11);

      //軸を追加する。
      const axesHelper = new THREE.AxesHelper( 1000 );
      scene.add( axesHelper );

      //グリッドを追加する。
      const gridHelper = new THREE.GridHelper(2000, 50,0xffff00)
      scene.add(gridHelper);

      tick();

      // 毎フレーム時に実行されるループイベントです
      function tick() {
        // レンダリング
        renderer.render(scene, camera);
        requestAnimationFrame(tick);
        controls.update(clock.getDelta());//この行を追加。FirstPersonControls.js で使う。
      }
    </script>
  </head>
  <body>
    <canvas id="myCanvas"></canvas>
  </body>
</html>
画面表示
初期位置
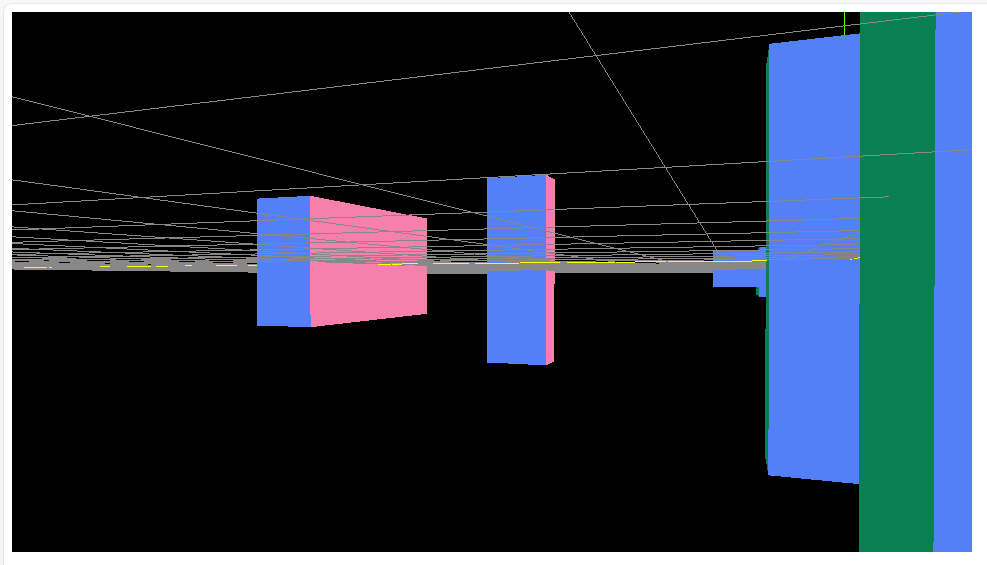
正面の壁を、左側に回避して抜けてみる。
シューティングゲームか、何かできそう。
操作方法)
左マウスクリックで、直進。
カメラの向き(進行方向)はマウスポインタで操作する。
CodePen
See the Pen three.js 入門 7_2 by sasuke (@vhmbdiog-the-flexboxer) on CodePen.


