自宅のLAN内で,動画をストリーミングで見れるようにしたかったので,
NginxとNuxtで,ストリーミング再生できる環境を構築しました.
記事概要
以下の内容を書いています.
- Nginxで, HTTP Live Streaming (HLS)ができる環境を構築
- Nuxt.jsベースで,ストリーミング動画を再生できるWebコンテンツを作成
動作環境
- Docker (Mac)
- Raspberry Pi (Dockerなし)
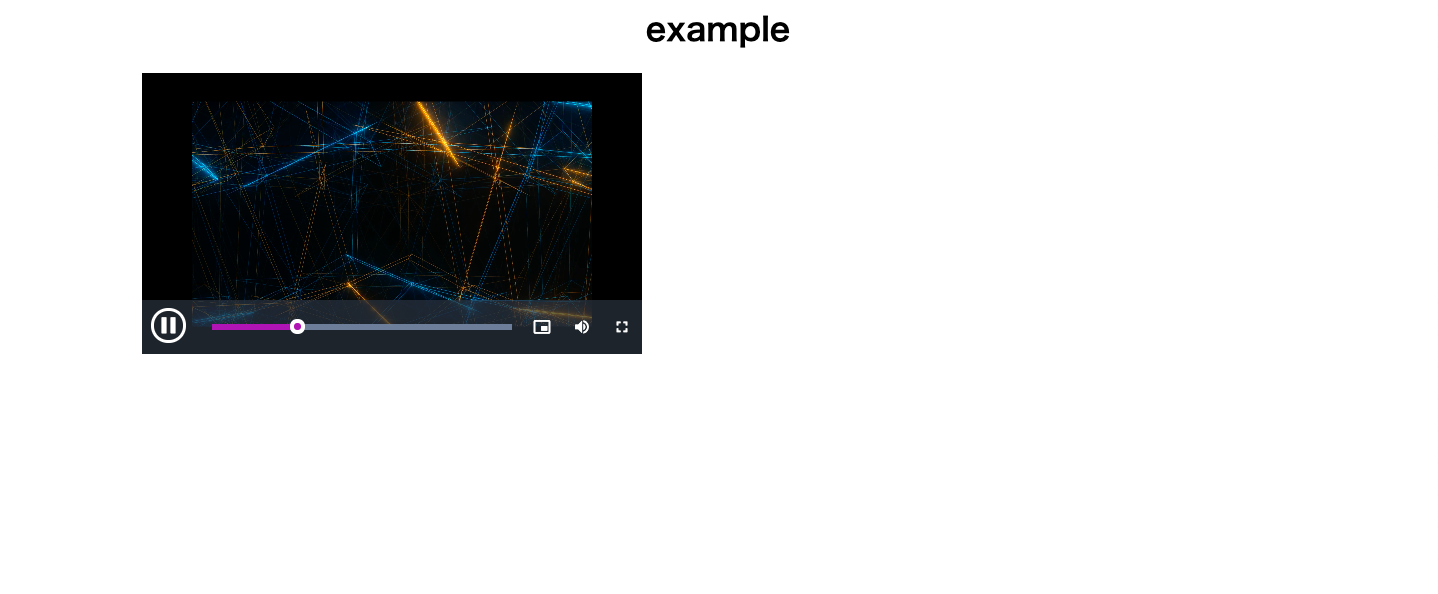
できたもの
Webアプリ
システム構成

NginxでHSLの準備
※ 再現性が高くなるように,Dockerで実装していきます. Raspberry Piで直接構築する場合は,Dockerコンテナと同じディレクトリ構成をRaspberry Pi上で構築すれば実現できます.
備考
簡単にするために, Nginxデフォルトの /usr/share/nginx/html以下で,Webアプリ・動画コンテンツも管理します.
Nginx設定ファイル
Nginxの2つの設定ファイルを以下に編集します.
/etc/nginx/nginx.conf
<・・・省略・・・>

http {
    include       /etc/nginx/mime.types;
    default_type  application/octet-stream;

    log_format  main  '$remote_addr - $remote_user [$time_local] "$request" '
                      '$status $body_bytes_sent "$http_referer" '
                      '"$http_user_agent" "$http_x_forwarded_for"';

    access_log  /var/log/nginx/access.log  main;

    sendfile        on;

    keepalive_timeout  65;

    include /etc/nginx/conf.d/*.conf;

    server {
        location / {
            add_header 'Access-Control-Allow-Origin' null;
            if ($request_method = 'OPTIONS') {
                add_header 'Access-Control-Allow-Origin' null always;
                add_header 'Access-Control-Allow-Methods' 'GET, POST, OPTIONS';

                add_header 'Access-Control-Max-Age' 1728000;
                add_header 'Content-Type' 'text/plain; charset=utf-8';
                add_header 'Content-Length' 0;
                return 204;
            }
            if ($request_method = 'POST') {
                add_header 'Access-Control-Allow-Origin' '*' always;
                add_header 'Access-Control-Allow-Methods' 'GET, POST, OPTIONS' always;
                add_header 'Access-Control-Allow-Headers' 'DNT,User-Agent,X-Requested-With,If-Modified-Since,Cache-Control,Content-Type,Range' always;
                add_header 'Access-Control-Expose-Headers' 'Content-Length,Content-Range' always;
            }
            if ($request_method = 'GET') {
                add_header 'Access-Control-Allow-Origin' '*' always;
                add_header 'Access-Control-Allow-Methods' 'GET, POST, OPTIONS' always;
                add_header 'Access-Control-Allow-Headers' 'DNT,User-Agent,X-Requested-With,If-Modified-Since,Cache-Control,Content-Type,Range' always;
                add_header 'Access-Control-Expose-Headers' 'Content-Length,Content-Range' always;
            }
        }
    }

}

<・・・省略・・・>
/etc/nginx/conf.d/mime.conf
HTTP通信時に,以下の拡張子のデータを扱うMIMEタイプを定義
-
m3u8: HSLのストリーミングmpegURLとしてあつかう -
ts:ストリーミング動画フォーマット (MPEG-2)
types {
    application/vnd.apple.mpegurl m3u8;
    video/mp2t ts;
}
mp4ファイルをMPEG-2に変換
通常の動画として,mp4をよく使うのですが,今回は MPEG-2に変換しないといけないので,その処理をします.
動画変換には, ffmpegを使いました.
# FILENAME : 任意のファイル名
ffmpeg -i FILENAME.mp4 -codec copy -map 0 \
    -f segment -vbsf h264_mp4toannexb \
    -segment_format mpegts \
    -segment_time 10 \
    -segment_list FILENAME/video.m3u8 FILENAME/video-%03d.ts
↓ FILENAME = "example"にしてこの処理をすると ↓
ストリーミング用に分割された動画ファイル tsと,tsの時系列データがまとめられた m3u8データが作成されました.

HTMLでストリーミング確認
サーバ側で,HLSの動画が準備できていれば,以下の簡単なHTMLコードを,同じWebサーバにコンテンツ配置すれば,Safariなら,ストリーミング再生ができるようになります.
※ ChromeやFirefoxは,デフォルトでHLSをサポートしていないので,後述する Nuxt.jsでの実装で対応させます.
/usr/share/nginx/html/player.html
<!DOCTYPE html>
<html>
<head>
    <title>HTTP Live Streaming Example</title>
</head>
<body>
    <video src="/video/example/video.m3u8" width="400" height="300" controls></video>
</body>
</html>
参考:https://www.yaz.co.jp/tec-blog/web%E3%82%B5%E3%83%BC%E3%83%93%E3%82%B9/212
コンテンツの配置
/usr/share/nginx/html以下のように配置します.
/usr/share/nginx/html
┝ video/
|  ┗ example/
|     ┝ 0000.ts
|     ┝ 0001.ts
|     ┗ video.m3u8
┗ test.html
ローカル or コンテナで, Nginxを起動して,
http://localhost/test.html にアクセスするとストリーミングが閲覧できる様になっています.

Nuxt.jsでHSL動画を再生
Chrome FirefoxでHLSを使うことができるように, Video.jsを使ってWebコンテンツを作ります.
Nuxt プロジェクト作成
参考 : 【初心者向け】3ステップで始める NuxtJS インストール編 | 北海道札幌市のホームページ・Web制作・システム開発会社|株式会社マーベリックス
※ 特に,必要なライブラリはこの段階ではないので,自由に設定してください.
なお,遊びでUI系のライブラリは, Vuesaxを使っています.
$ npx create-nuxt-app StreamingProject
HLS対応Webコンテンツを作成
HLSを再生できる. Nuxtのページを作っていきます.
Video.jsをインストール
Video.jsで,HLSのサポートから,動画プレイヤーのデザインまでできるのですが,
今回は,デフォルトのプレイヤーテーマを活用していきます.
$ yarn add video.js @videojs/themes
Nuxtコンテンツ実装
全体像
コード全体 (Clickして展開)
<template>
    <div class="container">
        <vs-row>
            <vs-col vs-type="flex" vs-justify="center" vs-align="center" vs-w="4">
                テキスト
            </vs-col>
        </vs-row>
        <vs-row>
            <vs-col vs-type="flex" vs-justify="center" vs-align="center" vs-w="12">
                <h1>{{ $route.query.url }}</h1>
            </vs-col>
        </vs-row>
        <vs-row>
            <vs-col vs-type="flex" vs-justify="center" vs-align="center" vs-w="12">
                <div class="video-wrapper">
                    <video ref="videoPlayer" class="video-js vjs-theme-fantasy" playsinline width="300">
                        <source id="video-m3u8" type="application/x-mpegURL" />
                    </video>
                </div>
            </vs-col>
        </vs-row>
    </div>
</template>
<script>
import videojs from 'video.js';
import "video.js/dist/video-js.css";
import '@videojs/themes/dist/fantasy/index.css';

export default {
    name: 'player',

    data() {
        return {
            player: null
        }
    },

    mounted() {
        var url = "/video/example/video.m3u8";

        var video = document.getElementById('video-m3u8');
        video.src = url

        this.player = videojs(this.$refs.videoPlayer, {autoPlay: true, controls: true}, () => {console.log('onPlayerReady')});
    },

    beforeDestroy() {
        if(this.player) {
            this.player.dispose()
        }
    }
}
</script>
<style scoped>
.container {
    width: 80vw;
    margin: 0 auto;
}

.video-wrapper {
    padding-top: 20px;
    width: 80vw;
    margin: 0 auto;
}

.video-wrapper video {
    position: absolute;
    top: 50%;
    left: 50%;
    transform: translateX(-50%) translateY(-50%);
    width: 80%;
    height: 80%;
}
</style>
Point
全体像は,上記で見ていただくとして,要点は以下となります
- ストリームファイルの読み込み
-
http://localhost/video/example/video.m3u8 に動画がある状態なので,
urlに相対パスを代入し, - template部にある video > source 属性 に,video.jsでラッピングした動画コンテンツを割り当てる (this.playerの代入部)
- これで, Chrome Firefoxでもストリーミングが閲覧できるようになります.
<template>
・・・
<video ref="videoPlayer" class="video-js vjs-theme-fantasy" playsinline width="500">
    <source id="video-m3u8" type="application/x-mpegURL" />
</video>
・・・
</template>

<script>
・・・
    mounted() {
        var url = "/video/example/video.m3u8";

        var video = document.getElementById('video-m3u8');
        video.src = url

        this.player = videojs(this.$refs.videoPlayer, {autoPlay: true, controls: true}, () => {console.log('onPlayerReady')});
    },
・・・
</script>
以下のような動画プレイヤーでストリーミングできるようになっています.