- GitHub 公式のアクションのみ使用します
- 複数の Swagger YAML をホスティングできます
- クエリパラメータで特定の YAML を選択できます
 サンプルコード
 設定方法
設定方法
- GitHub Pages の設定変更
- HTML ファイルの配置
- GitHub Actions ワークフローの配置
.
├── .github
│   └── workflows
│       └── deploy_swagger_ui_to_pages.yml
├── README.md
└── docs
    └── dist
        └── swagger-ui
            ├── index.html
            └── swagger.yml
            └── hogehoge.yml # Optional
GitHub Pages の設定変更
Settings > Pages > Build and deployment
Source を Deploy from a branch から GitHub Actions に変更します。
HTML ファイルの配置
Swagger YAML が配置されているディレクトリと同階層に index.html を配置します。
今回は docs/dist/swagger-ui というディレクトリを切っています。
GitHub Actions ワークフローの配置
Swagger UI を GitHub Pages にデプロイするワークフローを追加します。
ワークフローを動かす
ワークフローのステータスの画面に行くと URL が表示されています。

そのままアクセスすると 404 になるので URL を下例のように変更してください。
# 末尾に swagger-ui/ を追加
https://sasamuku.github.io/swagger-ui-on-github-pages/swagger-ui/
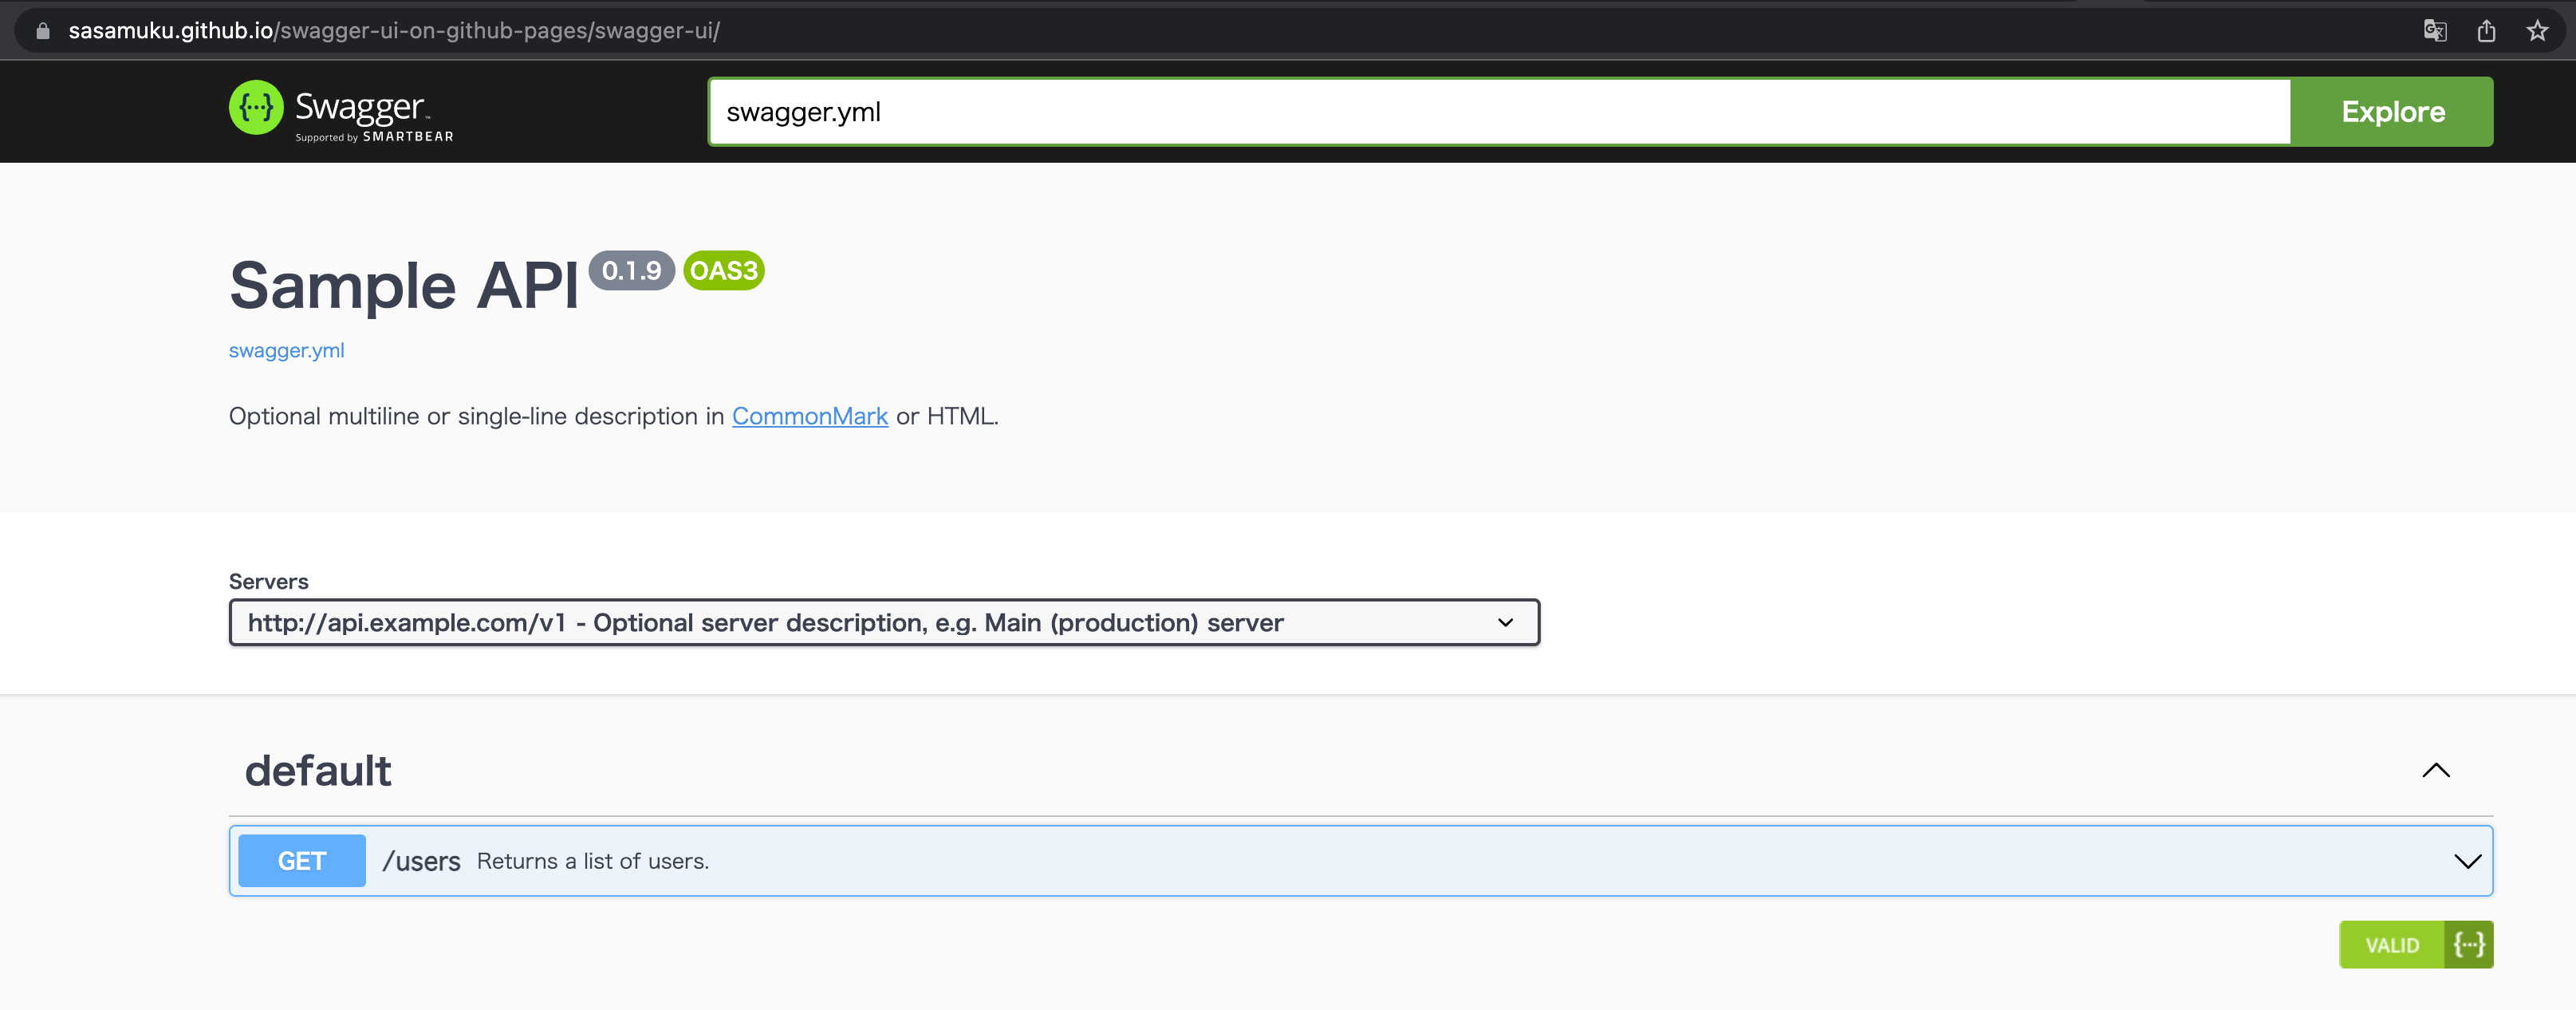
以下のようにページが表示されれば成功です。
https://sasamuku.github.io/swagger-ui-on-github-pages/swagger-ui/
https://sasamuku.github.io/swagger-ui-on-github-pages/swagger-ui/?q=hogehoge.yml

 解説
解説
設定方法について補足します。
index.html の中身
公開されている index.html をベースに改修を加えています。
-
swagger.ymlをデフォルトで読み込む - クエリパラメータがある場合はそちらを読み込む
- ディープリンクの有効化
<!-- HTML for static distribution bundle build -->
<!DOCTYPE html>
<html lang="en">

<head>
  <meta charset="UTF-8">
  <title>Swagger UI</title>
  <link rel="stylesheet" type="text/css" href="./swagger-ui.css" />
  <link rel="stylesheet" type="text/css" href="index.css" />
  <link rel="icon" type="image/png" href="./favicon-32x32.png" sizes="32x32" />
  <link rel="icon" type="image/png" href="./favicon-16x16.png" sizes="16x16" />
</head>

<body>
  <div id="swagger-ui"></div>
  <script src="./swagger-ui-bundle.js" charset="UTF-8"> </script>
  <script src="./swagger-ui-standalone-preset.js" charset="UTF-8"> </script>
  <script src="./swagger-initializer.js" charset="UTF-8"> </script>
  <script>
    window.onload = () => {
      window.ui = SwaggerUIBundle({
        url: new URL(location).searchParams.get('q') || 'swagger.yml',
        deepLinking: true,
        dom_id: '#swagger-ui',
        presets: [
          SwaggerUIBundle.presets.apis,
          SwaggerUIStandalonePreset
        ],
        layout: "StandaloneLayout",
      });
    };
  </script>
</body>

</html>
swagger.yml の配置場所
docs/dist/swagger-ui というやや深いディレクトリに入れているのは拡張性を持たせるためです。
Pages でアクセスする際に /swagger-ui/ とパスを切っているのも今後の拡張に備えての設計です。
なお swagger.yml を別ディレクトリで管理したい場合はシンボリックリンクを作成します。
deploy_swagger_ui_to_pages.yml でやっていること
swagger-api/swagger-ui から必要なアセットをコピーしてデプロイしています。
index.html は上述の通り改修を加えていますので上書きしないように cp -n としています。
name: Deploy Swagger UI to Pages

on:
  push:
    branches:
      - main
    paths:
      - docs/**
  workflow_dispatch:

permissions:
  contents: read
  pages: write
  id-token: write

concurrency:
  group: "pages"
  cancel-in-progress: true

jobs:
  deploy:
    environment:
      name: github-pages
      url: ${{ steps.deployment.outputs.page_url }}
    runs-on: ubuntu-latest
    steps:
      - name: Checkout
        uses: actions/checkout@v3
        with:
          path: main
      - name: Checkout swagger-ui
        uses: actions/checkout@v3
        with:
          repository: swagger-api/swagger-ui
          ref: 'v4.15.5'
          path: swagger-ui
      - name: Inject Swagger static files
        run: cp -n swagger-ui/dist/* main/docs/dist/swagger-ui
      - name: Setup Pages
        uses: actions/configure-pages@v2
      - name: Upload artifact
        uses: actions/upload-pages-artifact@v1
        with:
          path: 'main/docs/dist'
      - name: Deploy to GitHub Pages
        id: deployment
        uses: actions/deploy-pages@v1
GitHub 謹製のアクションだけで作れましたが特に縛る必要はないかと思います。
(同様の記事がたくさんあるので差別化するためタイトルに盛り込みました)
 謝辞
謝辞
参考