簡単に制御するための覚え書き

■まずはサイトにアクセス
https://dialogflow.com/

ここで「SIGN UP FREE」を押してスタートします。
■Dialogflowのページに入ったら、
「CREATE AGENT」を押してAgent作成画面に行きます(確か無料で作れるのは1個だけなのかな)

■Agentも名前を付けます、今回は「foodtest01」としています。
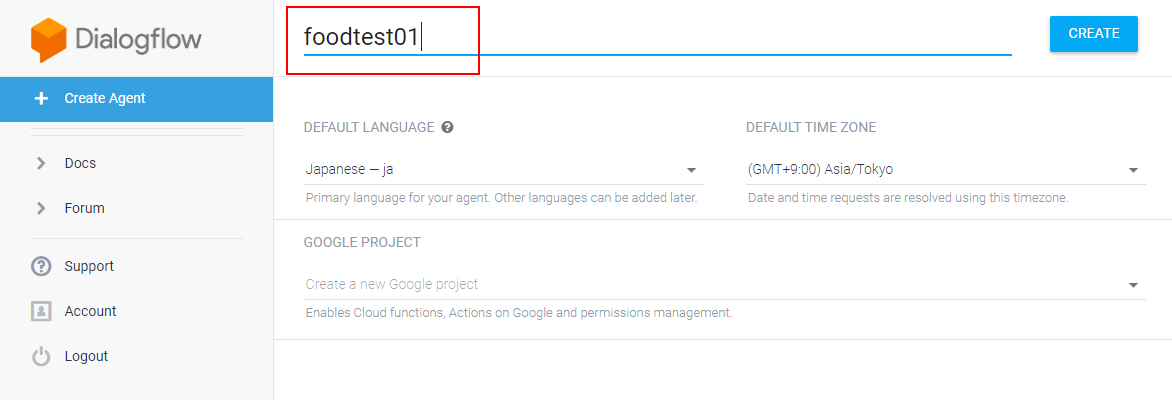
DEFAULT LANGUAGEは「Japanese-ja」
DEFAULT TIME ZONEは「(GMT+9:00)Asia/Tokyo」
GOOGLE PROJECTは「Create a new Google project」
に設定したら「CREATE」を押してAgentの作成ができます。
■作成するとこのような画面が出てきます。

■まずは「Entities」の作成(Entitiesが何かは別途調べてください)
左のメニューの「Entities」を選択したら「CREATE ENTITY」を押してください

■foods のEntity作成

Entitiy nameは今回「foods」を入れ、食べ物の情報を入れていきます。
スイカ:「スイカ」「すいか」「西瓜」
メロン:「メロン」「めろん」
バナナ:「バナナ」「ばなな」
ミカン:「ミカン」「みかん」「蜜柑」
ブドウ:「ブドウ」「ぶどう」「葡萄」
入力が終わったら「SAVE」を押して登録完了です。
■もう一個「feel」のEntityの作成

Entitiy nameは「feel」を入れます。
好き:「好き」「すき」「スキ」「おいしい」「美味しい」「うまい」「美味い」
嫌い:「嫌い」「きらい」「キライ」「まずい」「不味い」
入力が終わったら「SAVE」を押して登録完了です。
■Intentsの作成。(Intentsが何かは別途調べてください)
左のメニューの「Intents」を選択したら「CREATE INTENT」を押してください

■Intentの名前は「食べ物の好み!」にしました。

細かいIntentの設定をしていきます。
「ADD TRAINING PHRASES」を押してトレーニングします
■TRAINIG
入力画面に「スイカが好きです」と入力すると以下のような画面になります

さきほど登録したEntityでうまく分離できていると思います。
■Action and parameters

foods と feel の左のチェックボックスをONにしてください。
そしてfoodsの「Define prompts」を選択
■これで、食べ物の名前がない時の質問を入力します。
今回は「なにが $feel ですか?」

■Responses
返事の作成をします。「ADD RESPONSE」を押してください。

こんな画面が現れたら「私も $foods は $feel です。」とします。

■これでIntityのSave
ちゃんと「SAVE」ボタンを押してSAVEしてください。

■テスト1
右側にある入力欄に「すいかが好きです」と入力し、リターンしてもらえれば返事「私もスイカは好きです。」が帰ってきます。

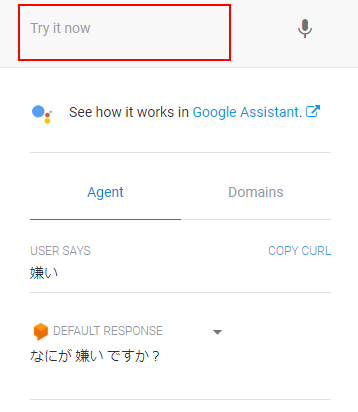
■テスト2
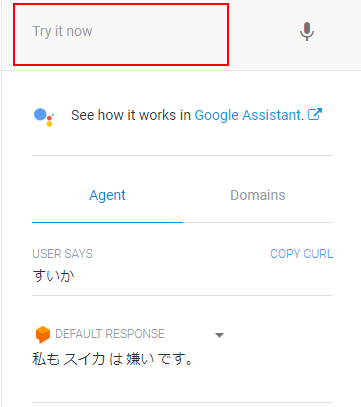
入力欄に「嫌い」と入力すると、「なにが嫌いですか?」と聞いてきますので!
「すいか」と答えると「私もスイカは嫌いです。」と返事が返ってきます。