概要
表題ままですが、Unityのエディタ拡張機能を使用してオリジナルのウィンドウを作成する方法を綴ります。
以前投稿した「UnityのInspectorを拡張する。」と併せて読むといい感じです。
実践
1. カスタムウィンドウ用クラス作成
[Project]以下のEditorという名前のフォルダの下に、任意のクラスを作成してね。
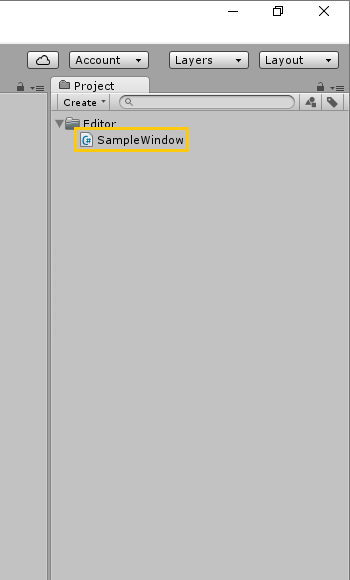
※Editorフォルダがない場合は新しく作ってね!
※Project(Assets)直下でなくてもOK!
2. メニューへの追加とウィンドウの作成
コードはこんな感じ
SampleWindow.cs
using UnityEngine;
using System.Collections;
using UnityEditor;	//!< UnityEditorを使うよ!

public class SampleWindow : EditorWindow	//!< EditorWindowを継承してね!
{
	//! MenuItem("メニュー名/項目名") のフォーマットで記載してね
	[MenuItem("Custom/SampleWindow")]
	static void ShowWindow()
	{
		// ウィンドウを表示!
		EditorWindow.GetWindow<SampleWindow>();
	}
}
実行画面はこんな感じ
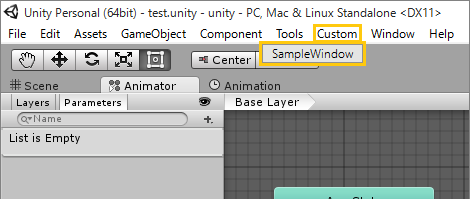
メニューに、[Custom] -> [SampleWindow] が追加されるよ!
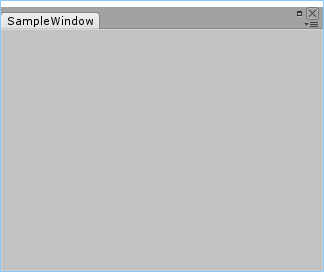
空っぽのウィンドウが開かれたら成功!
解説
-
MenuItem()でUnityの上部に並ぶアイテム名を指定しているよ - その下のstatic関数で
EditorWindow.GetWindow<>()を呼ぶことでウィンドウが開かれるよ
とっても簡単ね!
3. ウィンドウの中身を描画
描画関数を追記してね
SampleWindow.cs
using UnityEngine;
using System.Collections;
using UnityEditor;	//!< UnityEditorを使うよ!

public class SampleWindow : EditorWindow	//!< EditorWindowを継承してね!
{
	//! MenuItem("メニュー名/項目名") のフォーマットで記載してね
	[MenuItem("Custom/SampleWindow")]
	static void ShowWindow()
	{
		// ウィンドウを表示!
		EditorWindow.GetWindow<SampleWindow>();
	}


	/**
	 * ウィンドウの中身
	 */
	void OnGUI()
	{
		if( GUILayout.Button( "ボタン" ) )
		{
			Debug.Log( "押された!" );
		}
	}
}
実行画面はこんな感じ
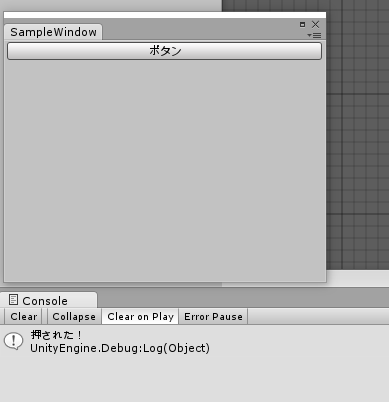
これでもうカスタムウィンドウの作り方はマスターしたね!
ウィンドウの中身の描画方法については「UnityのInspectorを拡張する。」も参考にしてみてね!