はじめに
Ruby Advent Calendar 2020 の13日目の記事です。
昨日は、@jerrywdlee さんの Rubyでロックファイルによる簡易的排他制御 でした。
昨年の11/14に開催された平成Ruby会議で、「Procのススメ」というテーマで登壇したんですが、その番外編を1年以上経った 今更 、Advent Calendarという機会に便乗して書きます。
当初発表内容に盛り込もうと思っていたけど、時間の都合で省いたトピックについて記事にまとめていきます。
※1. 知識はあるけど自分でもなかなか利用場面に恵まれないテクニックが結構あることは内緒 ![]()
※2. 時間の都合上、一部に関しては「使ってみる」 の部分は用意できませんでした ![]()
1. Enumerator::Yielder#to_proc
発表当時の構想にはなかったんですが、次の「独自に to_proc を定義」の部分の都合上、Ruby2.7 がリリースされた現在だと先に説明しておいた方が良さそうなので最初に説明しておきます。
Enumerator::Yielder#to_procとは
Enumearator::Yielder#to_proc は Ruby2.7 から追加されたメソッドです。
Enumearator::Yielder 自体がかなりマニアックなので、るりまのサンプルコードを見ながら説明していきます。
text = <<-END
Hello
こんにちは
END

enum = Enumerator.new do |y|
  text.each_line(&y)
end

enum.each do |line|
  p line
end
# => "Hello\n"
#    "こんにちは\n"
上記のコードの new に渡しているブロックのブロック引数で渡ってくるのが Enumerator::Yielder のインスタンスです。
enum = Enumerator.new do |y| # <= こいつが `Enumerator::Yielder`
  text.each_line(&y)
end
この部分を &修飾子 と to_proc を利用しない等価なコードを書くと以下の様になります。
enum = Enumerator.new do |y|
  text.each_line { |line| y.yield line } # <= y.yield でブロックを評価する際に line をブロック引数として渡す
end
また、Enumerator が each でイテレーション(繰り返し処理)を実行する際に渡されるブロックが Enumerator::Yielder としてブロック引数で渡ってきます。
enum.each do |line| # <= このブロックの部分が `Enumerator::Yielder` として渡ってくる
  p line
end
つまり、要素をブロック引数にそのまま引き渡すのが Enumerator::Yielder#to_proc です。
2. 独自に to_proc を定義
&修飾子と to_proc
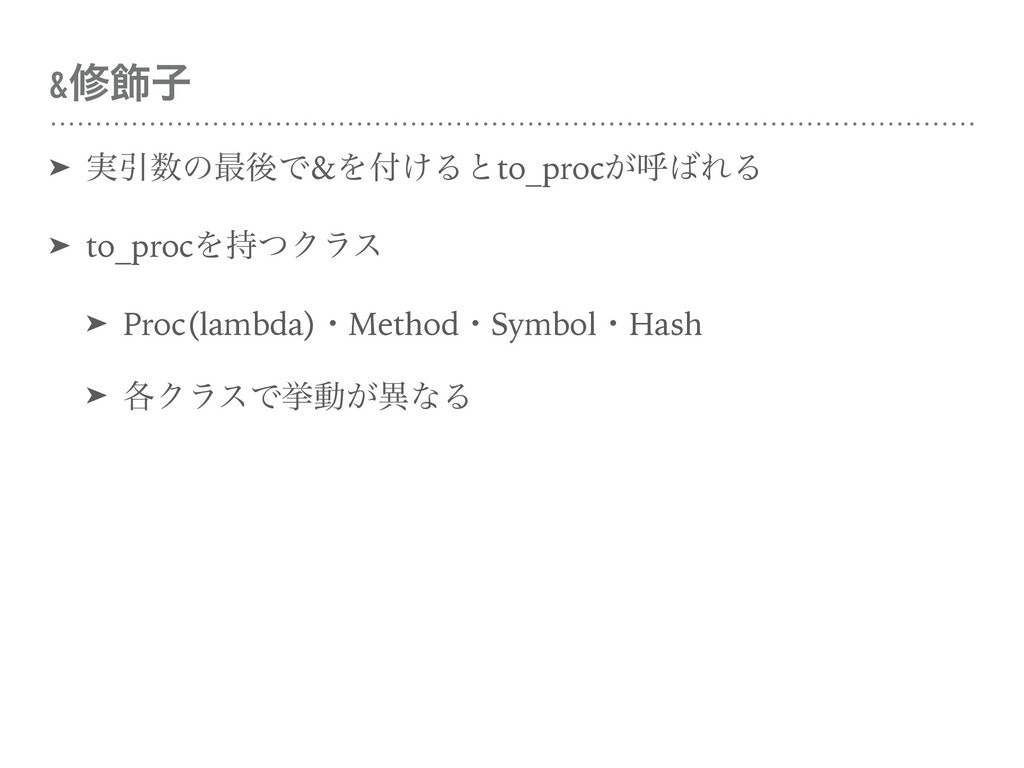
平成Ruby会議の際のスライドにある通り、実引数の最後で &修飾子 を使うとその実引数に対して to_proc が呼ばれます。
Procのススメ/recommendation-of-proc - Speaker Deck
デフォルトで to_proc が定義されているのはスライドに記載している Proc(lambda)・Method・Symbol・Hash、それに Ruby2.7 からは先程紹介したEnumerator::Yielder が加わります。
それ以外は普通は例外が発生します。
[1, 2, 3].map(&"to_proc")
# => TypeError (wrong argument type String (expected Proc))
ただ、以下の条件を満たせば他のクラスでも &修飾子 が利用できます。
-
to_procが定義されている -
to_procがProc(lambda)を返す
class String
  def to_proc
    -> (n) { "#{self.upcase}#{n}" }
  end
end

[1, 2, 3].map(&"to_proc")
# => ["TO_PROC1", "TO_PROC2", "TO_PROC3"]
使ってみる
to_proc を実装するテクニックを使って簡単なロガーを作ってみます。
出力対象は以下のコードです。(出力対象の設計はめちゃくちゃ適当なのでご容赦を ![]() )
)
module Readable;end

module Writable;end

class User
  @@role = 'general'
  include Readable

  def initialize(name)
    @name = name
  end

  def self.all;end

  def name;end
end

class Admin < User
  @@role = 'admin'
  ADDRESS = 'Tokyo'
  include Writable

  def manage;end
end
ロガーの実装は以下の通り。
デバッグ情報を色々ぶち込んだハッシュを pp で出力します。
また、今回はインスタンスではなく Logger クラスを直接渡す実装にしてみました。
&修飾子 をつける実引数が to_proc を実装していればいいので、 to_proc を特異メソッドにすれば OK です。
class Logger
  def self.to_proc
    -> (obj) do
      klass = obj.class
      pp(
        {
          inspect: obj.inspect,
          class: klass.name,
          ancestors: klass.ancestors,
          class_variables: klass.class_variables,
          constants: klass.constants,
          included_modules: klass.included_modules,
          singleton_methods: klass.singleton_methods(false),
          instance_methods: klass.instance_methods(false)
        }
      )
    end
  end
end
あとは each に &修飾子 をつけた Logger を渡してやれば OK です。
[Admin.new("Alice"), User.new("Bob")].each(&Logger)
# => {:inspect=>"#<Admin:0x00007ff6c8892bc0 @name=\"Alice\">",
#     :class=>"Admin",
#     :ancestors=>[Admin, Writable, User, Readable, Object, Kernel, BasicObject],
#     :class_variables=>[:@@role],
#     :constants=>[:ADDRESS],
#     :included_modules=>[Writable, Readable, Kernel],
#     :singleton_methods=>[],
#     :instance_methods=>[:manage]}
#    {:inspect=>"#<User:0x00007ff6c8892b70 @name=\"Bob\">",
#     :class=>"User",
#     :ancestors=>[User, Readable, Object, PP::ObjectMixin, Kernel, BasicObject],
#     :class_variables=>[:@@role],
#     :constants=>[],
#     :included_modules=>[Readable, PP::ObjectMixin, Kernel],
#     :singleton_methods=>[:all],
#     :instance_methods=>[:name]}
.irbrc とか .pryrc にこんな感じの便利クラスを用意しておくと便利(かも?)
3. 関数合成(Proc#>>, Proc#<<, Method#>>, Method#<<)
関数合成について
例として、別々の処理をする lambda を返すメソッドが3つあり、それを配列に対して適用していきたいケースを考えます。
def convert_integer
  -> (n) { n.to_i }
end

def count_up
  -> (n) { n.succ }
end

def output
  -> (n) { p n }
end
愚直に each で実装すると次のようになります。
%w[1 2 3].each do |n|
  output.call(count_up.call(convert_integer.call(n)))
end
これを関数合成を使うと以下のように書けます。
%w[1 2 3].each(&convert_integer >> count_up >> output)
配列の要素に対してどのような処理が適用されていくのかが左から右に流れるように読めて読みやすくなりました。![]()
ちなみに << もあるので逆方向の関数合成をすることもできます。
%w[1 2 3].each(&output << count_up << convert_integer)
使ってみる
先程は lambda を返すメソッドを定義していましたが、実際は以下のように定義されている事が多いかと思います。
def convert_integer(n)
  n.to_i
end

def count_up(n)
  n.succ
end

def output(n)
  p n
end
また、可読性重視のためにループごとの処理を少なくし、以下のように書くこともあると思います。
%w[1 2 3]
  .map { |n| convert_integer(n) }
  .map { |n| count_up(n) }
  .each { |n| output(n) }
ただ、これだと配列の要素が多い場合にループ回数が3倍になってしまいます。
ここで関数合成が使えます。
今回は each で実行したい処理は全てメソッドなので、Method クラスを利用します。
Method にも >> と << が実装されているので、関数合成ができます。
使い方・動きは Proc#>> と Proc#<< と同じです。
%w[1 2 3].each(&method(:convert_integer) >> method(:count_up) >> method(:output))
4. メソッドの引数にブロック(proc)を渡す
Proc(lambda) はオブジェクトなので、引数として渡すことができます。
これをうまく使うと、メインとなる処理の前後に前処理や後処理を必要に応じて差し込むような柔軟な実装ができます。
def hoge(before: nil, after: nil)
  before.call unless before.nil?
  yield if block_given?
  after.call unless after.nil?
end

# 上記と下記は等価なコード
def hoge(before: nil, after: nil, &block)
  before.call unless before.nil?
  block.call unless block.nil?
  after.call unless after.nil?
end
実行側は下記のようになります。
hoge(
  before: -> { p 1 },
  after: -> { p 2 }
) { p 3 }
# 1
# 3
# 2
# => 2
5. Enumerator::Lazy
Enumerator::Lazy とは
るりまを見ると下記のように書いてあります。
map や select などのメソッドの遅延評価版を提供するためのクラス。
動作は通常の Enumerator と同じですが、以下のメソッドが遅延評価を行う (つまり、配列ではなく Enumerator を返す) ように再定義されています。
これはコードを見るとピンとくるかもです。
下記は単純に奇数のみの配列を返すコードです。
[1, 2, 3].select(&:odd?)
# => [1, 3]
よく見かける map や select 等のメソッドは Enumerator クラスに定義されています。
これらのメソッドにブロック(または Proc)を渡すと、渡したブロックを評価して配列を返します。
また、ブロックを渡さなかったときは Enumerator クラスのインスタンスを返します。
普段は意識していないかもしれませんが、下記のようなコードを書くときにこの挙動を使っています。
%w[a b c].map.with_index(1) { |char, n| "#{n}: #{char}" }
# => ["1: a", "2: b", "3: c"]
一方、Enumerator::Lazy を使う場合下記のようなコードになります。
[1, 2, 3].select.lazy
# => #<Enumerator::Lazy: #<Enumerator: [1, 2, 3]:select>>
Enumerator::Lazy は force または first または to_a が呼ばれるまで値が確定せず、ループも回りません。
def hoge(x)
  x.tap { p :hoge }
end

def fuga(x)
  x.tap { p :fuga }
end

# :hogeも:fugaも1度しか出力されない
[1, 2, 3].lazy.map(&method(:hoge)).map(&method(:fuga)).take(1).to_a
# :hoge
# :fuga
# => [1]
この挙動を利用するとループ回数を減らせるのでパフォーマンス改善に利用できそうです。
ただ、残念ながら「lazy は基本的には遅くなる」そうです。(ruby-jp情報)
Enumerator::Lazy は以下のようなものに対して利用するといいそうです。(これもruby-jp情報)
- 大きすぎて全体をメモリに乗せられないもの 例:数GBのファイル
- 終わりがわからないもの 例:ネットワーク越しにやってくるデータ
- 終わりがないもの 例: (
Date.today..)
最後に
書くと言っておきながら1年以上ずっと書けていなかった記事をようやく書けました。
今夜は赤飯です ![]() (なお実際はカレー
(なお実際はカレー ![]() でした)
でした)
(Proc#curry について書いていればきれいにオチつけれたのにOTL)
