この記事は?
- この記事は「Google Cloud Platform Advent Calendar 2021」カレンダー2の25日目の記事です。
謝辞
- お忙しい中、快く相談に乗っていただいた、Google Cloud JapanのCEの皆様に多大なる感謝を。
- 以下の記事、大変参考になりました。ありがとうございます。
この記事でやること/やりたいこと
- WEBサイトのSSL証明書監視をGCPで実装してみます。
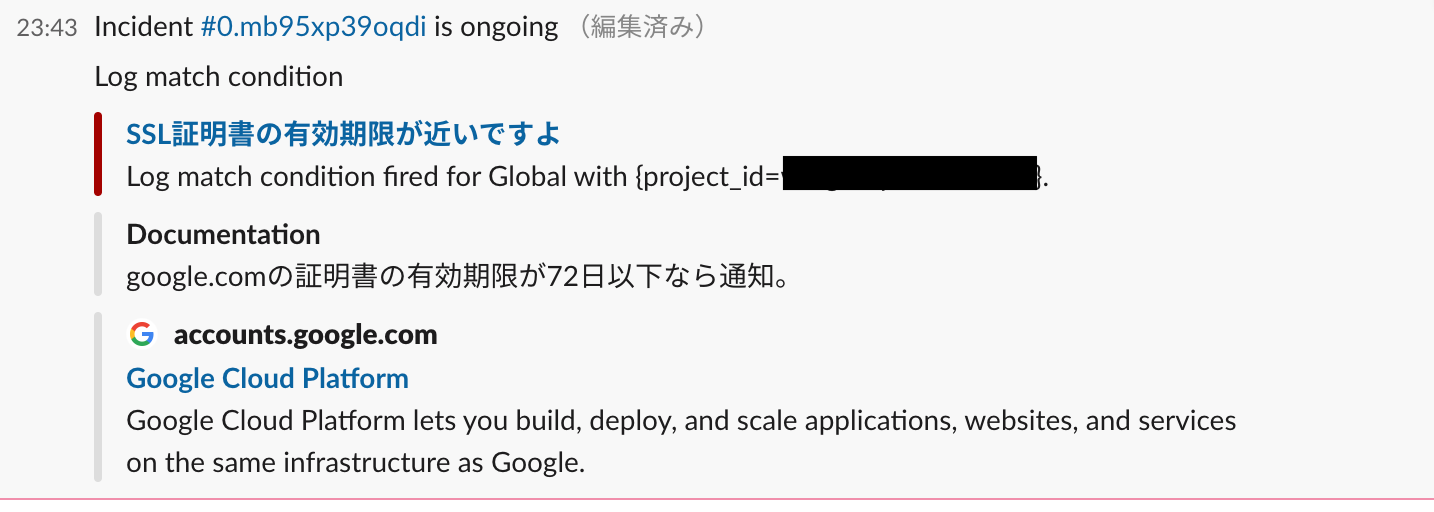
- 有効期限残りXX日(閾値)を下回ったらSlackに通知、がゴールです。
- ここでは例として、google.comの証明書有効期限をチェックするようにしています。
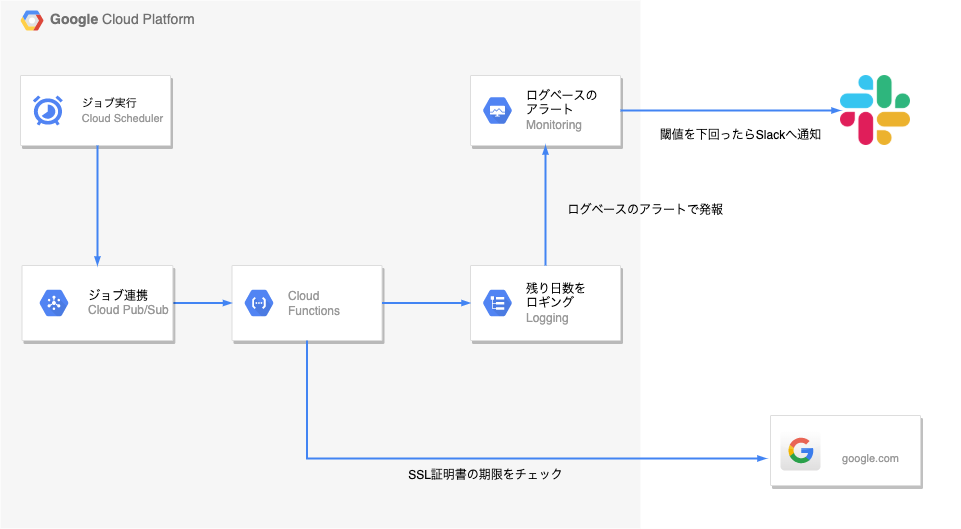
- イメージ図
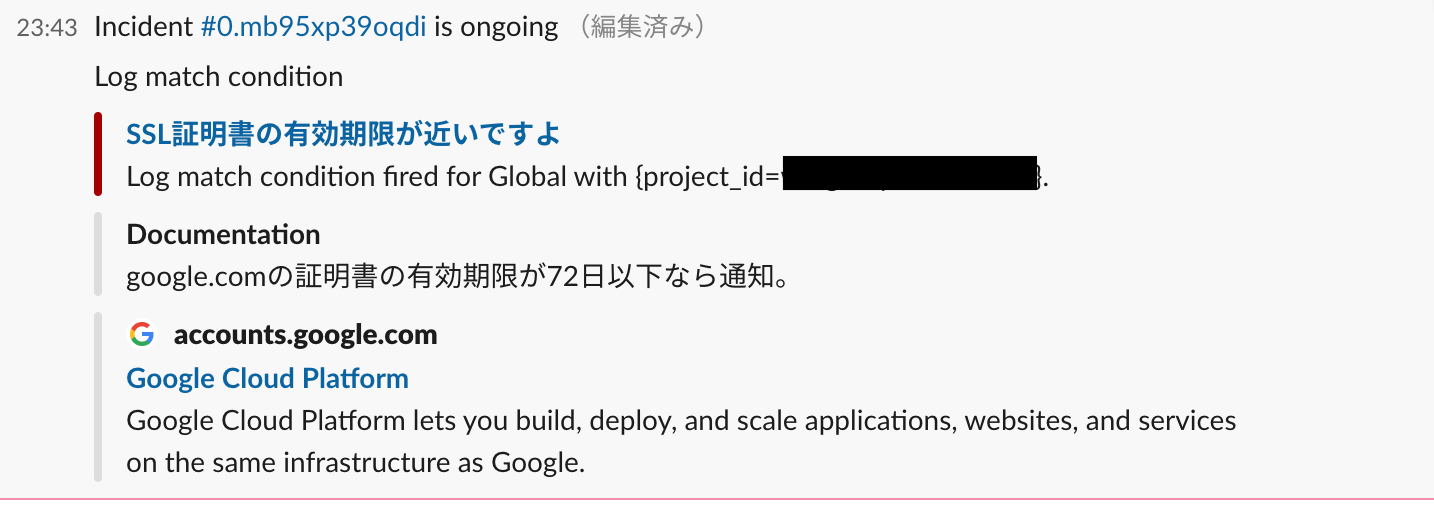
出来上がったもの
所感
- Monitoringで直接SSL証明書の有効期限ができると嬉しいなあ…
- おそらく、CloudFuntcions→Logging→ログベースのアラートは良くない。
- 本来
- MonitoringAPIで直接メトリクス書き込むべき。
- でないと、Monitoring側でメトリクス表示できなさそう。
- 別途直していきます。
- MonitoringAPIで直接メトリクス書き込むべき。
- 本来
- 残り有効期限何日、をSlackで通知したい。
- とはいえ、プログラム万年初心者でも、こういったものをサクッと作れるのはGCPの良いところ。
- 大変ありがたい。
前提
- 課金設定済みのGCP環境があること。
- 以下のGCPリソースの作成権限があり、APIが有効化されていること。
- CloudScheduler
- Pub/Sub
- CloudFunctions
- CloudLogging
- CloudMonitoring
- 通知用のSlackがあること。
- Slackへの通知設定等はここでは割愛します。
要素
- 1.CloudScheduler
- JOBキック用。
- Pub/Subへ連携します。
- 2.Pub/Sub
- CloudSchedulerとCloudFunctionsの橋渡し。
- 3.CloudFunctions
- Pub/Subから経由でCloudFuntcionsを実行します。
- pythonでgoogle.comのSSL証明書有効期限をチェック。
- 残り日数をCloudLoggingへ記録。
- Pub/Subから経由でCloudFuntcionsを実行します。
- 4.CloudLogging
- ログベースのアラートを仕掛ける。
- 5.CloudMonitoring
- 通知先にSlackを指定。
- ここでは割愛します。
- 通知先にSlackを指定。
- 6.Slack
- Monitoring側から通知を受信。
やること
1.CloudScheduler
JOBキック用にCloudSchedulerを設定します。
以下のようにJOBを作成します。
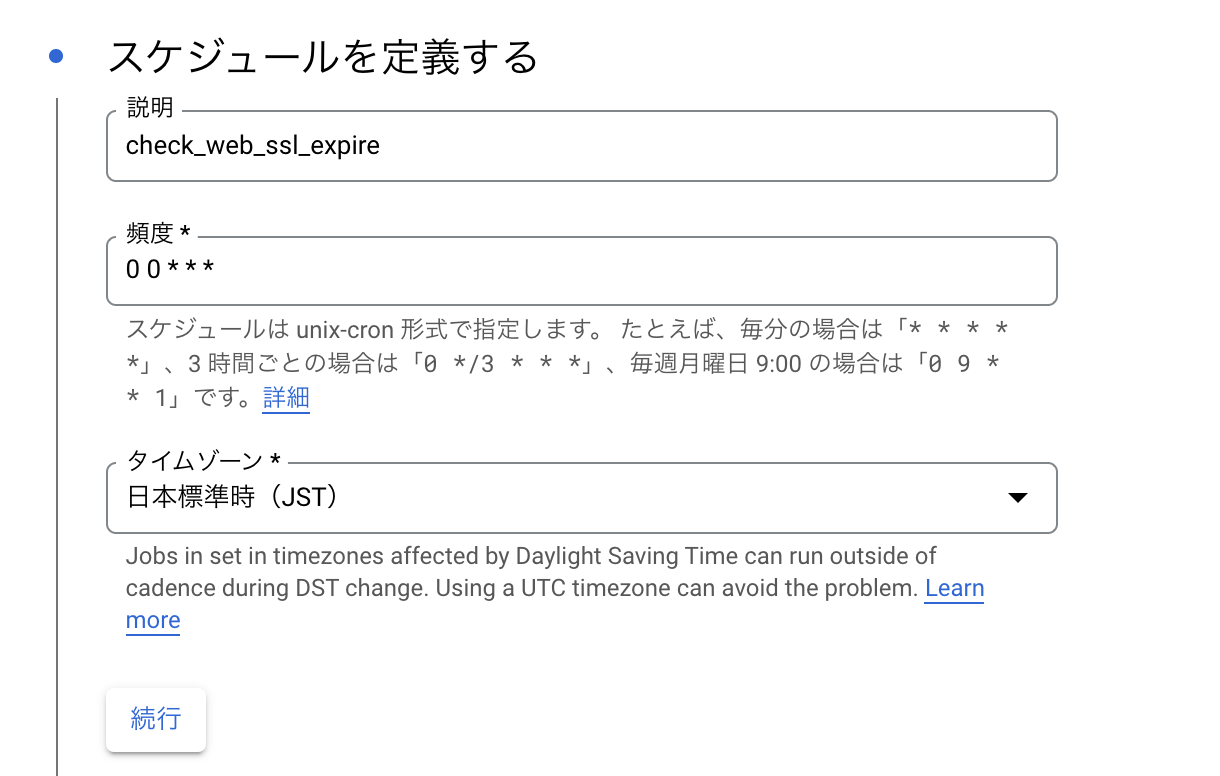
1.スケジュールの定義する。
- 説明
- よしなに。極力分かりやすい命名規則に。
- 頻度
- 毎日00:00に実行したいので以下のように設定しています。
0 0 * * * - タイムゾーン
- 日本在住なのでJSTで。
- 毎日00:00に実行したいので以下のように設定しています。
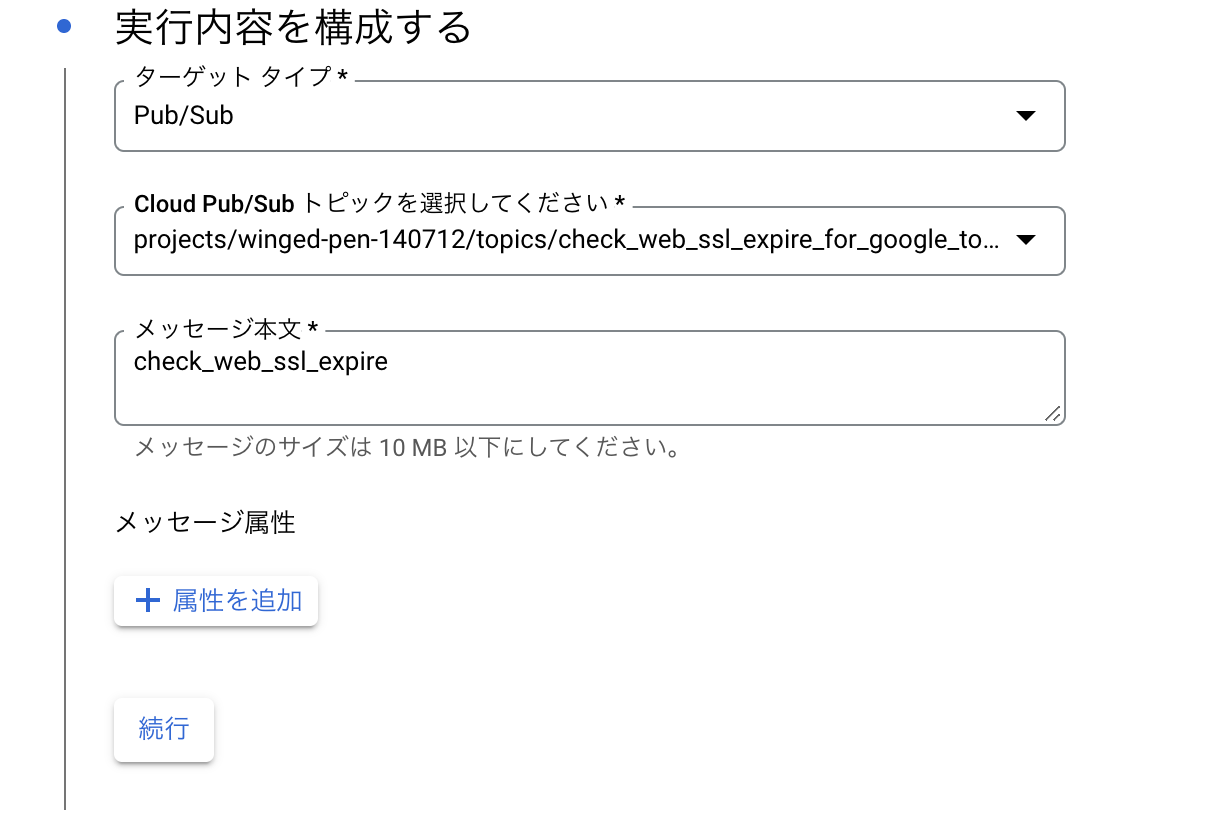
2.実行内容を構成する。
- ターゲットタイプ
- Pub/Sub
- CloudPub/Subトピック
- メッセージ本文
- 今回はメッセージは使用しないのですが、必須項目なので
check_web_ssl_expireと入力しています。
- 今回はメッセージは使用しないのですが、必須項目なので
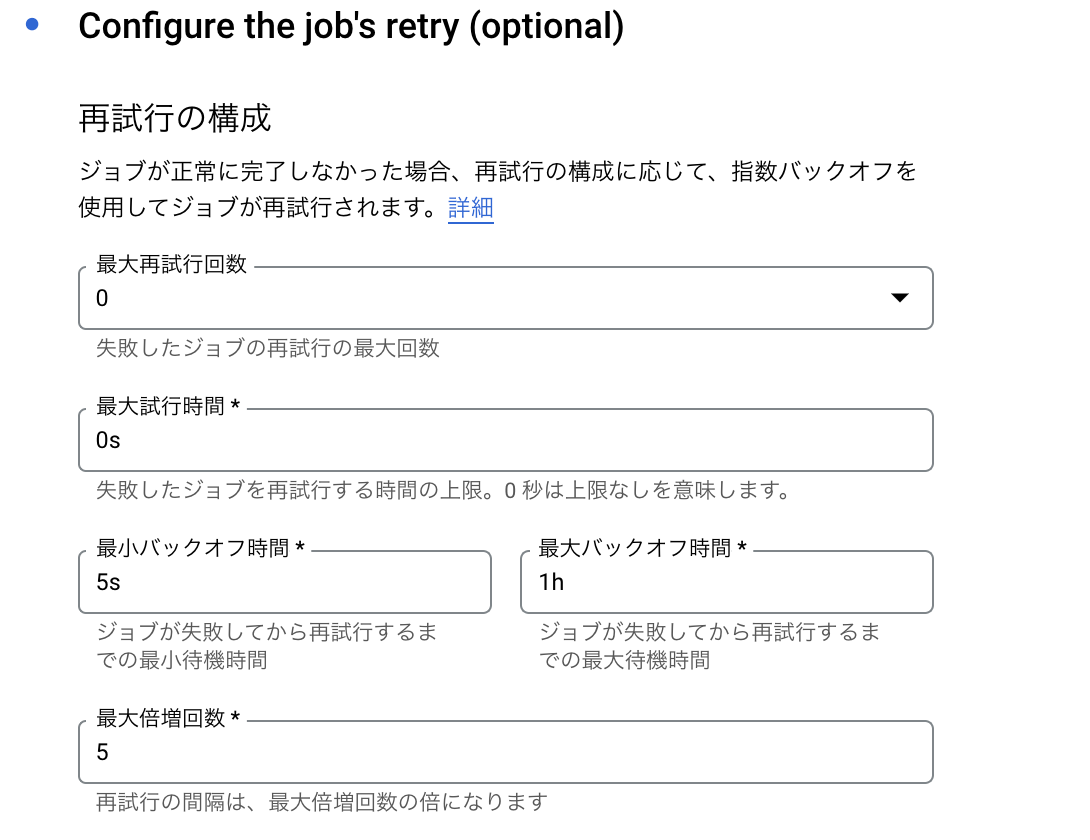
3.Configure the job's retry (optional)
- リトライ回数、リトライ時間等の設定。
- オプションなので、今回はそのまま。
2.Pub/Sub
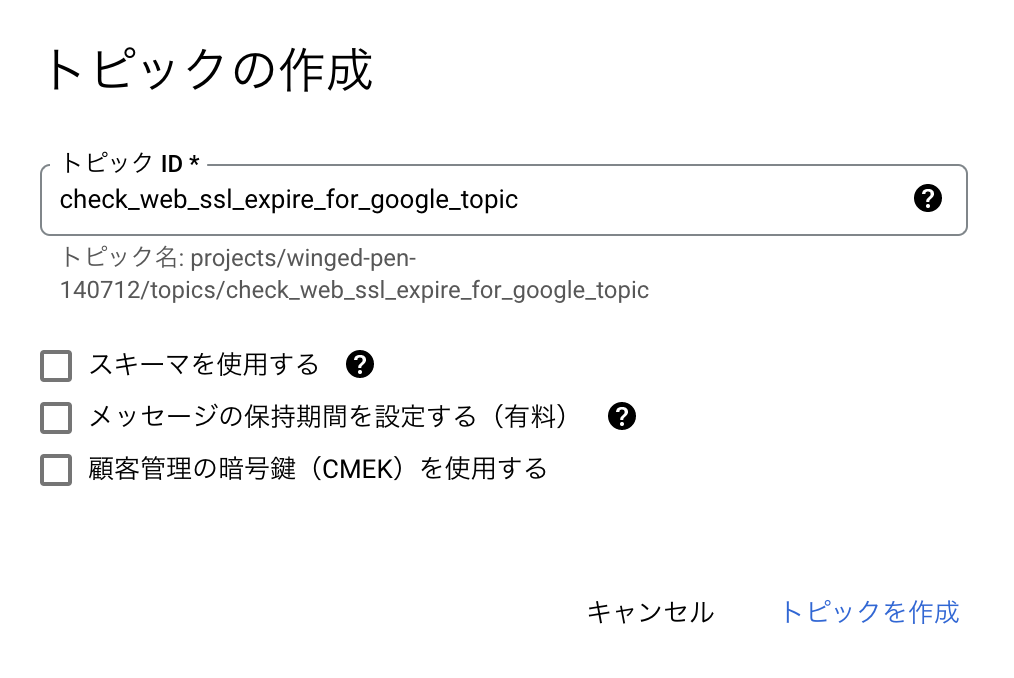
- 今回、上記1のCloudScheduler設定時にPub/Subのトピックも作成したので不要です。
3.CloudFunctions
CloudFunctionsで関数の作成を行います。
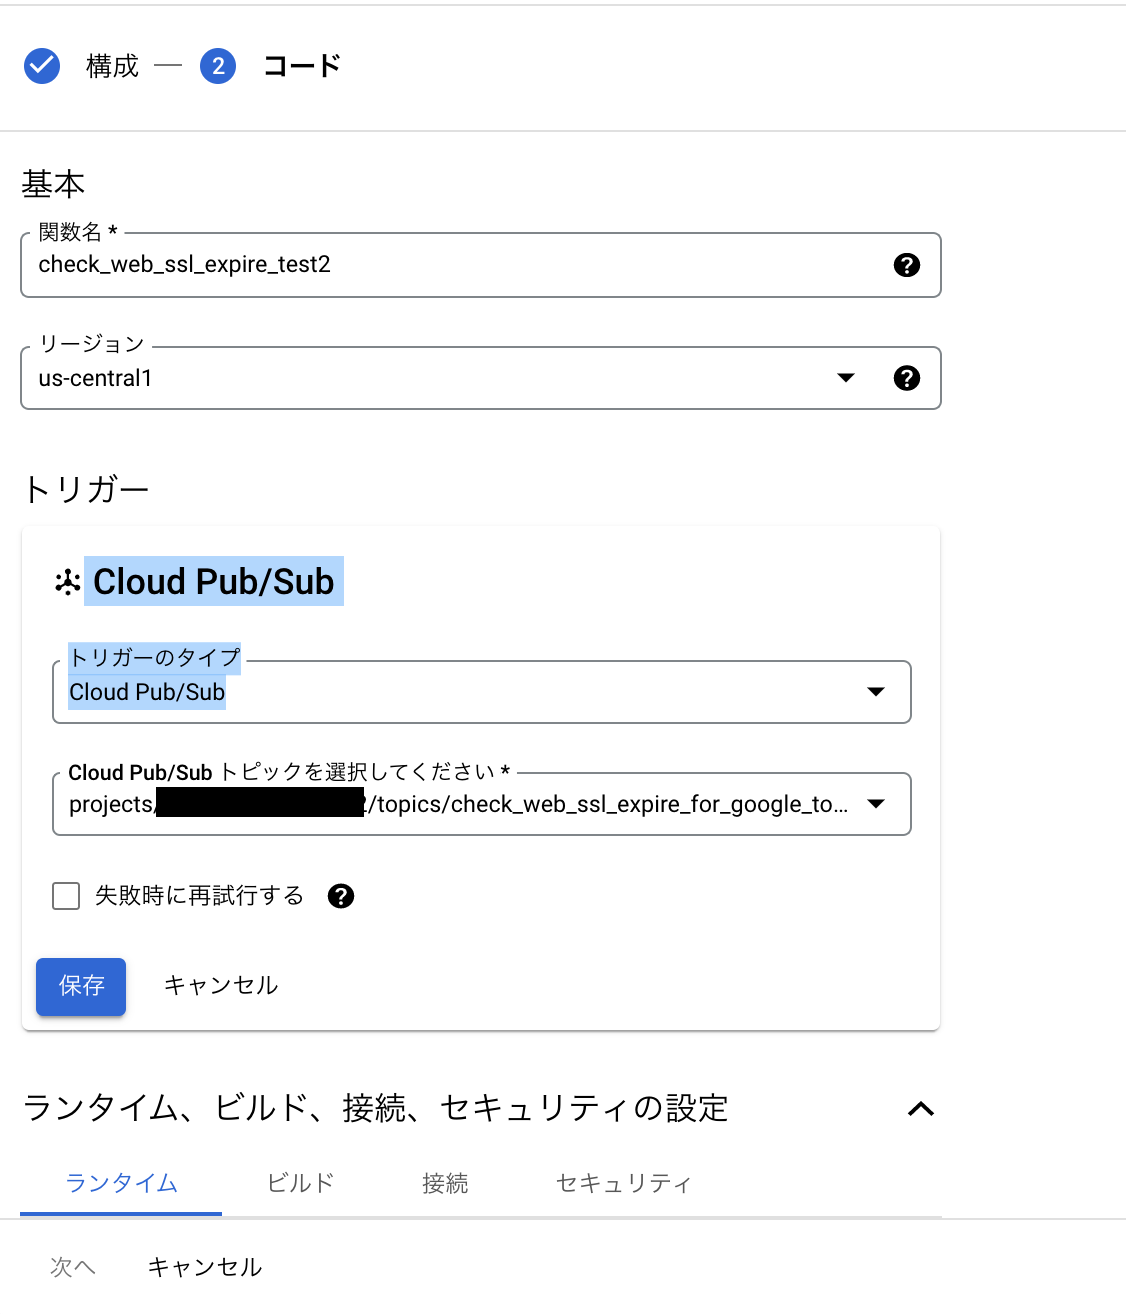
3-1.構成
- 関数名
- 任意の値を入力。ここでは
check_web_ssl_expire_test2としています。
- 任意の値を入力。ここでは
- リージョン
- 実行したいリージョンを選択。ここでは
us-central1にしています。
- 実行したいリージョンを選択。ここでは
- トリガー
- トリガーのタイプ
- Cloud Pub/Subを選択。
- Cloud Pub/Subのトピック
- 先に作成したものを選択。ここでは
check_web_ssl_expire_for_google_topicを選択します。
- 先に作成したものを選択。ここでは
- トリガーのタイプ
- ランタイム、ビルド、接続、セキュリティの設定
- 今回はデフォルトのまま次へ。
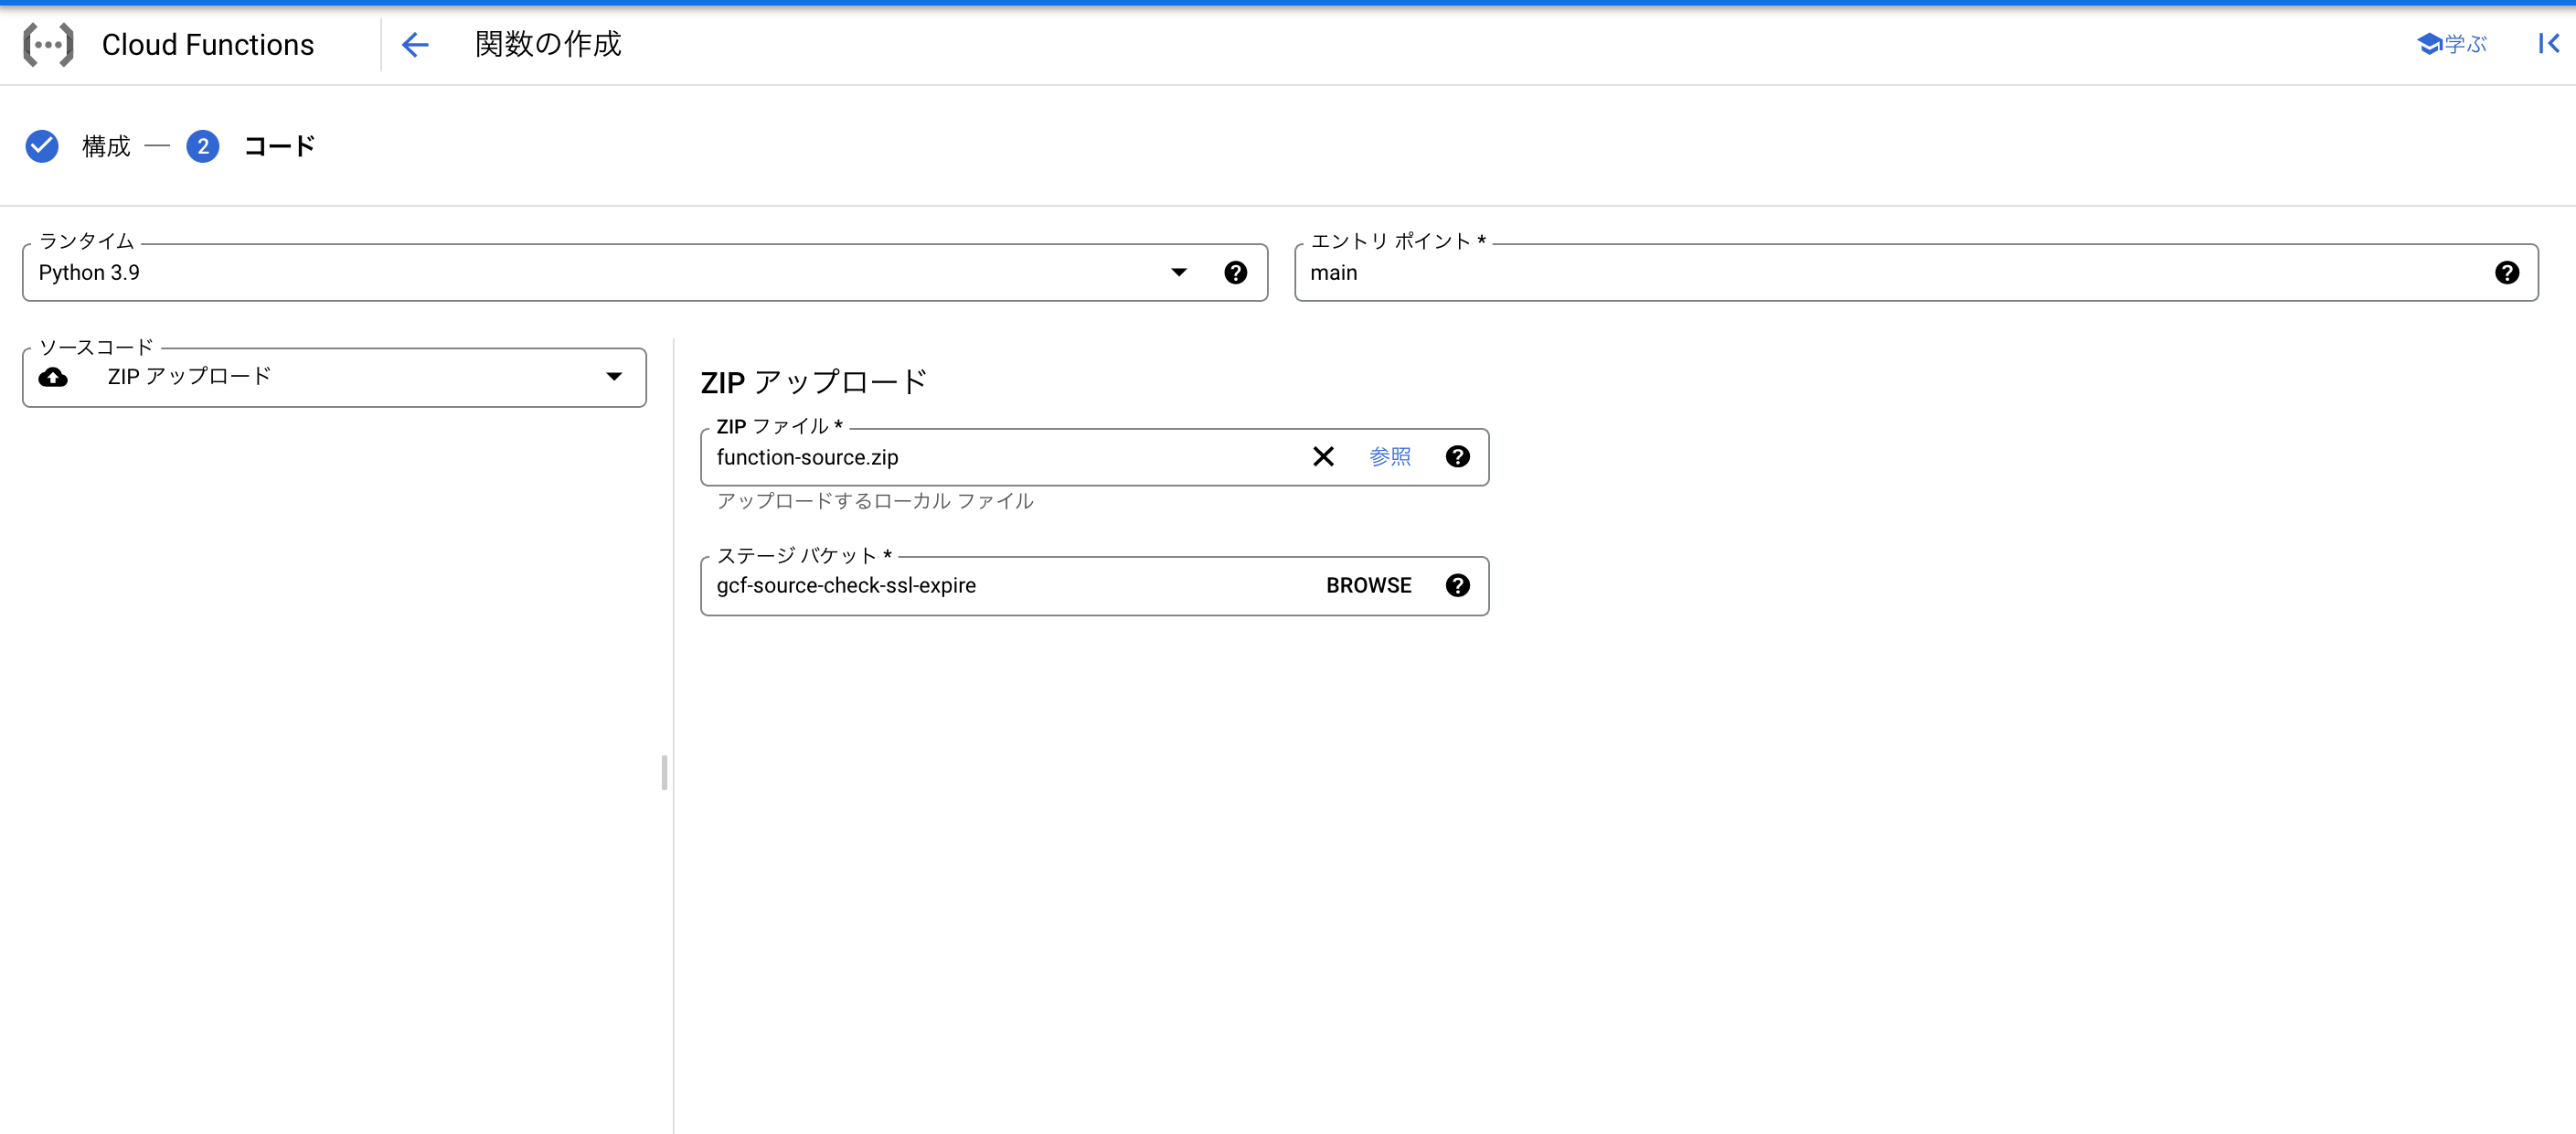
3-2.関数の作成
- ランタイム
- Python 3.9 を選択。
- エントリ ポイント
-
mainと入力
-
- ソースコード
- ZIPアップロードを選択。
- ZIPファイル
- ローカルに落としてきた、function-source.zipを選択。
- ステージバケット
- ここでは
gcf-source-check-ssl-expireというGCSを作成して、選択しています。
- ここでは
- ZIPファイル
- ZIPアップロードを選択。
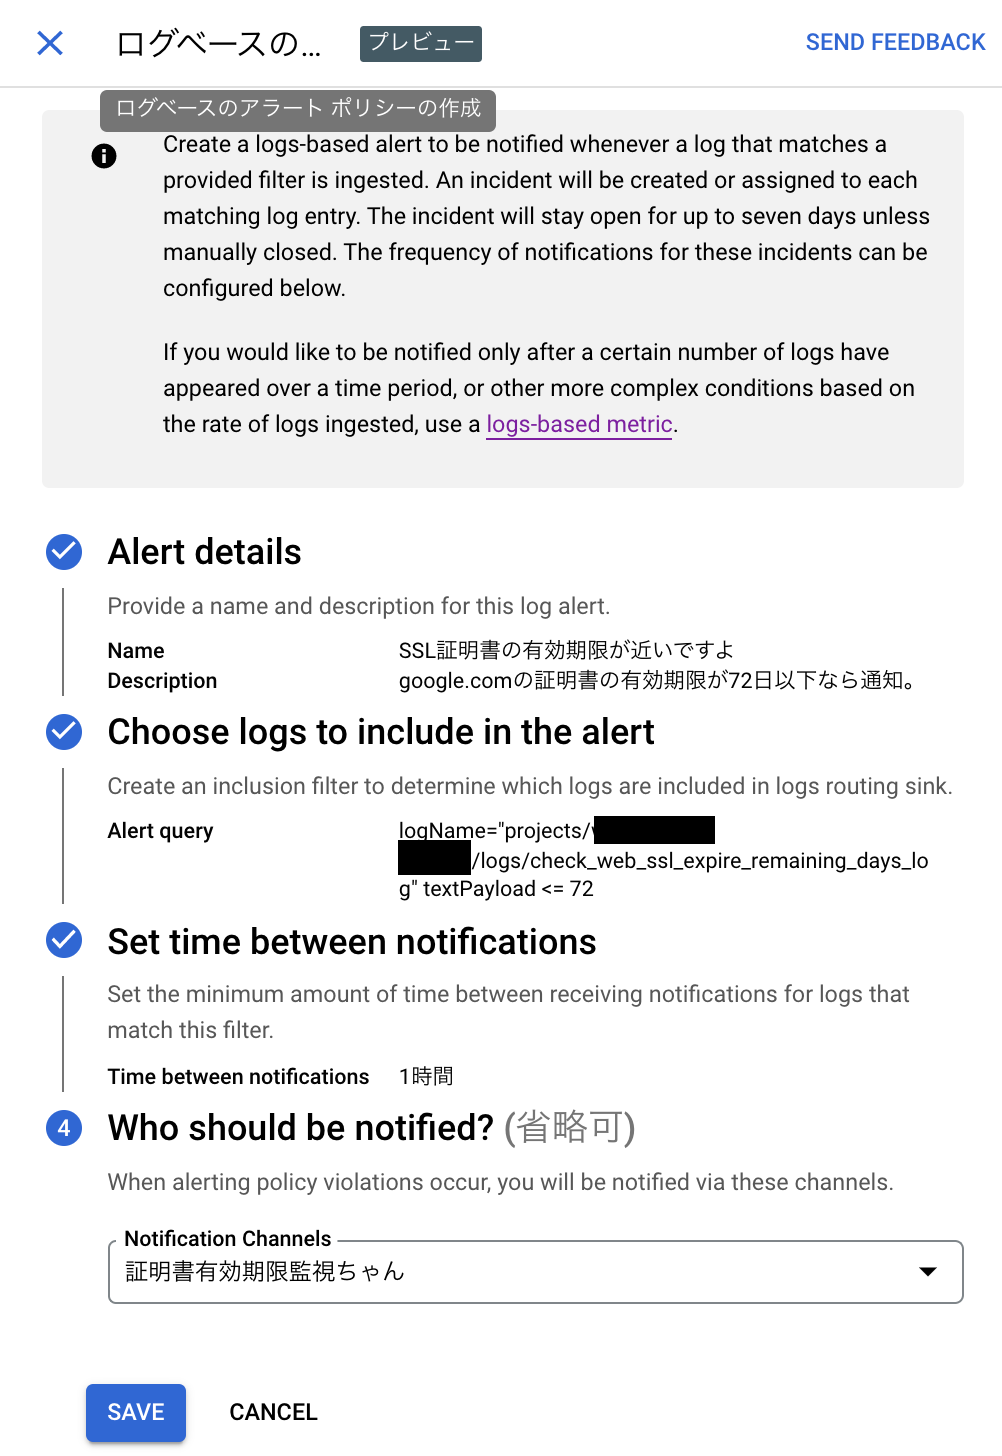
4.CloudLogging
ログエクスプローラーにてアラートを作成します。
まずはログエクスプローラーで対象のログを検索します。
- クエリ
logName="projects/<プロジェクト名>/logs/check_web_ssl_expire_remaining_days_log"
textPayload <= 72
