本記事は、FastAPIとVue.js(CompositionAPI+Pinia)で動作するJWT認証のシステムを作ってみたので、備忘録として残すのが目的です。またFastAPIでセキュリティや認証を強いるときはDependency Injectionが使われますが、個人的には一般的な概念を理解するよりは、単に使い方を学ぶ方が良いと思われます。
【関連過去記事】
VueのCompositionAPIでPiniaを使う - Qiita
FastAPIでつくるVue SPAアプリの雛形 - Qiita
FastAPI OAuth2 クライアント - Qiita
FastAPI OAuth2パスワード認証 - Qiita
プログラムのディレクトリ構成
jwttoken                   # FastAPIプロジェクトトップ
├── jwttoken.py            # FastAPIメインプログラム
├── static                 # Vue用のサブディレクトリ
│   ├── package.json
│   ├── public
│       └── index.html
│   ├── src                # Vueプロジェクトディレクトリ
│       ├── store
│         ├── index.js
│         ├── auth-store.js
│         └── profile-store.js
│       ├── views
│         ├── index.js
│         ├── HomeView,vue
│         └── ProfileView.vue
│       ├── router
│         └── index.js
│       ├── App.vue
│       ├── main.js
│       ├── ...
│       └── ...
│   ├── dist           # FastAPIメインのマウント先
│   ├── node_modules
│   ├── ...
│   └── ...
まずはFastAPIプログラムをみて、次にVueプログラムを見ていきます。
1. FastAPIプログラム - jwttoken.py
from datetime import datetime, timedelta
from typing import Union

from fastapi import Depends, FastAPI, HTTPException, status
from fastapi.security import OAuth2PasswordBearer, OAuth2PasswordRequestForm
from jose import JWTError, jwt
from passlib.context import CryptContext
from pydantic import BaseModel

from fastapi.staticfiles import StaticFiles

# to get a string like this run:
# openssl rand -hex 32
SECRET_KEY = "09d25e094faa6ca2556c818166b7a9563b93f7099f6f0f4caa6cf63b88e8d3e7"
ALGORITHM = "HS256"
ACCESS_TOKEN_EXPIRE_MINUTES = 30


fake_users_db = {
    "yamada": {
        "username": "yamada",
        "full_name": "Yamada Taro",
        "age": 33,
        "height": 172,
        "weight": 65,
        "email": "yamada@example.com",
        "hashed_password": "$2b$12$EixZaYVK1fsbw1ZfbX3OXePaWxn96p36WQoeG6Lruj3vjPGga31lW",
        "disabled": False,
    },
    "tanaka": {
        "username": "tanaka",
        "full_name": "Tanaka Hanako",
        "age": 22,
        "height": 165,
        "weight": 53,
        "email": "tanaka@example.com",
        "hashed_password": "$2b$12$EixZaYVK1fsbw1ZfbX3OXePaWxn96p36WQoeG6Lruj3vjPGga31lW",
        "disabled": False,
    }

}


class Token(BaseModel):
    access_token: str
    token_type: str


class TokenData(BaseModel):
    username: Union[str, None] = None


class User(BaseModel):
    username: str
    email: Union[str, None] = None
    full_name: Union[str, None] = None
    age: Union[int, None] = None,
    height: Union[int, None] = None,
    weight: Union[int, None] = None,
    disabled: Union[bool, None] = None


class UserInDB(User):
    hashed_password: str


pwd_context = CryptContext(schemes=["bcrypt"], deprecated="auto")

oauth2_scheme = OAuth2PasswordBearer(tokenUrl="token")

app = FastAPI()

def verify_password(plain_password, hashed_password):
    return pwd_context.verify(plain_password, hashed_password)


def get_password_hash(password):
    return pwd_context.hash(password)


def get_user(db, username: str):
    if username in db:
        user_dict = db[username]
        return UserInDB(**user_dict)


def authenticate_user(fake_db, username: str, password: str):
    user = get_user(fake_db, username)
    if not user:
        return False
    if not verify_password(password, user.hashed_password):
        return False
    return user


def create_access_token(data: dict, expires_delta: Union[timedelta, None] = None):
    to_encode = data.copy()
    if expires_delta:
        expire = datetime.utcnow() + expires_delta
    else:
        expire = datetime.utcnow() + timedelta(minutes=15)
    to_encode.update({"exp": expire})
    encoded_jwt = jwt.encode(to_encode, SECRET_KEY, algorithm=ALGORITHM)
    return encoded_jwt


async def get_current_user(token: str = Depends(oauth2_scheme)):
    credentials_exception = HTTPException(
        status_code=status.HTTP_401_UNAUTHORIZED,
        detail="Could not validate credentials",
        headers={"WWW-Authenticate": "Bearer"},
    )
    try:
        payload = jwt.decode(token, SECRET_KEY, algorithms=[ALGORITHM])
        username: str = payload.get("sub")
        if username is None:
            raise credentials_exception
        token_data = TokenData(username=username)
    except JWTError:
        raise credentials_exception
    user = get_user(fake_users_db, username=token_data.username)
    if user is None:
        raise credentials_exception
    return user


async def get_current_active_user(current_user: User = Depends(get_current_user)):
    if current_user.disabled:
        raise HTTPException(status_code=400, detail="Inactive user")
    return current_user


@app.post("/token", response_model=Token)
async def login_for_access_token(form_data: OAuth2PasswordRequestForm = Depends()):
    user = authenticate_user(fake_users_db, form_data.username, form_data.password)
    if not user:
        raise HTTPException(
            status_code=status.HTTP_401_UNAUTHORIZED,
            detail="Incorrect username or password",
            headers={"WWW-Authenticate": "Bearer"},
        )
    access_token_expires = timedelta(minutes=ACCESS_TOKEN_EXPIRE_MINUTES)
    access_token = create_access_token(
        data={"sub": user.username}, expires_delta=access_token_expires
    )
    return {"access_token": access_token, "token_type": "bearer"}


@app.get("/users/me", response_model=User)
async def read_users_me(current_user: User = Depends(get_current_active_user)):
    return current_user

# must mount on root(/) after all path operations, otherwise they will be overrided !
app.mount("/", StaticFiles(directory="static/dist", html=True), name="html")
後で述べるVueアプリのdeployが終わったら、FastAPIプログラムは以下のコマンドで起動することができます。
uvicorn jwttoken:app --reload
1-1. PythonでJWT - python-jose
pythonでJWTを扱うためにpython-joseをインストールします。
pip install "python-jose[cryptography]"
python-joseの利用方法は以下の通り。
>>> from jose import jwt
>>> token = jwt.encode({'key': 'value'}, 'secret', algorithm='HS256')
u'eyJhbGciOiJIUzI1NiIsInR5cCI6IkpXVCJ9.eyJrZXkiOiJ2YWx1ZSJ9.FG-8UppwHaFp1LgRYQQeS6EDQF7_6-bMFegNucHjmWg'

>>> jwt.decode(token, 'secret', algorithms=['HS256'])
{u'key': u'value'}
secretは以下のコマンドで取得できます。
openssl rand -hex 32
566fad6d8df44eef2c4be2727b6693153bf61f6bae30b3e8e4fb5697e1953d0a
JWTに関係のある個所を抜粋すると以下のようになります。
from jose import JWTError, jwt

---

# to get a string like this run:
# openssl rand -hex 32
SECRET_KEY = "09d25e094faa6ca2556c818166b7a9563b93f7099f6f0f4caa6cf63b88e8d3e7"
ALGORITHM = "HS256"
ACCESS_TOKEN_EXPIRE_MINUTES = 30

---

def create_access_token(data: dict, expires_delta: Optional[timedelta] = None):
    to_encode = data.copy()
    if expires_delta:
        expire = datetime.utcnow() + expires_delta
    else:
        expire = datetime.utcnow() + timedelta(minutes=15)
    to_encode.update({"exp": expire})
    encoded_jwt = jwt.encode(to_encode, SECRET_KEY, algorithm=ALGORITHM)
    return encoded_jwt

---

    access_token = create_access_token(
        data={"sub": user.username}, expires_delta=access_token_expires
    )
decodeの結果をプリントしているので確かめてみます。
async def get_current_user(token: str = Depends(oauth2_scheme)):
    credentials_exception = HTTPException(
        status_code=status.HTTP_401_UNAUTHORIZED,
        detail="Could not validate credentials",
        headers={"WWW-Authenticate": "Bearer"},
    )
    try:
        payload = jwt.decode(token, SECRET_KEY, algorithms=[ALGORITHM])
        print(f'### token = {token},  payload = {payload}')
コンソールには以下のプリント出力があります。正しいですね。
### token = eyJhbGciOiJIUzI1NiIsInR5cCI6IkpXVCJ9.eyJzdWIiOiJqb2huZG9lIiwiZXhwIjoxNjM3ODIwNjU5fQ.TU5EI6Y8bfshkT1h4hY7IW3z6_cx2mkF-yaqq3j2KhE,
payload = {'sub': 'johndoe', 'exp': 1637820659}
1-2. Hash を使った passwords の検証 - passlib
password は平文では保存されず Hash(暗号)化されて保存されます。ここではpasslibを使ってHash化を行います。
pip install "passlib[bcrypt]"
passlibに関係しているところを抜粋しています。ここではDBに保存されているパスワード hashed_password は既にハッシュ化されていると仮定しているので、ログイン時に送られてきた平文パスワードとverify関数で比較しています。
from passlib.context import CryptContext
---
pwd_context = CryptContext(schemes=["bcrypt"], deprecated="auto")
---
def verify_password(plain_password, hashed_password):
    return pwd_context.verify(plain_password, hashed_password)
1-3. Dependency Injection
FastAPIのDependency Injectionは、主にpath operation functionの引数で宣言されます。これは共通のロジックを何度も繰り返し使うときや、セキュリティ(authenticationやrole requirementsなども)を強制するとき、などの場合便利なものです。
このコードでは2か所でDependency Injectionが使われています。それぞれHTTPリクエストから username/passwordを抽出したりtokenを抽出するものです。
@app.post("/token", response_model=Token)
async def login_for_access_token(form_data: OAuth2PasswordRequestForm = Depends()):
ここではOAuth2PasswordRequestForm = Depends()は OAuth2PasswordRequestForm = Depends(OAuth2PasswordRequestForm)と読み替えます。これはクライアント側から 'Content-Type': 'application/x-www-form-urlencoded' のヘッダーで渡されてくるhttpリクエストからusername/passwordを抽出してくれるものです。
以下のようにネストされたDependencyはSub-dependenciesと呼ばれます。
@app.get("/users/me", response_model=User)
async def read_users_me(current_user: User = Depends(get_current_active_user)):
--
async def get_current_active_user(current_user: User = Depends(get_current_user)):
--
async def get_current_user(token: str = Depends(oauth2_scheme)):
これはクライアント側から Authorization: Bearer + tokenのヘッダーで渡されるHttpリクエストから、oauth2_schemeを使って、tokenを抽出するものです。
1-4.StaticFilesのマウント
app.mount("/", StaticFiles(directory="static/dist", html=True), name="html")
Vueのアプリは、「npm run build」コマンドで、distディレクトリにdeployされますので、それを"/"になるようにFastAPIでマウントします。アプリのプログラムは全てルートディレクトリ(/)を参照しています。それなのでFasAPIでapp.mountするときは(/)にマウントする必要があります。
またプログラムの最初の位置で、FasAPIで(/)にapp.mountすると、FastAPIのパスの定義が全て上書きされてしまうので、このapp.mount文は最後に置く必要があります。
2. Vueプログラム
vue create static               # Rotre有、Vuex無
cd static
npm install pinia --save
npm install vee-validate@next --save
npm install yup --save
npm run build
先に述べたように、Vueのアプリは、「npm run build」コマンドで、distディレクトリにdeployされます。
<!DOCTYPE html>
<html lang="en">

<head>
    <meta charset="UTF-8" />
    <link rel="icon" href="/favicon.ico" />
    <meta name="viewport" content="width=device-width, initial-scale=1.0" />
    <title>FastAPI and  Vue 3 + Pinia - JWT Authentication Example</title>

    <!-- bootstrap css -->
    <link href="//netdna.bootstrapcdn.com/bootstrap/4.5.2/css/bootstrap.min.css" rel="stylesheet" />
</head>

<body>
    <div id="app"></div>
    <script type="module" src="/static/src/main.js"></script>
</body>

</html>
2-1.メイン
main.jsでPiniaとRouterの利用を宣言しておきます。
import { createApp } from 'vue';
import { createPinia } from 'pinia';

import App from './App.vue';
import { router } from './router';

const app = createApp(App);

app.use(createPinia());
app.use(router);

app.mount('#app');
App.vueはパスで画面を切り替えRouterViewに表示します。
routerの設定で非ログインの時にこのページにアクセスするとログイン画面にリダイレクトされますが、ここではログイン状態の時にのみ、Home,Profile,Logoutのリンクを表示するようコーディングしてます。
<script setup>
import { RouterLink, RouterView } from 'vue-router';
import { useAuthStore } from '@/stores';

const authStore = useAuthStore();
</script>

<template>
    <div class="app-container bg-light">
        <nav v-show="authStore.authUser" class="navbar navbar-expand navbar-dark bg-dark">
            <div class="navbar-nav">
                <RouterLink to="/" class="nav-item nav-link">Home</RouterLink>
                <RouterLink to="/profile" class="nav-item nav-link">Profile</RouterLink>
                <a @click="authStore.logout()" class="nav-item nav-link">Logout</a>
            </div>
        </nav>
        <div class="container pt-4 pb-4">
            <RouterView />
        </div>
    </div>
</template>
2-2. Router
routerの設定を行います。Navigation GuardsのGlobal Before Guardsで非ログイン時のページ遷移を制御します。
import { createRouter, createWebHistory } from 'vue-router';
import { useAuthStore } from '@/stores';
import { HomeView, ProfileView, LoginView } from '@/views';

export const router = createRouter({
    history: createWebHistory(process.env.BASE_URL),
    linkActiveClass: 'active',
    routes: [
        { path: '/', component: HomeView },
        { path: '/profile', component: ProfileView },
        { path: '/login', component: LoginView }
    ]
});

// Navigation Guards - Global Before Guards
router.beforeEach(async (to) => {
    // to(遷移先)がログインを必要とするページで、未ログイン状態なら、ログインページへリダイレクト
    const publicPages = ['/login'];
    const authRequired = !publicPages.includes(to.path);
    const auth = useAuthStore();
    console.log("to.fullPath=",to.fullPath," authRequired=",authRequired, "  auth.authUser=",auth.authUser)
    if (authRequired && !auth.authUser) {
        auth.returnUrl = to.fullPath;
        return '/login'; // リダイレクト先
    }
});
beforeEachでパブリックページ(ここではログインページのみ)以外のページに、非ログイン状態でアクセスしようとすると、ログイン画面にリダイレクトするように制御します。
Vue Router の Navigation Guards
2-3. Store(Pinia)
Pinia のstoreを定義します。
export * from './auth-store';
export * from './profile-store';
username/passwordの認証に成功したユーザ名 authUser と tokenを保持するstoreです。
ここで username/password はネーミングは FastAPI側 の OAuth2パスワード認証のスキームに従っています。
認証成功時にはパス'/' (もしくはreturnUrlに保持しているurl)にリダイレクトします。
import { defineStore } from 'pinia';
import axios from 'axios';
import { router } from '@/router';

export const useAuthStore = defineStore({
    id: 'auth',
    state: () => ({
        token: null,
        authUser: null,
        returnUrl: null
    }),
    actions: {
        async login(username, password) {
            const params = new URLSearchParams();
            params.append('username', username);
            params.append('password', password);

            let config = {
              headers: {
                'Content-Type': 'application/x-www-form-urlencoded'
              }
            };

            axios.post('/token', params, config)
            .then((response) => {
              this.authUser = username;
              this.token = response.data.access_token
              // localStorage.setItem('token', JSON.stringify(response.data));
              router.push(this.returnUrl || '/');
            })
            .catch((err) => {
              console.log("Error = ", err)
            })
          },
        logout() {
            this.authUser = null;
            this.token = null;
            // localStorage.removeItem('token');
            router.push('/login');
        }
    }
});
profile情報を保持するstoreです。
Profileリンクをクリックしたときに、FastAPI側から情報を取得し保持します。
import { defineStore } from 'pinia';
import { storeToRefs } from 'pinia';
import axios from 'axios';
import { useAuthStore } from '@/stores';

export const useProfileStore = defineStore({
    id: 'users',
    state: () => ({
        username: null,
        full_name: null,
        age: null,
        height: null,
        weight: null,
        email: null,
    }),
    actions: {
        fetchProfile() {
            const authStore = useAuthStore();
            const { token } = storeToRefs(authStore);

            let config = {
                headers: {
                Authorization: `Bearer ${token.value}`
                }
            };
            axios.get('/users/me', config)
            .then((response) => {
                this.username = response.data.username;
                this.full_name = response.data.full_name;
                this.age = response.data.age;
                this.height = response.data.height;
                this.weight = response.data.weight;
                this.email = response.data.email;
             })
            .catch((err) => {
                console.log("Error = ", err)
                this.response = JSON.stringify(err)
            })
        }
    },
});
2-4. Views
ViewsはCompositionAPI Componenntで定義されている画面コンポーネントです。
export { default as HomeView } from './HomeView.vue';
export { default as ProfileView } from './ProfileView.vue';
export { default as LoginView } from './LoginView.vue';
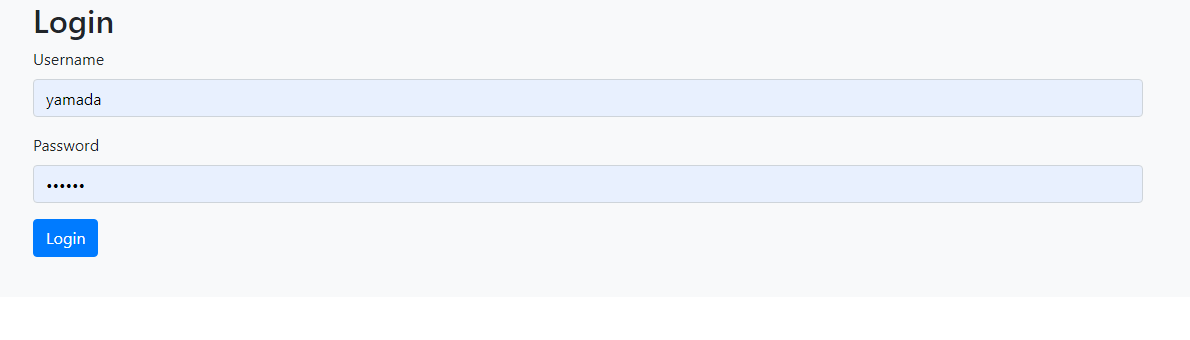
ログイン画面です。
<script setup>
import { Form, Field } from 'vee-validate';
import * as Yup from 'yup';

import { useAuthStore } from '@/stores';

const schema = Yup.object().shape({
    username: Yup.string().required('Username is required'),
    password: Yup.string().required('Password is required')
});

function onSubmit(values, { setErrors }) {
    const authStore = useAuthStore();
    const { username, password } = values;

    return authStore.login(username, password)
        .catch(error => setErrors({ apiError: error }));
}
</script>

<template>
    <div>
        <h2>Login</h2>
        <Form @submit="onSubmit" :validation-schema="schema" v-slot="{ errors, isSubmitting }">
            <div class="form-group">
                <label>Username</label>
                <Field name="username" type="text" class="form-control" :class="{ 'is-invalid': errors.username }" />
                <div class="invalid-feedback">{{errors.username}}</div>
            </div>
            <div class="form-group">
                <label>Password</label>
                <Field name="password" type="password" class="form-control" :class="{ 'is-invalid': errors.password }" />
                <div class="invalid-feedback">{{errors.password}}</div>
            </div>
            <div class="form-group">
                <button class="btn btn-primary" :disabled="isSubmitting">
                    <span v-show="isSubmitting" class="spinner-border spinner-border-sm mr-1"></span>
                    Login
                </button>
            </div>
            <div v-if="errors.apiError" class="alert alert-danger mt-3 mb-0">{{errors.apiError}}</div>
        </Form>
    </div>
</template>
基本的にログインフォーム画面の定義ですが、yupとvee-validateを利用してバリデーションを行っています。
VeeValidateでVue.js用の超便利なバリデーションを実装する
compositionAPIでyupとvee-validateを使ったバリデーションをする
入力されたusername/passwordは、authStore.login()によりFastAPI側に渡され認証が行われます。
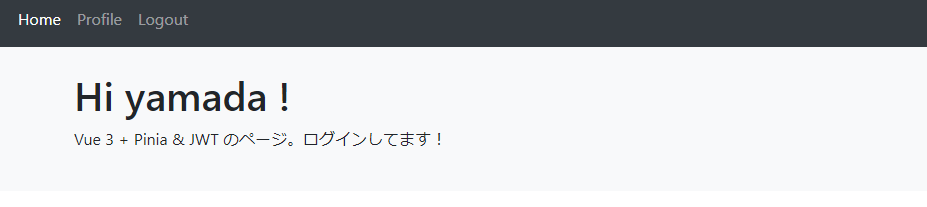
Home画面です。
<script setup>
import { storeToRefs } from 'pinia';

import { useAuthStore, useUsersStore } from '@/stores';

const authStore = useAuthStore();
const { authUser } = storeToRefs(authStore);

</script>

<template>
    <div>
        <h1>Hi {{authUser}} !</h1>
        <p>Vue 3 + Pinia & JWT のページ。ログインしてます!</p>
    </div>
</template>
authStoreに保持してある認証済みのユーザ名 authUser を表示します。
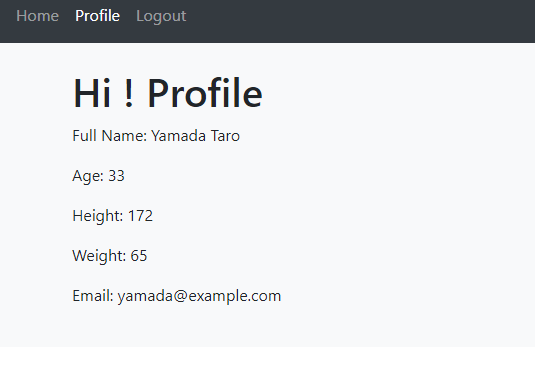
プロファイル画面です
<script setup>
import { storeToRefs } from 'pinia';
import { useProfileStore } from '@/stores';

const profileStore = useProfileStore();
const { full_name, age, height, weight, email } = storeToRefs(profileStore);
profileStore.fetchProfile()
</script>

<template>
    <div>
        <h1>Hi {{authUser}}! Profile</h1>
        <p>Full Name: {{full_name}}</p>
        <p>Age: {{age}}</p>
        <p>Height: {{height}}</p>
        <p>Weight: {{weight}}</p>
        <p>Email: {{email}}</p>
    </div>
</template>
profileStore.fetchProfile()を呼ぶことで、profileStoreにてFastAPI側からプロファイル情報を取得・保持し、その情報を表示します。
3.実行結果
'http://127.0.0.1:8000/ へアクセスするとログイン画面へリダイレクトされます。
ユーザ名yamadaでログインすると、yamadaのHomeViewに遷移します。
Profileリンクをクリックすると、yamadaのProfile画面に遷移します
Logoutリンクをクリックするとログイン画面に遷移します
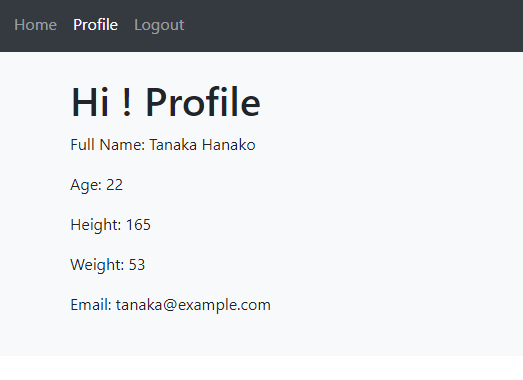
ユーザtanakaでログインし直し、Profile画面を表示すると、正しくtanakaの情報が表示されます。
今回は以上です。