Django Rest APIでJWTを使った認証の実現方法を調べてみました。
Django Rest APIでのJWTについて
JWTの認証とは次のようなものです。クライアント側がログインリクエスト(username,password)を出したときに、その(username,password)が正しいことを判断しトークン(JWT)を返してくれる。クライアントは受け取ったトークン(JWT)をlocalstorageとかに保存しておき、新たなリクエストを送るときにヘッダーにそのトーク(JWT)を付けて送る。サーバはそのトークン(JWT)からuser情報を取り出しリクエストを処理するというものです。JWT特有の処理はもっぱらサーバ側(Django)で行われます。==> 過去記事参考:Phoenix1.3+Guardian1.0でJWT -Qiita
以下のDjangoパッケージを使います。
- django-rest-auth : API ENDPOINT
- django-rest-framework-jwt : JWT
- django-allauth : user登録
djangorestframework_simplejwtというのもあるが、django-rest-authがサポートしているのはdjango-rest-framework-jwtだけなので、こちらを選ぶ。==> django-rest-auth
ちなみに、クライアントからリクエスト時に設定するヘッダーは、両者でちょっと違うので注意が必要でしょう。
django-rest-framework-jwtのヘッダー
$ curl -H "Authorization: JWT <your_token>" http://localhost:8000/protected-url/
djangorestframework_simplejwtのヘッダー
$ curl -H "Authorization: Bearer <your_token>" http://localhost:8000/protected-url/
Demoのインストール
django-rest-authの公式サイトのDemoを指示に従ってインストールします。
Demo project - django-rest-auth
このDemoはdjango-rest-frameworkが標準で持っているトークン認証を使っていて、JWTには対応していません。とりあえずDemoが普通に動作することを確認してからJWTに対応します。
cd /tmp
git clone https://github.com/Tivix/django-rest-auth.git
cd django-rest-auth/demo/
pip install -r requirements.pip
python manage.py migrate --settings=demo.settings --noinput
私の環境は、DjangoはRemoteサーバに構築していますので、サーバのドメイン名を入力してアクセスを許可します。
---
ALLOWED_HOSTS = ["www.mypress.jp"]
---
ここまででDemo環境が整いましたので、起動して確認してみます。
python manage.py runserver 0:8080 --settings=demo.settings
これで普通に動作することが確認できました。
以下、JWTに対応していきます。
まずJWTのパッケージをインストールします。
pip install djangorestframework-jwt
次に設定をJWT用に変更します。
次の2か所(# new)を追加します。これでJWT対応になっているはずです。
ALLOWED_HOSTS = ["www.mypress.jp"]

# Application definition

INSTALLED_APPS = (
    'django.contrib.admin',
    'django.contrib.auth',
    'django.contrib.contenttypes',
    'django.contrib.sessions',
    'django.contrib.messages',
    'django.contrib.staticfiles',
    'django.contrib.sites',

    'rest_framework',
    'rest_framework.authtoken',
    'rest_auth',

    'allauth',
    'allauth.account',
    'rest_auth.registration',
#    'allauth.socialaccount',
#    'allauth.socialaccount.providers.facebook',
#    'rest_framework_swagger',
)


REST_USE_JWT = True # new

REST_SESSION_LOGIN = True
EMAIL_BACKEND = 'django.core.mail.backends.console.EmailBackend'
SITE_ID = 1
ACCOUNT_EMAIL_REQUIRED = False
ACCOUNT_AUTHENTICATION_METHOD = 'username'
ACCOUNT_EMAIL_VERIFICATION = 'optional'

REST_FRAMEWORK = {
    'DEFAULT_AUTHENTICATION_CLASSES': (
        'rest_framework.authentication.SessionAuthentication',
#        'rest_framework.authentication.TokenAuthentication',
        'rest_framework_jwt.authentication.JSONWebTokenAuthentication', # new
    )
}
サーバを起動します。
python manage.py runserver 0:8080 --settings=demo.settings
実行結果
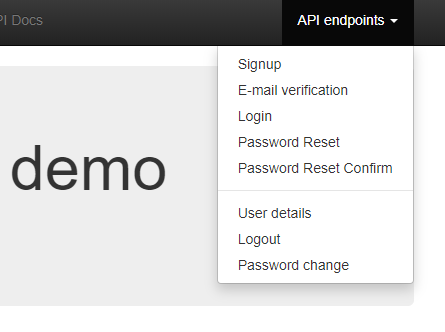
アカウント周りのメニュー
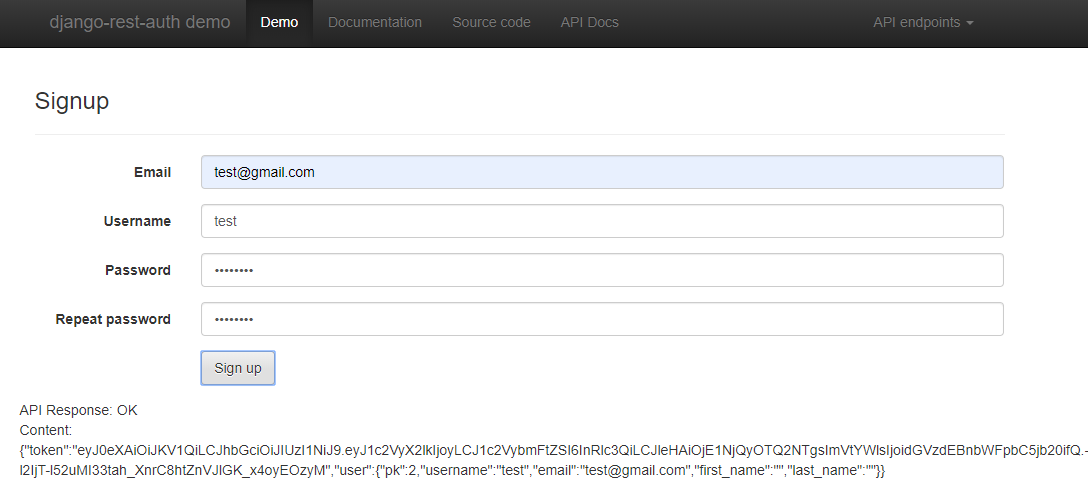
ユーザ登録、レスポンスとしてJWTが返されます
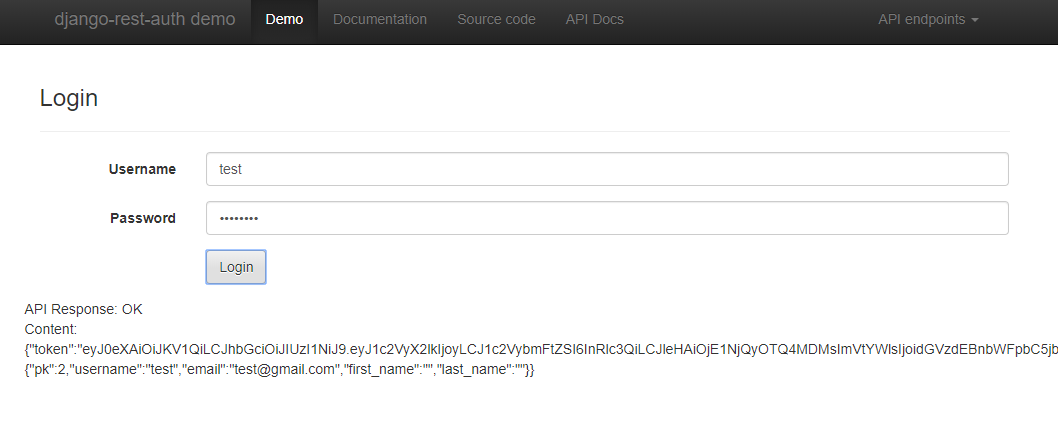
ログイン、成功時のレスポンスとしてJWTが返されます
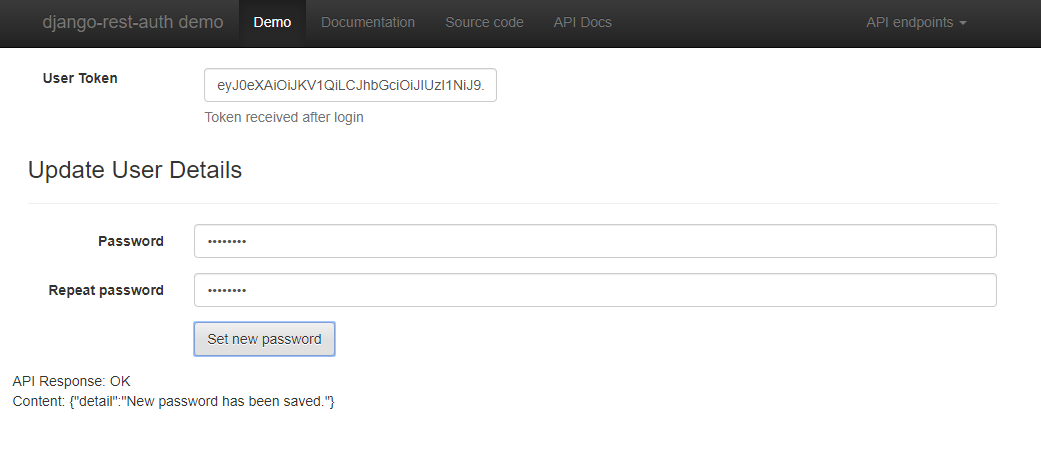
パスワード変更、ログイン時のJWTを入力します
細かいところの調整が必要かと思いますが、大枠は一応、正しく動作しているようです。
urls.py
urls.pyは修正していませんが、一応掲載しておきます。
from django.conf.urls import include, url
from django.contrib import admin
from django.views.generic import TemplateView, RedirectView

from rest_framework_swagger.views import get_swagger_view

urlpatterns = [
    url(r'^$', TemplateView.as_view(template_name="home.html"), name='home'),
    url(r'^signup/$', TemplateView.as_view(template_name="signup.html"),
        name='signup'),
    url(r'^email-verification/$',
        TemplateView.as_view(template_name="email_verification.html"),
        name='email-verification'),
    url(r'^login/$', TemplateView.as_view(template_name="login.html"),
        name='login'),
    url(r'^logout/$', TemplateView.as_view(template_name="logout.html"),
        name='logout'),
    url(r'^password-reset/$',
        TemplateView.as_view(template_name="password_reset.html"),
        name='password-reset'),
    url(r'^password-reset/confirm/$',
        TemplateView.as_view(template_name="password_reset_confirm.html"),
        name='password-reset-confirm'),

    url(r'^user-details/$',
        TemplateView.as_view(template_name="user_details.html"),
        name='user-details'),
    url(r'^password-change/$',
        TemplateView.as_view(template_name="password_change.html"),
        name='password-change'),


    # this url is used to generate email content
    url(r'^password-reset/confirm/(?P<uidb64>[0-9A-Za-z_\-]+)/(?P<token>[0-9A-Za-z]{1,13}-[0-9A-Za-z]{1,20})/$',
        TemplateView.as_view(template_name="password_reset_confirm.html"),
        name='password_reset_confirm'),

    url(r'^rest-auth/', include('rest_auth.urls')),
    url(r'^rest-auth/registration/', include('rest_auth.registration.urls')),
    url(r'^account/', include('allauth.urls')),
    url(r'^admin/', admin.site.urls),
    url(r'^accounts/profile/$', RedirectView.as_view(url='/', permanent=True), name='profile-redirect'),
    url(r'^docs/$', get_swagger_view(title='API Docs'), name='api_docs')
]
今回は以上です。
参考サイト
Welcome to django-rest-auth’s documentation!
爆速で作れるDjangoユーザ認証機能【django-allauth】
How to Use JWT Authentication with Django REST Framework
Simple JWT - A JSON Web Token authentication plugin for the Django REST Framework.