経緯
Linux(CentOS 6)のサーバが死んだので、バックアップの外付けHDDから復旧しようとして、MacBookにマウントするときに調べたのでメモ。
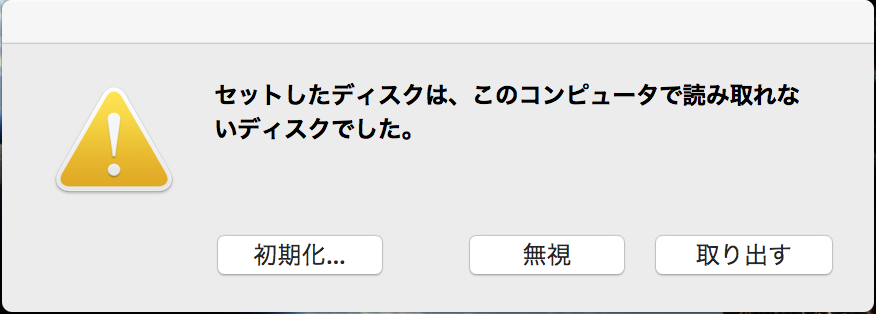
ちなみに普通に外付けHDDをUSB3.0でMacbookにつなぐとext4フォーマットに対応していないらしく、ダイアログが出て「初期化」するか、「無視」するか、聞かれました。
以降の手順は先に外付けHDDをUSBで繋いでから実行しちゃいましたが、常識的に考えてインストール後にUSB接続した方がいいですよね。。
ext4fuseのインストール
どうやらext4fuseというのが必要らしい。
$ brew cask install osxfuse
$ brew install ext4fuse
マウント
マウントのコマンドのヘルプ。うむ。分かりやすい。
$ ext4fuse -h
Version: ext4fuse-0.1.3
Usage: ext4fuse <disk> <mountpoint>
ちなみに外付けHDDのデバイスはディスクユーティリティを開くと見れた。
マウントは以下のコマンドで実行する。すると、初回実行時にmacOSの「セキュリティとプライバシー」のパネルが開くので、そこでこのosxfuseの実行許可を与えないといけない。
$ sudo ext4fuse /dev/path_to_disk /path_to_your_mountpoint -o allow_other
注意: ext4fuse時に-o allow_otherオプションをつけないと、root以外のユーザーでマウントしたディレクトリが見えませんでした。
以上。あとはマウントポイントで煮るなり焼くなり、お好きなように。
取り外すとき
普通にumountするだけでした。
$ sudo umount /path_to_your_mountpoint
参考文献
https://github.com/gerard/ext4fuse
このREADME見れば全部書いてくれてるから、正直この記事はいらない気もする・・・。
