はじめに
以前書いたjupyterでhtml-javascript側の値を取得するメモではフロント側(javascript側)のデータをバック側(python側)で受信する方法について書いてみましたが、その逆のバック側(python側)のデータをフロント側(javascript側)で受信する方法も一緒にしてみました。テキストがやりとりできればJSONを送受信していろいろできると思います。
ソースはこちらにおいてあります。
https://github.com/samacoba/Mytest/blob/master/No_04_ipy_bidirect.ipynb
説明
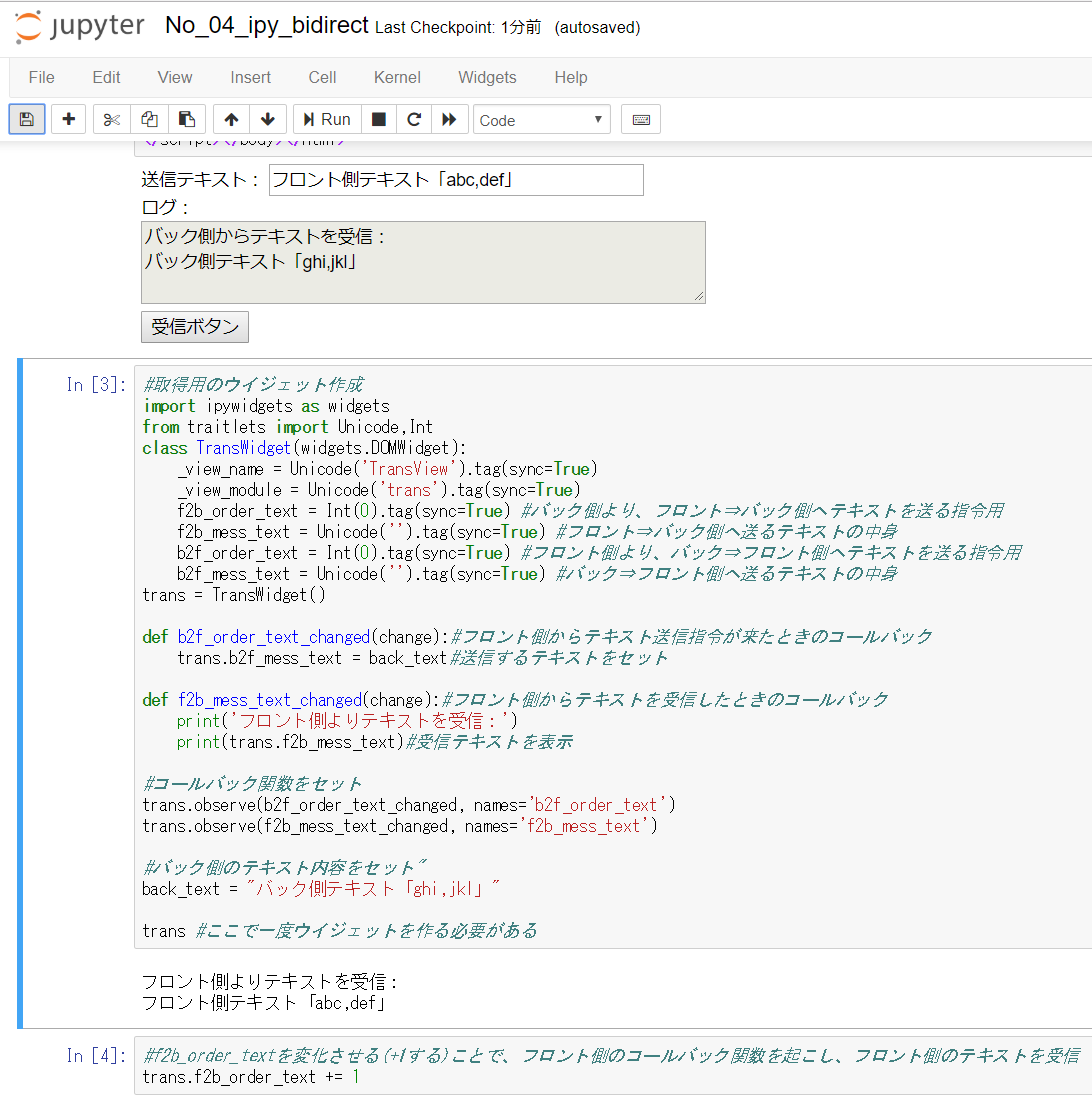
バック(python)側ソース抜粋
# 取得用のウイジェット作成
import ipywidgets as widgets
from traitlets import Unicode,Int
class TransWidget(widgets.DOMWidget):
    _view_name = Unicode('TransView').tag(sync=True)
    _view_module = Unicode('trans').tag(sync=True)
    f2b_order_text = Int(0).tag(sync=True) #バック側より、フロント⇒バック側へテキストを送る指令用
    f2b_mess_text = Unicode('').tag(sync=True) #フロント⇒バック側へ送るテキストの中身
    b2f_order_text = Int(0).tag(sync=True) #フロント側より、バック⇒フロント側へテキストを送る指令用
    b2f_mess_text = Unicode('').tag(sync=True) #バック⇒フロント側へ送るテキストの中身
trans = TransWidget()

def b2f_order_text_changed(change):#フロント側からテキスト送信指令が来たときのコールバック
    trans.b2f_mess_text = back_text#送信するテキストをセット

def f2b_mess_text_changed(change):#フロント側からテキストを受信したときのコールバック
    print('フロント側よりテキストを受信:')
    print(trans.f2b_mess_text)#受信テキストを表示

# コールバック関数をセット
trans.observe(b2f_order_text_changed, names='b2f_order_text')
trans.observe(f2b_mess_text_changed, names='f2b_mess_text')
フロント(javascript)側ソース抜粋
require.undef('trans');
define('trans', ["@jupyter-widgets/base"], function(widgets) {
    var TransView = widgets.DOMWidgetView.extend({
        render: function() {
            //コールバック関数をセット
            this.model.on('change:f2b_order_text', this.f2b_order_text_changed, this);
            this.model.on('change:b2f_mess_text', this.b2f_mess_text_changed, this);

            ipy_TransView = this //外側からウィジェットにアクセスできるようにセット
        },
        f2b_order_text_changed: function() {//バック側からテキスト送信指令が来たときのコールバック
            this.model.set('f2b_mess_text', document.form1.input1.value);//送信するテキストをセット
            this.touch();
        },
        b2f_mess_text_changed: function() {//バック側からテキストを受信したときのコールバック
            document.form1.output1.value += 'バック側からテキストを受信:\n'
            document.form1.output1.value += this.model.get('b2f_mess_text')+'\n'//受信テキストを表示
            this.touch();
        },

    });
    return {
        TransView : TransView
    };
});
ipywidgetsの動き
ipywidgetsではpython側とjavascript側両方にwidgetsのオブジェクトがいて、双方中身のデータを同期させているような感じみたいです。
今回はtransというwidgetsを定義して、その中に同期する変数を4つ作っています。
f2b_order_text = Int(0).tag(sync=True) #バック側より、フロント⇒バック側へテキストを送る指令用
f2b_mess_text = Unicode('').tag(sync=True) #フロント⇒バック側へ送るテキストの中身
b2f_order_text = Int(0).tag(sync=True) #フロント側より、バック⇒フロント側へテキストを送る指令用
b2f_mess_text = Unicode('').tag(sync=True) #バック⇒フロント側へ送るテキストの中身
widgetsの中の変数は常に同期させていて、変化が起こると事前にwidgetsに登録しておいたコールバックが実行されるようです。
# python側コールバック関数をセット
trans.observe(b2f_order_text_changed, names='b2f_order_text')
trans.observe(f2b_mess_text_changed, names='f2b_mess_text')
//javascript側コールバック関数をセット
this.model.on('change:f2b_order_text', this.f2b_order_text_changed, this);
this.model.on('change:b2f_mess_text', this.b2f_mess_text_changed, this);
バック側からフロント側のテキストを取得
# f2b_order_textを変化させる(+1する)ことで、フロント側のコールバック関数を起こし、フロント側のテキストを受信
trans.f2b_order_text += 1
結構ややこしいことしてますが、
バック側ウィジェットの「f2b_order_text」の値を+1して変化させる
⇒ 自動でフロント側ウィジェットの「f2b_order_text」の値が同期して更新される
⇒ フロント側のコールバック関数「f2b_order_text_changed」が呼び出される
⇒ コールバック関数内で、フロント側のデータを取得して、フロント側のウィジェットの「f2b_mess_text」の値を上書きする
⇒ 自動でバック側ウィジェットの「f2b_mess_text」の値が同期して更新される
⇒ バック側のコールバック関数「f2b_mess_text_changed」で「f2b_mess_text」の値を表示する。
フロント側からバック側のテキストを取得
//b2f_order_textを変化させる(+1する)、バック側のコールバック関数を起こし、バック側のテキストを受信
ipy_TransView.model.set('b2f_order_text', (ipy_TransView.model.get('b2f_order_text')+1))
ipy_TransView.touch();
同様に、
フロント側ウィジェットの「b2f_order_text」の値を+1して変化させる
⇒ 自動でバック側ウィジェットの「b2f_order_text」の値が同期して更新される
⇒ バック側のコールバック関数「b2f_order_text_changed」が呼び出される
⇒ コールバック関数内で、バック側のデータを取得して、バック側のウィジェットの「b2f_mess_text」の値を上書きする
⇒ 自動でフロント側ウィジェットの「b2f_mess_text」の値が同期して更新される
⇒ フロント側のコールバック関数「b2f_mess_text_changed」で「b2f_mess_text」の値を表示する。
その他
ipywidgets-server
https://github.com/pbugnion/ipywidgets_server
というのがありまして、自分で定義したwidgetsも動くようなので、jupyter上で開発してから、そのまま簡単なwebアプリ化もできなくはなさそうです。
結構ややこしい操作をしているのでもっと簡単な方法があるかもしれません。
ほかの方法では
[Python] EelをつかってHTML/CSS/JavaScriptでGUIを構築
のようにEelを使うと簡単にできるかもしれません。
