目次
- はじめに(目的とか環境とか)
- CodeStarでプロジェクトを作成
- CodeのClone
- 新規関数の作成
- デプロイ
はじめに
概要
この記事ではCodeStarでPython×LambdaのWeb系プロジェクトを作成し、新規にLambda関数を作成する場面を想定して手順の備忘を記載します。
随時キャプチャが登場しますが全て2021/06/10前後時点のものなので、サービスアップデートに伴い変更される可能性があります。
目標
CodeStarプロジェクトをローカルにCloneしてVSCodeで開発し、新規Lambdaを作る
環境
ローカル環境
- マシン:Mac ※Intel CPU
- OS:macOS Big Sur ver11.4
- テキストエディタ:Visual Studio Code
- インストール済みライブラリ:Git CLI, AWS CLI
AWS環境
- アカウント:プライベートアカウント
- 作業リージョン:Tokyo (ap-northeast-1)
- 作業IAMユーザー名:work
- Access type:Programmatic access
- AWS Management Console access
- Group:Administrator
CodeStarでプロジェクトを作成
細かい説明は こちら をご覧ください。
本記事では検証用に作成した下記プロジェクトを用います。
|設定項目名 | 設定値 |
|:-----------|------------|------------|
|CodeStarテンプレート |Python / Web service / AWS Lambda |
|Project name |private-work-codestar |
|Project ID |private-work |
|Repository name |private-work-codestar |
なお不要なアクセスを防ぐため上記プロジェクト作成後に自動作成されたAPI Gatewayを削除しています。
CodeのClone
プロジェクトの作成により、CodeCommitやCodeBuild、CodeDeploy、CodePipeline等一連のCI/CDのツールチェーンが作成されています。
続いて作成されたCodeCommitリポジトリをCloneして手元で編集できる環境を作ります。
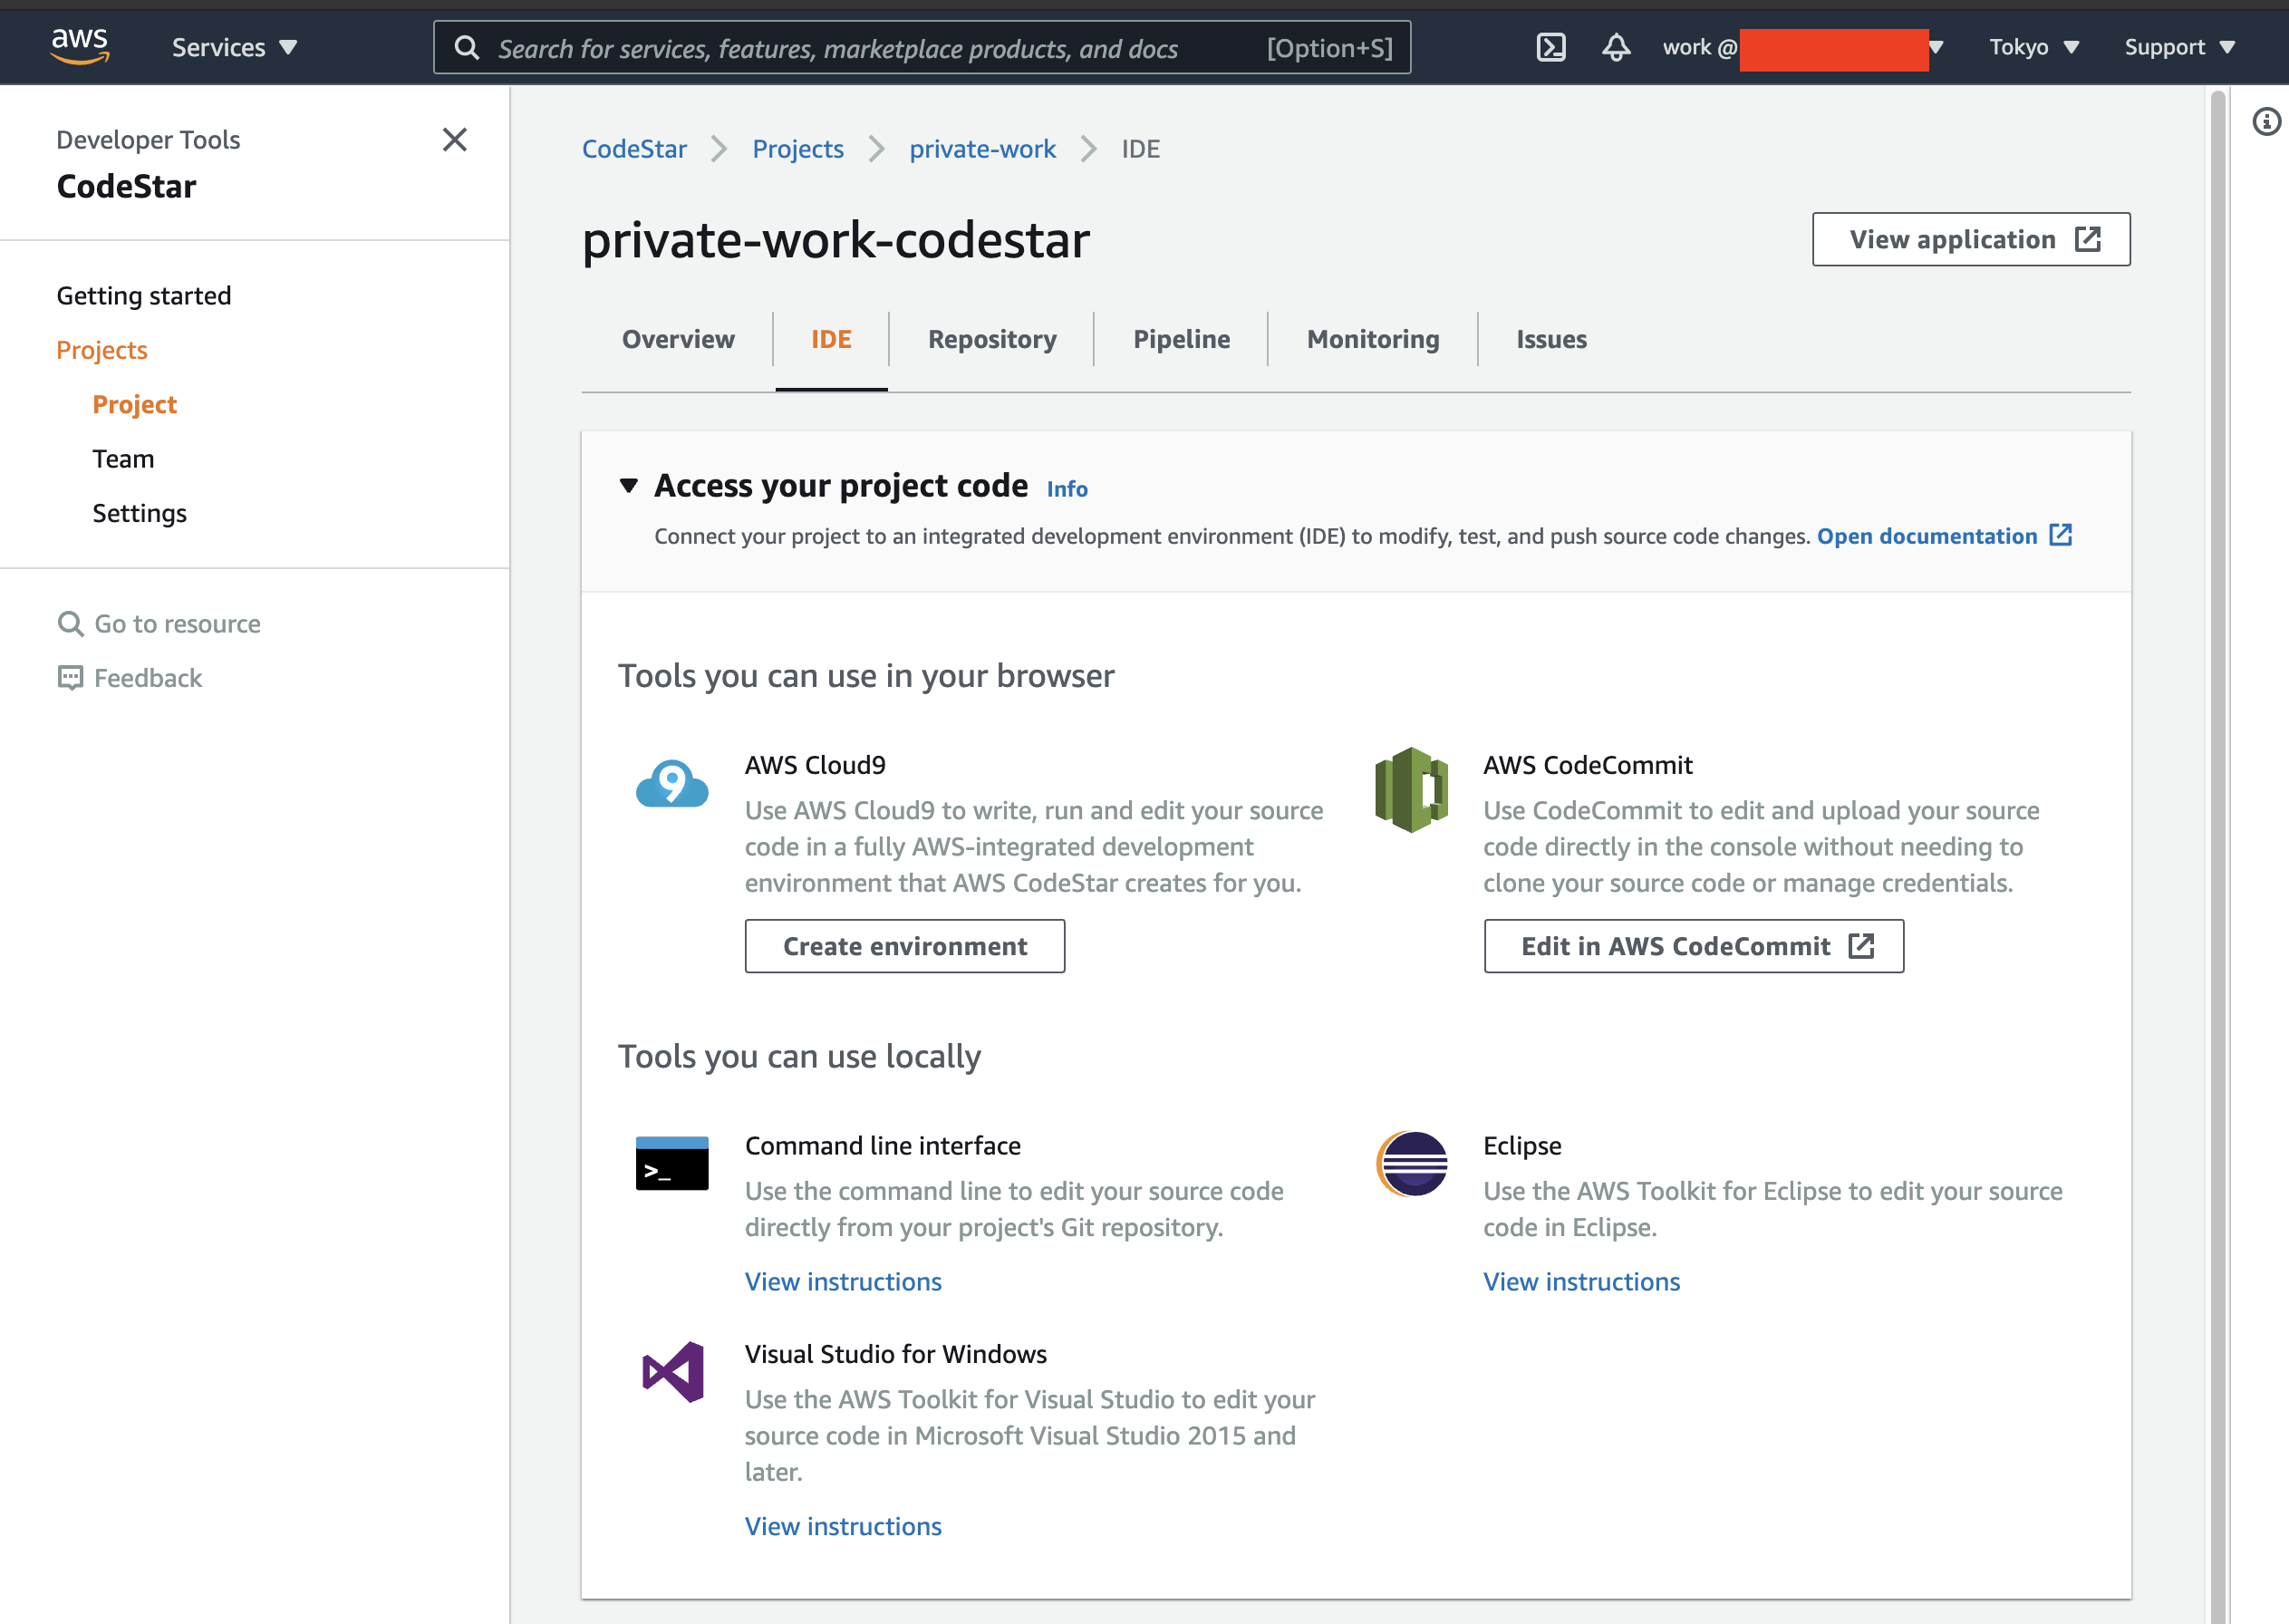
上記の通りCodeStarプロジェクトでもClone方法はいくつか紹介されていますが、今回はAWSのCredential情報を用いてHTTPSでローカルにCloneする方法を用います。
なお一番簡単なのはCloud9を用いたCloneです。この場合CodeCommit→clone→Cloud9とAWS環境内で作業が閉じるため、IAMの権限不足等不要なエラーが起こりづらい印象です。
Cloneがうまく行かなかった場合の最終手段としてお試しください。
以後Git CLIとAWS CLIはインストール済みの前提で記述となりますのでご注意ください。
HTTPS経由でのCode Clone手順
作業は下記ドキュメントに従って実施していきます。 ※MFAを設定している場合この手順のみでは対応できません、ご注意ください。
https://docs.aws.amazon.com/ja_jp/codecommit/latest/userguide/setting-up-https-unixes.html
1. AWSCodeCommitPowerUserポリシーのアタッチ
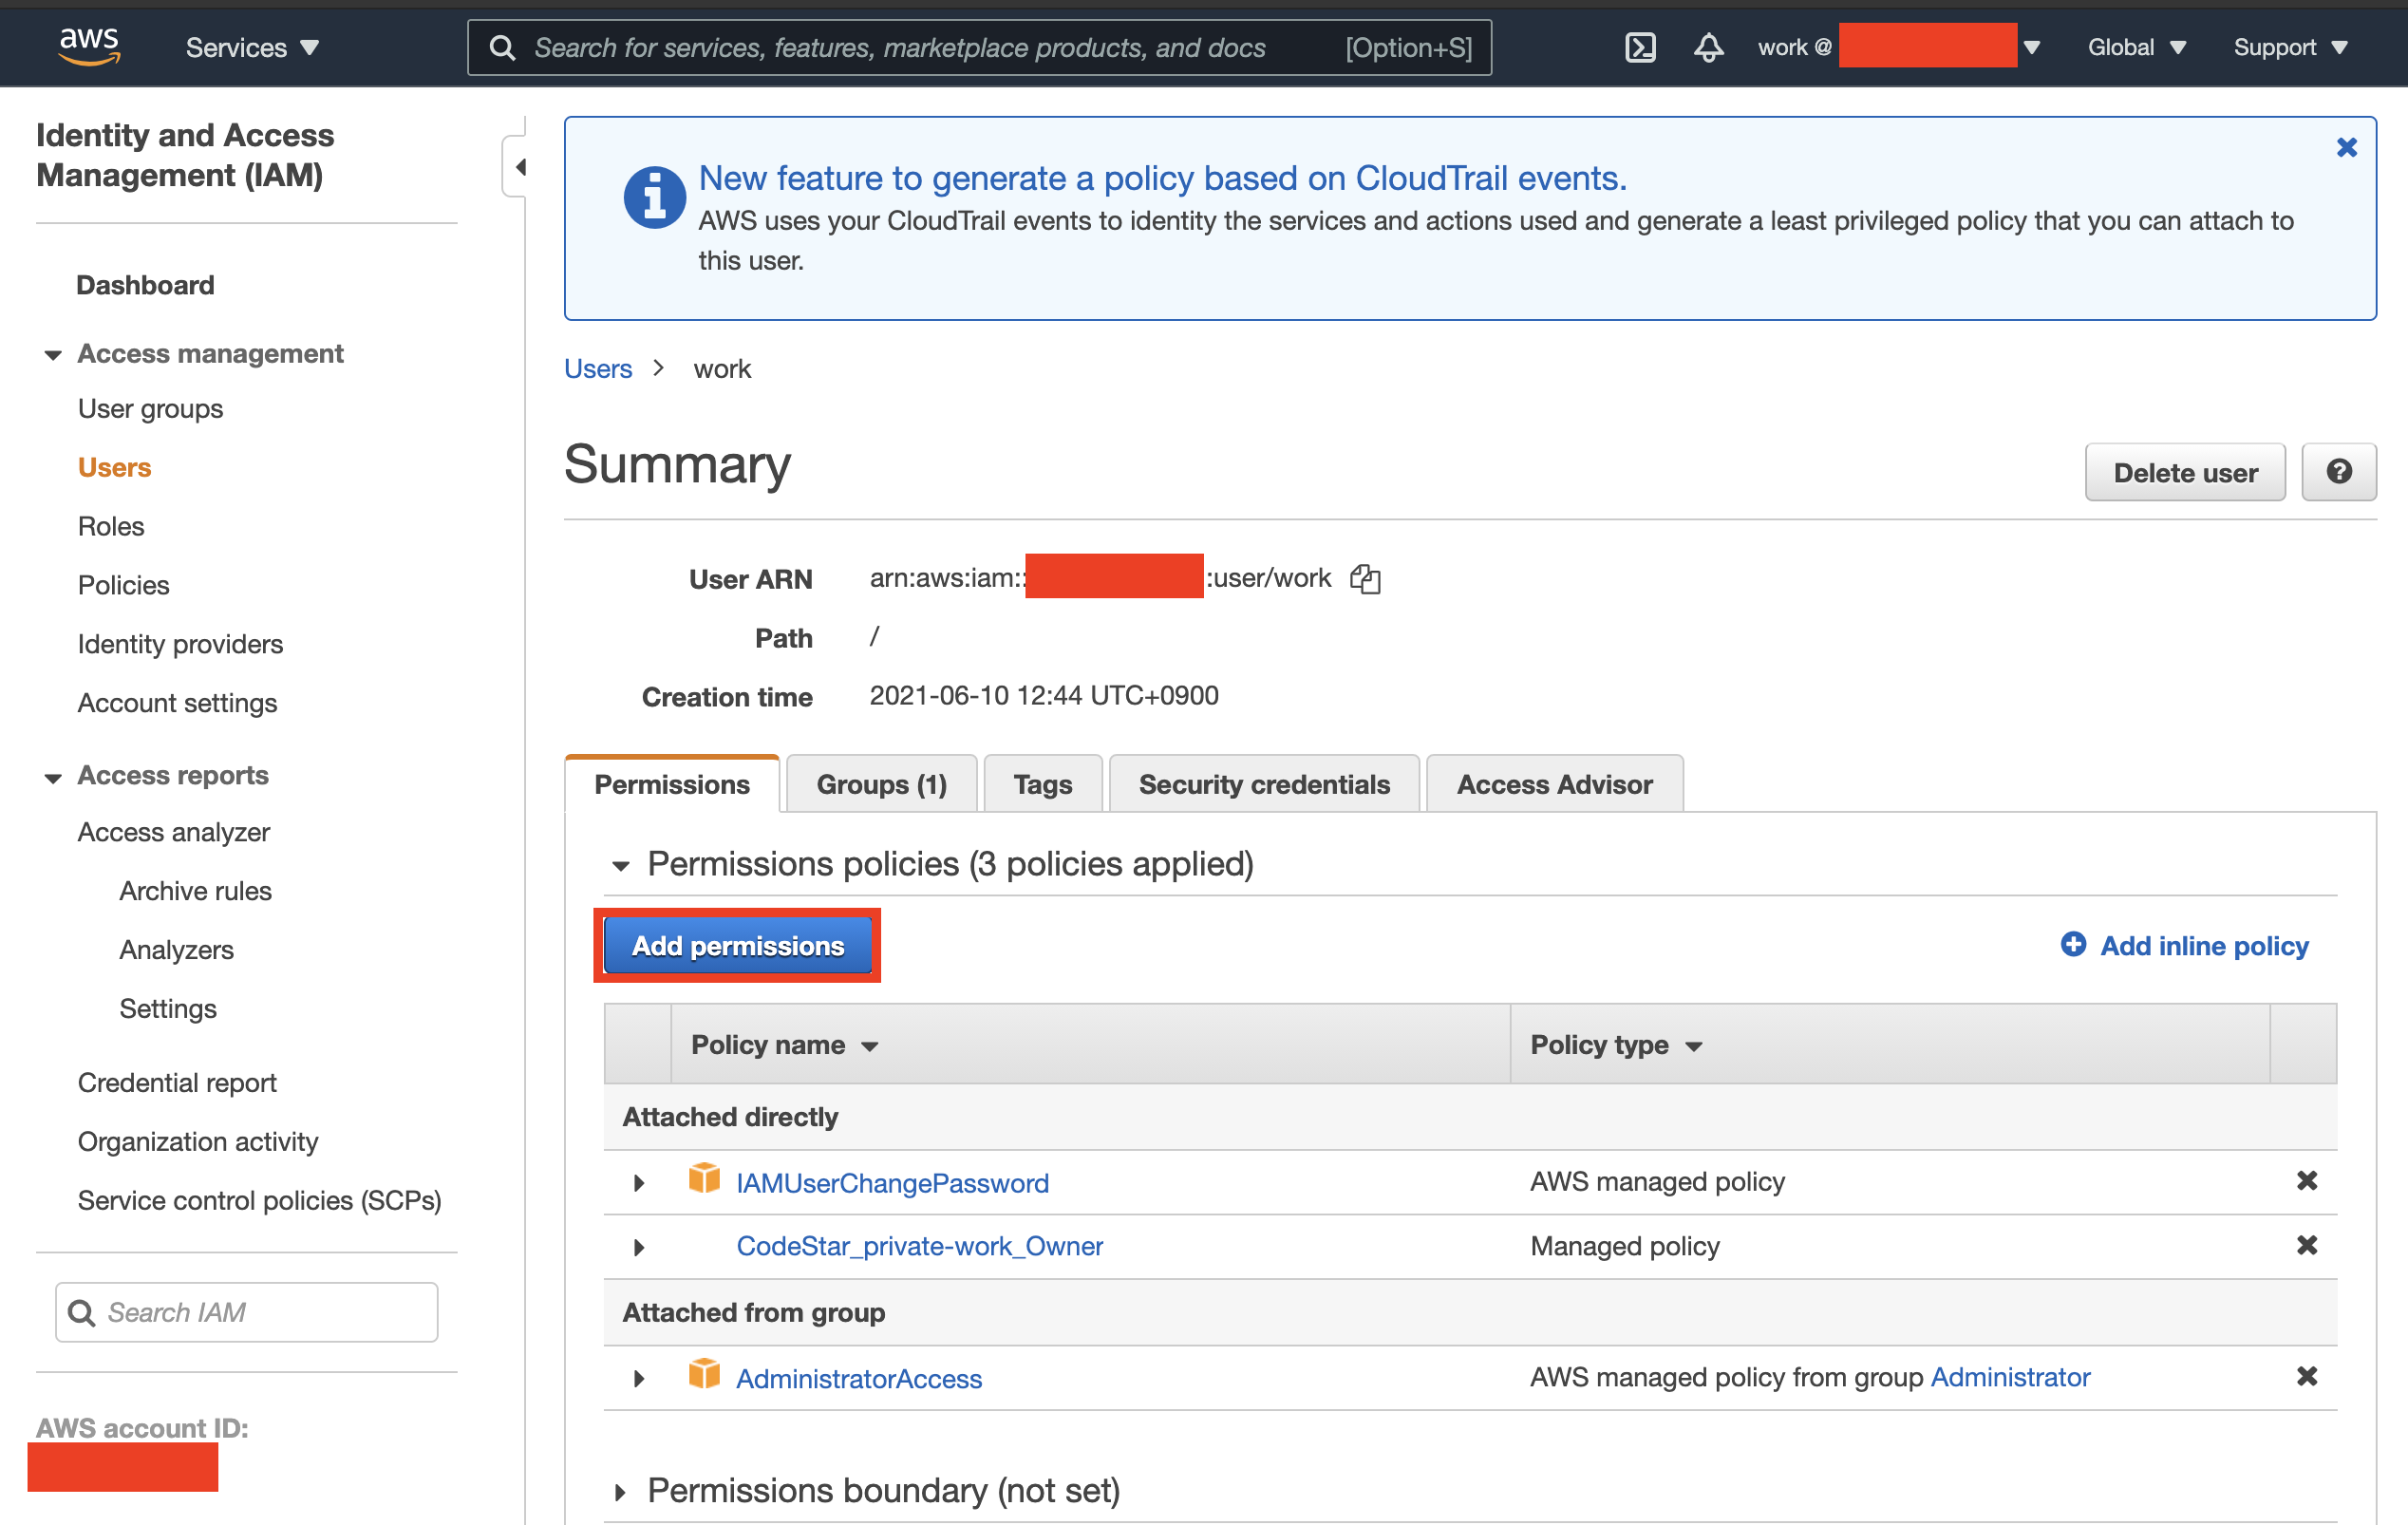
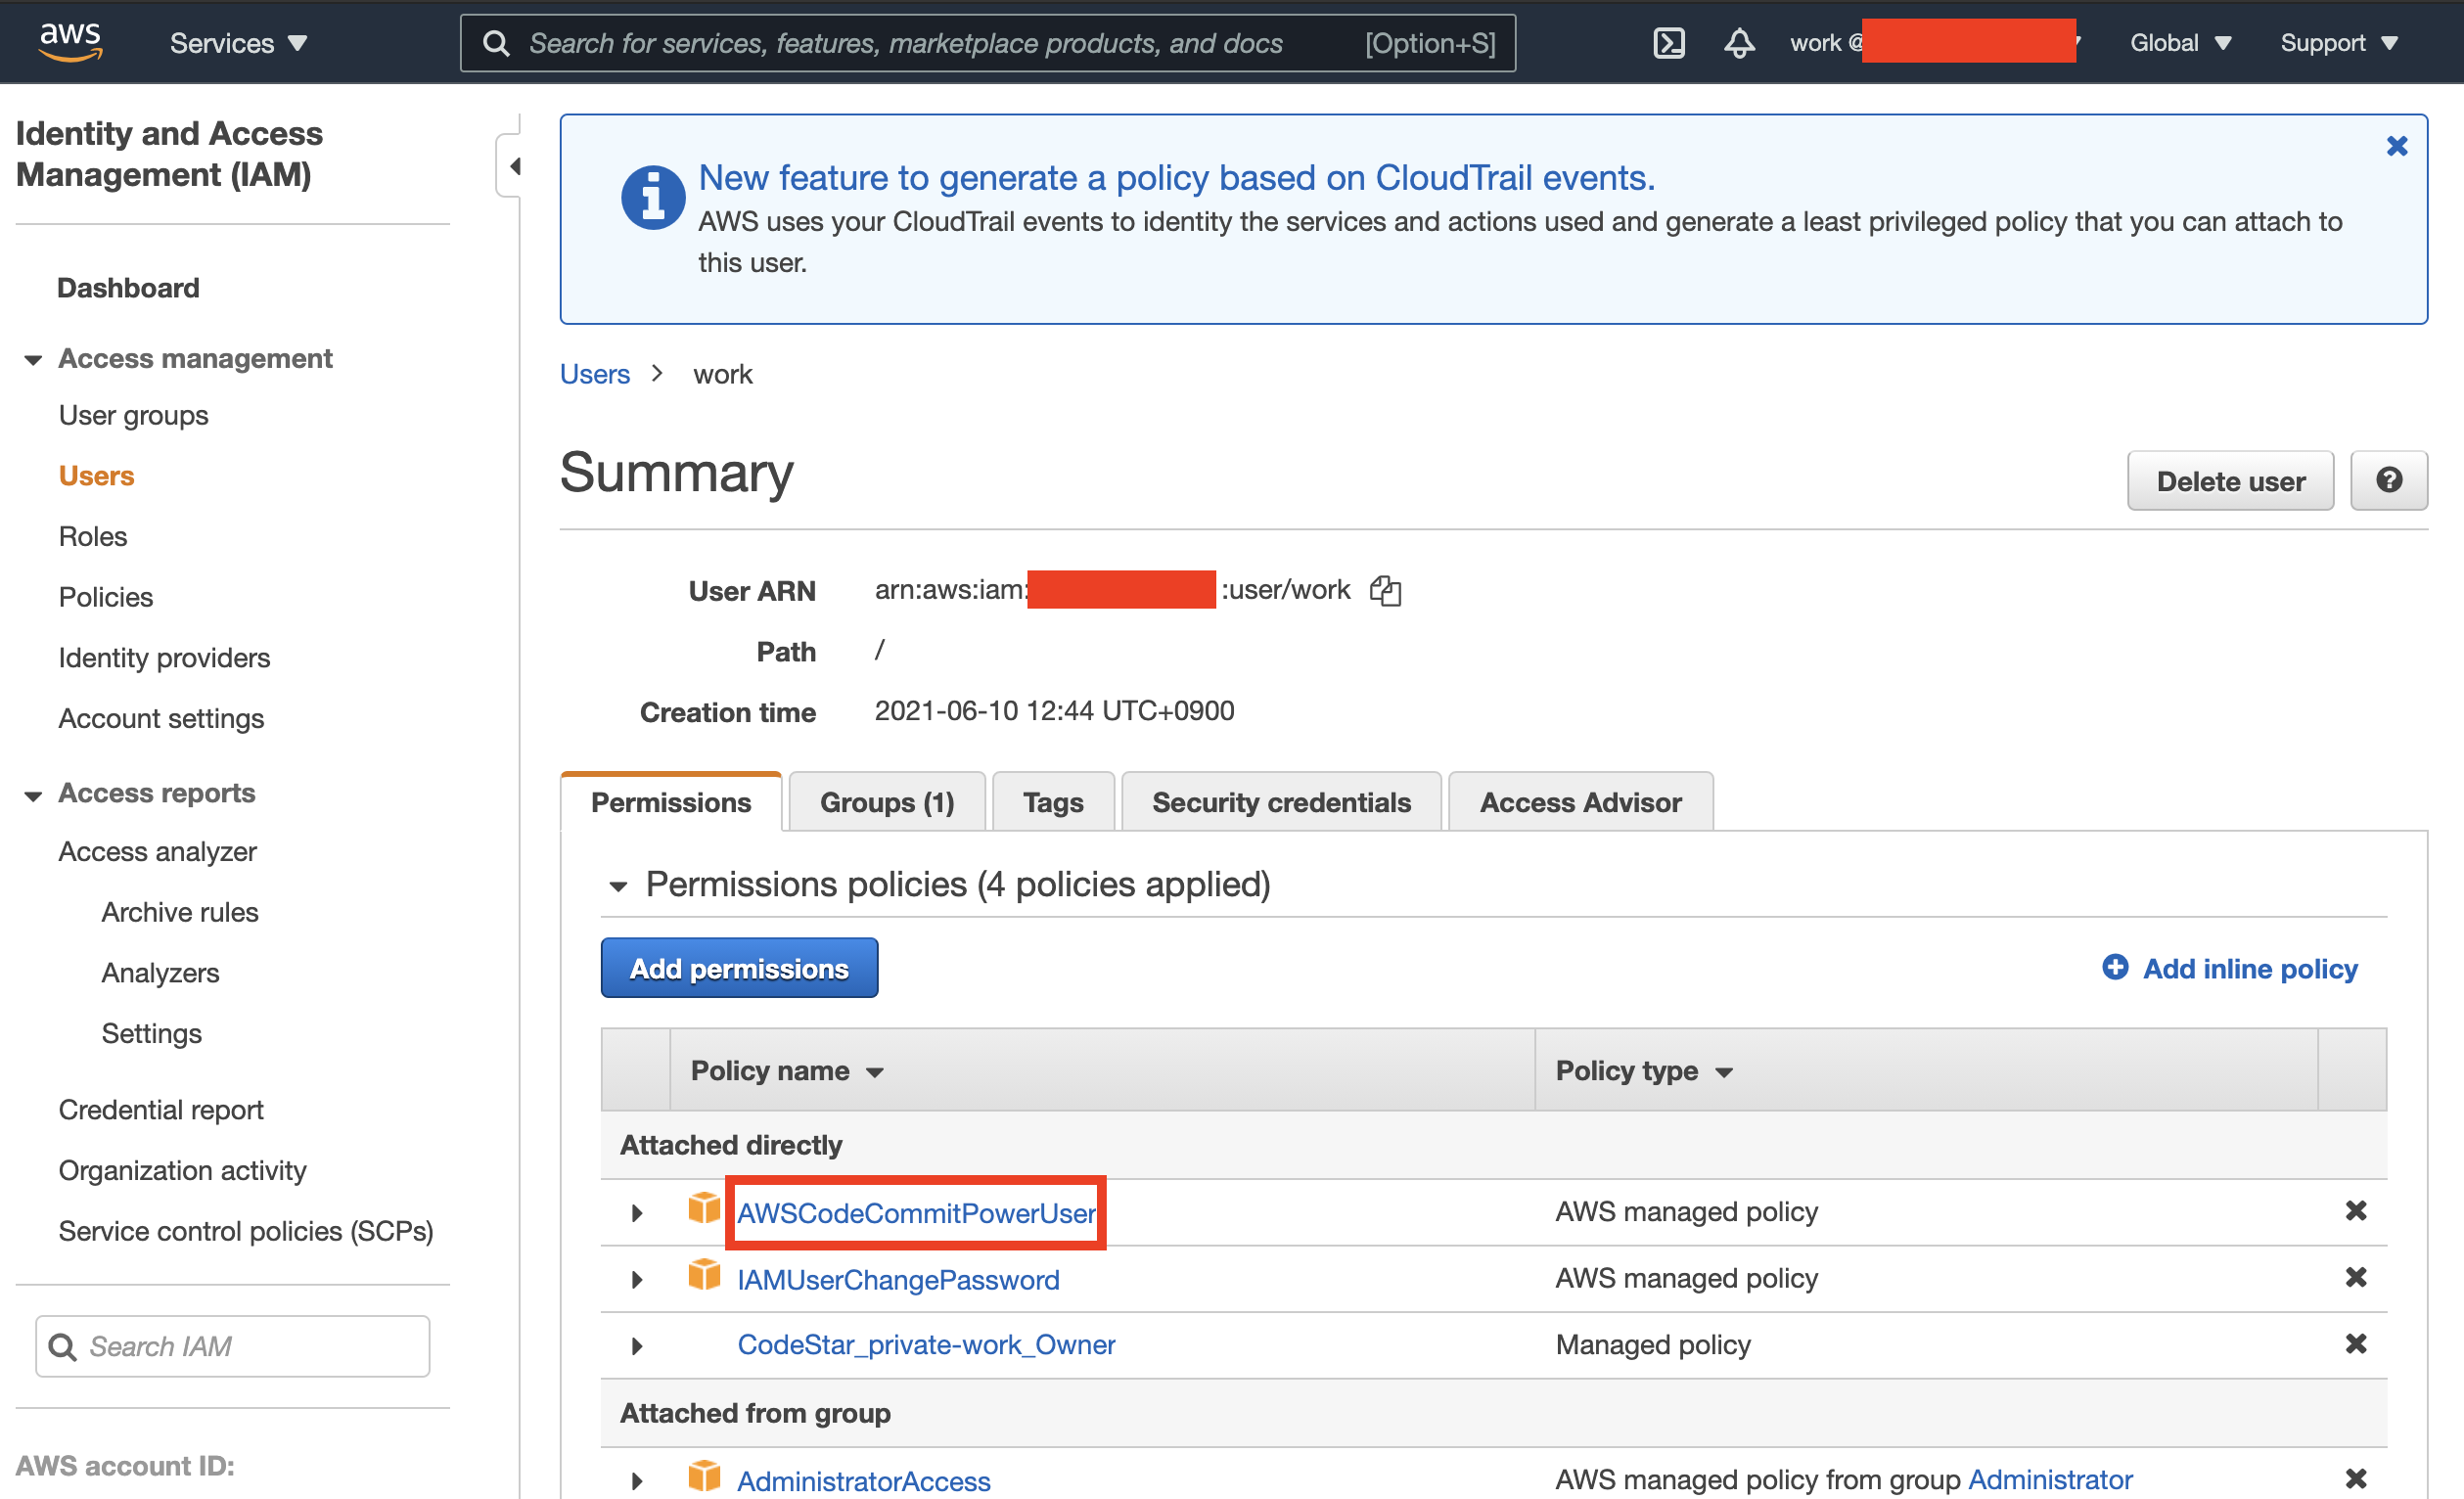
開発を行うユーザー(ここではwork)にAWSCodeCommitPowerUserポリシーを付与します。
しかしAdministratorで作成したユーザーはデフォルトでCodeCommitにFull Accessできるはずなので、この作業は(おそらく)不要です。
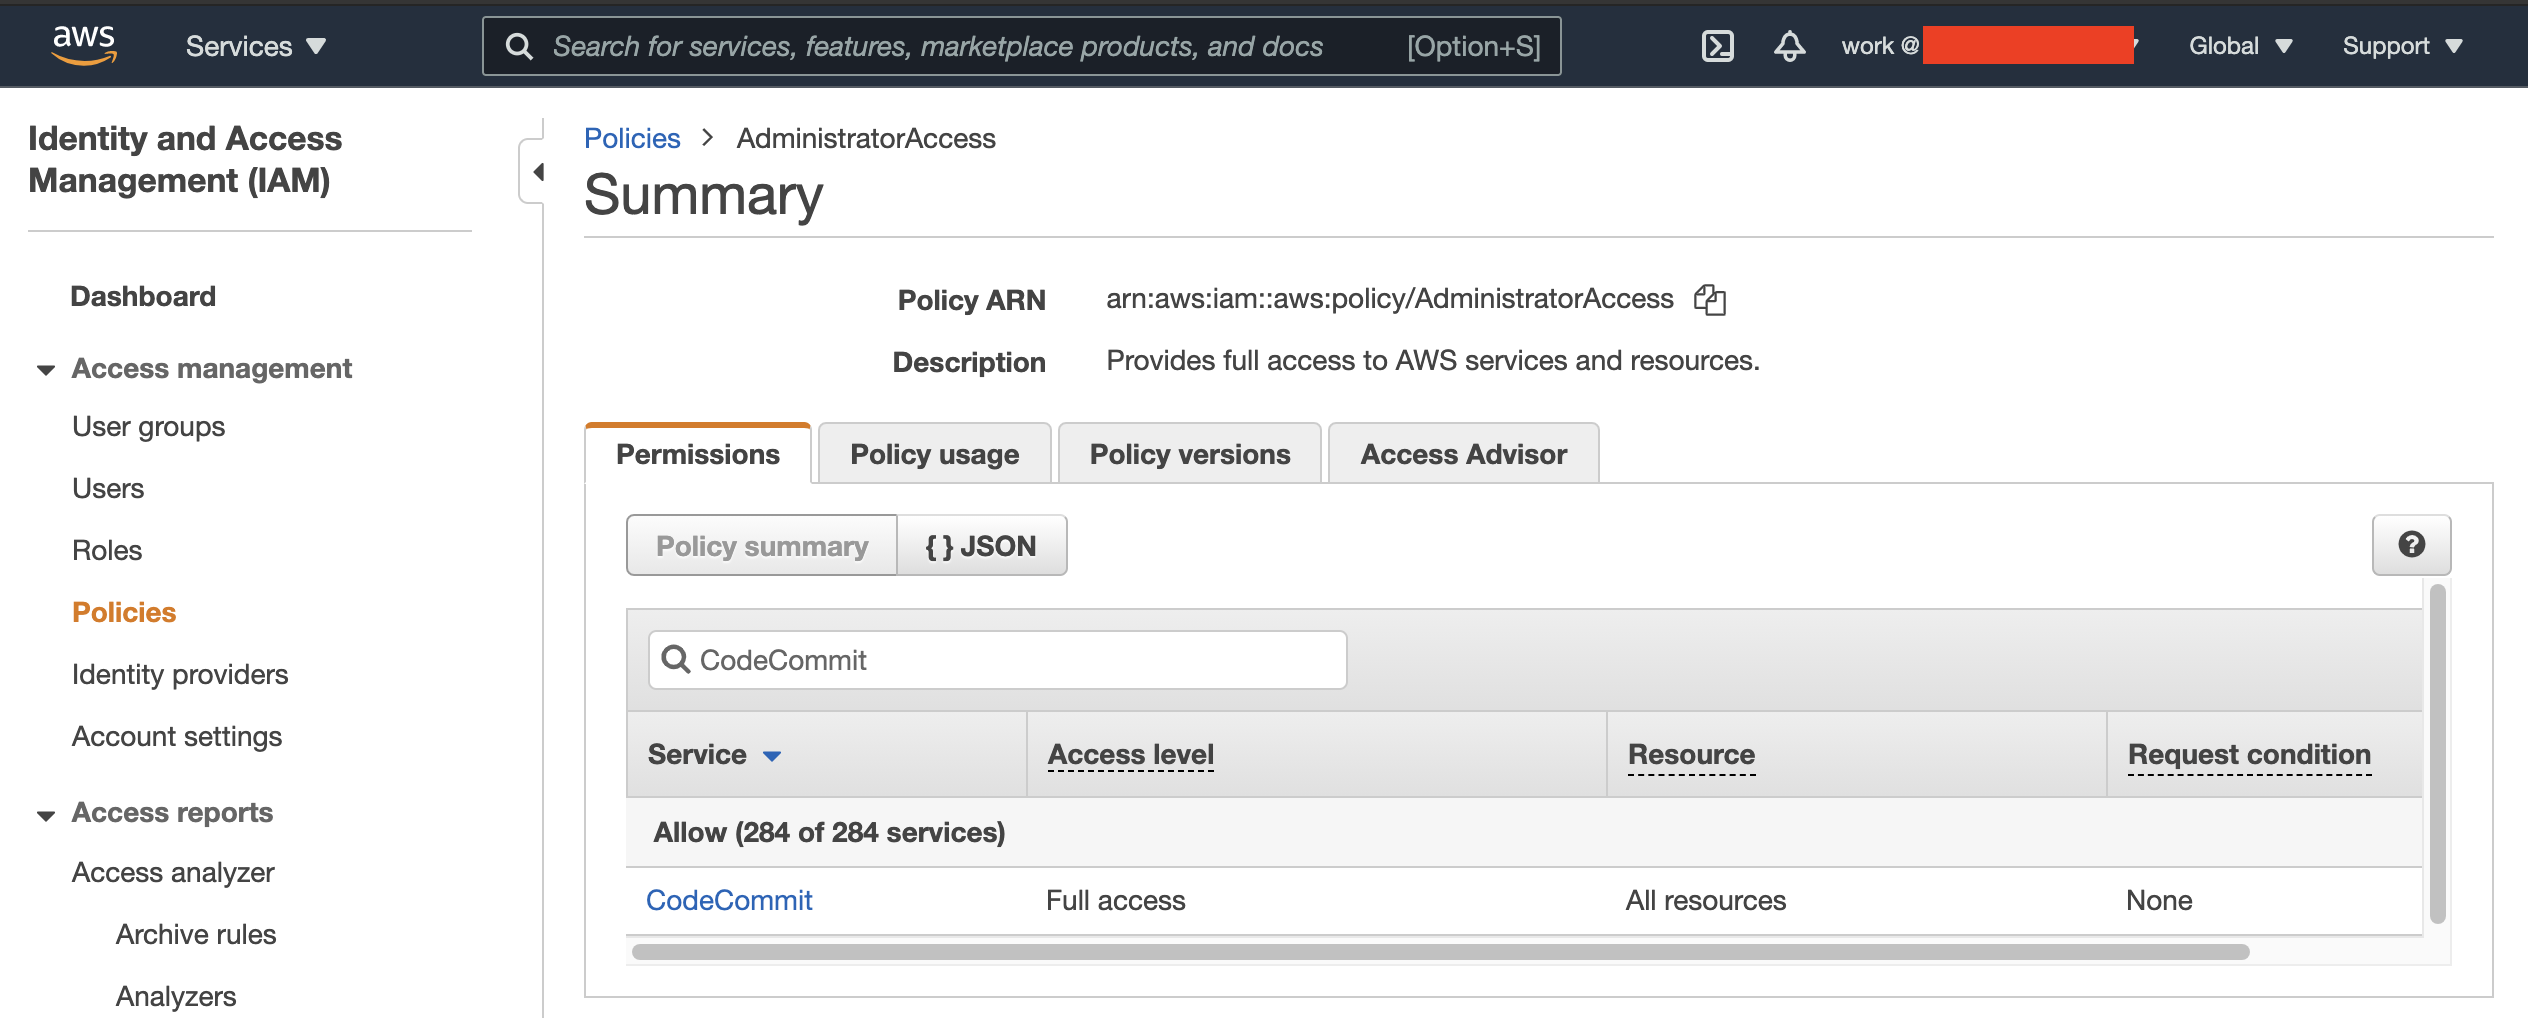
以下CodeCommitのFull Access権がないユーザーに対する記述です。
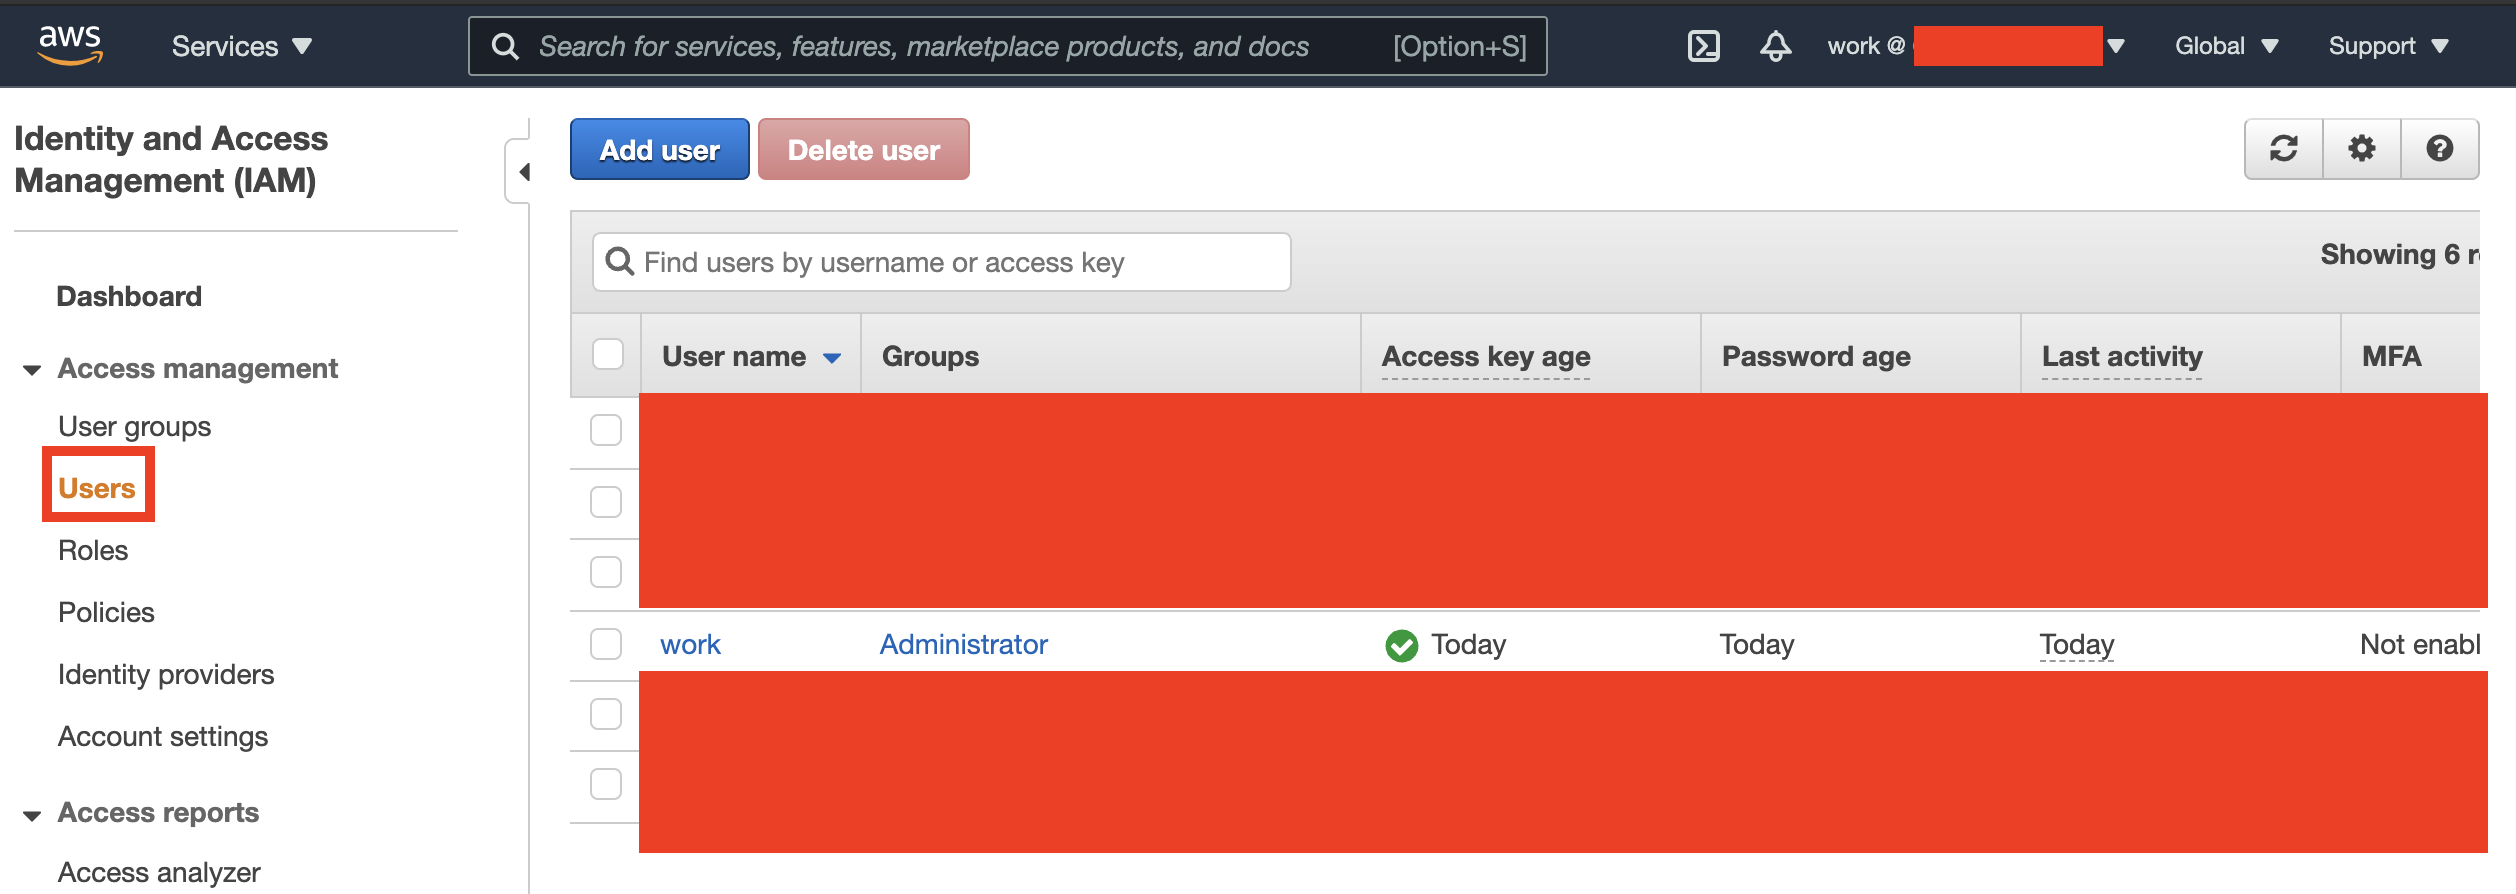
AWSコンソールトップからIAMを開き、ユーザーメニューから作業対象ユーザーを選択します。
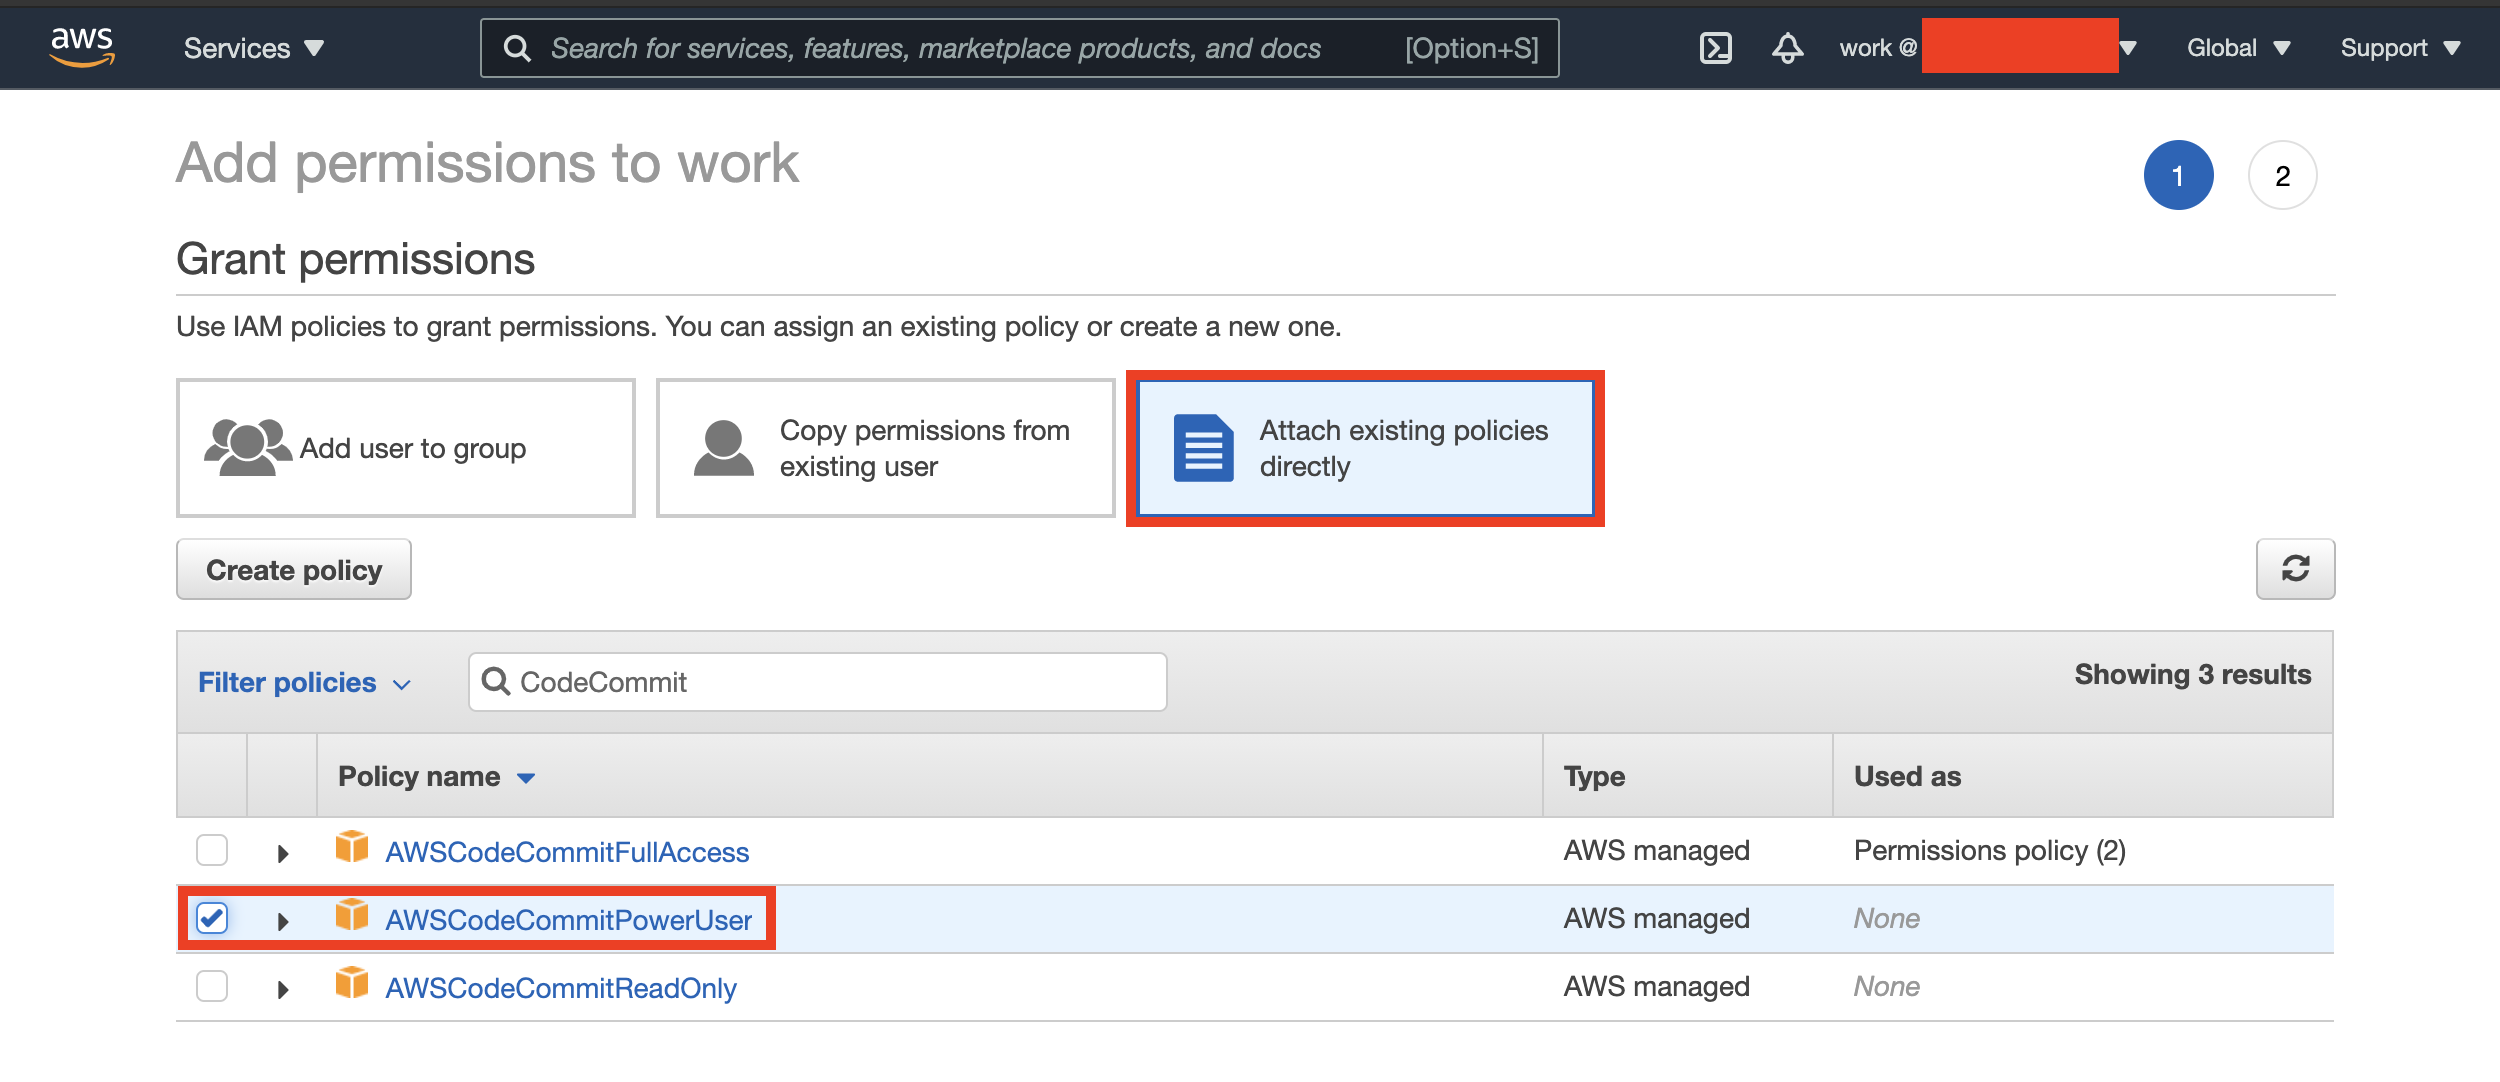
ViewをAttach existing policies directlyに切り替え、CodeCommitを検索して表示される「AWSCodeCommitPowerUser」にチェックを入れ、Nextを押し、次の画面でAdd permissionsを押します。
2. AWS Configure
この作業ではIAMユーザーのAWS Credential情報が必要になりますので、お持ちでない場合はアカウントの管理者にお問い合わせください。
まずローカルのターミナルで下記を実行し、aws cliのconfig情報を書き換えます。
$ aws configure
実行すると下記の通りAccess KeyとSecret Keyの入力が求められるので入力します。
region nameはこの記事の場合「ap-northeast-1」、Default output formatは「json」と入力します。
AWS Access Key ID [None]: Type your target AWS access key ID here, and then press Enter
AWS Secret Access Key [None]: Type your target AWS secret access key here, and then press Enter
Default region name [None]: Type a supported region for CodeCommit here, and then press Enter
Default output format [None]: Type json here, and then press Enter
続いて下記コマンドを入力します。
これを実行することでgitコマンド実行時にaws configureで設定した認証状を用いてCodeCommitにアクセスするようになります。
$ git config --global credential.helper '!aws codecommit credential-helper $@'
$ git config --global credential.UseHttpPath true
以上で設定は完了です。
3. Codeのclone
下記URLからCodeCommitのHomeにアクセスします。
https://console.aws.amazon.com/codesuite/codecommit/home
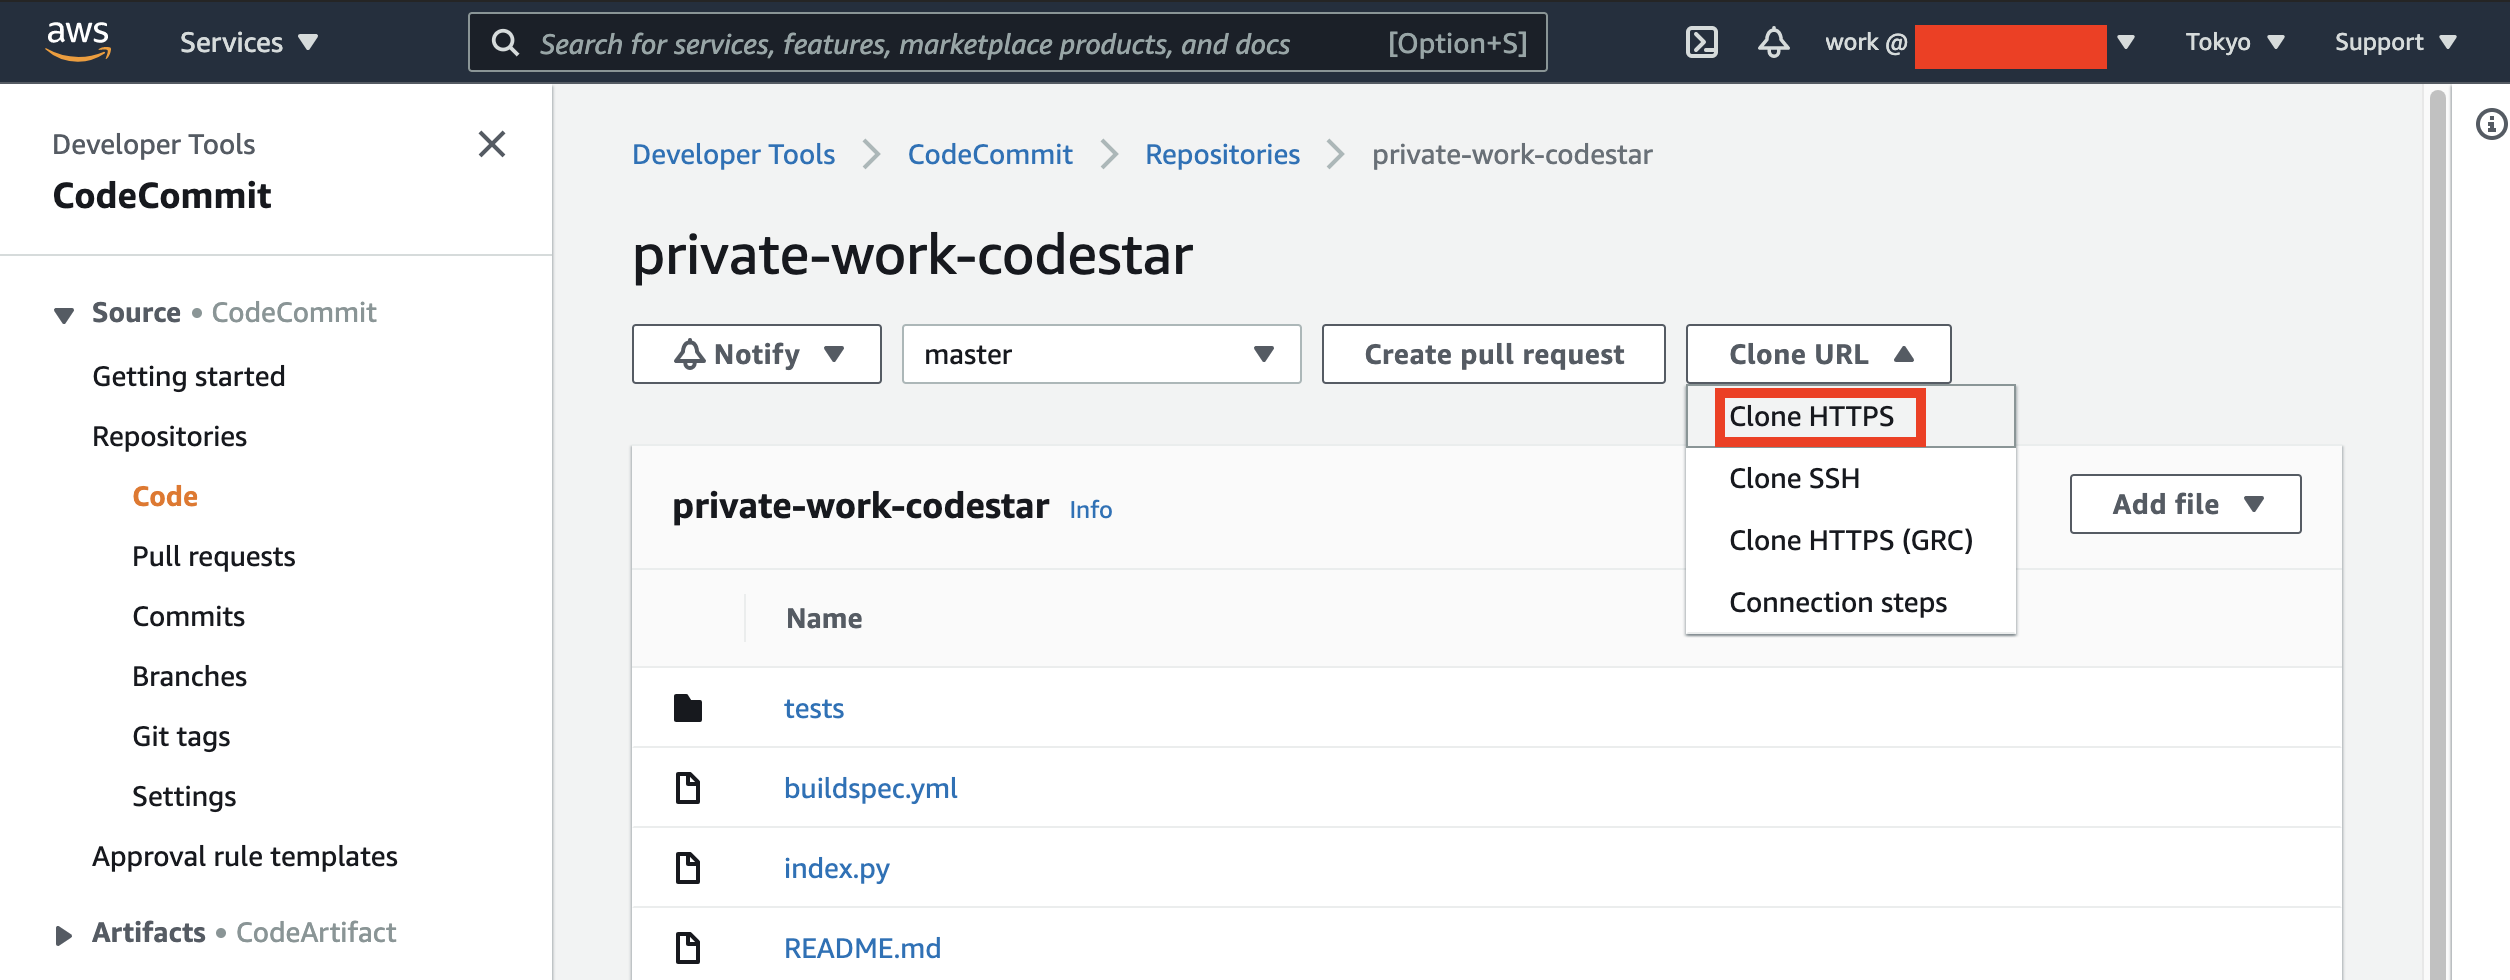
表示されているリポジトリ一覧からCloneしたいプロジェクトを選択します。
続いてClone URLのプルダウンからClone HTTPSを選択すると、URLがコピーできます。
上記でコピーしたリポジトリを任意のパスにcloneします。下記のhttps移行はご自身のコピーしたURLに置き換えてください。
$ git clone https://git-codecommit.ap-northeast-1.amazonaws.com/v1/repos/private-work-codestar
Cloning into 'private-work-codestar'...
remote: Counting objects: 12, done.
Unpacking objects: 100% (12/12), done.
以上でCodeのCloneは完了です。
新規関数の作成
続いて新規関数を作成していきます。
既存コードの確認
まずはCloneしたプロジェクトをテキストエディタで開いてください。下記のような構造になっているはずです。
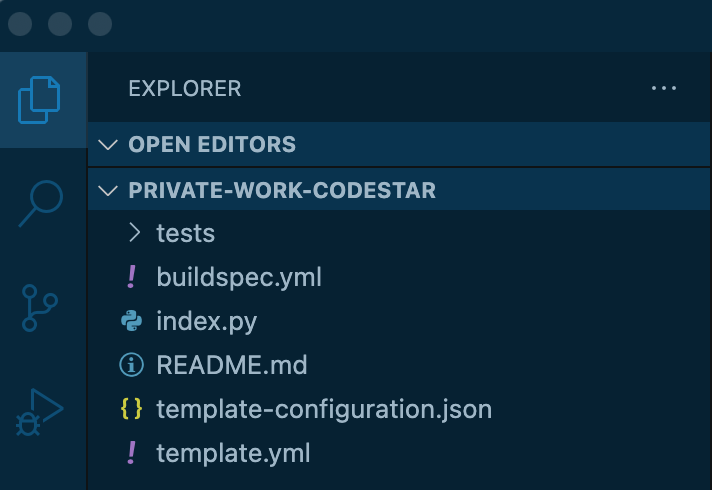
ここでは簡単な紹介に留めますが、それぞれ下記のような役割です。
| ファイルまたはディレクトリ名 | 役割 |
|---|---|
| tests/ | CodeBuild時に実行される単体テストコード群 |
| buildspec.yml | CodeBuild用設定ファイル デフォルトではライブラリインストールや単体テストの実行、デプロイパッケージの作成についての設定が記述されている |
| index.py | デプロイされているLambda関数本体のコード |
| README.md | CodeCommitリポジトリの説明文 |
| template-configuration.json | CloudFormationによるアプリ更新時に用いConfig情報?詳細不明 |
| template.yml | Lambda関数の環境設定ファイル 環境変数やLambdaの実行時間等が設定可能 |
プロジェクト構造のアップデート:
関数がもう一つできるので見通しをよくするため、まずプロジェクトの構造を下記の通り変更します。
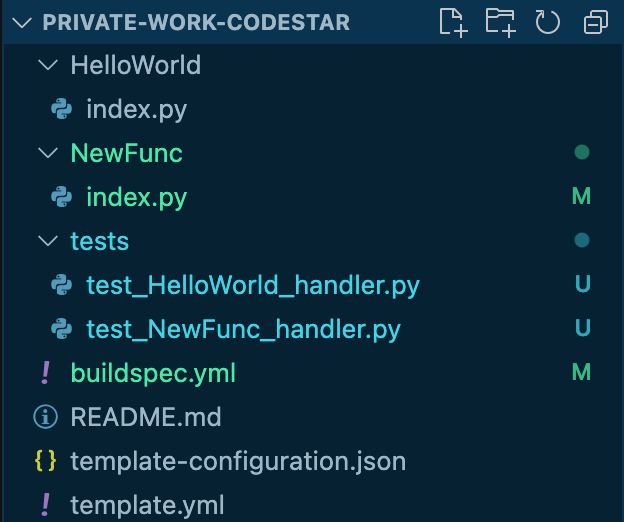
変更点は下記の通りです。
- HelloWorldディレクトリの作成
- 同ディレクトリへのindex.pyの移動
- NewFuncディレクトリの作成
- 同ディレクトリへのindex.pyのコピー
- testsディレクトリ以下のアップデート
- test_handler.pyの複製
- test_HelloWorld_handler.pyおよびtest_NewFunc_handler.pyへ名前の変更
コードのアップデート
続いて稼働確認時にわかりやすいようNewFunc/index.pyのコードを下記の通りアップデートします。
import json
import datetime
from logging import getLogger, StreamHandler, DEBUG, Formatter

def handler(event, context):
    logger = getLogger(__name__)
    handler = StreamHandler()
    handler.setLevel(DEBUG)
    formatter = Formatter('%(asctime)s:%(lineno)d:%(levelname)s:%(message)s')
    handler.setFormatter(formatter)
    logger.setLevel(DEBUG)
    logger.addHandler(handler)
    logger.propagate = False

    logger.info('NewFunc handler start')

    data = {
        'output': 'Hello New Func',
        'timestamp': datetime.datetime.utcnow().isoformat()
    }
    logger.debug('data: {}'.format(data))

    response = {'statusCode': 200,
            'body': json.dumps(data),
            'headers': {'Content-Type': 'application/json'}}
    logger.debug('response: {}'.format(response))

    logger.info('NewFunc handler complete')
    return response
続いてtests/以下のコードを下記の通り変更します。
import unittest
from HelloWorld import index ### アップデート

class TestHandlerCase(unittest.TestCase):

    def test_response(self):
        print("testing response.")
        result = index.handler(None, None)
        print(result)
        self.assertEqual(result['statusCode'], 200)
        self.assertEqual(result['headers']['Content-Type'], 'application/json')
        self.assertIn('Hello World', result['body'])


if __name__ == '__main__':
    unittest.main()
import unittest
from NewFunc import index ### アップデート

class TestHandlerCase(unittest.TestCase):

    def test_response(self):
        print("testing response.")
        result = index.handler(None, None)
        print(result)
        self.assertEqual(result['statusCode'], 200)
        self.assertEqual(result['headers']['Content-Type'], 'application/json')
        self.assertIn('Hello New Func', result['body']) ### アップデート


if __name__ == '__main__':
    unittest.main()
template.ymlのアップデート
続いて新規関数用の設定を記述していきます。
template.ymlを開き、下記の様に編集します。
AWSTemplateFormatVersion: 2010-09-09
Transform:
- AWS::Serverless-2016-10-31
- AWS::CodeStar

Parameters:
  ProjectId:
    Type: String
    Description: CodeStar projectId used to associate new resources to team members
  CodeDeployRole:
    Type: String
    Description: IAM role to allow AWS CodeDeploy to manage deployment of AWS Lambda functions
  Stage:
    Type: String
    Description: The name for a project pipeline stage, such as Staging or Prod, for which resources are provisioned and deployed.
    Default: ''

Globals:
  Function:
    AutoPublishAlias: live
    DeploymentPreference:
      Enabled: true
      Type: Canary10Percent5Minutes
      Role: !Ref CodeDeployRole

Resources:
  HelloWorld:
    Type: AWS::Serverless::Function
    Properties:
      FunctionName: !Sub 'awscodestar-${ProjectId}-lambda-HelloWorld'
      CodeUri: ./HelloWorld ### 新規追加 ###
      Handler: index.handler
      Runtime: python3.7
      Role:
        Fn::GetAtt:
        - LambdaExecutionRole
        - Arn
      # Events:
      #   GetEvent:
      #     Type: Api
      #     Properties:
      #       Path: /
      #       Method: get
      #   PostEvent:
      #     Type: Api
      #     Properties:
      #       Path: /
      #       Method: post
  ### 新規追加 ここから ###
  NewFunc:
    Type: AWS::Serverless::Function
    Properties:
      FunctionName: !Sub 'awscodestar-${ProjectId}-lambda-NewFunc'
      CodeUri: ./NewFunc
      Handler: index.handler
      Runtime: python3.7
      Role:
        Fn::GetAtt:
        - LambdaExecutionRole
        - Arn
  ### 新規追加 ここまで ###
  LambdaExecutionRole:
    Description: Creating service role in IAM for AWS Lambda
    Type: AWS::IAM::Role
    Properties:
      RoleName: !Sub 'CodeStar-${ProjectId}-Execution${Stage}'
      AssumeRolePolicyDocument:
        Statement:
        - Effect: Allow
          Principal:
            Service: [lambda.amazonaws.com]
          Action: sts:AssumeRole
      Path: /
      ManagedPolicyArns:
        - !Sub 'arn:${AWS::Partition}:iam::aws:policy/service-role/AWSLambdaBasicExecutionRole'
      PermissionsBoundary: !Sub 'arn:${AWS::Partition}:iam::${AWS::AccountId}:policy/CodeStar_${ProjectId}_PermissionsBoundary'
デフォルトのtemplate.ymlからの変更点は下記3点です。
-
Resources>Helloworld>Properties に 「CodeUri: ./HelloWorld」を追加:
これは先程アップデートしたディレクトリ構造を反映させるためのものです。
これをしないままだと存在しない./index.pyを読みに行こうとし、一方でHelloWorld/index.pyを読めずにエラーとなります。 -
Resources>Helloworld>Properties のEventsをコメントアウト:
前述の通りAPI Gatewayは削除済みのため不要な設定のためコメントアウトしました。
API Gatewayを削除せず利用している場合、コメントアウトは不要です。 -
Resources に 「NewFunc」を追加:
この項目を記述することでデプロイ時に新規Lambda関数として「NewFunc」が認識されます。
単体テスト
最後にプロジェクトディレクトリ下で単体テストを行いましょう。
 $ python -m unittest discover tests
testing response.
{'statusCode': 200, 'body': '{"output": "Hello World", "timestamp": "2021-06-10T11:31:37.461334"}', 'headers': {'Content-Type': 'application/json'}}
.testing response.
2021-06-10 20:31:37,461:15:INFO:NewFunc handler start
2021-06-10 20:31:37,462:21:DEBUG:data: {'output': 'Hello New Func', 'timestamp': '2021-06-10T11:31:37.462032'}
2021-06-10 20:31:37,462:26:DEBUG:response: {'statusCode': 200, 'body': '{"output": "Hello New Func", "timestamp": "2021-06-10T11:31:37.462032"}', 'headers': {'Content-Type': 'application/json'}}
2021-06-10 20:31:37,462:28:INFO:NewFunc handler complete
{'statusCode': 200, 'body': '{"output": "Hello New Func", "timestamp": "2021-06-10T11:31:37.462032"}', 'headers': {'Content-Type': 'application/json'}}
.
----------------------------------------------------------------------
Ran 2 tests in 0.001s

OK
以上でコードの編集は完了です。
デプロイ
いよいよデプロイです!
cloneしたディレクトリ下に移動してpushします。
$ git add .
$ git commit -m "first commit"
$ git push
pushするとCodePipelineがCodeCommitの変化を検知し、Pipelineが動き出します。AWSコンソールよりCodePipeline→作成したプロジェクトIDのPipilineを開くと様子が確認できます。
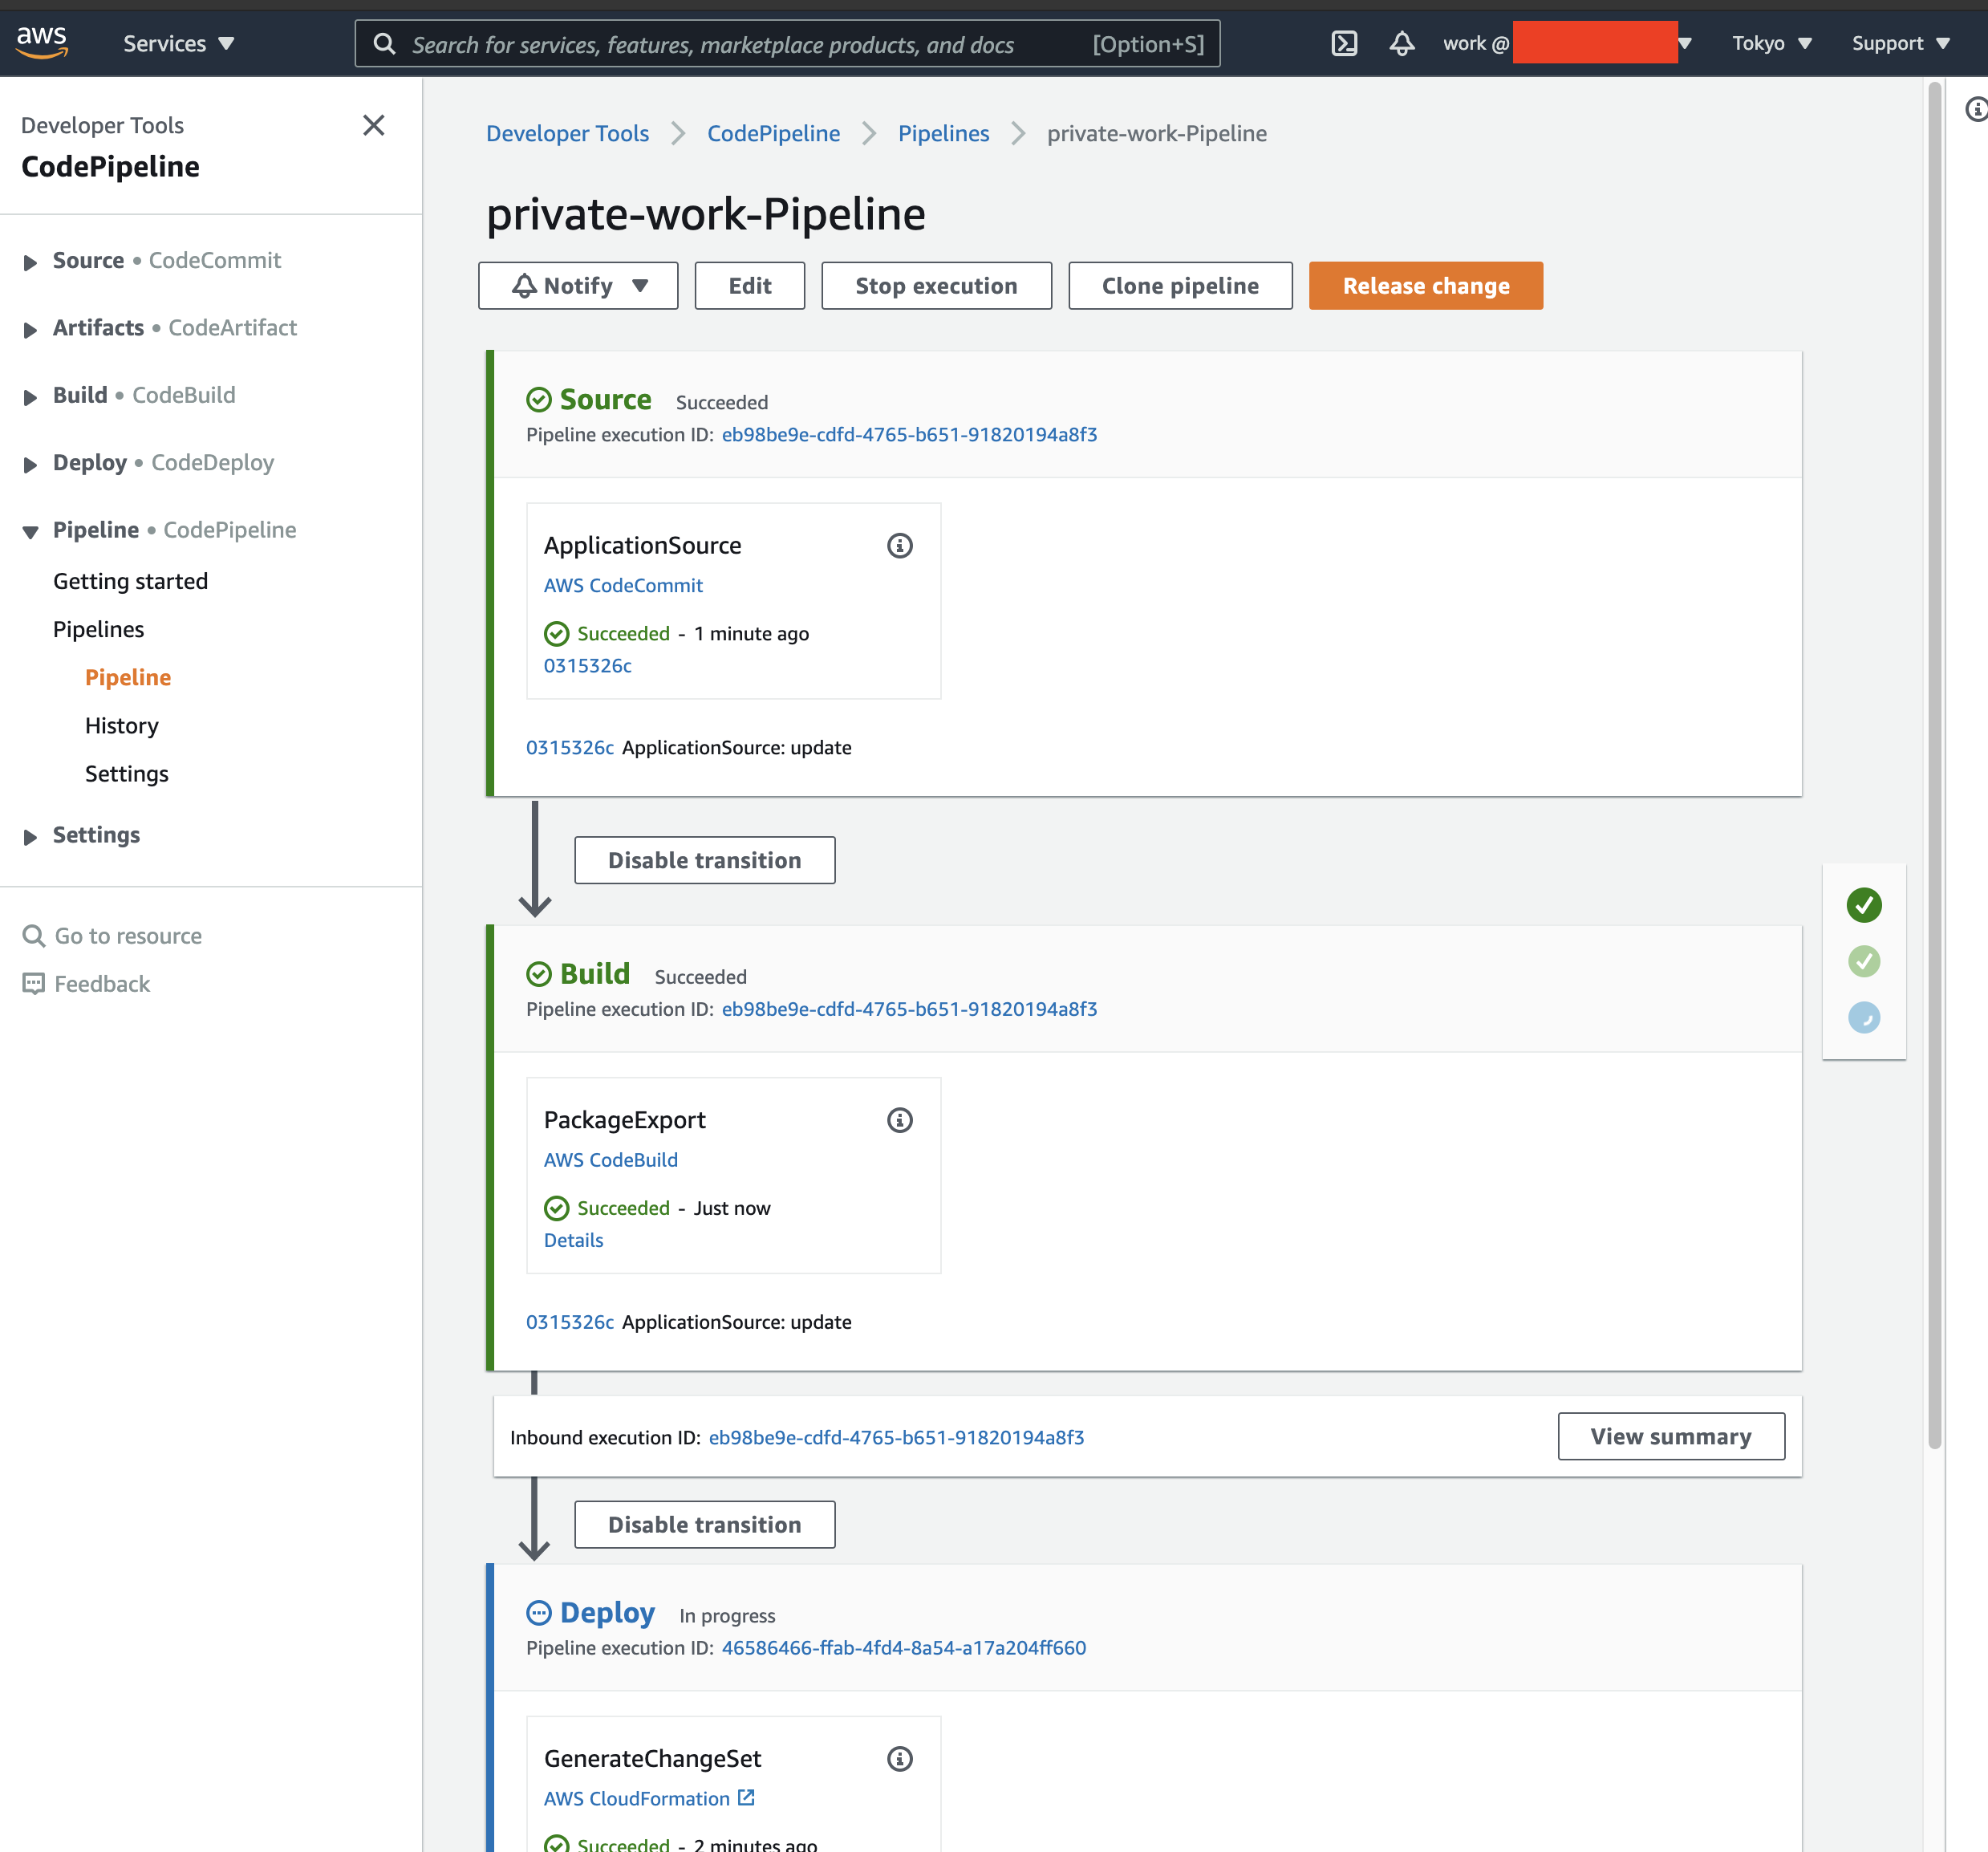
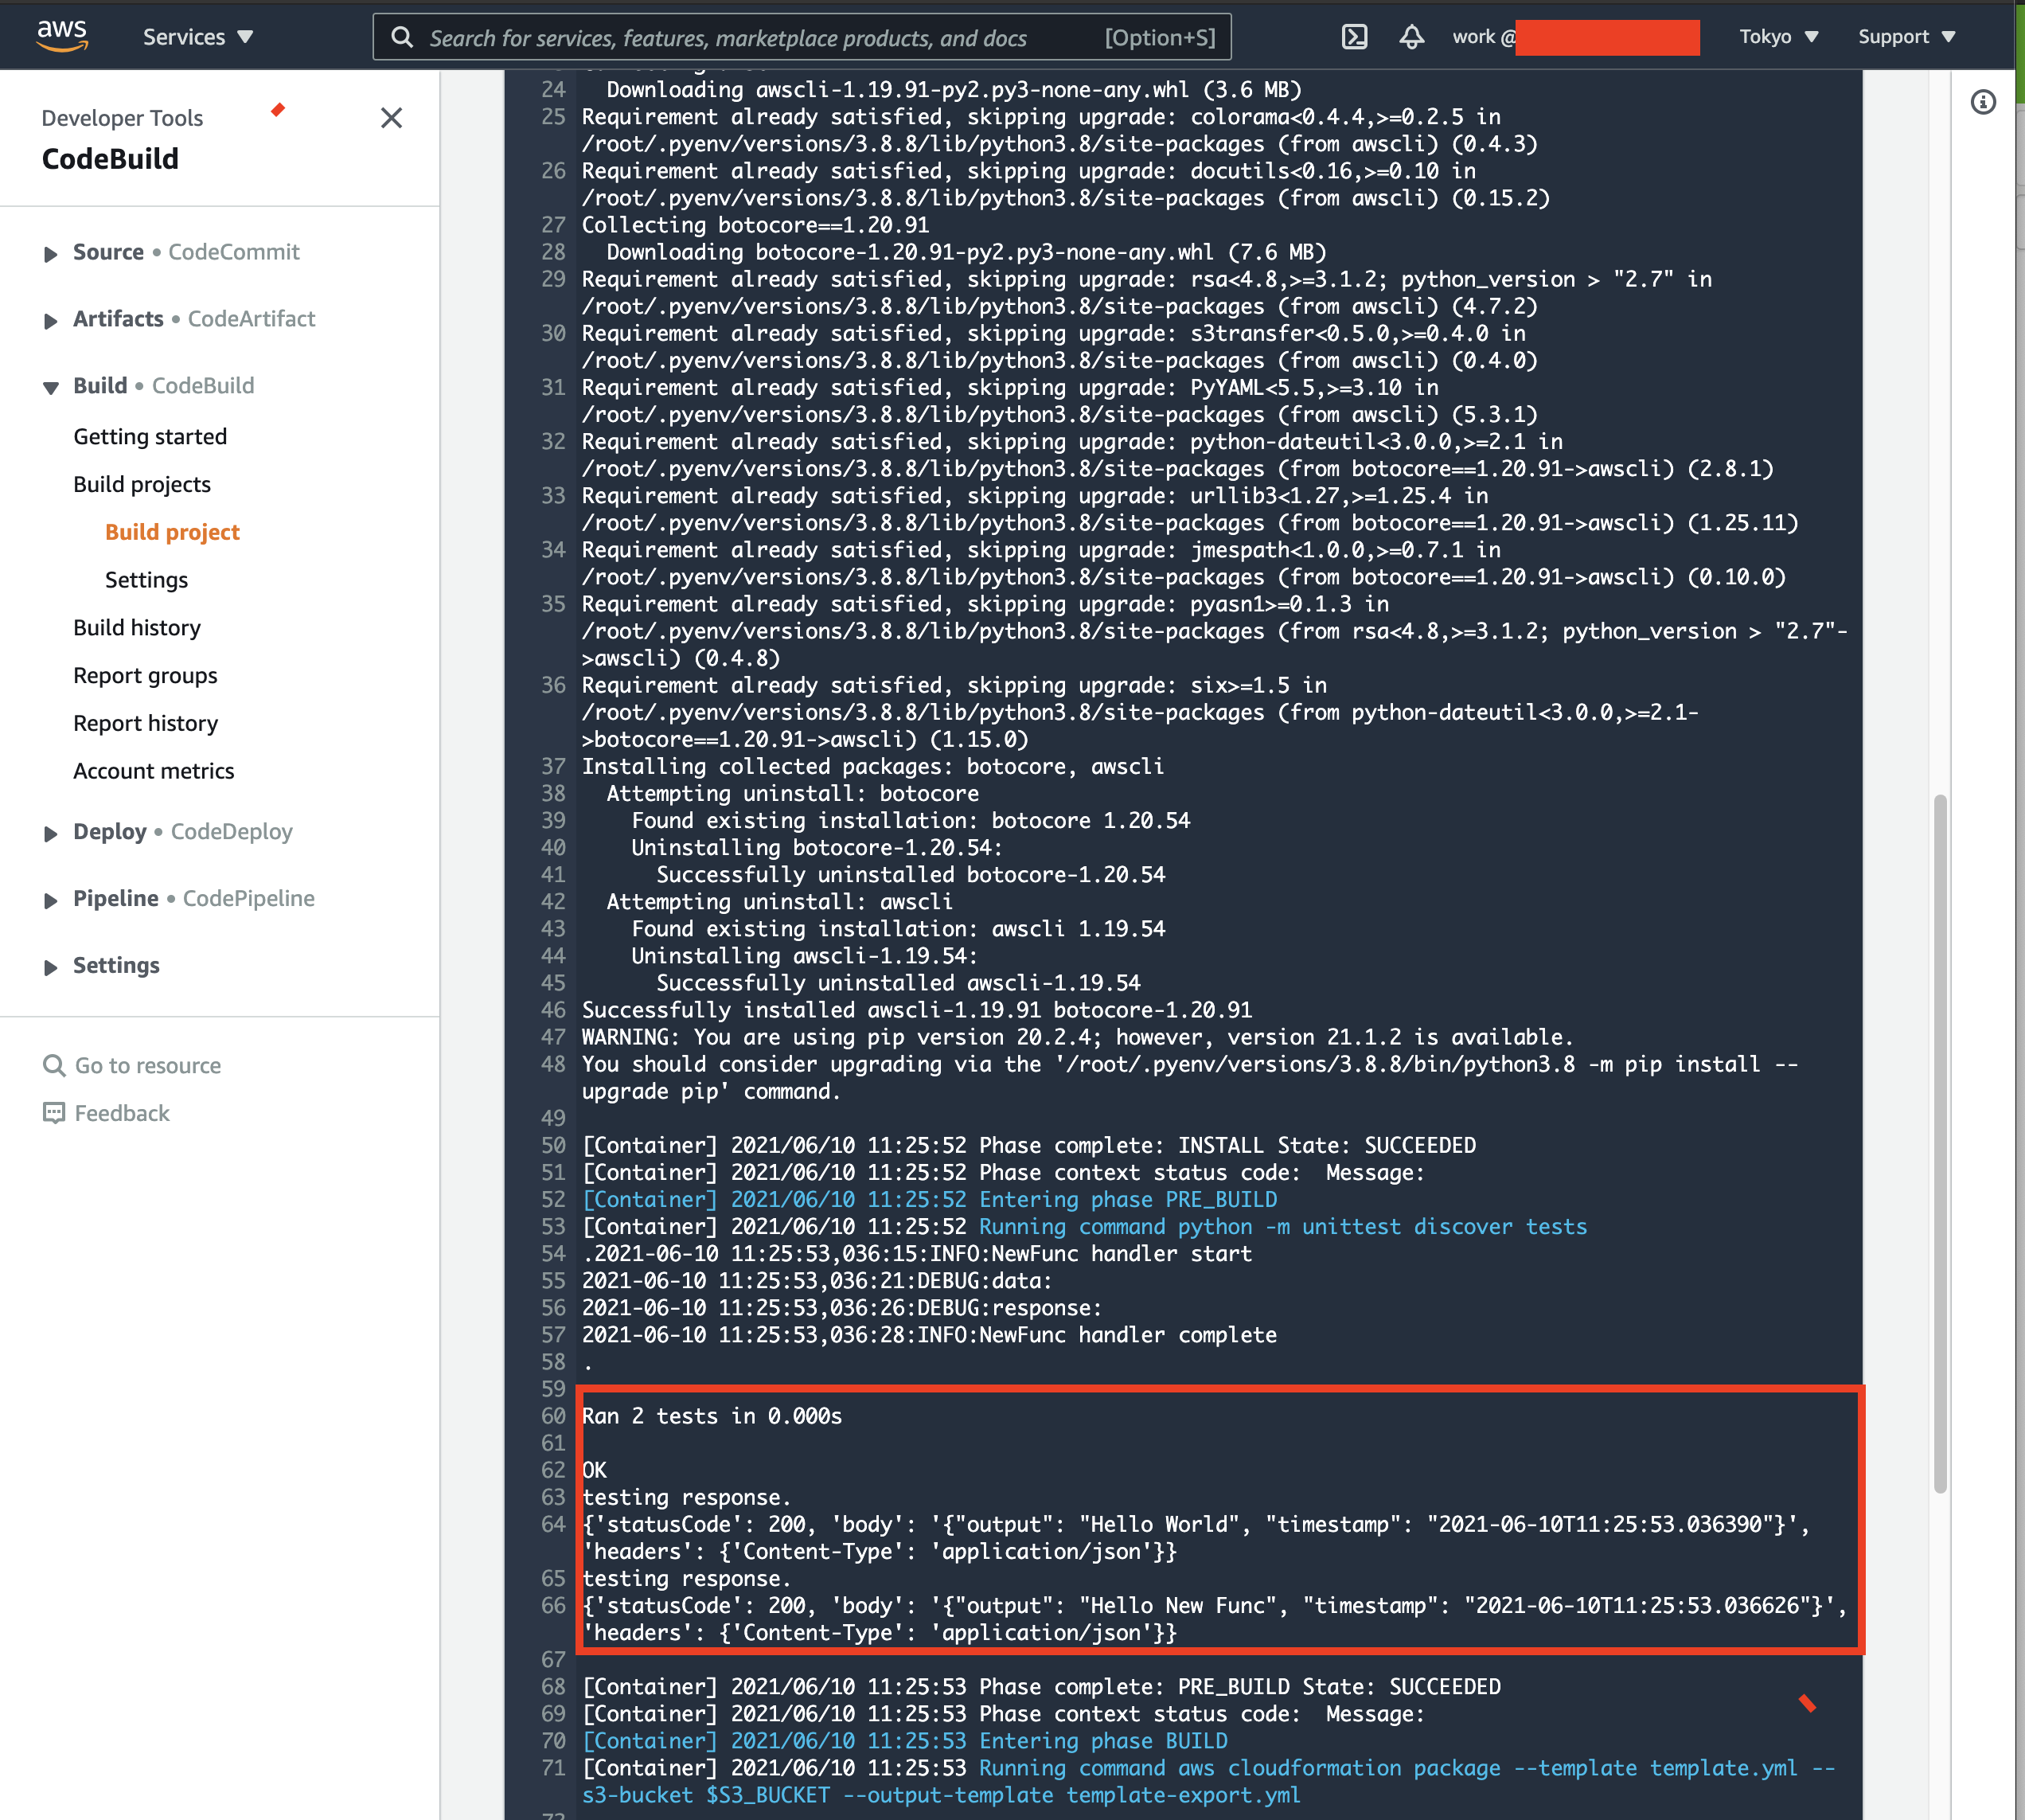
CodeBuildの「Details」をクリックするとbuildspec.ymlに記述されたコマンドが実行されていった様子が確認できます。先程ローカルで行った単体テストも無事通りました。
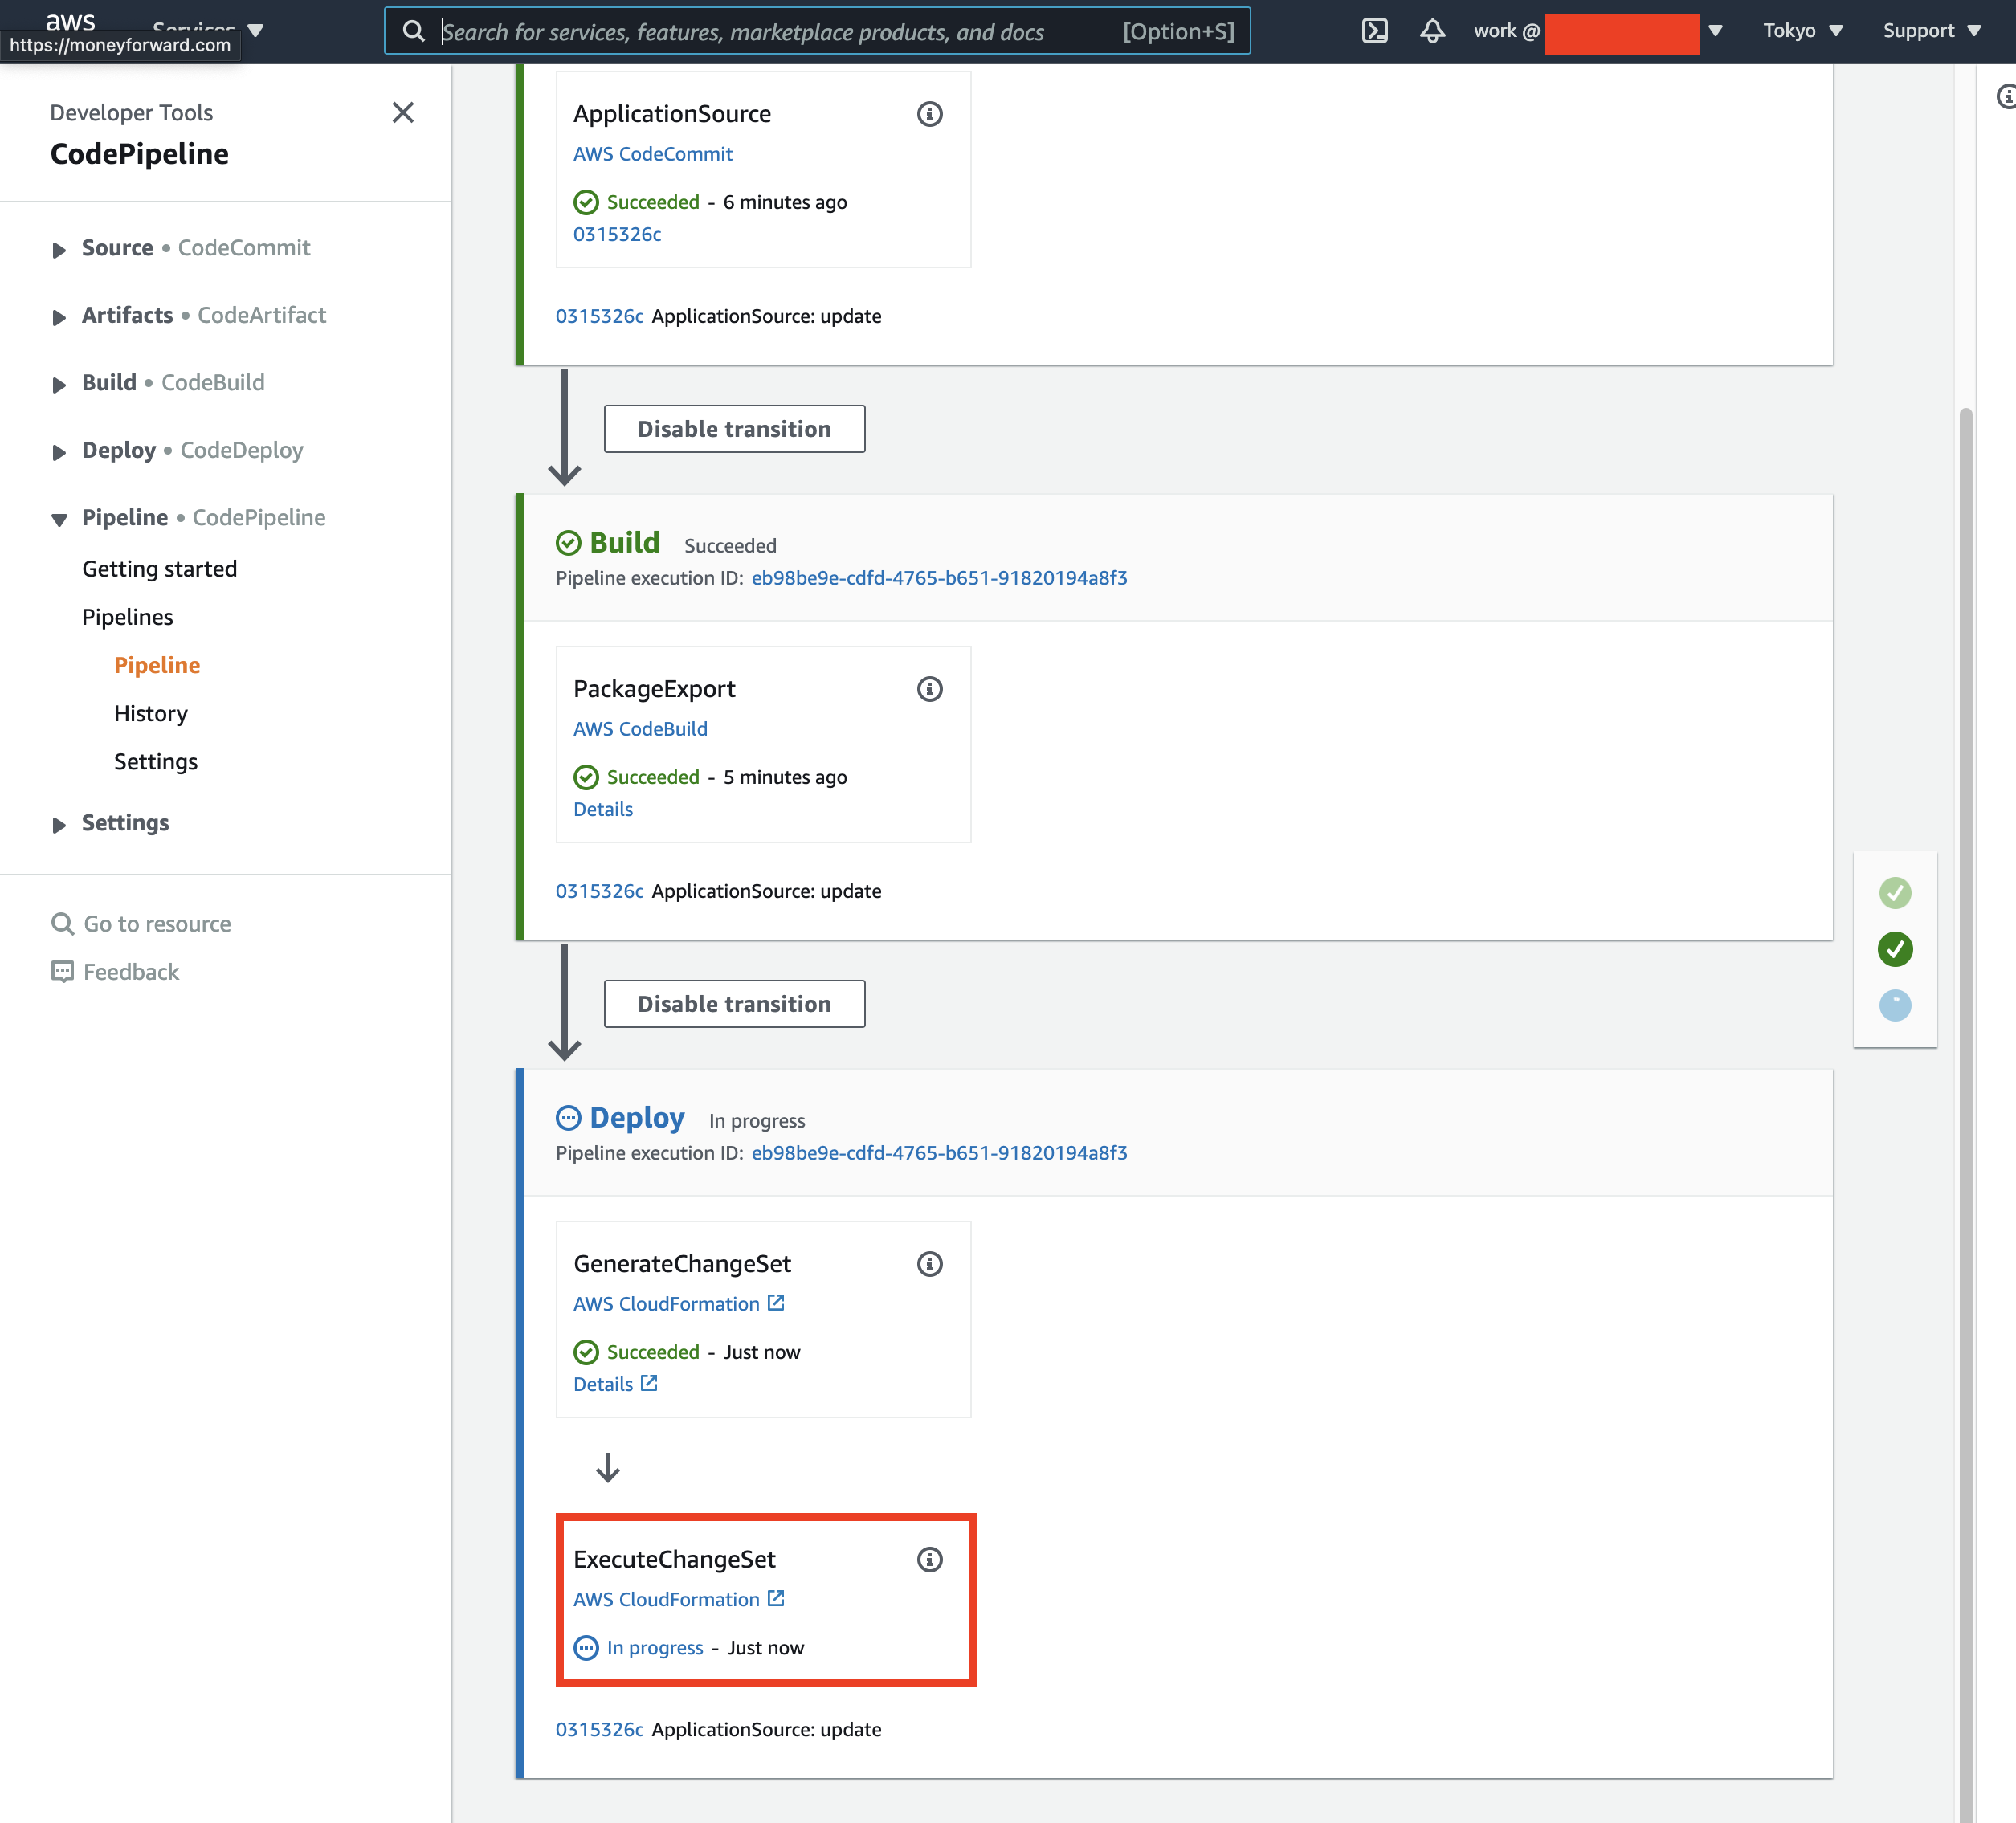
PipelineのフローがExecuteChangeSetに差し掛かると大体Lambdaのデプロイが完了しているので、Lambdaコンソールで確認します。
Lambdaコンソールを開くと作成したLambdaが存在することが確認できます。この関数を開いて稼働の確認を行っていきます。

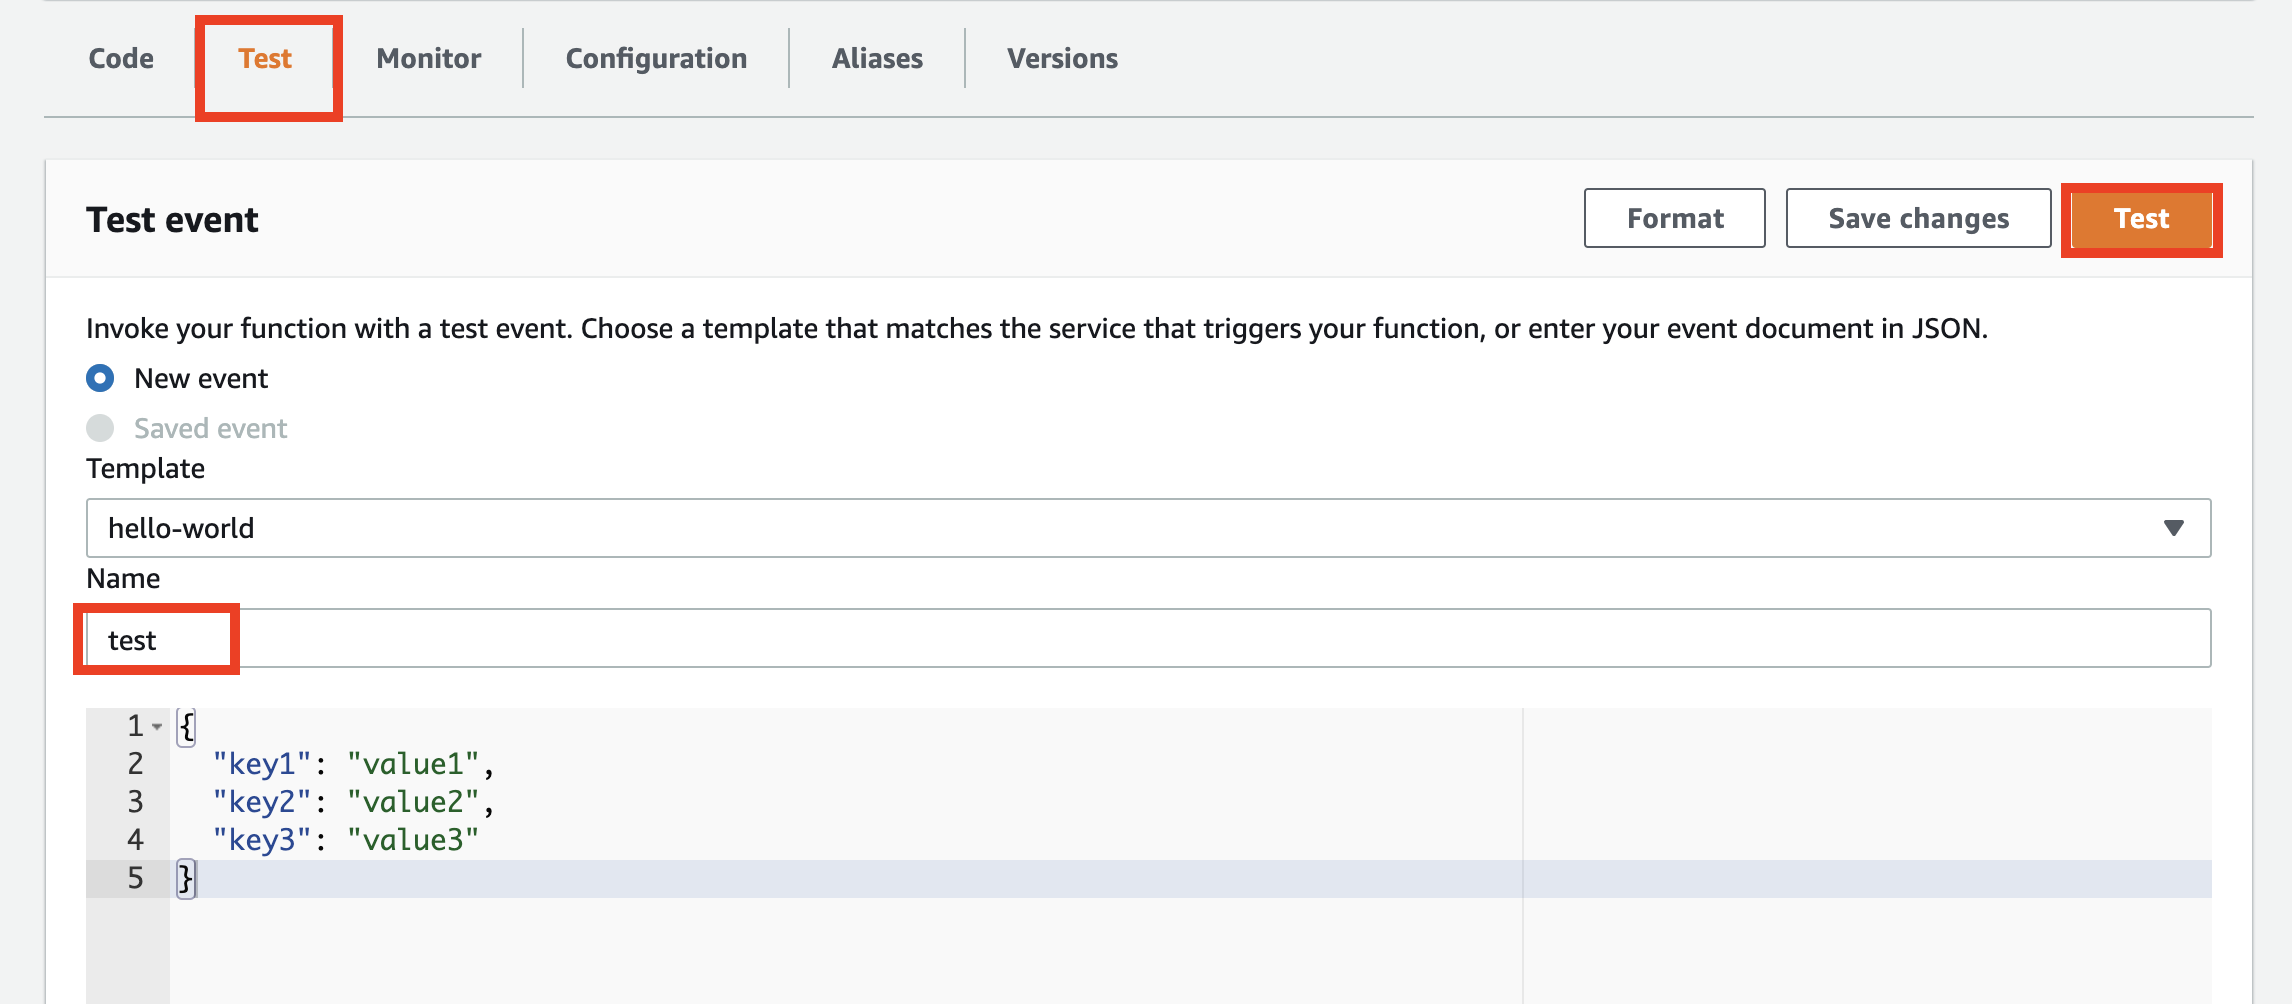
開いた画面で「Test」タブをクリックし、「Name」に適当なテスト名を入力し、「Test」ボタンを押下します。このタイミングで入力するkey valueは何でも良いです。
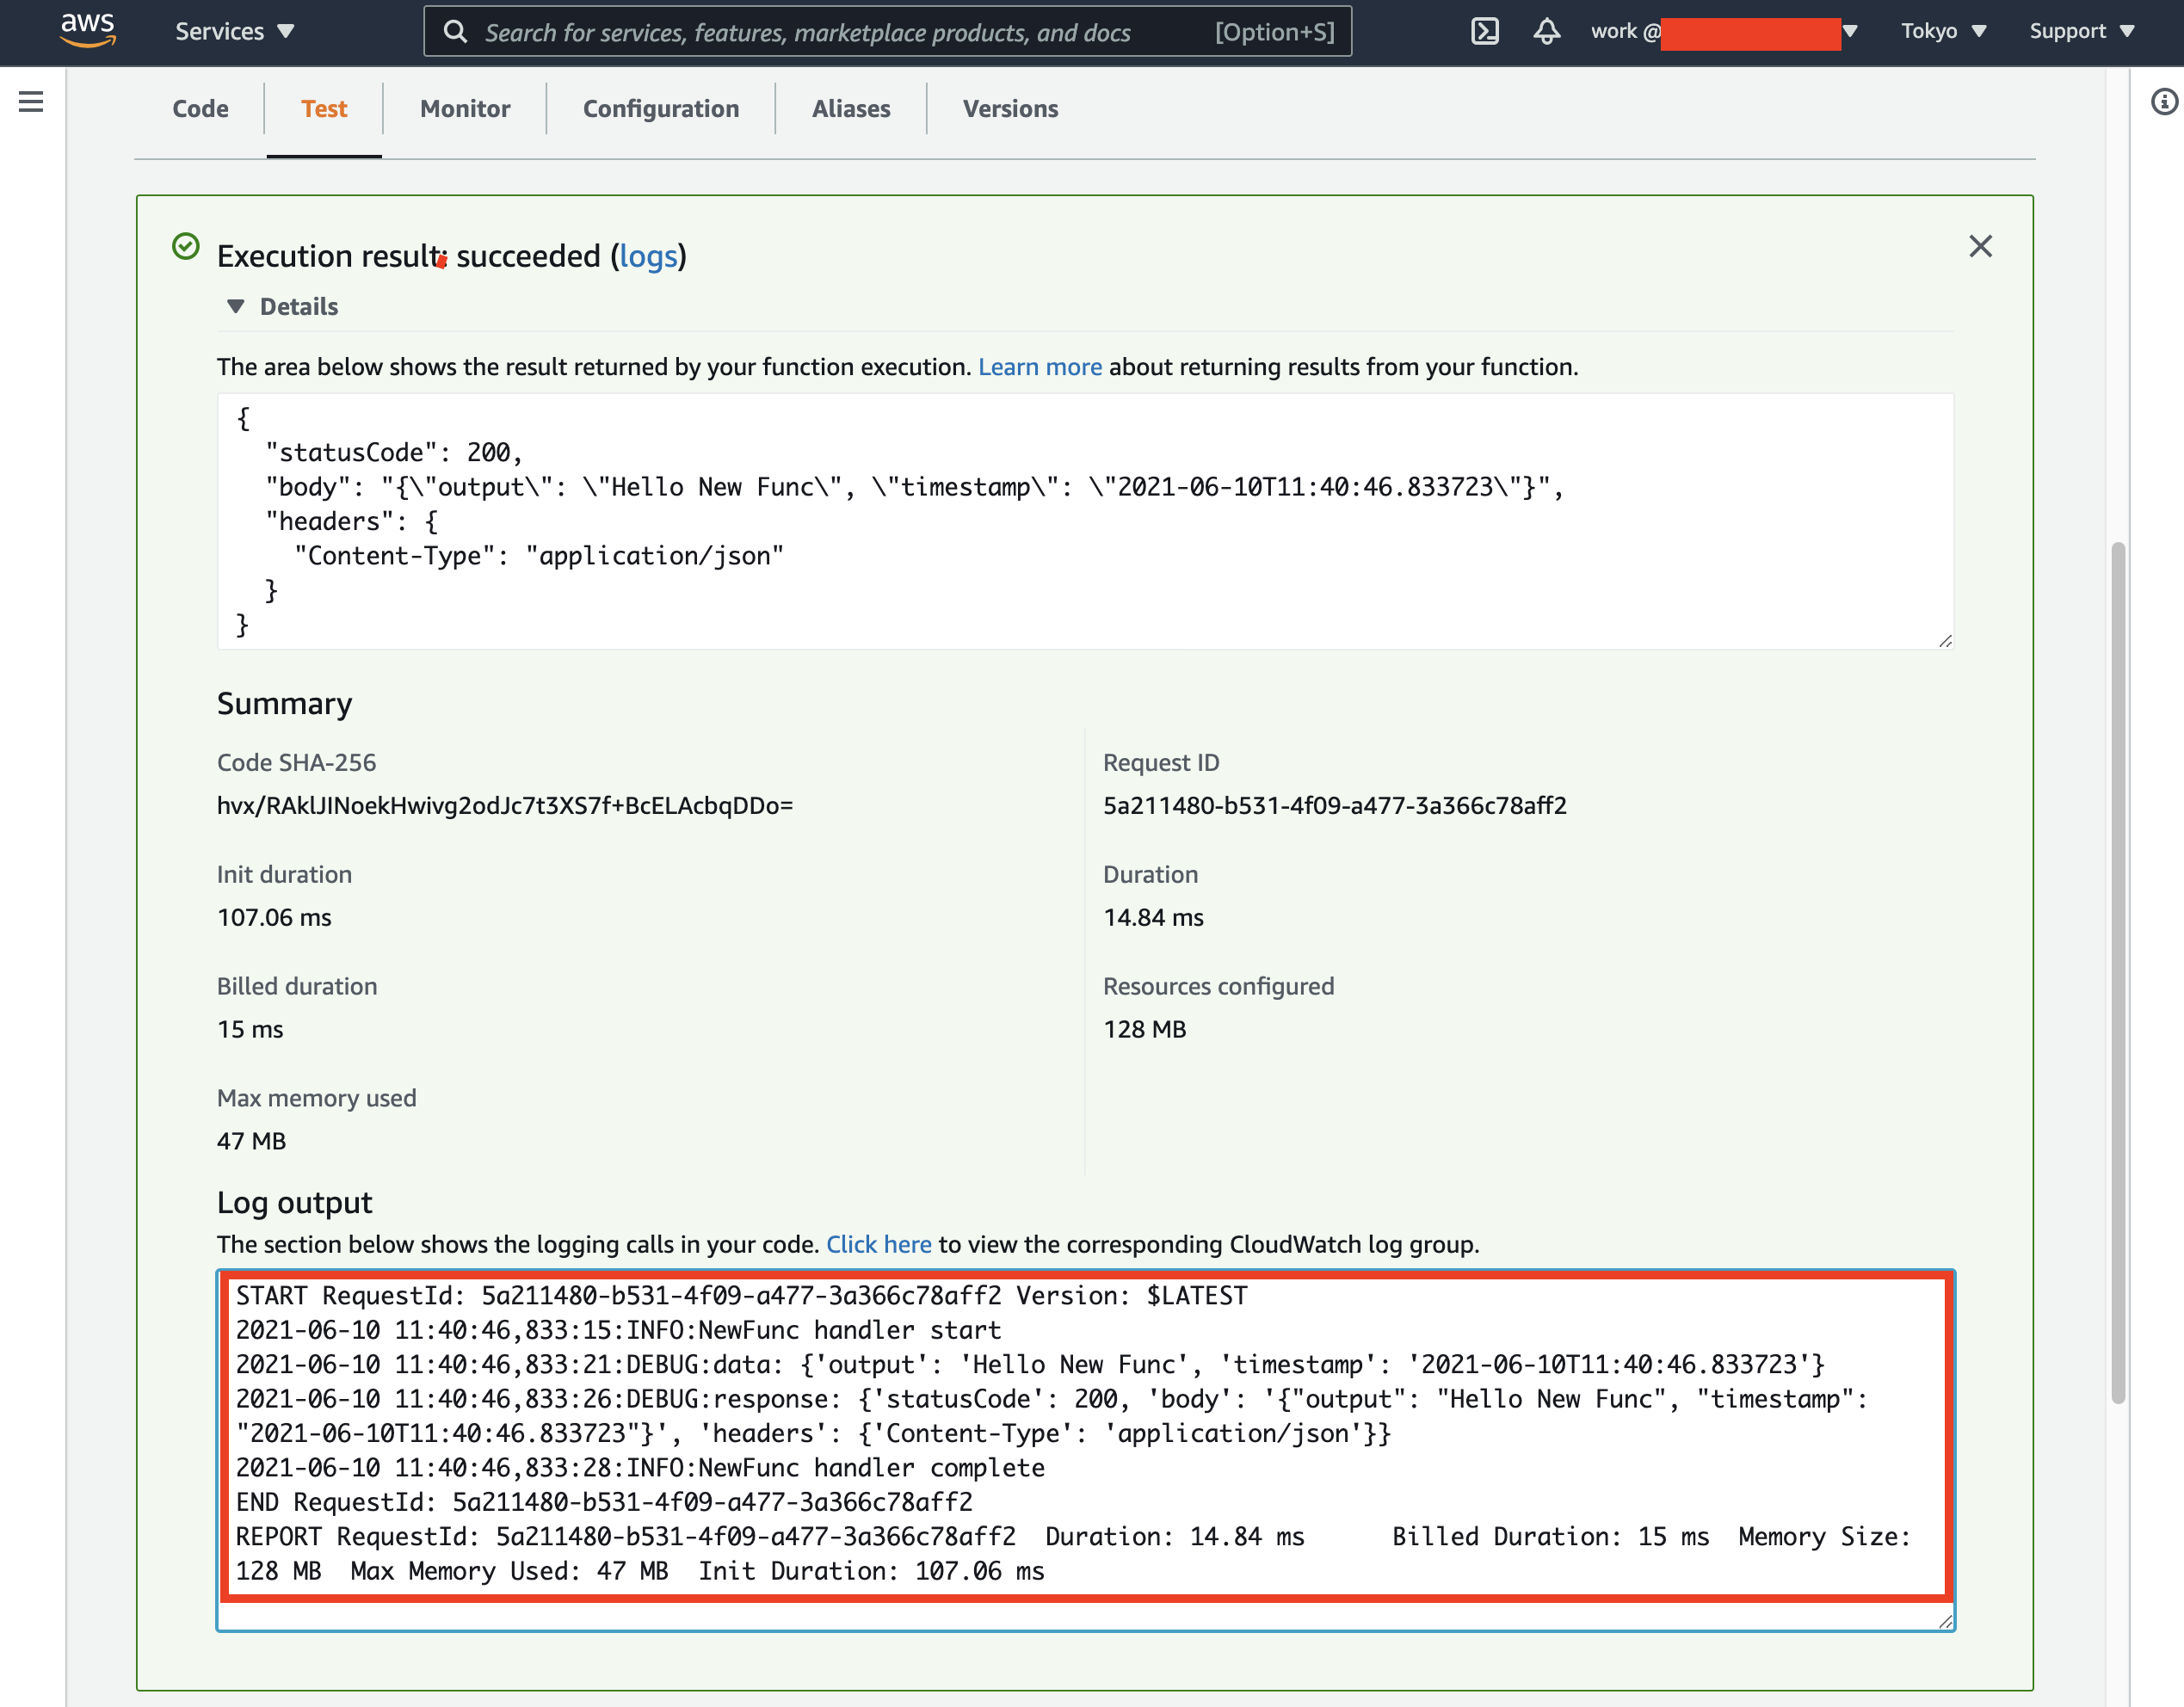
実行した結果ローカルでの単体テストと同じような形で出力されていれば成功です。またログの実態はCloudWatch Logsにあり、添付キャプチャの「Click here」から遷移できます。
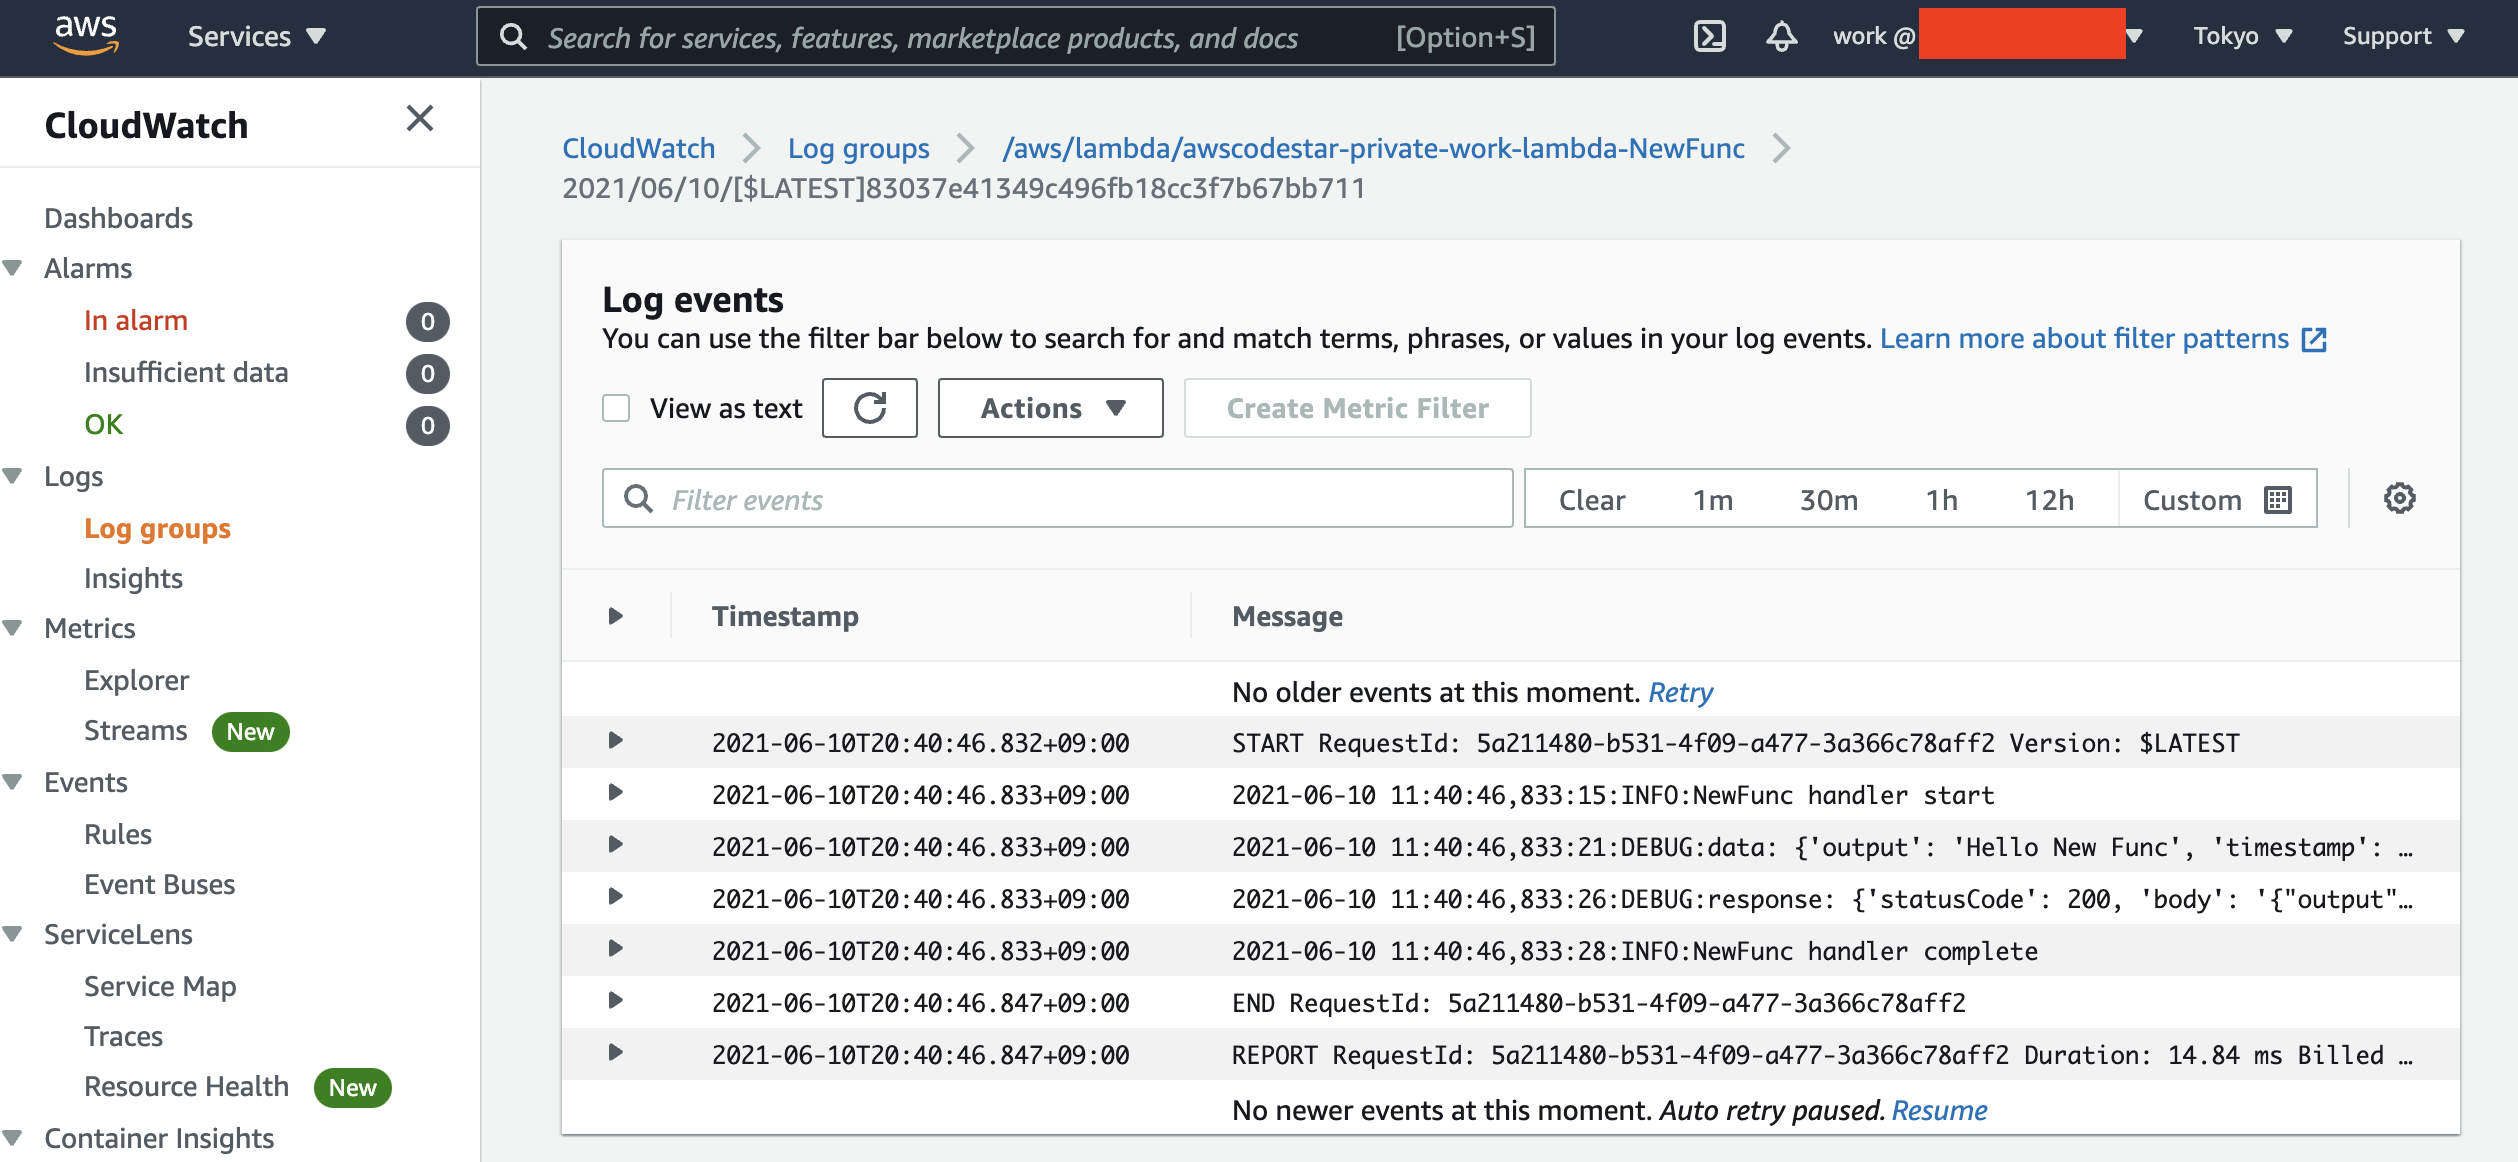
Lambdaのテスト時に表示されたLog outputと同じものが確認できます。
長くなりましたが以上です!
文は長いですがやってみると意外とあっさりなはず・・。
