はじめに
以下のサイトを参考にしました
動かない部分があったので変更・補足しました
目次
-
WSL・nvidia-container-toolkitのインストール
1.1 WSLのインストール
1.2 nvidia-container-toolkitのインストール - docker desktopの設定
-
作業フォルダの設定&docker+PyTorch環境構築
3.1 作業フォルダの設定
3.2 docker imageのpull
3.3 docker conteinerの作成~入る - 確認
1.WSL・nvidia-container-toolkitのインストール
1.1 WSLのインストール
Microsoft Storeで、"ubuntu 22.04 LTS"をインストール&PCを再起動し、アプリを開く
名前、パスワードなどを入力
1.2 nvidia-container-toolkitのインストール
以下の公式サイトの、"Setup the package repository and the GPG key:"の部分を実行
具体的には、このコードを実行
distribution=$(. /etc/os-release;echo $ID$VERSION_ID) \
      && curl -fsSL https://nvidia.github.io/libnvidia-container/gpgkey | sudo gpg --dearmor -o /usr/share/keyrings/nvidia-container-toolkit-keyring.gpg \
      && curl -s -L https://nvidia.github.io/libnvidia-container/$distribution/libnvidia-container.list | \
            sed 's#deb https://#deb [signed-by=/usr/share/keyrings/nvidia-container-toolkit-keyring.gpg] https://#g' | \
            sudo tee /etc/apt/sources.list.d/nvidia-container-toolkit.list
sudo apt-get update && sudo apt-get install -y nvidia-container-toolkit
2.docker_desktopの設定
ここからdocker desktopのインストール
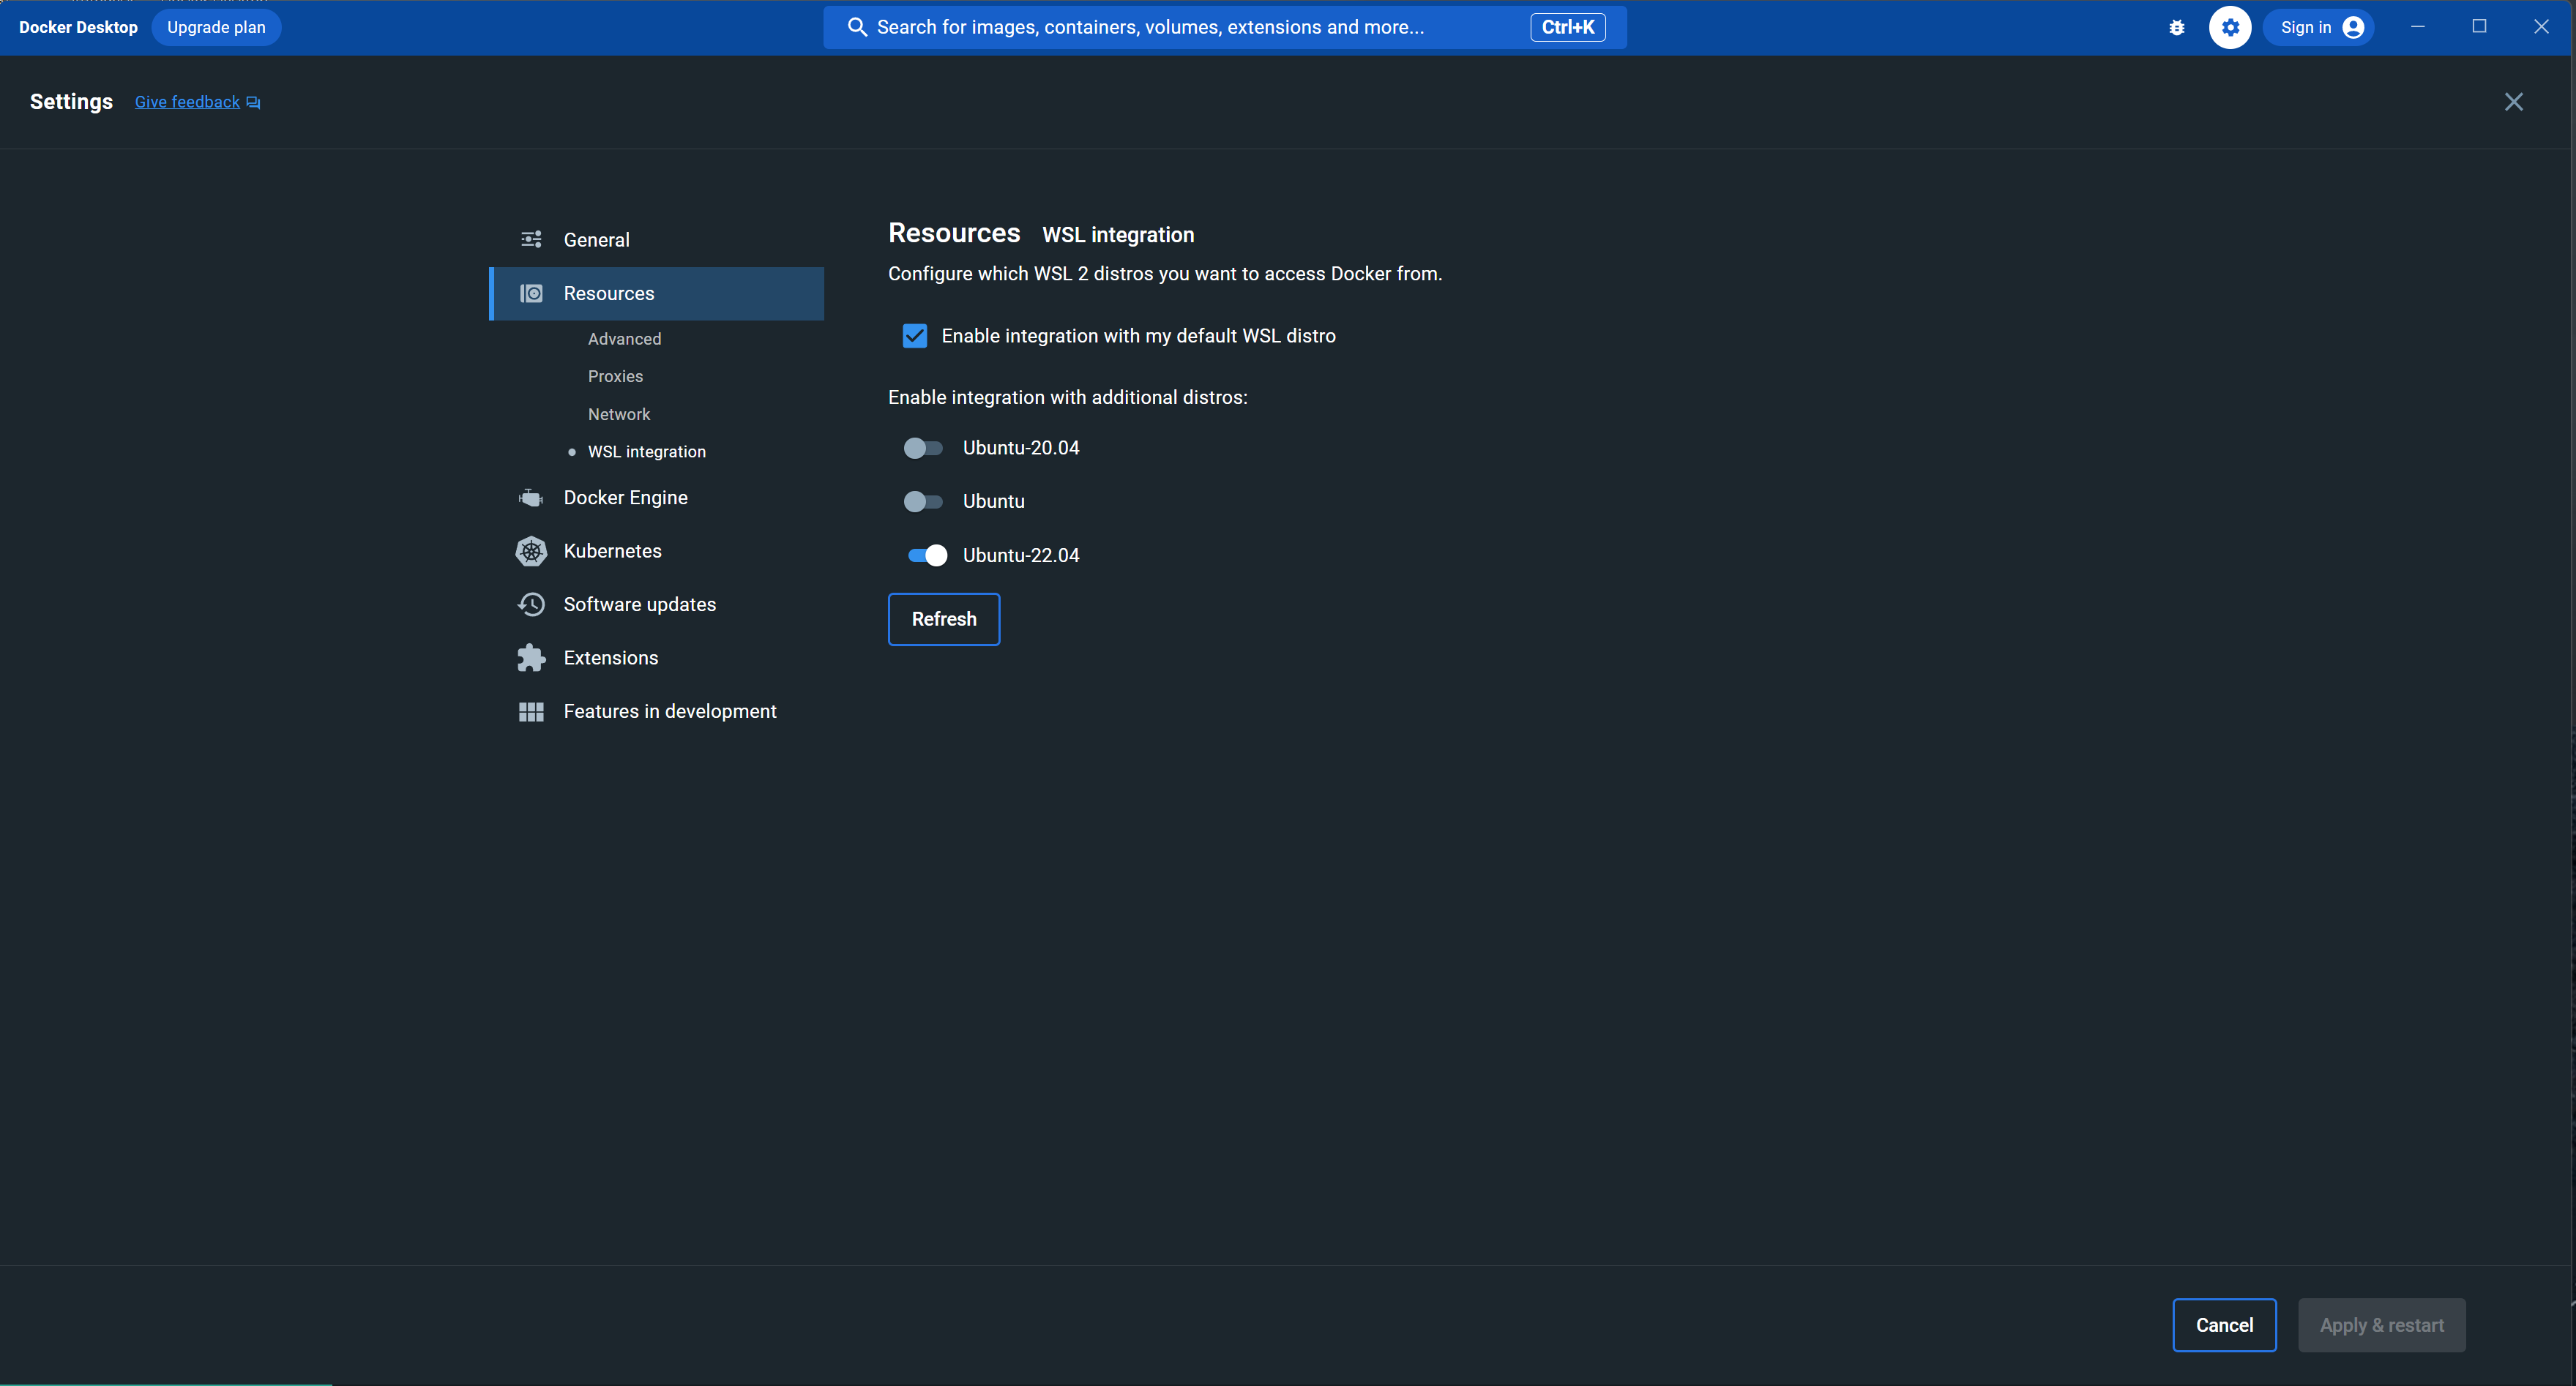
docker desktopを開き、右上の設定マーク(歯車)→Resources→WSL integration
で、チェックマークを押し、入れたバージョンのトグル(?)スイッチをオンにする
(これを行わないと、WSL内で"docker not found"となる)
3.作業フォルダの設定&docker+PyTorch環境構築
3.1 作業フォルダの設定
cd 作業フォルダのパス
pwd
により、出力されたパスをメモしておく
例えば
/home/user/workspace
3.2 docker_imageのpull
cudaのバージョン確認をするため、以下を入力
nvidia-smi
このようなものが出るので、"CUDA Version: ~"の部分の数字をメモ

ここから、"CUDA Version: ~"の部分の数字に一致したもの(devel)のコマンド(docker pull ~)をコピーし、入力(10分以上かかる)
※少し下のVersionでもOK
3.3 docker_conteinerの作成~入る
コンテナを作成するため、以下のコマンドを打つ
※"pytorch/pytorch:2.0.0-cuda11.7-cudnn8-devel"の部分は、"docker pull ~"の部分
※my_envは、コンテナ名で、好きな名前で構いません
docker run --gpus all --ipc host -v /home:/home --name my_env -it pytorch/pytorch:2.0.0-cuda11.7-cudnn8-devel /bin/bash
コンテナの起動
docker start my_env
コンテナに入る
docker exec -it -w /home/user/workspace my_env bash
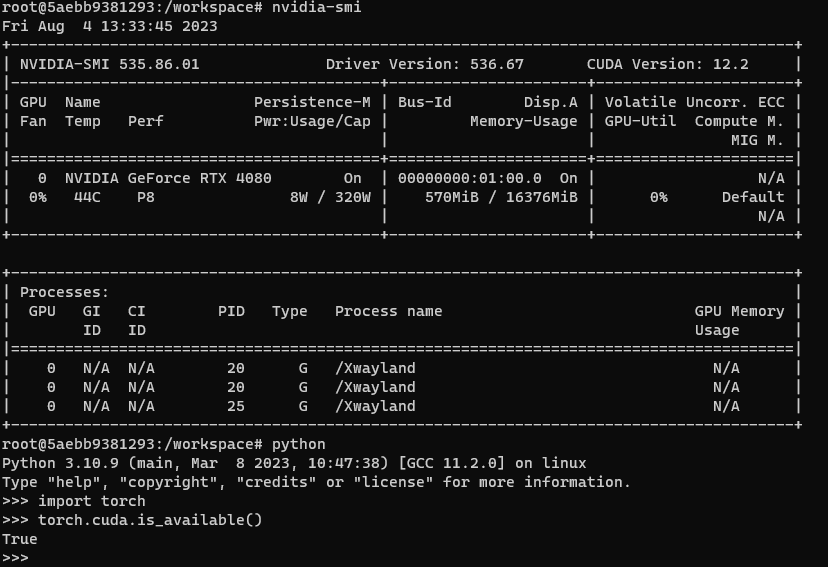
4.確認
nvidia-smi

