最近、iOSアプリでGoogle Driveのスプレッドシート一覧を取得したくて色々と調べてました。
サンプルとして、GoogleアカウントにサインインしてREST APIを叩くまでのアプリを作ってみたので、
似たようなことをしたい方がいたら参考にしてください。
環境
- Swift 2.1.1
- Xcode 7.2
- CocoaPods 0.39.0
1. プロジェクトの作成
まずはXcodeでプロジェクトを新規に作成し、CocoaPodsで必要なライブラリをインストールします。
platform :ios, '8.0'

use_frameworks!

pod 'Google/SignIn' # Googleアカウント認証
pod 'Alamofire'     # HTTPクライアント
pod 'SwiftyJSON'    # JSONパーサ

target 'TestGoogle' do

end
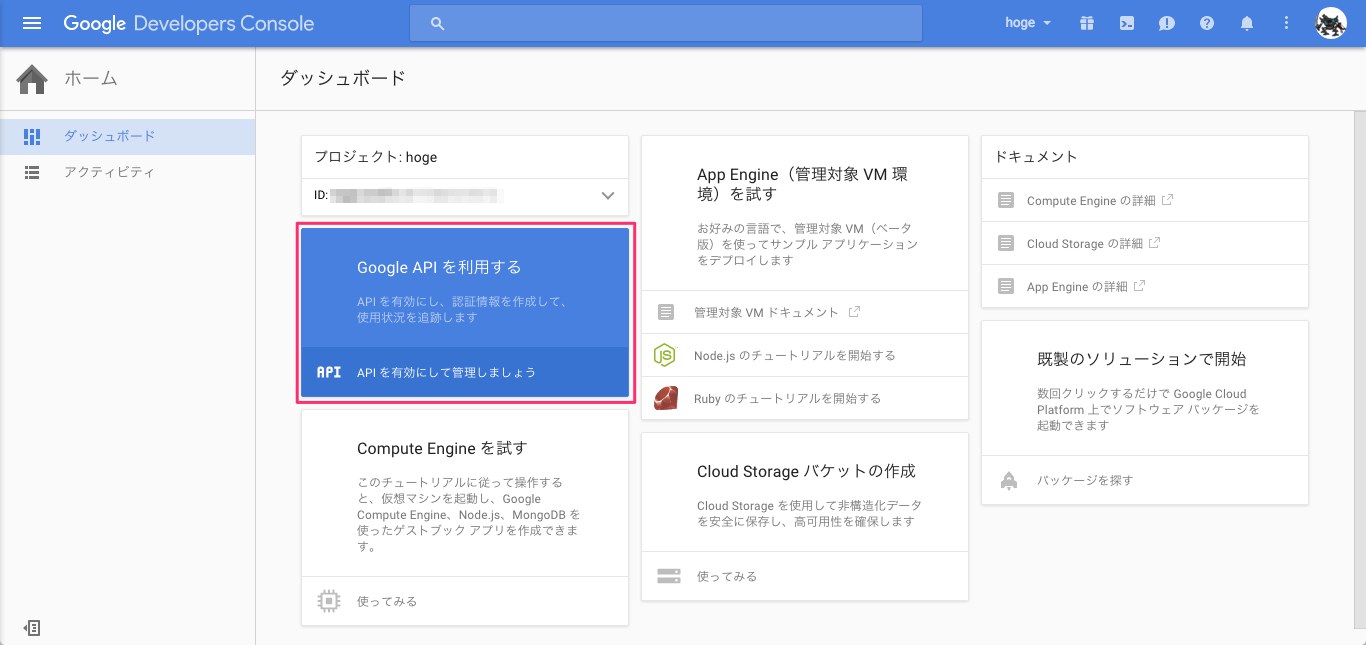
2. Google Developers Consoleでプロジェクト作成
このページのGET A CONFIGURATION FILEというリンクからGoogleのサービスを有効にするための設定ファイルを取得します。
- アプリ名、Bundle IDを入力します。アプリ名は適当、Bundle IDは先ほど作ったXcodeプロジェクトのそれを入力してください。
- Google Sign-Inを有効にして
Generate configuration filesをクリックしてください。 - GoogleService-info.plistをダウンロードします。このファイルは後で使います。
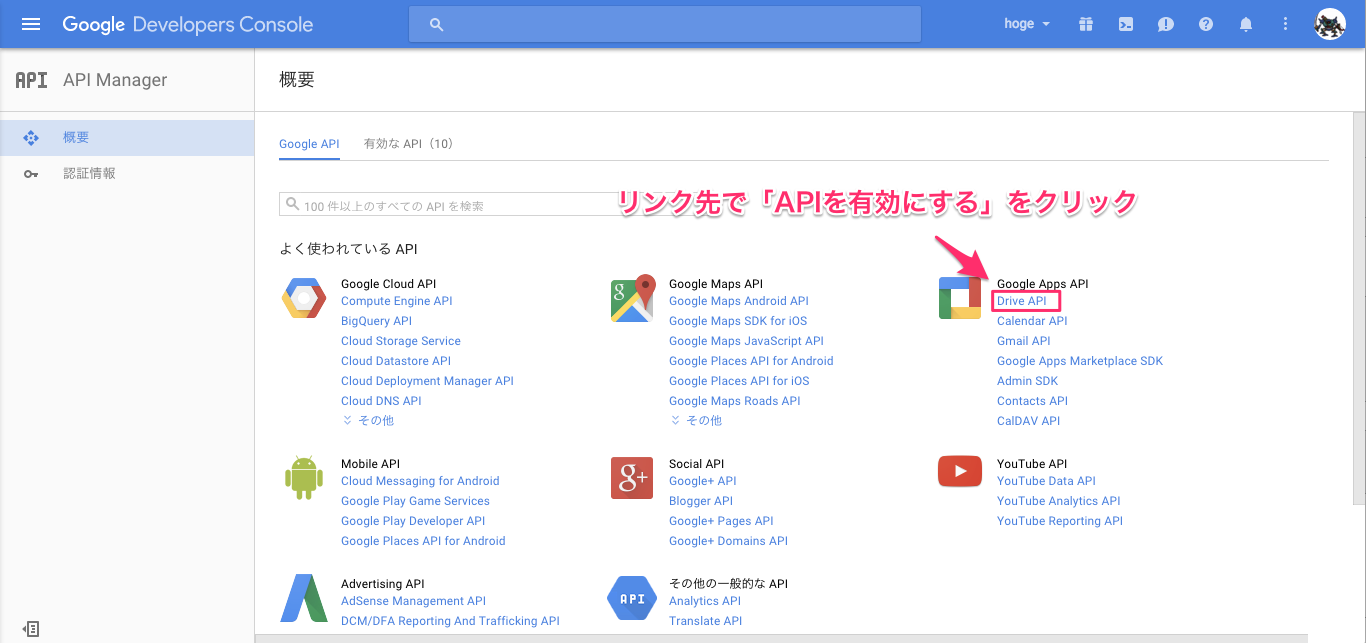
3. Drive APIを有効にする
先ほど作成したGoogleアプリのプロジェクトをここから選択し、Drive APIを有効にします。
4. iOSアプリにGoogleプロジェクトの情報を組み込む
コードを書く前の最後の下準備になります。
-
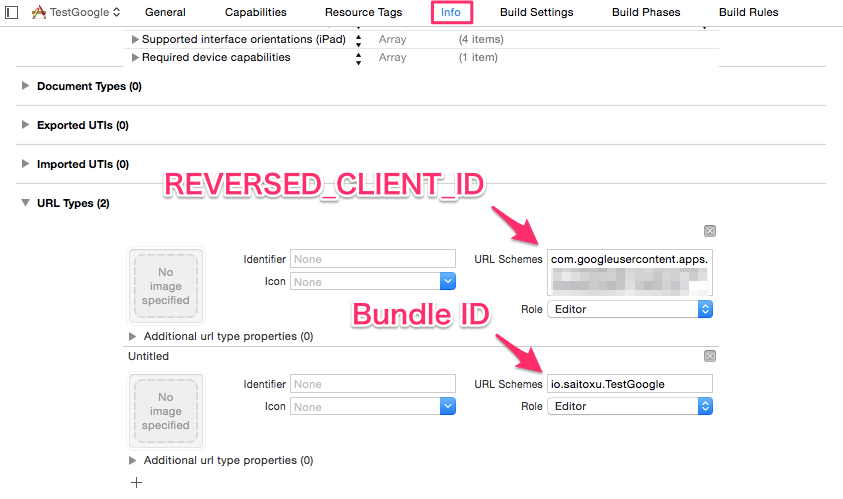
Info > URL TypesにGoogleService-Info.plistに書かれている
REVERSED_CLIENT_IDとiOSアプリのBundle IDを入力します。
-
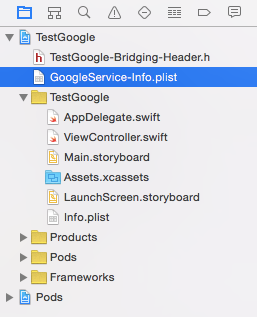
<プロジェクト名>-Bridging-Header.hというヘッダーファイルを作成し、プロジェクトトップに配置します。ヘッダーファイルには#import <Google/SignIn.h>とだけ記述してください。 -
最後にBuild Settings > Swift Compiler - Code Generation > Objective-C Bridging Headerに先ほど作成した
<プロジェクト名>-Bridging-Header.hを入力してください。
5. コーディング
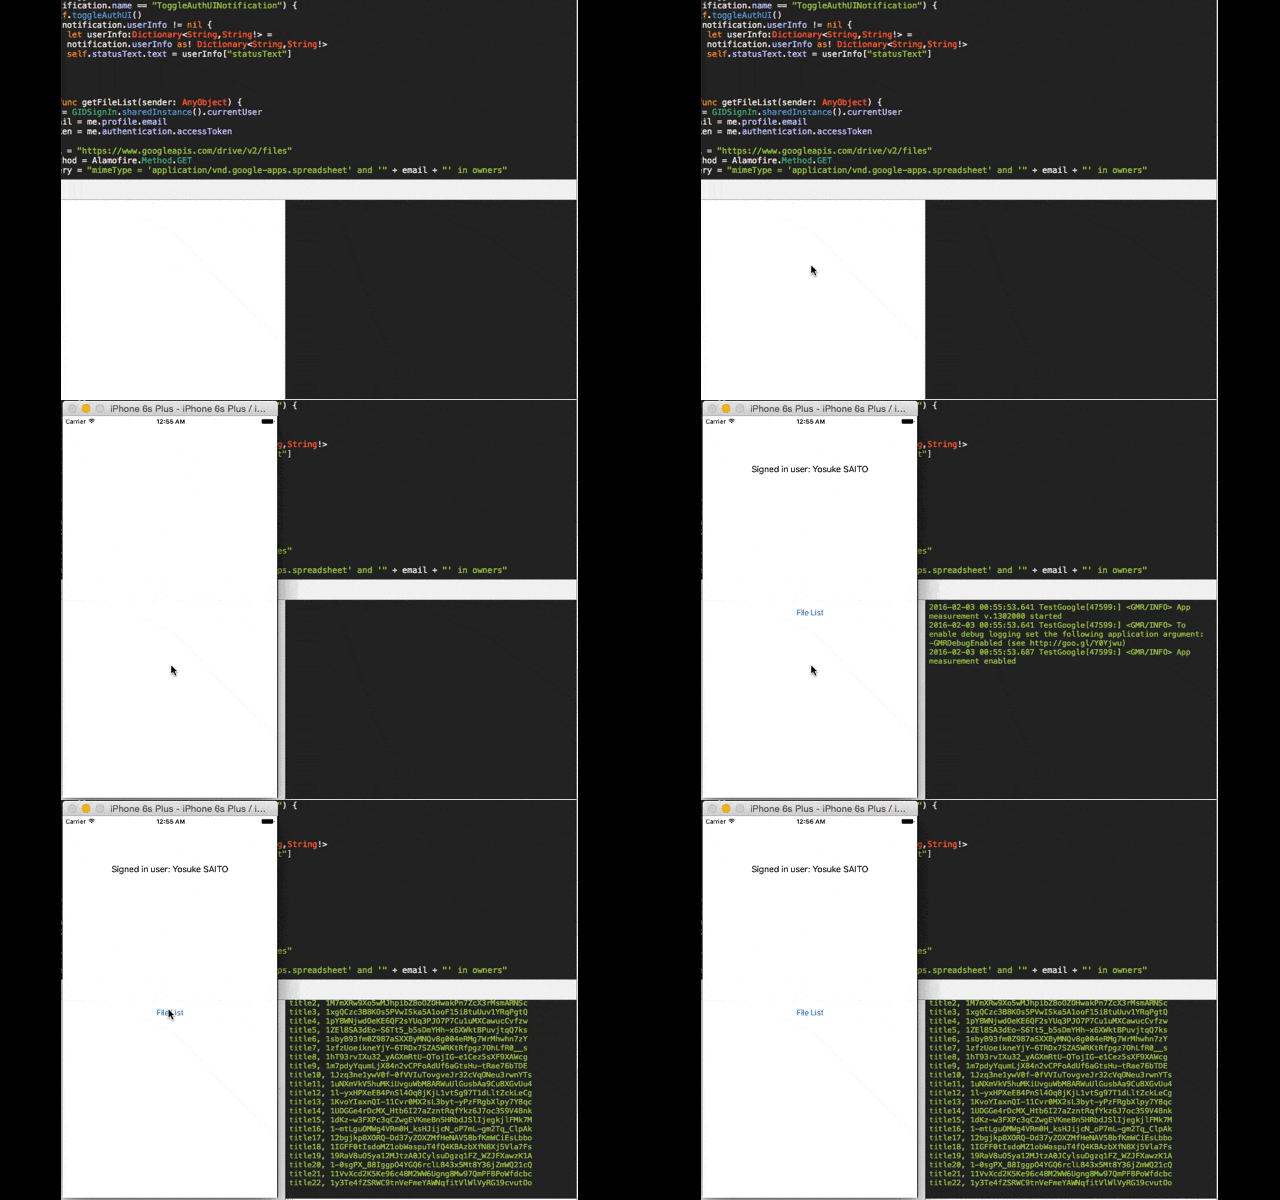
いよいよコーディング(+ストーリーボードの編集)を行います。最終的に、ボタンを押すとログインユーザ自身がオーナーのスプレッドシート一覧が取得できるようなアプリを作ってみます。
5.1. AppDelegate.swift
import UIKit

@UIApplicationMain
class AppDelegate: UIResponder, UIApplicationDelegate, GIDSignInDelegate {

    var window: UIWindow?

    func application(application: UIApplication, didFinishLaunchingWithOptions launchOptions: [NSObject: AnyObject]?) -> Bool {
        var configureError: NSError?
        GGLContext.sharedInstance().configureWithError(&configureError)
        assert(configureError == nil, "Error configuring Google services: \(configureError)")

        GIDSignIn.sharedInstance().delegate = self
        return true
    }

    func application(application: UIApplication,
        openURL url: NSURL, sourceApplication: String?, annotation: AnyObject) -> Bool {
            return GIDSignIn.sharedInstance().handleURL(url,
                sourceApplication: sourceApplication,
                annotation: annotation)
    }

    @available(iOS 9.0, *)
    func application(app: UIApplication, openURL url: NSURL, options: [String : AnyObject]) -> Bool {
        return GIDSignIn.sharedInstance().handleURL(url,
            sourceApplication: options[UIApplicationOpenURLOptionsSourceApplicationKey] as! String?,
            annotation: options[UIApplicationOpenURLOptionsAnnotationKey])
    }

    func signIn(signIn: GIDSignIn!, didSignInForUser user: GIDGoogleUser!,
        withError error: NSError!) {
            if (error == nil) {
                let name = user.profile.name
                NSNotificationCenter.defaultCenter().postNotificationName(
                    "ToggleAuthUINotification",
                    object: nil,
                    userInfo: ["statusText": "Signed in user: \(name)"])
            } else {
                print("\(error.localizedDescription)")
                NSNotificationCenter.defaultCenter().postNotificationName(
                    "ToggleAuthUINotification", object: nil, userInfo: nil)
            }
    }

    func signIn(signIn: GIDSignIn!, didDisconnectWithUser user:GIDGoogleUser!,
        withError error: NSError!) {
            NSNotificationCenter.defaultCenter().postNotificationName(
                "ToggleAuthUINotification",
                object: nil,
                userInfo: ["statusText": "User has disconnected."])
    }
}
5.2. Main.storyboard
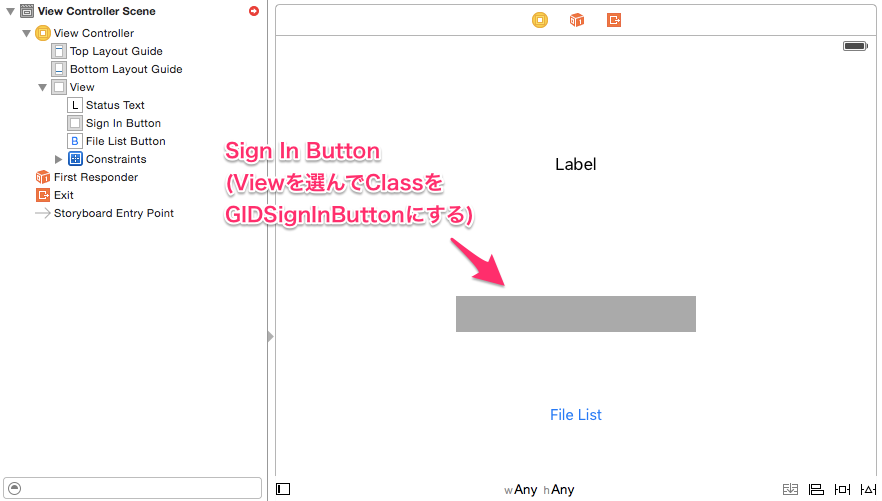
ログイン状況を表すラベル、ログインボタン、スプレッドシート一覧を取得するボタンを配置します。
5.3. ViewController.swift
import UIKit
import Alamofire
import SwiftyJSON

class ViewController: UIViewController, GIDSignInUIDelegate {

    // 関連付けを忘れないように
    @IBOutlet weak var statusText: UILabel!
    @IBOutlet weak var signInButton: GIDSignInButton!
    @IBOutlet weak var fileListButton: UIButton!

    override func viewDidLoad() {
        super.viewDidLoad()
        GIDSignIn.sharedInstance().uiDelegate = self
        // Drive APIを叩くのでこれをscopeに足すこと
        GIDSignIn.sharedInstance().scopes.append("https://www.googleapis.com/auth/drive.readonly")

        // 自動ログイン
        GIDSignIn.sharedInstance().signInSilently()

        NSNotificationCenter.defaultCenter().addObserver(self,
            selector: "receiveToggleAuthUINotification:",
            name: "ToggleAuthUINotification",
            object: nil)

        statusText.text = "Initialized Swift app..."
        toggleAuthUI()
    }

    deinit {
        NSNotificationCenter.defaultCenter().removeObserver(self,
            name: "ToggleAuthUINotification",
            object: nil)
    }

    func toggleAuthUI() {
        if (GIDSignIn.sharedInstance().hasAuthInKeychain()){
            signInButton.hidden = true
        } else {
            signInButton.hidden = false
            statusText.text = "Google Sign in\niOS Demo"
        }
    }

    func receiveToggleAuthUINotification(notification: NSNotification) {
        if (notification.name == "ToggleAuthUINotification") {
            self.toggleAuthUI()
            if notification.userInfo != nil {
                let userInfo:Dictionary<String,String!> =
                notification.userInfo as! Dictionary<String,String!>
                self.statusText.text = userInfo["statusText"]
            }
        }
    }

    // 関連付けを忘れないように
    @IBAction func getFileList(sender: AnyObject) {
        let me = GIDSignIn.sharedInstance().currentUser
        let email = me.profile.email
        let token = me.authentication.accessToken

        let url = "https://www.googleapis.com/drive/v2/files"
        let method = Alamofire.Method.GET
        // MIME Typeがスプレッドシートで、オーナーに自身を含むものを検索
        let query = "mimeType = 'application/vnd.google-apps.spreadsheet' and '" + email + "' in owners"

        Alamofire.request(method, url, parameters: [ "access_token": token, "q":  query ])
            .responseJSON { response in
                let json = JSON(response.result.value!)
                for (_, sub): (String, JSON) in json["items"] {
                    print(sub["title"].string! + ", " + sub["id"].string!)
                }
        }
    }
}
以上で完成です!
公式のドキュメントが古かったりして少し苦労しましたが、
これでサインインからREST APIを叩くまで一通りできるようになりました。
