AWS初心者がよくあるコレを作ってみました。サーバレス入門です
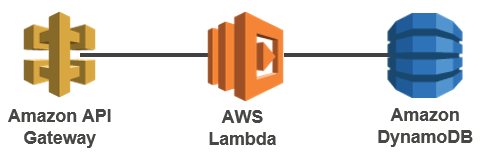
今回作りたいこと
API経由でDynamoDBへ会員のCRUDを行う
DynamoDB
まずはデータストアとなるDynamoDBを作ってみます。
テーブルの作成
作り方の詳細は割愛します。
テーブル名:user
- プライマリキー:id(文字列)
- 項目:
- id(文字列)
- name(文字列)
テーブル名:sequences
- プライマリキー:name(文字列)
- 項目:
- name(文字列)
- current_number(文字列)
Lambda
テーブルに対して取得・新規/編集・削除のLambdaファンクションを作成します。
※Lambdaファンクション作成後にはdynamoDBへのロールを付与します
取得
仕様
・GETパラメータとしてユーザ名の一部をもらってuserテーブルのname項目に対してあいまい検索。
パラメータが無ければ全件検索
'use strict';

var url = require('url');
var aws = require('aws-sdk');
var dynamo = new aws.DynamoDB.DocumentClient({region: 'ap-northeast-1'});
var tableName = "user";

exports.handler = function(event, context) {
        console.log('get event');
        //パラメータチェック
        if(event.plefix !== null && event.plefix !== ""){
            //name項目にパラメータが含まれているものを取得
            dynamo.scan({
              TableName: tableName,
              FilterExpression:
                 "contains(name, :tag) ",
              ExpressionAttributeValues: {
                ":tag": event.plefix
              }}, function (err, data) {
                    if (err) {
                        console.log(err,err.stack);
                        context.fail(err);
                    } else {
                        console.log(JSON.stringify({event: event, context: context}, null, 2));
                        context.succeed(data);
                    }
            });
        }else{
            //全件取得
            dynamo.scan({TableName: tableName}, function (err, data) {
                    if (err) {
                        console.log(err,err.stack);
                        context.fail(err);
                    } else {
                        console.log(JSON.stringify({event: event, context: context}, null, 2));
                        context.succeed(data);
                    }
            });
        }
};
新規/編集
仕様
・POSTパラメータとしてuserテーブルのid項目もらってuserテーブルを更新。
パラメータがなければ新規登録
・新規作成時のid項目はsequencesから取得
※sequencesテーブルはロックするわけではないので、同時アクセス時にどうするかという問題あり
'use strict';

var url = require('url');
var aws = require('aws-sdk');
var dynamo = new aws.DynamoDB({region: 'ap-northeast-1'});
var tableName = "user";
var sequencestableName = "sequences";

exports.handler = function(event, context) {
        var item = {};
        //idの有無を判別
        if(event.id !== undefined && event.id !== null && event.id !== ""){
       console.log('modify event:');
            item.id= {"N": event.id};
            //更新処理へ
            update(item,context,event);
        }else{
            console.log('regist event:');
            //新規IDをシーケンステーブルから取得
            var paramsid = {
                    TableName: sequencestableName,
                    KeyConditionExpression: "#dt = :Id",
                    ExpressionAttributeValues:{
                         ":Id":{"S":"sequences"}
                    },
                    ExpressionAttributeNames : {
                        "#dt"  : 'name'
                    }
            };
            dynamo.query(paramsid, function(err, data){
                if (err) {
                    console.log(err, err.stack);
                    context.fail(err);
                } else {
                    //ID付番
                    item.id= {"N": data.Items[0].current_number.N};
                     var params = {
                        TableName: sequencestableName,
                        Key: {name:{S:'sequences'}},
                        AttributeUpdates:{
                            current_number:{
                                Action: 'ADD',
                                Value:{N:"1"}
                            }
                        },
                        ReturnValues: 'UPDATED_NEW'
                    };
                    //シーケンスを更新
                    dynamo.updateItem(params, function(err, data){
                        if (err) {
                            console.log(err, err.stack);
                            context.fail(err);
                        } else {
                            //更新処理へ
                            update(item,context,event);
                        }
                    });

                }
            });
        }

};

//更新処理
function update(item,context,event){
        //各パラメータチェック。あれば設定
        item.name= {"S": event.name};
        var params = {
            TableName: tableName,
            Item: item
        };

        dynamo.putItem(params, function (err, data) {
            if (err) {
                console.log(err, err.stack);
                context.fail(err);
            } else {
                context.succeed('OK');
            }
        });
}
削除
'use strict';

var url = require('url');
var aws = require('aws-sdk');
var dynamo = new aws.DynamoDB({region: 'ap-northeast-1'});
var tableName = "user";

exports.handler = function(event, context) {
        console.log('delete event:');
        //データ削除
         dynamo.deleteItem({
                TableName: tableName,
                Key : {
                    "id": {"N": event.id }
                    }
                }, function(err, data) {
                    if (err) {
                        console.log(err,err.stack);
                        context.fail('error','putting item into dynamodb failed: '+err);
                    }
                    else {
                        console.log('great success: '+JSON.stringify(data, null, '  '));
                        context.done('success');
                    }
                });
};
APIGateWay
APIを作成します。
取得用Getメソッドの作成
1.API作成後に左ペインのリソースを選択します。
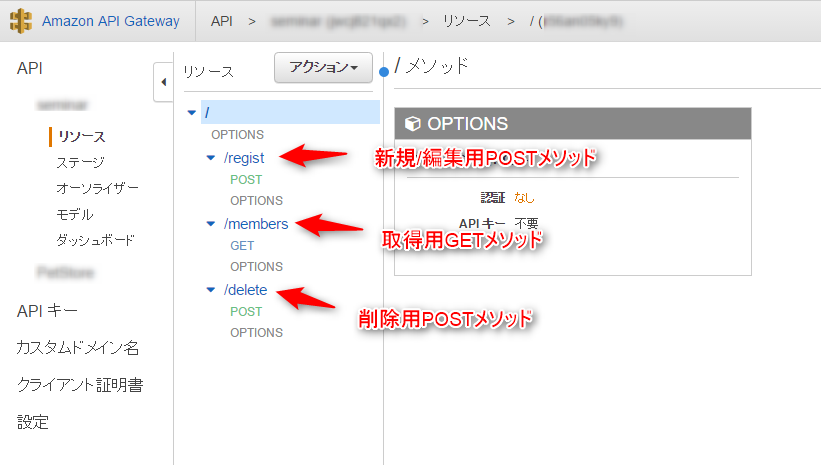
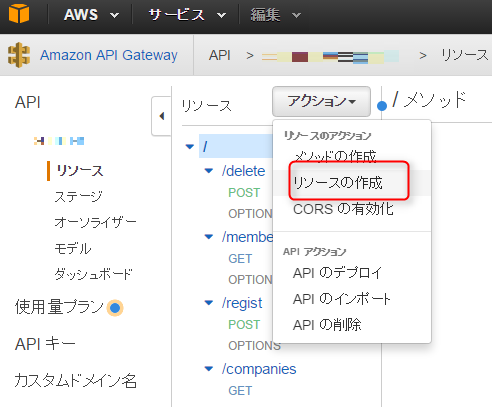
2.ルート(/)を選択してアクションから「リソースの作成」でリソースを作成します。
3.作成したリソースを選択してアクションから「メソッドの作成」でGETを選択します。
※選択したら右側に表示されるチェックのアイコンをクリックして確定します。(忘れやすい)
4.作成したメソッド(GET)を選択し、エンドポイントを設定します。
総合タイプ=Lambda関数
Lambdaリージョン=Lambdaを作成したリージョン
Lambda関数=Lambda関数名
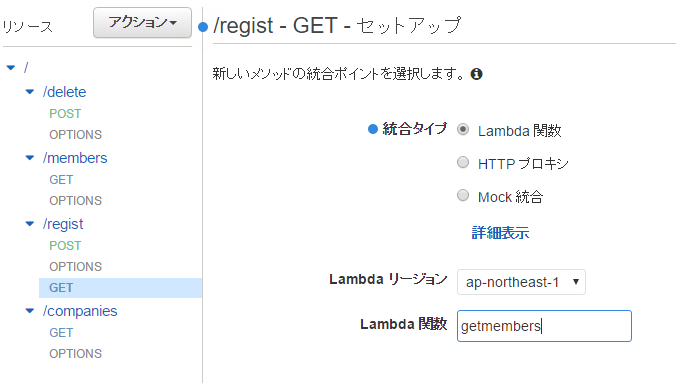
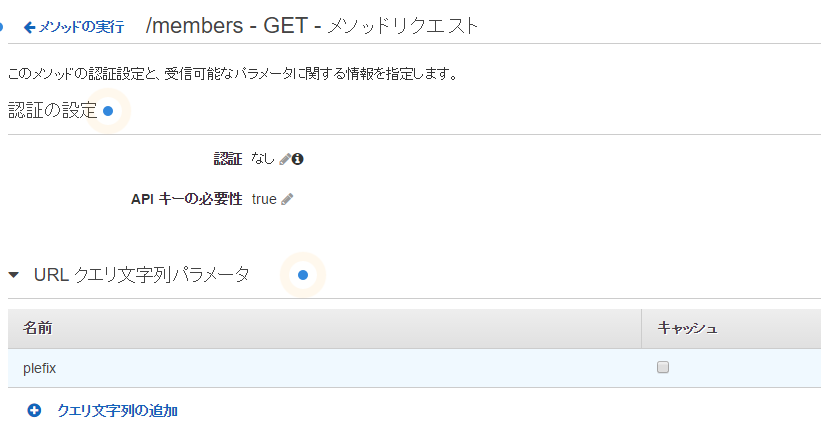
5.保存したら「メソッドリクエスト」を選択して「URLクエリ文字列パラメータ」を設定します。
※Getリクエストのキー名になります。
APIキーの必要性も「true」にしておきます
6.次にメソッドの実行画面に戻り「総合リクエスト」を選択します。
ここではメソッドリクエストとLambdaのeventオブジェクトのキー名をマッピングします。
今回は上のlambdaの取得で設定した「plefix」という文字を設定します。
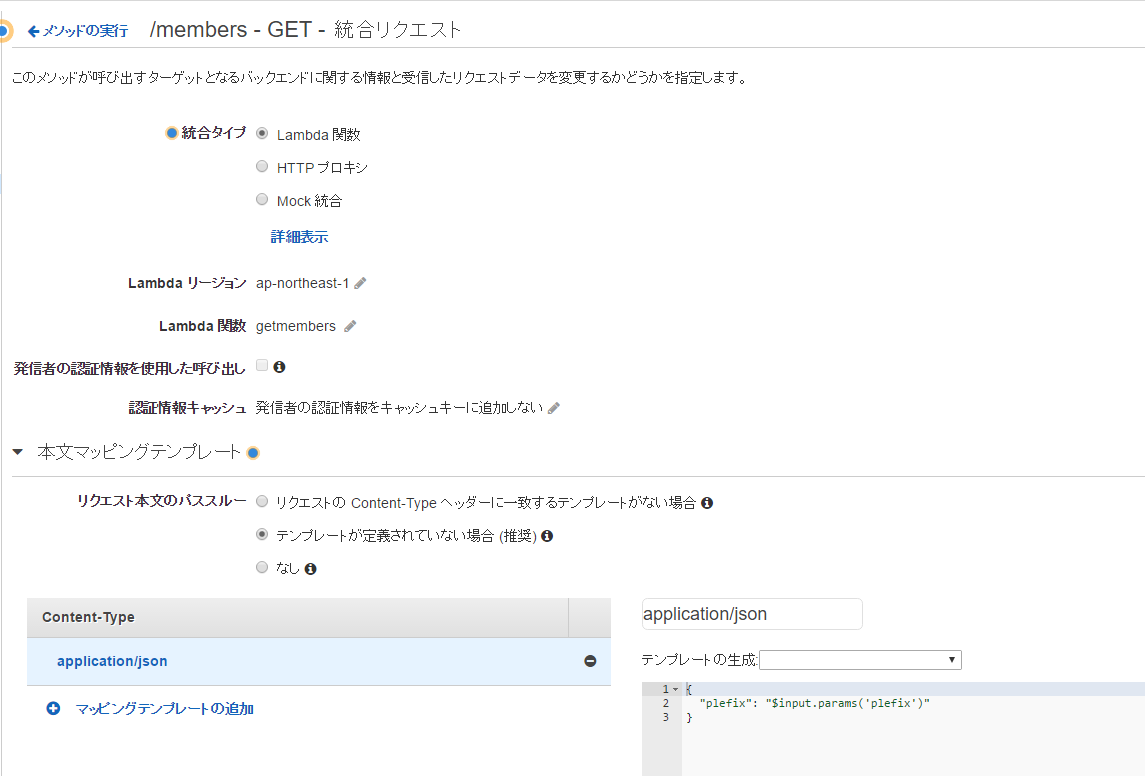
7.作成したらメソッドの実行画面に戻り「テスト」で確認します。
同様に登録・編集と削除のリソース+メソッドを作成します
ステージの作成
リソース&メソッドの作成が終わったらステージを作成します。
ステージを選択して任意の名前でステージを作成します。
※ステージ名がAPIのURIのフォルダ名になります

APIキーの設定
最後にAPIキーの設定です。
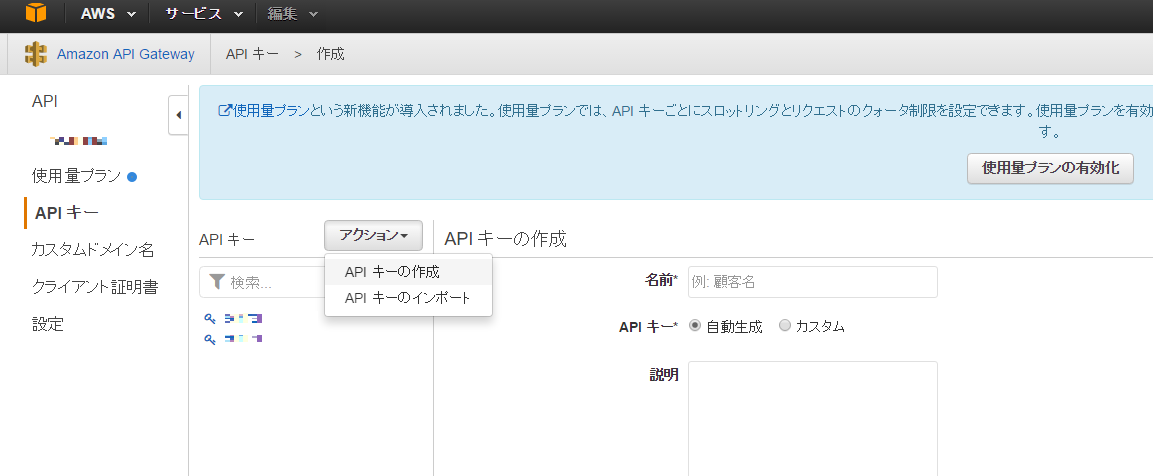
1.APIキーから「APIキーの作成」アクションを選択します。
任意の名前で保存します。
2.作成したらキーを選択してAPIと上で作成したステージを選択して「追加」します。
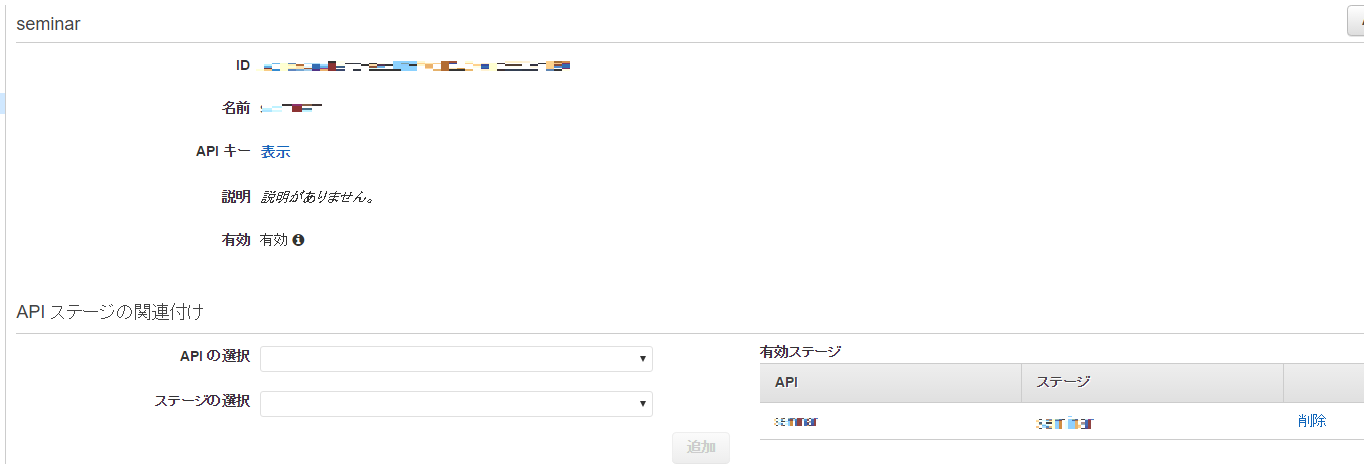
以上で完成。
POSTMAN等のツールで確認してみます。
