Pelican
Python製の静的サイトジェネレータです。Ruby製のJekyllやOctropressに似ていますが、PelicanはPythonだけで動かせます。GitHub Pagesへの公開も非常に簡単です。
公式サイトがとても充実していますが日本語の資料少ないので、備忘録として残します。
公式
http://docs.getpelican.com/en/4.0.1/
▪️動作環境
macOS Mojave
python 3.6.5
pelican 4.0.1
GitHub Pages
まず、サイトをアップロードするGitHub Pagesを作成します。
GitHub Pagesは、静的サイトのホスティングサービスです。GitHub のアカウントがあればすぐに静的サイトが公開できます。
さらに昨年から、独自ドメインのHTTPS化も対応しました。
https://github.blog/2018-05-01-github-pages-custom-domains-https/
GitHubの使い方は下記の記事が参考になります。
【GitHub超初心者入門】この前初めてGitHubを使い始めたエンジニア見習いが書くGitHubの使い方と実践~とりあえず一緒に動かしてみようぜ!~
GitHub Pagesを利用してサイトを作る際は、Repository nameを、[ユーザ名].github.io としてください。
これにより、実際に公開されるサイトのURLはhttps://[ユーザ名].github.ioとなります。
インストール
venv で仮想環境を作ってその中で環境構築します。
venv: Python 仮想環境管理
ここでは、pelicanの他に、markdownとghp-importもインストールする。
- markdown : Markdown形式で記事を書ける。
- ghp-import : GitHub Pagesへの公開操作を実施してくれる。
$ pip install pelican markdown ghp-import
quickstart
プロジェクトフォルダを作成して、中に入って、pelican-quickstart
$ mkdir project
$ cd project
$ pelican-quickstart
すると、サイトを設定するための、結構な量の質問がきます。(後で変更できる)
> Where do you want to create your new web site? [.] .
   どこにプロジェクトを作成しますか? [ . ]で、カレントディレクトリ。
> What will be the title of this web site? TestBlog
   Webサイトのタイトルは?
> Who will be the author of this web site? TestUser
   Webサイトの著者は?
> What will be the default language of this web site? [English] ja
   使う言語は?
> Do you want to specify a URL prefix? e.g., https://example.com   (Y/n) n
   URLプレフィックスを指定するか?
> Do you want to enable article pagination? (Y/n) Y
   ページネーションを使うか?
> How many articles per page do you want? [10] 10
   ページネーションするページ数は?
> What is your time zone? [Europe/Paris] Asia/Tokyo
   タイムゾーンは?
> Do you want to generate a tasks.py/Makefile to automate generation and publishing? (Y/n) Y
   自動生成・公開用の'task.py/Makefile'を作成するか?
> Do you want to upload your website using FTP? (y/N) N
   アップロードにFTPを使うか?
> Do you want to upload your website using SSH? (y/N) N
   アップロードにSSHを使うか?
> Do you want to upload your website using Dropbox? (y/N) N
   アップロードにDropboxを使うか?
> Do you want to upload your website using S3? (y/N) N
   アップロードにS3を使うか?
> Do you want to upload your website using Rackspace Cloud Files? (y/N) N
   アップロードにRackspace Cloud Filesを使うか?
> Do you want to upload your website using GitHub Pages? (y/N) y
   アップロードにGitHub Pagesを使うか?
> Is this your personal page (username.github.io)? (y/N) y
   個人サイトか?

Done. Your new project is available at /Users/TestUser/project
   設定終わり。
記事の作成
Markdown形式で記事を書いてみる。記事は拡張子.mdとして、projectフォルダ内のcontentに保存。ちなみに3行目以降の[Category:] ~ [Summary:]は省略可能。
Title: 最初の投稿
Date: 2019-02-24
Category: テスト
Tags: テスト, 投稿
Slug: FirstPost
Authors: UserName
Summary: 簡単にブログ作成

## 最初の投稿です。

Hello **world!** My name is *User* @Japan.

|テスト1|テスト2|テスト3|
|---|---|---|
|テスト|テスト|テスト|

**ペリカンを使ってみた.**

    :::python
    print('hello world!')
make html & serve
記事をcontentに保存したらテストページを起動してみる。
make htmlで保存した記事内容に沿ったhtmlファイル群をoutputディレクトリに生成。serveで組み込みWebサーバを起動する。
$ make html
$ make serve
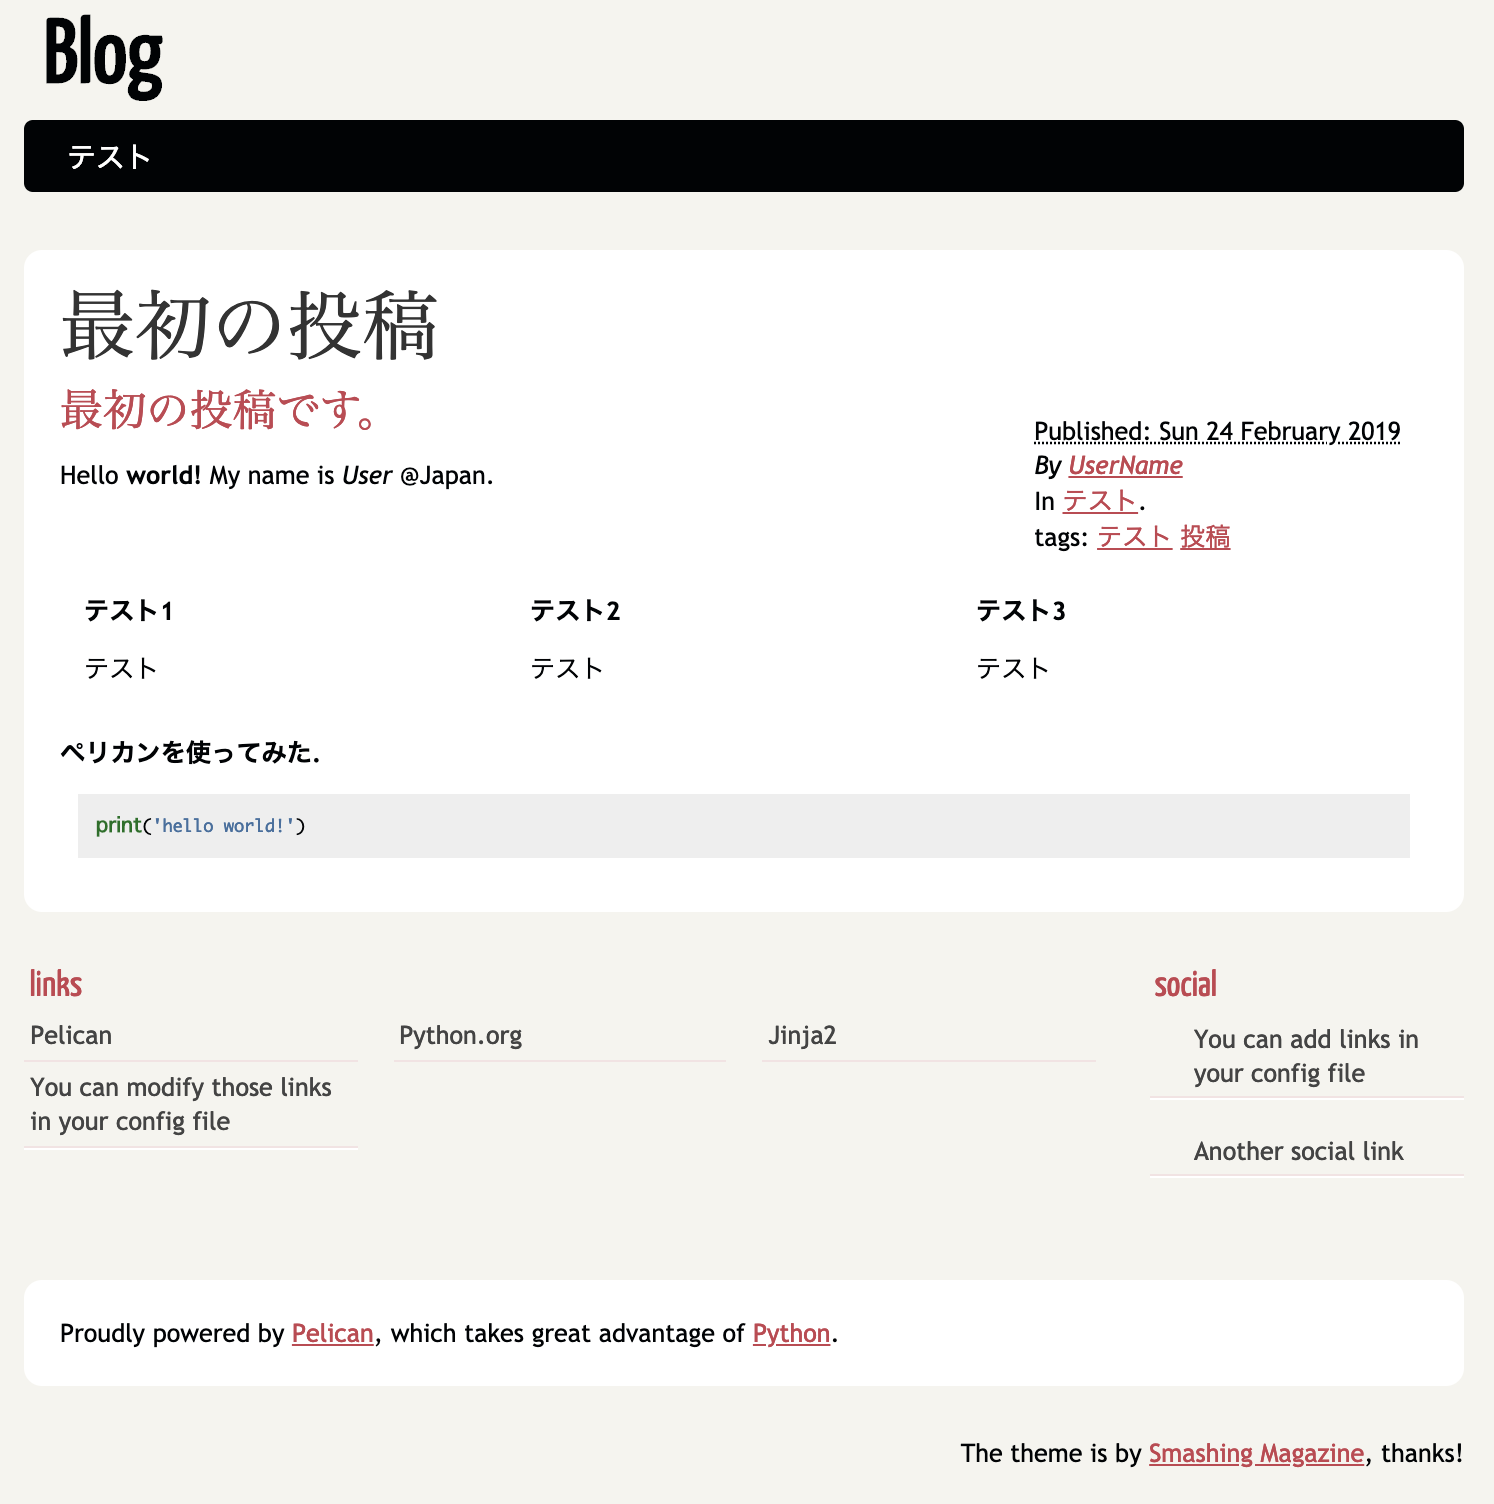
好きなWebブラウザで、http://localhost:8000にアクセス。
すると下のような画面が表示される。Markdownで記述した内容が反映されていることがわかる。あとは、同じ手順で記事をcontentに追加、make htmlを繰り返すだけで投稿ページが追加されていく。
GitHub Pageで公開
make publishで、公開用のhtmlファイル群を生成する。
projectディレクトリ内で、リポジトリを作成する。すると.gitというサブディレクトリが作成される。そしてghp-importを利用して、リモートリポジトリへpushする。
$ make publish
$ git init
  => Initialized empty Git repository in /Users/TestUser/project/.git/
$ ghp-import output
$ git push https://github.com/[ユーザ名]/[ユーザ名].github.io.git gh-pages:master
これで必要なファイルのみGitHubのリポジトリへpushされ、同時に https://[ユーザ名].github.ioで公開される。
※反映までタイムラグ(長い時で10分ぐらい?)あるので、しばらくしてからアクセスする。