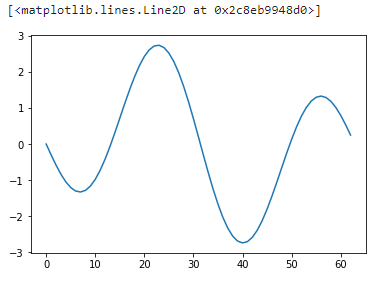
はじめに
今回はpythonで適当な合成波を生成し, 離散フーリエ変換と逆離散フーリエ変換をかけて遊でみた.
初投稿なので見苦しい内容になりそうだが, これを機に資料作成の練習もしていきたい.
準備
今回以下をインポートして利用する.
%matplotlib inline

import functools
import matplotlib.pyplot as plt
import cmath
import random

import numpy as np
Sin波の生成
まず基本となるSin波を作成する.
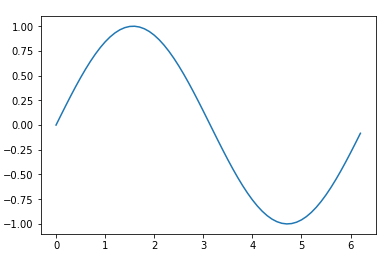
今回はxを0.1刻みで0から2πまで変化させ, np.sin(x)で対応するyの値を求める.
以下にコードとその実行結果をのせる.
# ステップ
s = 0.1
# 横軸(0~2πまで)
x = np.arange(0, 2 * cmath.pi, s)
y1 = np.sin(x)
plt.plot(x, y1)
周波数, 位相, 振幅
周波数(ω), 位相(b), 振幅(a)を変えたSin波はこんな感じ
${\displaystyle y = a×\sin{(ωx + b)}}$
コードにしてみても数式そのままなのでわかりやすい.
# 振幅
a = 2
# 位相
b = cmath.pi
# 周波数
o = 2
# sin波
y2 = a * np.sin(o * x + b)
plt.plot(x, y2)
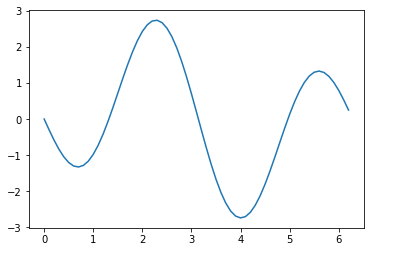
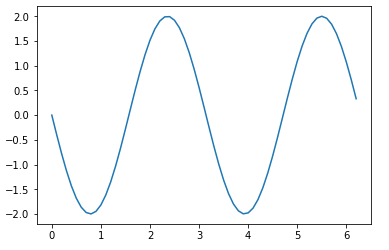
同じく実行結果 振幅2, 周波数2Hzで位相がπだけずれてるのでOK
合成波の生成
合成波は単純に足し合わせるだけで作れる. 今回は先で作ったy1とy2の合成波を作る.
y = y1+y2
plt.plot(x, y)
行列演算でもサクッとかけるので, もっと複雑な合成波を作る場合はおすすめ.
以下y1+y2と同じ波形ができる.(本質ではないので飛ばしてもOK)
X = x.reshape(1, -1)
O = np.array([1, 2]).reshape(-1, 1)
B = np.array([0, cmath.pi]).reshape(-1, 1)
A = np.array([1, 2]).reshape(-1, 1)
y = np.sum(A * np.sin(O * X + B), axis=0)
plt.plot(x, y)
DFT実装
wikiの離散フーリエ変換
https://ja.wikipedia.org/wiki/%E9%9B%A2%E6%95%A3%E3%83%95%E3%83%BC%E3%83%AA%E3%82%A8%E5%A4%89%E6%8F%9B
とりあえずこんな数式らしい
${\displaystyle F(t)= \sum_{x=0}^{N-1} f(x) e^{-i\frac{2 \pi t x}{N}} \quad \quad }$
すなおにfor文つかって書くとこんな感じ
def dft_(f):
    n = len(f)
    Y = []
    for x in range(n):
        y = 0j
        for t in range(n):
            a = 2 * cmath.pi * t * x / n
            y += f[t] * cmath.e**(-1j * a)
        Y.append(y)
    return Y
だけど,for文使うのはダサいのでこんな感じで書くとすっきりする?
def dft(f):
    n = len(f)
    A = np.arange(n)
    M = cmath.e**(-1j * A.reshape(1, -1) * A.reshape(-1, 1) * 2 * cmath.pi / n)
    return np.sum(f * M, axis=1)
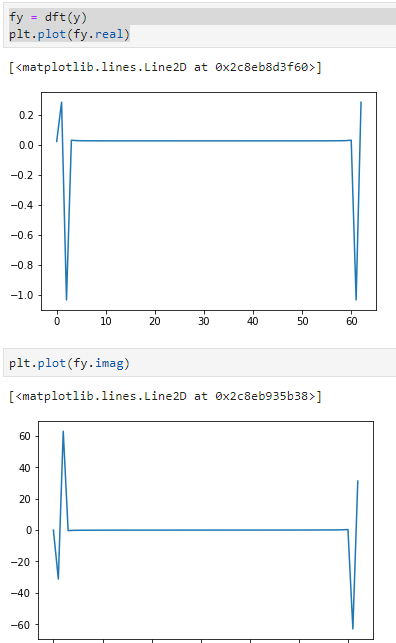
変換してみる, 変換あとは実部と虚部に分かれているのでそれぞれ可視化しておく.
fy = dft(y)
plt.plot(fy.real)
plt.plot(fy.imag)
逆離散フーリエ変換
同じくwikiの逆離散フーリエ変換
${\displaystyle f(x)={\frac {1}{N}}\sum _{{t=0}}^{{N-1}}F(t)e^{{i{\frac {2\pi xt}{N}}}}\quad \quad}$
フーリエ変換とほぼ同じで, ${-i}$が${i}$になって, 最後に${N}$で割ってるだけ.
つまり以下のコード(簡単ですね)
def idft(f):
    n = len(f)
    A = np.arange(n)
    M = cmath.e**(1j * A.reshape(1, -1) * A.reshape(-1, 1) * 2 * cmath.pi / n)
    return np.sum(f * M, axis=1) / n
おまけ
numpyに高速フーリエ変換とその逆変換がすでにあったりする.
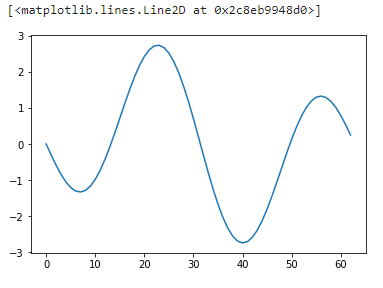
今回作ったdftの変換結果をnumpyのifftに食わせてみた.
ちゃんと動くね(・ω・)b
yd = np.fft.ifft(fy)
plt.plot(yd.real)
まとめ
てきとうな合成波を作って離散フーリエ変換とその逆変換を実装してかけてみた.
思っていたより離散フーリエ変換は簡単ということが分かった.
最後に・・・
初投稿の実験も兼ねているので内容がひどいのは大目に見て・・・(´・ω・`)
