何番煎じになるかわからないですが、おうちNGFG(Next Generation Firewall)を作ってみようと思います。
構成(レシピ)
- Asus Vivo Mini (CPU Celeron 2 core, メモリー: 4GB)
- IO-data USB3.0対応 ETG5-US3 (※Vivo MiniにNICが一つしかなく、NICが2つ必要なため)
- 事前に調べて、USBが対応しているようにだったで試してみます。
"Some USB NICs may be visible and usable, some may not. "
Ref: [sophos community] USB NIC on Sophos XG Home - 事前に調べて、USBが対応しているようにだったで試してみます。
- USB メモリ (2つあれば、まかなえます。)
- memtest86用
- Sophos XG Firewall用
- Proxmox VE用
事前確認
- メモリの正常性を図るため、memtest86をおこなう。
- Test selectionにて、13番目の項目(13 Hammer test)をオフにする。
- memtest86の詳細はこちら:PassMark Memtest86でメモリのエラーを確認する
- 4周して問題なければ、正常に動作できる可能性が高い。
1回目のインストール
- Sophos XG firewall のイメージをダウンロードする。
- エラー防止のためRufusのDDモードでSophos XG firewall のイメージを焼きこむ。
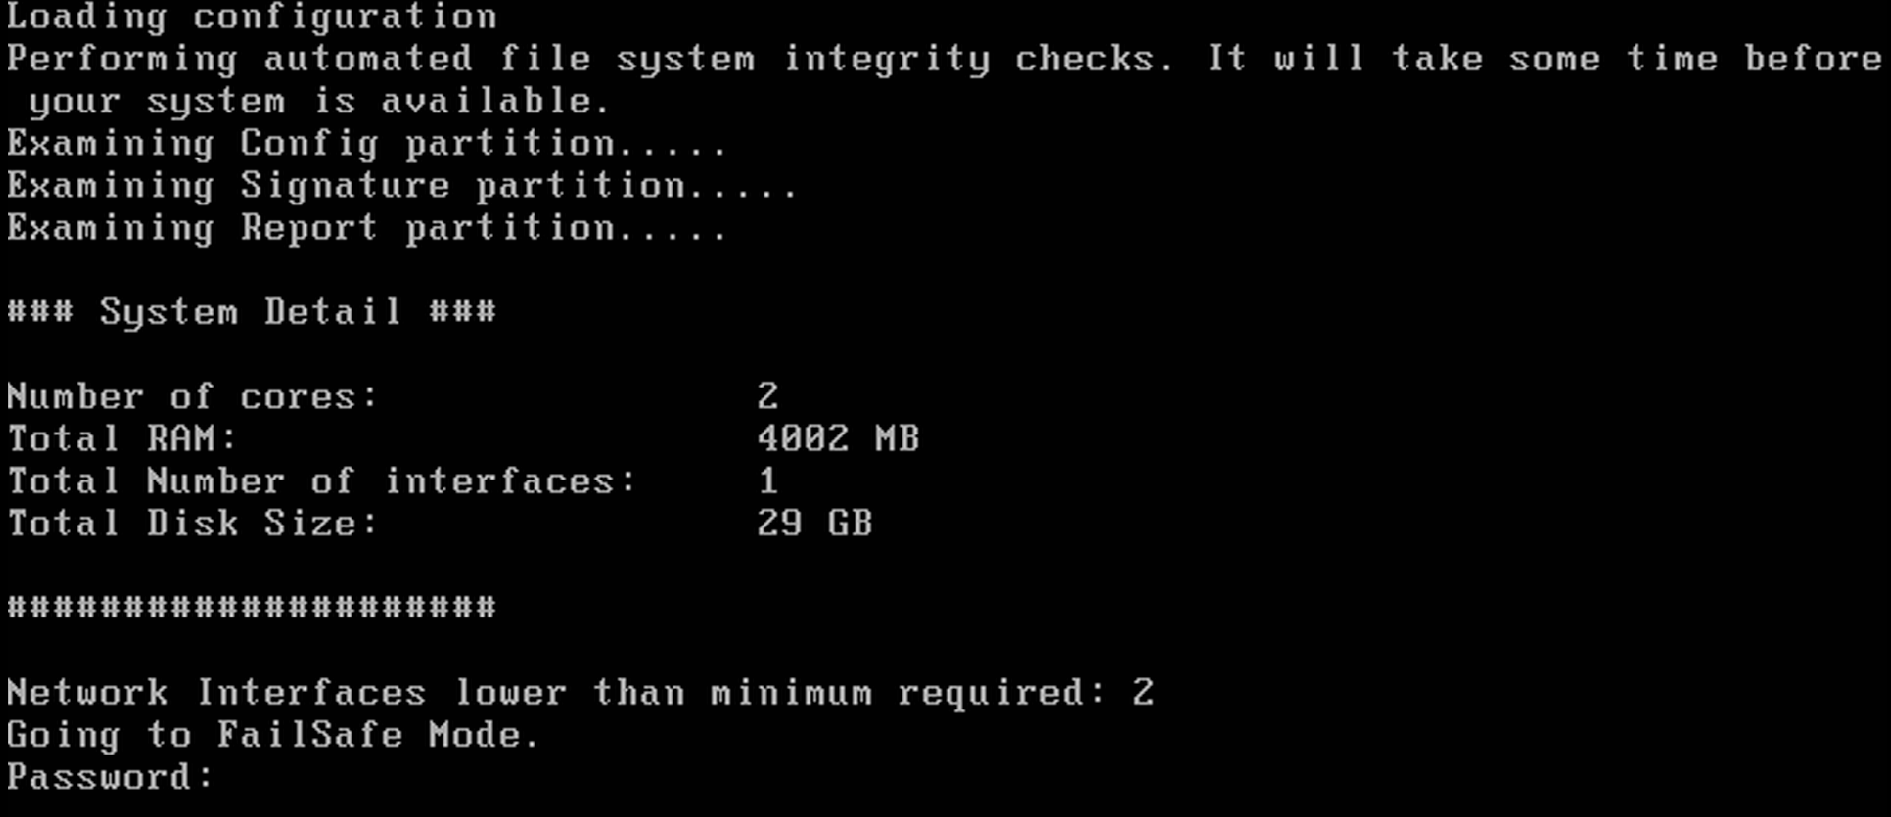
- 以下の通り、直接インストールした場合、USBのNICが認識できていないことが分かった。
エラー内容: “Network Interfaces lower than minimum required: 2
対策方法の調査
- 以下の話し合いによると、ハイパーバイザーproxmoxを使うとよいという記載がありました。
I have the same setup on an old laptop (Asus) and their way that I did it was to install virtualization software, anyone software will do (except hyper-v) but I used Proxmox...
You can then install the USB to Ethernet drivers into Proxmox and then install Sophos as a virtual machine... Here is a link on USB to ethernet on Proxmox (https://forum.proxmox.com/threads/use-additional-usb-nic-not-detected.40811/)
I have a 500Mb internet connection and I notice zero slowdowns using Proxmox and Sophos as a VM. (laptop has 8gig RAM and I set Sophos to 6gig (Home Licence Limit)
作戦の練り直し
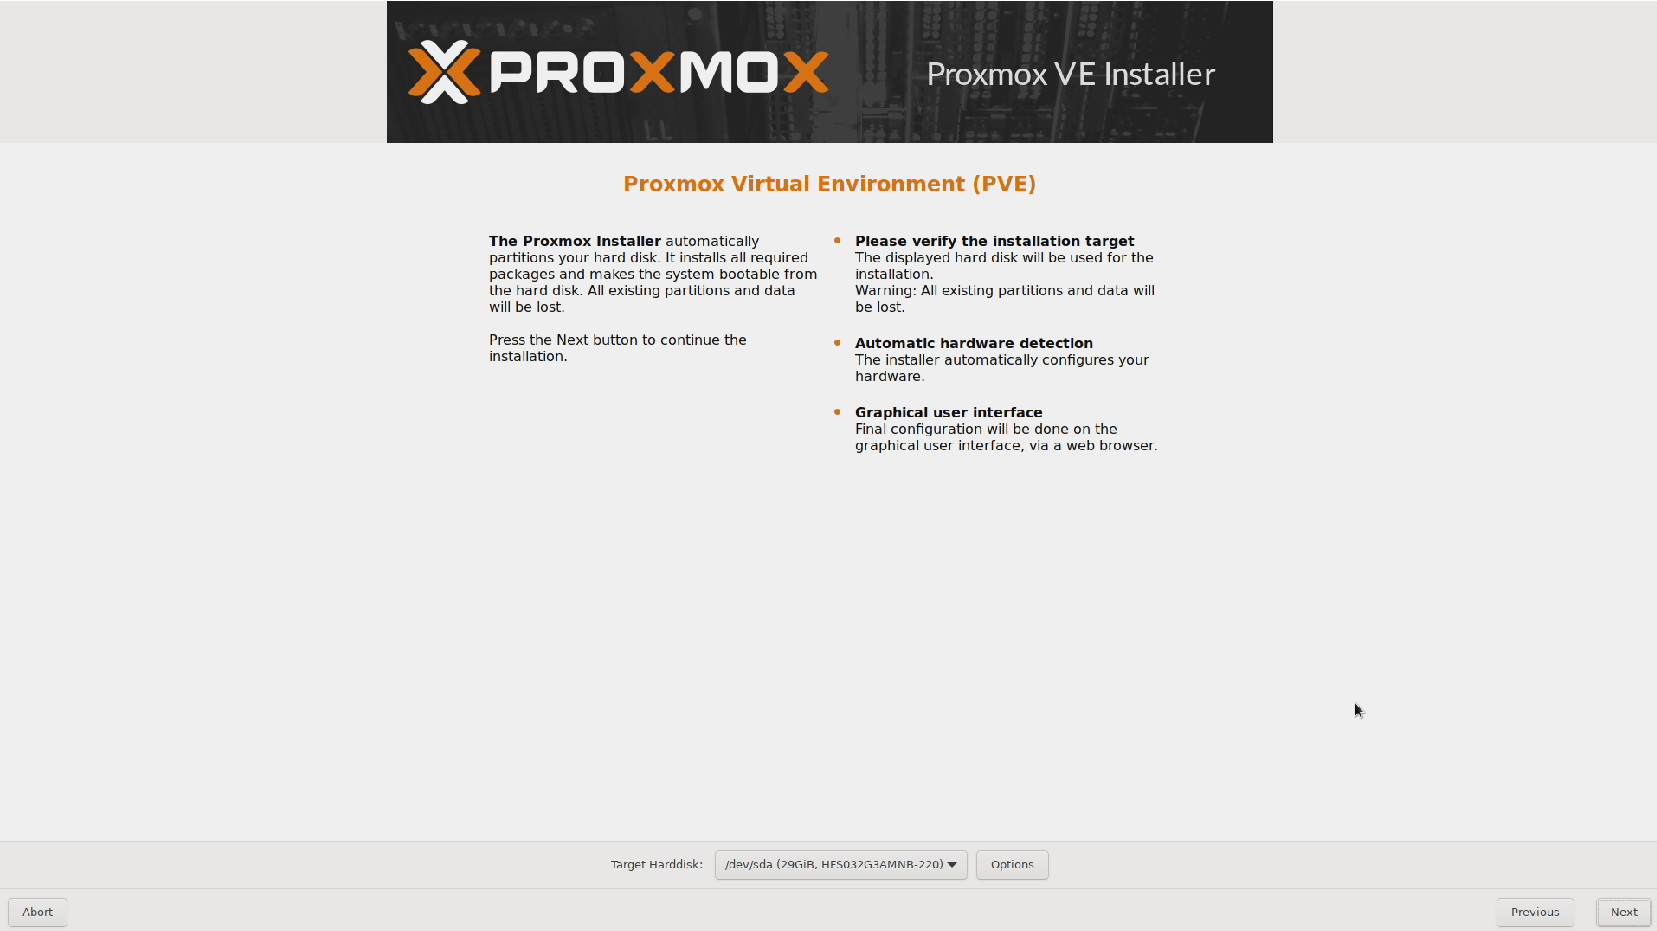
- Proxmoxのインストール
- Proxmoxにおいて、VMを作成
- Sophos XG firewallをVMにインストール
2回目のインストール
Proxmoxのインストール
- Proxmoxのイメージをダウンロードする。
- エラー防止のためRufusのDDモードでProxmox のイメージを焼きこむ。
- Proxmoxをインストールする。


ストレージの追加
root@proxmox01:~# wipefs -a /dev/mmcblk0
/dev/mmcblk0: 2 bytes were erased at offset 0x000001fe (dos): 55 aa
/dev/mmcblk0: calling ioctl to re-read partition table: Success
root@proxmox01:~# pvcreate /dev/mmcblk0
  Physical volume "/dev/mmcblk0" successfully created.
root@proxmox01:~# vgcreate vgrp /dev/mmcblk0
  Volume group "vgrp" successfully created
root@proxmox01:~# lvcreate -n lvol vgrp
  No command with matching syntax recognised.  Run 'lvcreate --help' for more information.
root@proxmox01:~# lvcreate -n lvol vgrp -L 128.0G
  Volume group "vgrp" has insufficient free space (30485 extents): 32768 required.
root@proxmox01:~# mkfs.ext4 /dev/vgrp/lvol
mke2fs 1.46.2 (28-Feb-2021)
The file /dev/vgrp/lvol does not exist and no size was specified.
root@proxmox01:~# vgs
  VG   #PV #LV #SN Attr   VSize   VFree
  pve    1   3   0 wz--n-  29.31g   3.62g
  vgrp   1   0   0 wz--n- 119.08g 119.08g
root@proxmox01:~# lvcreate -n lvol vgrp -L 119.0G
WARNING: LVM2_member signature detected on /dev/vgrp/lvol at offset 536. Wipe it? [y/n]: y
  Wiping LVM2_member signature on /dev/vgrp/lvol.
  Logical volume "lvol" created.
root@proxmox01:~# mkfs.ext4 /dev/vgrp/lvol
mke2fs 1.46.2 (28-Feb-2021)
Discarding device blocks: done
Creating filesystem with 31195136 4k blocks and 7798784 inodes
Filesystem UUID: a7b7ef6d-a943-49ec-b539-4f2ab11c743f
Superblock backups stored on blocks:
        32768, 98304, 163840, 229376, 294912, 819200, 884736, 1605632, 2654208,
        4096000, 7962624, 11239424, 20480000, 23887872

Allocating group tables: done
Writing inode tables: done
Creating journal (131072 blocks): done
Writing superblocks and filesystem accounting information: done

root@proxmox01:~# mkdir -p /mnt/lvol
root@proxmox01:~# mount /dev/vgrp/lvol /mnt/lvol
root@proxmox01:~# echo "/dev/vgrp/lvol /mnt/lvol ext4 defaults 0 2" >> /etc/fstab
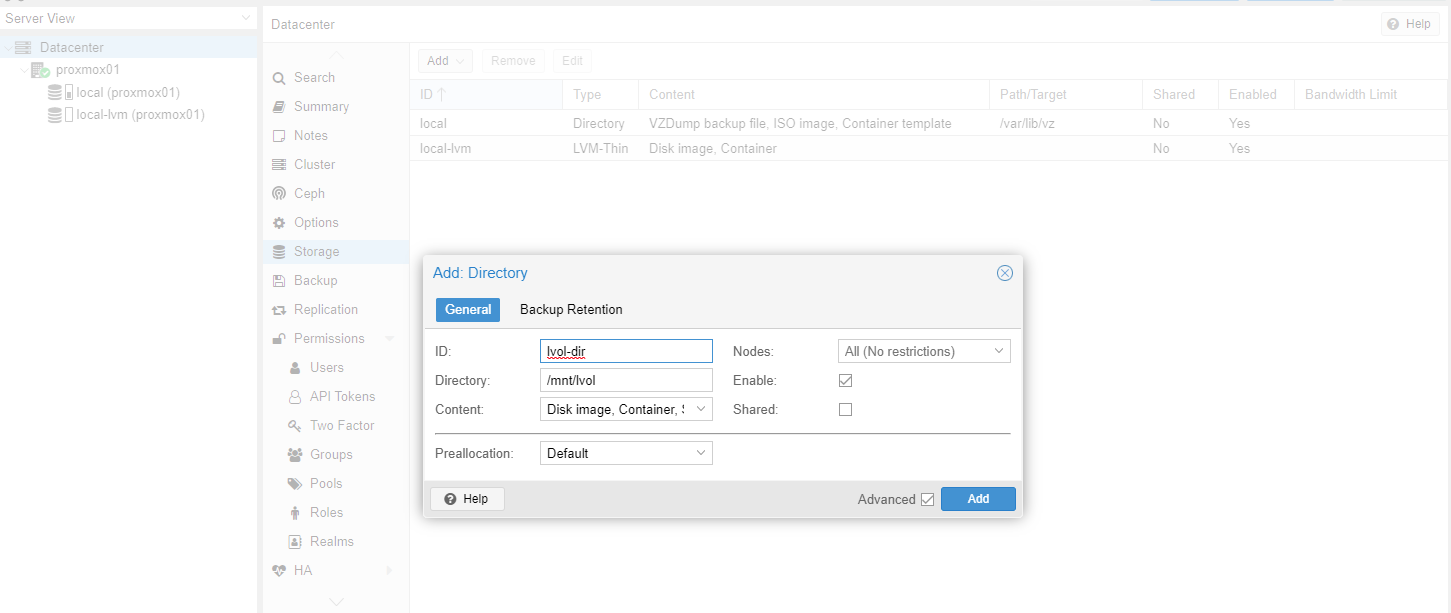
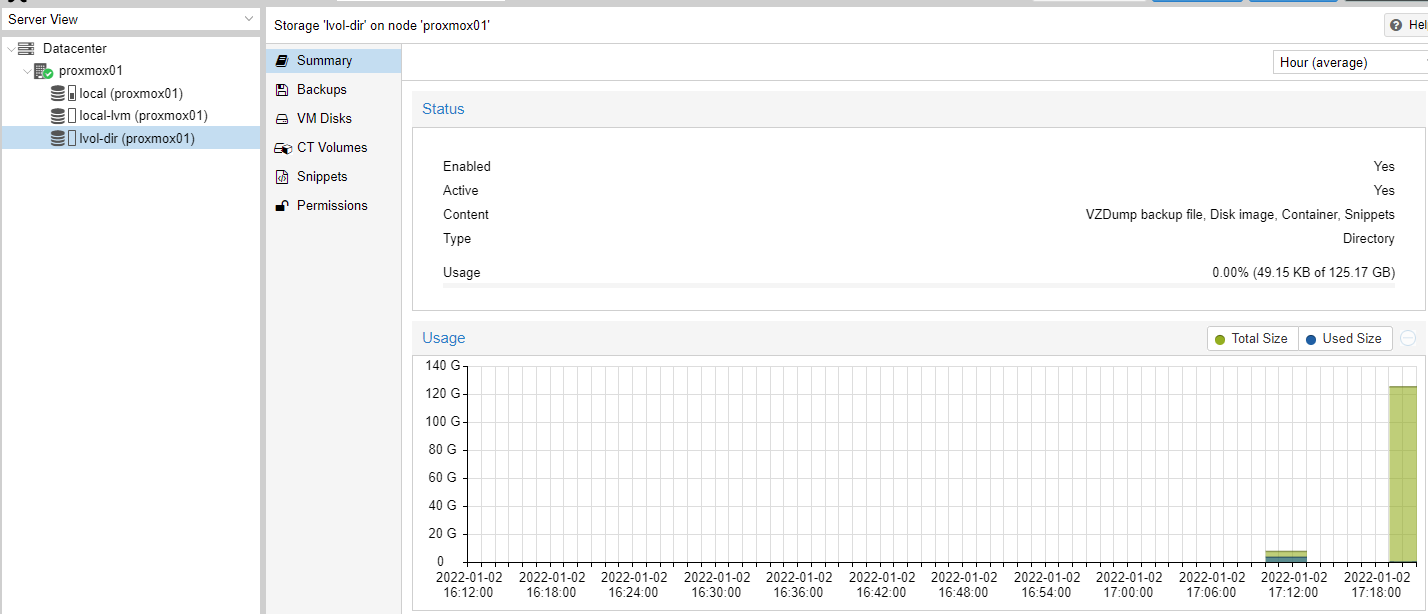
- Webコンソールにおいて、Lvolのディレクトリを作成する。
- ディスク領域が増えたか確認する。
Sophos XG firewall のVM作成
下記記事によると空のVMを作成後、Sophos XG firewallのKVMイメージをダウンロードすることで、Sophos XG firewall のVM作成ができる。
-
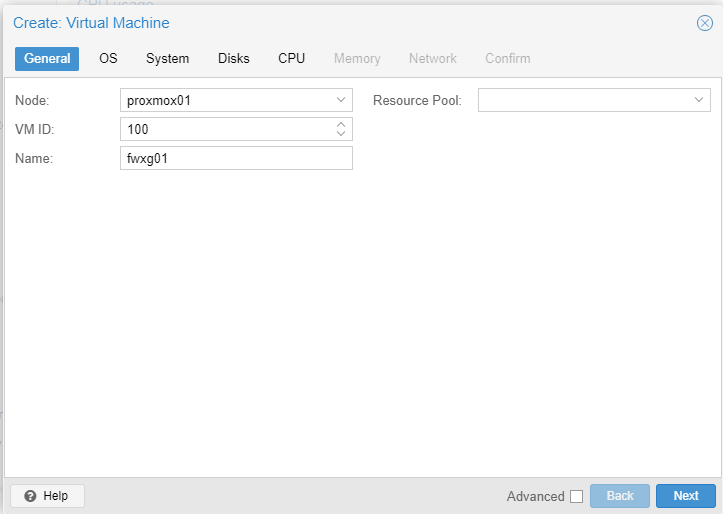
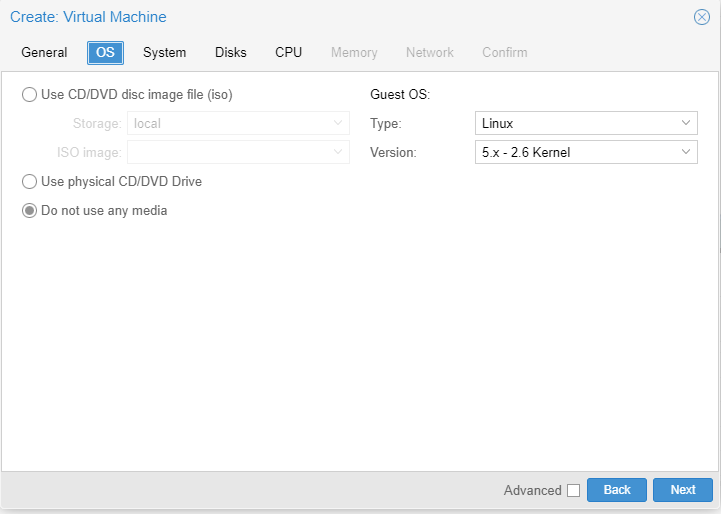
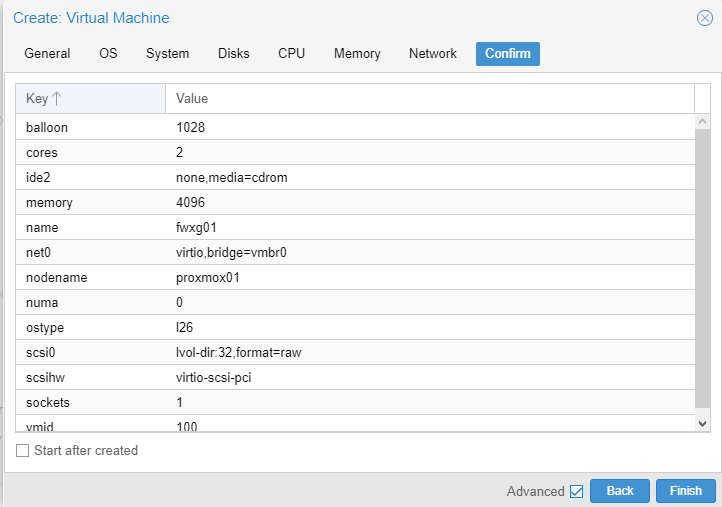
空のVMをWeb コンソール上で作成する。
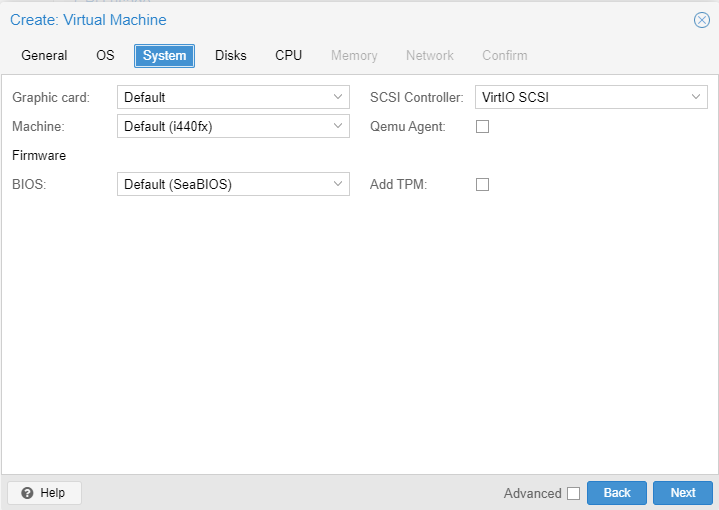
- ※Storage は先ほど作った
lvol-dirにする。FormatはRaw disk image にする。

- ※Storage は先ほど作った
-
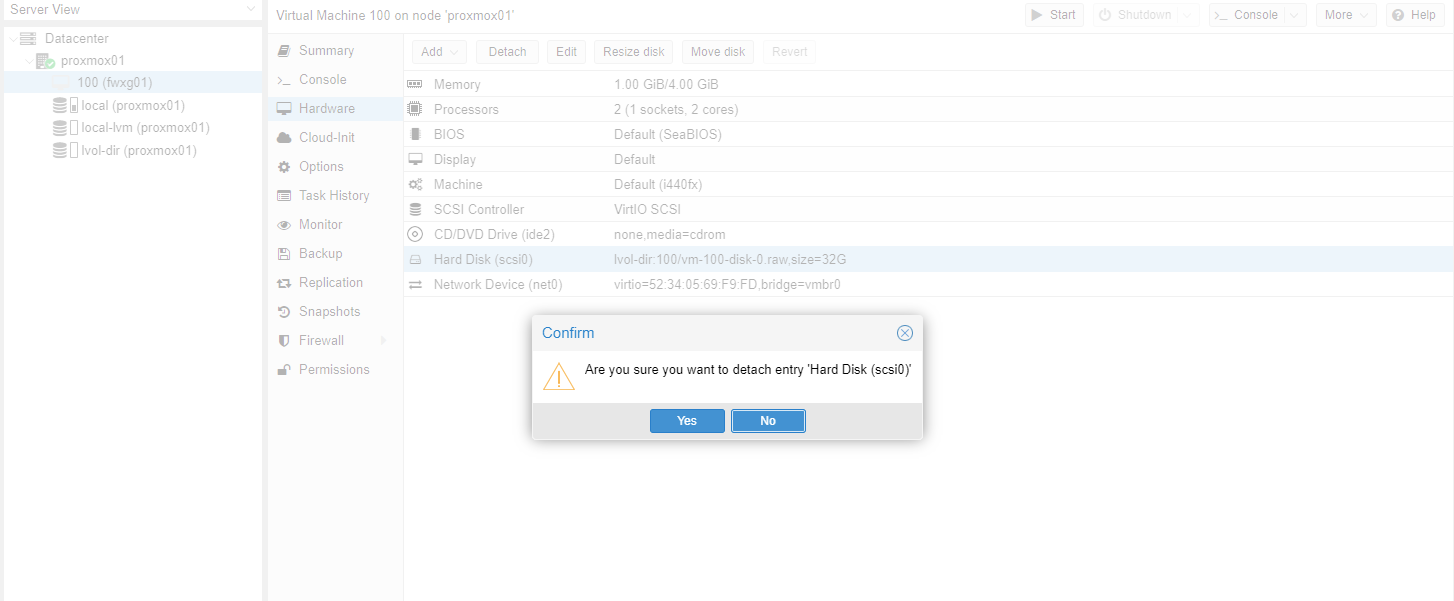
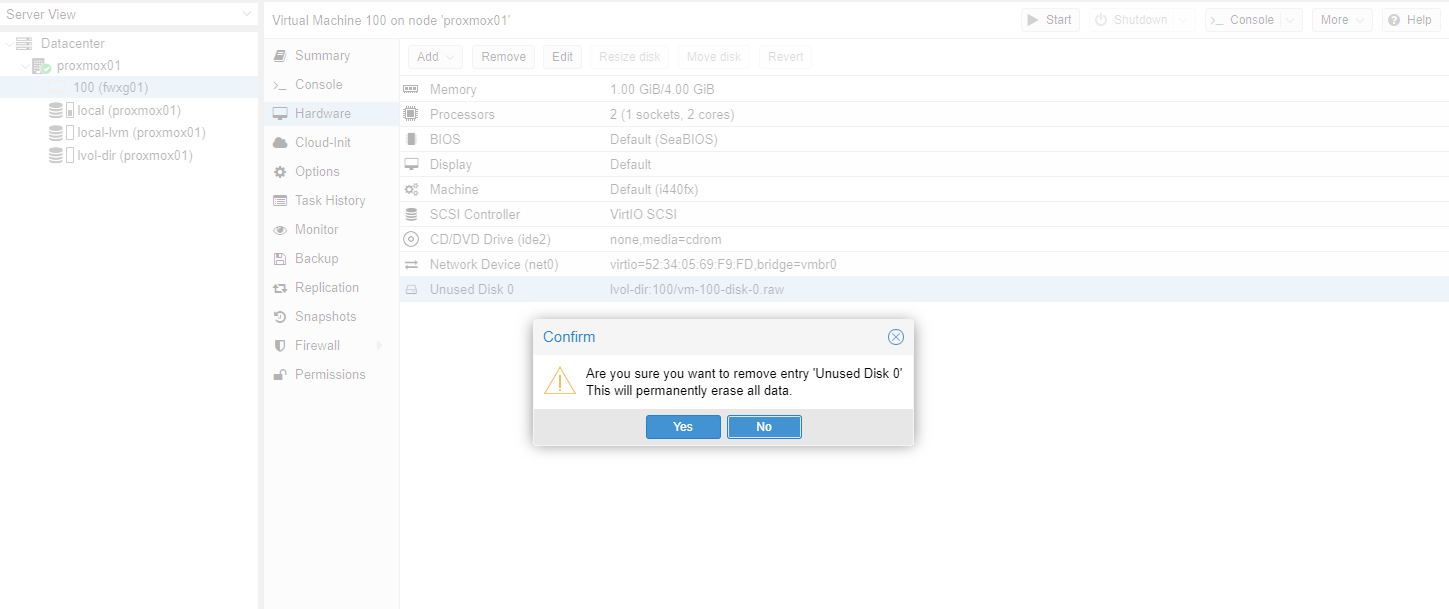
Hard diskを削除する。
-
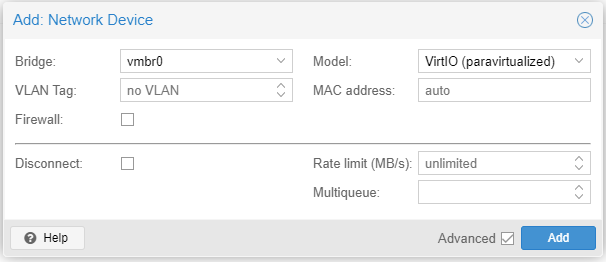
Nicを追加する。
-
KVMのイメージをDonwloadする
https://www.sophos.com/ja-jp/support/downloads/firewall-installers
Download Virtual Installers: Firewall OS for KVM as VI-18.5.1_MR-1.KVM-326.zip -
ディスクイメージをProxmoxに転送する。
$ scp ./* root@192.168.3.245:/var/lib/vz/template/qemu/ root@192.168.abc.abc's password: AUXILIARY-DISK.qcow2 100% 11MB 92.9MB/s 00:00 PRIMARY-DISK.qcow2 100% 448MB 59.8MB/s 00:07 -
転送できたか確認する。
root@proxmox01:~# ls -la /var/lib/vz/template/qemu total 469704 drwxr-xr-x 2 root root 4096 Jan 1 02:11 . drwxr-xr-x 5 root root 4096 Jan 1 00:48 .. -rwxr-xr-x 1 root root 11206656 Jan 1 02:11 AUXILIARY-DISK.qcow2 -rwxr-xr-x 1 root root 469762048 Jan 1 02:11 PRIMARY-DISK.qcow2 -
PRIMARY-DISK.qcow2 をインポートする。
root@proxmox01:~# cd /var/lib/vz/template/qemu root@proxmox01:/var/lib/vz/template/qemu# qm importdisk 100 PRIMARY-DISK.qcow2 lvol-dir importing disk 'PRIMARY-DISK.qcow2' to VM 100 ... Formatting '/mnt/lvol/images/100/vm-100-disk-0.raw', fmt=raw size=17179869184 preallocation=off transferred 0.0 B of 16.0 GiB (0.00%) transferred 232.7 MiB of 16.0 GiB (1.42%) transferred 452.2 MiB of 16.0 GiB (2.76%) transferred 673.4 MiB of 16.0 GiB (4.11%) transferred 892.9 MiB of 16.0 GiB (5.45%) transferred 1.1 GiB of 16.0 GiB (6.80%) transferred 1.3 GiB of 16.0 GiB (8.14%) ... transferred 15.8 GiB of 16.0 GiB (98.68%) transferred 16.0 GiB of 16.0 GiB (99.89%) transferred 16.0 GiB of 16.0 GiB (100.00%) transferred 16.0 GiB of 16.0 GiB (100.00%) Successfully imported disk as 'unused0:lvol-dir:100/vm-100-disk-0.raw' -
AUXILIARY-DISK.qcow2 をインポートする。
root@proxmox01:/var/lib/vz/template/qemu# qm importdisk 100 AUXILIARY-DISK.qcow2 lvol-dir importing disk 'AUXILIARY-DISK.qcow2' to VM 100 ... Formatting '/mnt/lvol/images/100/vm-100-disk-1.raw', fmt=raw size=85899345920 preallocation=off transferred 0.0 B of 80.0 GiB (0.00%) transferred 1.3 GiB of 80.0 GiB (1.63%) ... transferred 79.4 GiB of 80.0 GiB (99.19%) transferred 80.0 GiB of 80.0 GiB (100.00%) transferred 80.0 GiB of 80.0 GiB (100.00%) Successfully imported disk as 'unused1:lvol-dir:100/vm-100-disk-1.raw' root@proxmox01:/var/lib/vz/template/qemu# -
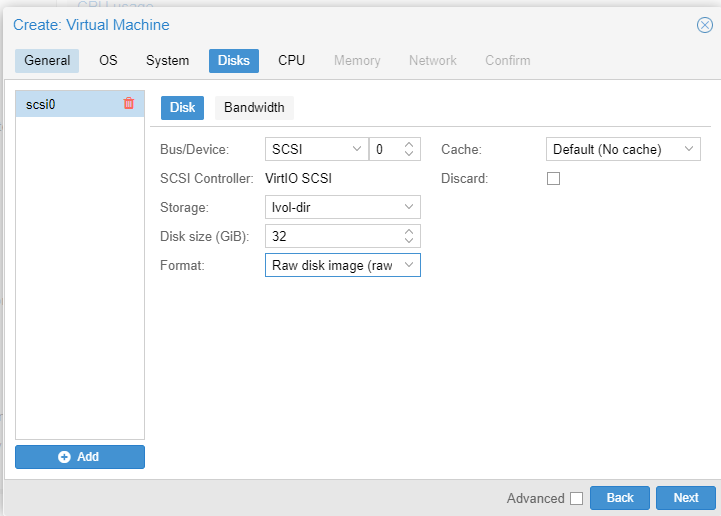
ディスクを編集して追加ボタンを押して、Hard Diskとして使用する。
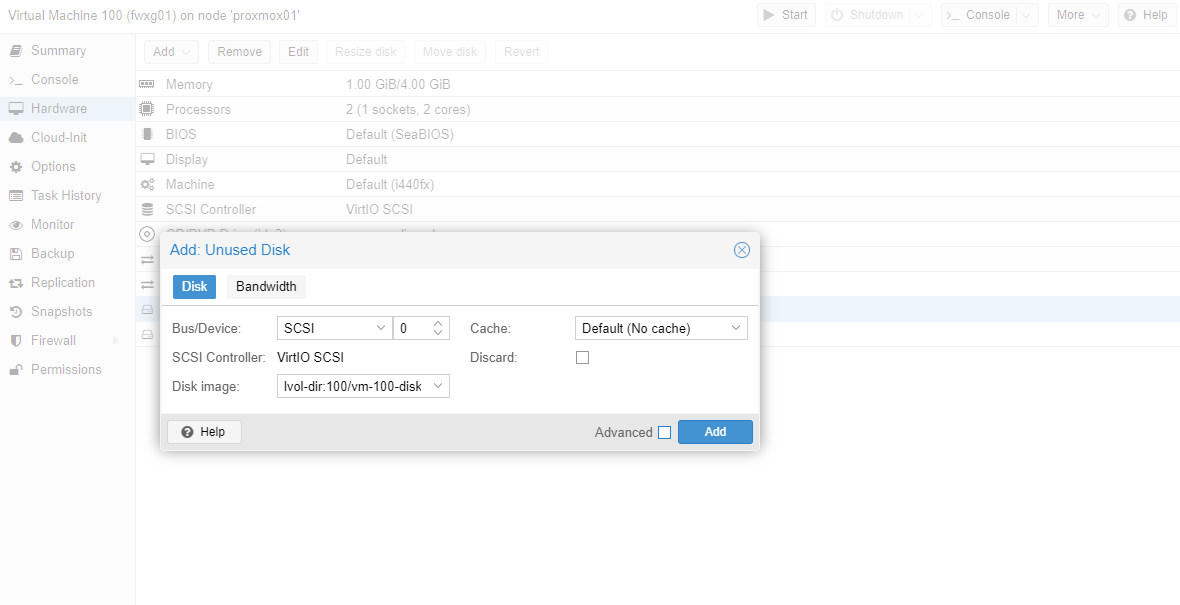

-
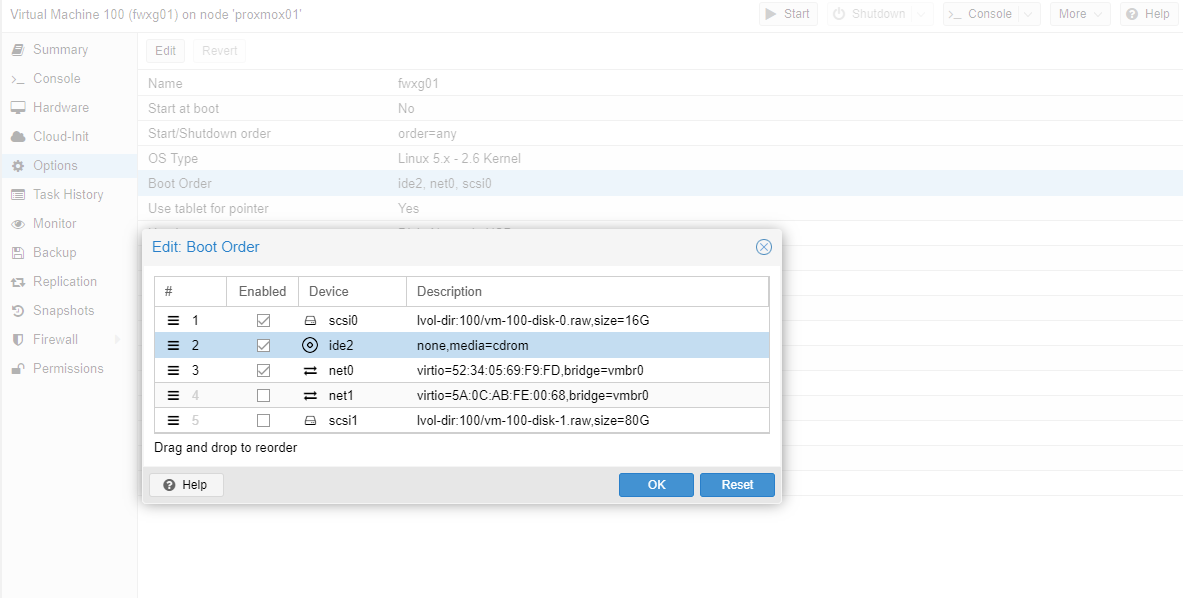
VMのオプション設定において、Scsi0(lvol-dir:100/vm-100-disk-0.raw)を有効にしたうえで、起動順番を変更する。
ESETの除外設定
シェルを起動するとundefined(Code:1006)が発生することや、noVNCでVNC経由で接続できないことがあるのでESETのIP除外の設定を行う。
- ProxmoxVEのアドレスを追加する。
- ESETの詳細設定 > WEBとメールのタブ > プロトコルフィルタリング > 対象外のIPアドレス > 編集を選択
- ShellやVNCがWeb から見えることを確認する。
あとがき
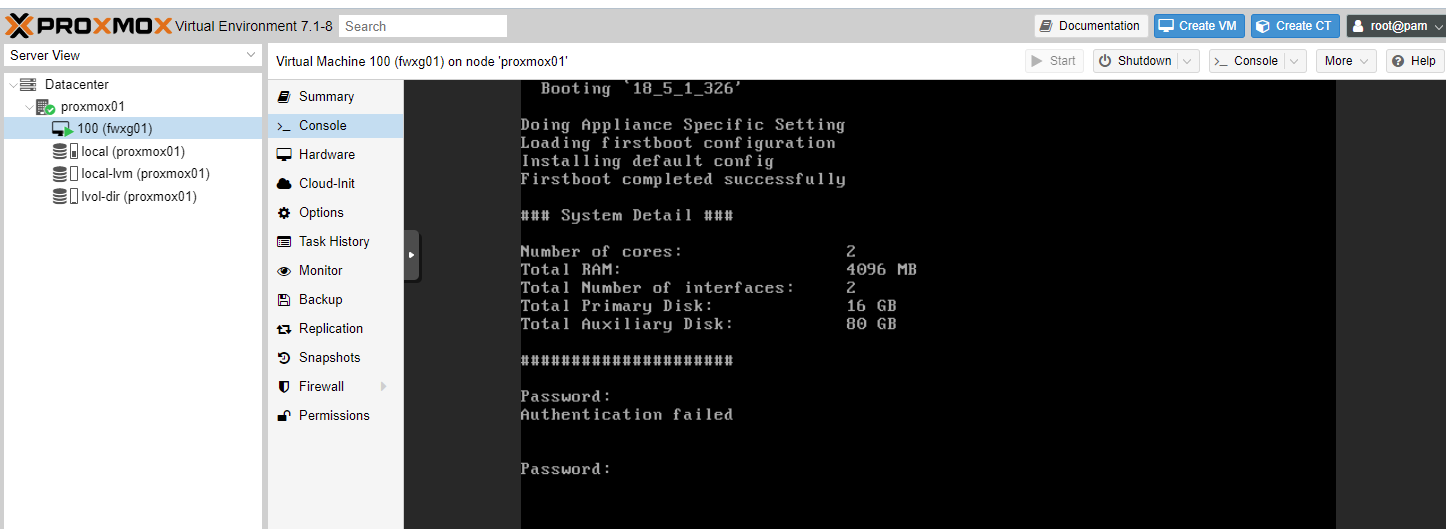
いろいろ試行錯誤した結果、このCeleronではVMとして動かすと固まるため、動かすことが難しいことが分かった。そのため、Lenovoのi5 8GBの小さめのコンピューターを調達し再構築を行った。
一通り上記の設定を行った後、USB NICが認識しなかったため、以下のコマンドを利用して、NICが認識するようにしました。
modprobe g_ether
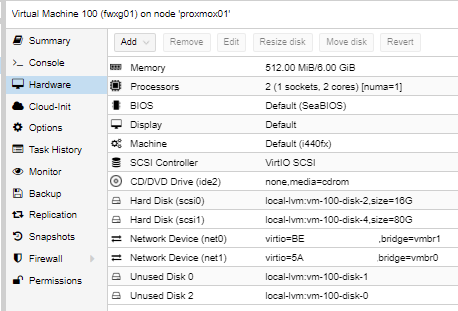
その後、Proxmoxにおいて、以下のようにVMホスト側を設定する。

VM側では以下のように設定する。
- net0: vmbr1
- net1: vmbr0
<< 設定編へ続く(仮) >>