Next.js 15を試してみたところデバッグ設定がそれまでと変わっていて上手くいきませんでした。
基本は公式サイトのドキュメントを見れば良いはずなのですが、Windows環境だとそのままでは上手くいかなかったので解決方法を書いておきます。
公式サイト
https://nextjs.org/docs/app/building-your-application/configuring/debugging
まず公式サイトでもページの下部に書いてあるように、cross-env をインストールします。
npm install --save-dev cross-env
そして、package.json の scripts -> dev 設定を次のように上書きします。
"dev": "cross-env NODE_OPTIONS='--inspect' next dev",
launch.json は次の通りです。
{
  "version": "0.2.0",
  "configurations": [
    {
      "name": "Next.js: フルスタックデバッグ",
      "type": "node",
      "request": "launch",
      "program": "${workspaceFolder}/node_modules/next/dist/bin/next",
      "runtimeArgs": ["--inspect"],
      "skipFiles": ["<node_internals>/**"],
      "serverReadyAction": {
        "action": "debugWithChrome",
        "killOnServerStop": true,
        "pattern": "- Local:.+(https?://.+)",
        "uriFormat": "%s",
        "webRoot": "${workspaceFolder}"
      }
    },
    {
      "name": "Next.js: サーバサイド用のデバッグ",
      "type": "node-terminal",
      "request": "launch",
      "command": "npm run dev"
    },
    {
      "name": "Next.js: クライアントサイド用のデバッグ",
      "type": "chrome",
      "request": "launch",
      "url": "http://localhost:3000"
    },
    {
      "name": "Next.js: クライアントサイド用のデバッグ (Firefox)",
      "type": "firefox",
      "request": "launch",
      "url": "http://localhost:3000",
      "reAttach": true,
      "firefoxExecutable": "C:\\Program Files\\Mozilla Firefox\\firefox.exe",
      "pathMappings": [
        {
          "url": "webpack://_N_E",
          "path": "${workspaceFolder}"
        }
      ]
    }
  ]
}
公式サイトとの違いは、フルスタックデバッグの programの設定です。
.bin/next はUNIX系OS (Linux, macOS) 用の設定なのでWindowsでは上手く動作しません。
"program": "${workspaceFolder}/node_modules/next/dist/bin/next",
もう一つの違いはクライアントサイドのFirefox の設定です。firefoxExecutable を追加してあります。
"firefoxExecutable": "C:\\Program Files\\Mozilla Firefox\\firefox.exe",
この設定は無くても、FireFoxが通常インストールで、この場所 Program Files\Mozilla Firefoxにある場合は上手くいきます。
しかし、FireFox.exeがこの場所にないパターン、私の例では Microsoft Store からインストールした時はfirefoxExecutable で指定する必要があります。
"firefoxExecutable": "C:\\Program Files\\WindowsApps\\Mozilla.Firefox_133.0.3.0_x64__n80bbvh6b1yt2\\VFS\\ProgramFiles\\Firefox Package Root\\firefox.exe",
そのため、あえて上記のように設定を追加してあります。
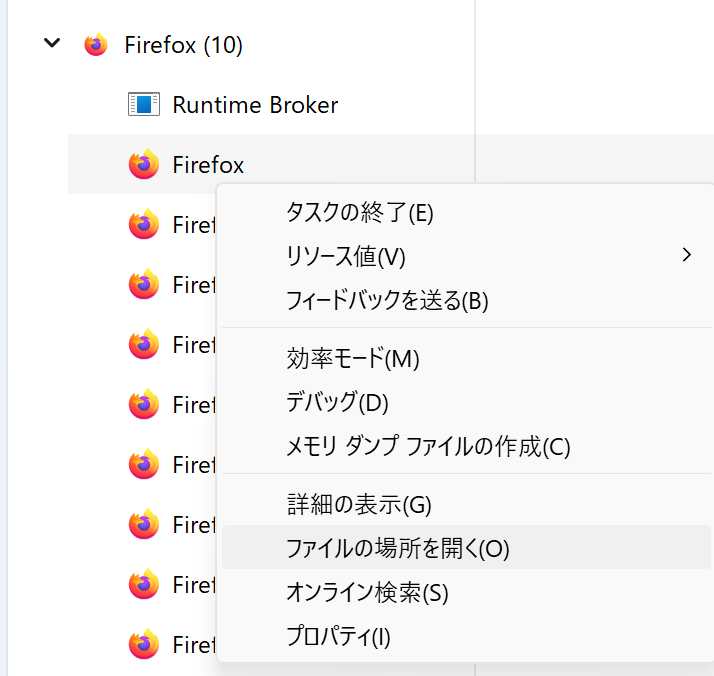
Q. Storeからインストールした場合、どこのパスで実行されているか分かりません
A. タスクマネージャーからプロセスを選択して右クリックで「ファイルの場所を開く」で分かります。
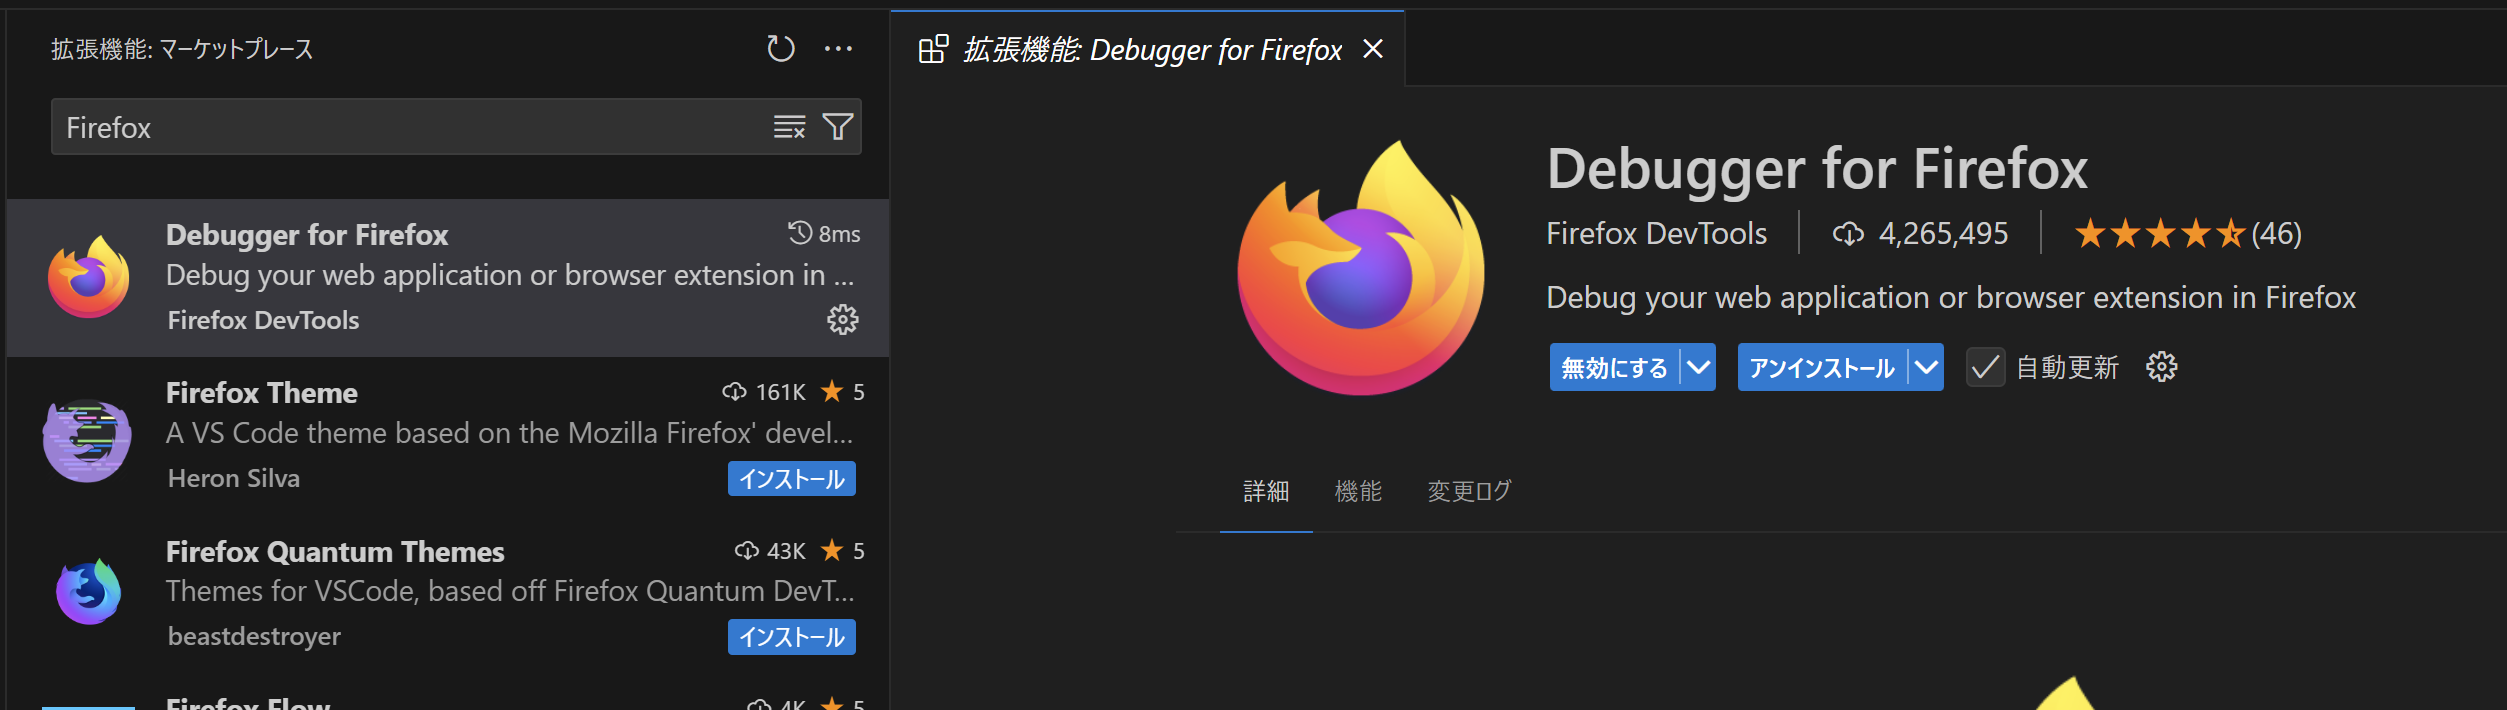
あとVSCodeの拡張機能に Debugger for Firefoxをインストールする必要があります。
以上、ご参考になれば幸いです。