はじめに
Private Docker Registryを個人的に利用していますが、「これだ!」と思えるようなUIが全く見つからず、コマンドラインで消耗してきて早1年が経過しました。
そんな時何の気なしにGithubで「Docker」と検索してスターが200以上のリポジトリを眺めていると、「Portus」を発見しました。
「Portus」は開発も活発だし、設計もきっちりしていて、そして何よりもWikiが充実していました。
これは使ってみるしかないな!と感じて使ってみたら、結構いい感じだったので、今回の記事を書くに至りました。
Portusとは

公式HP:http://port.us.org/
Github:https://github.com/SUSE/Portus
Portusは、Ruby on Railsで書かれたDockerRegistry用のUIです。
公式にはこの以下のような紹介がされています。
Portus is an authoritzation server and a user interface for the next generation of the Docker registry.
Portus targets version 2 of the Docker Registry API.
The minimum required version of Registry is 2.1, which is the first version supporting soft deletes of blobs.
Portusができること
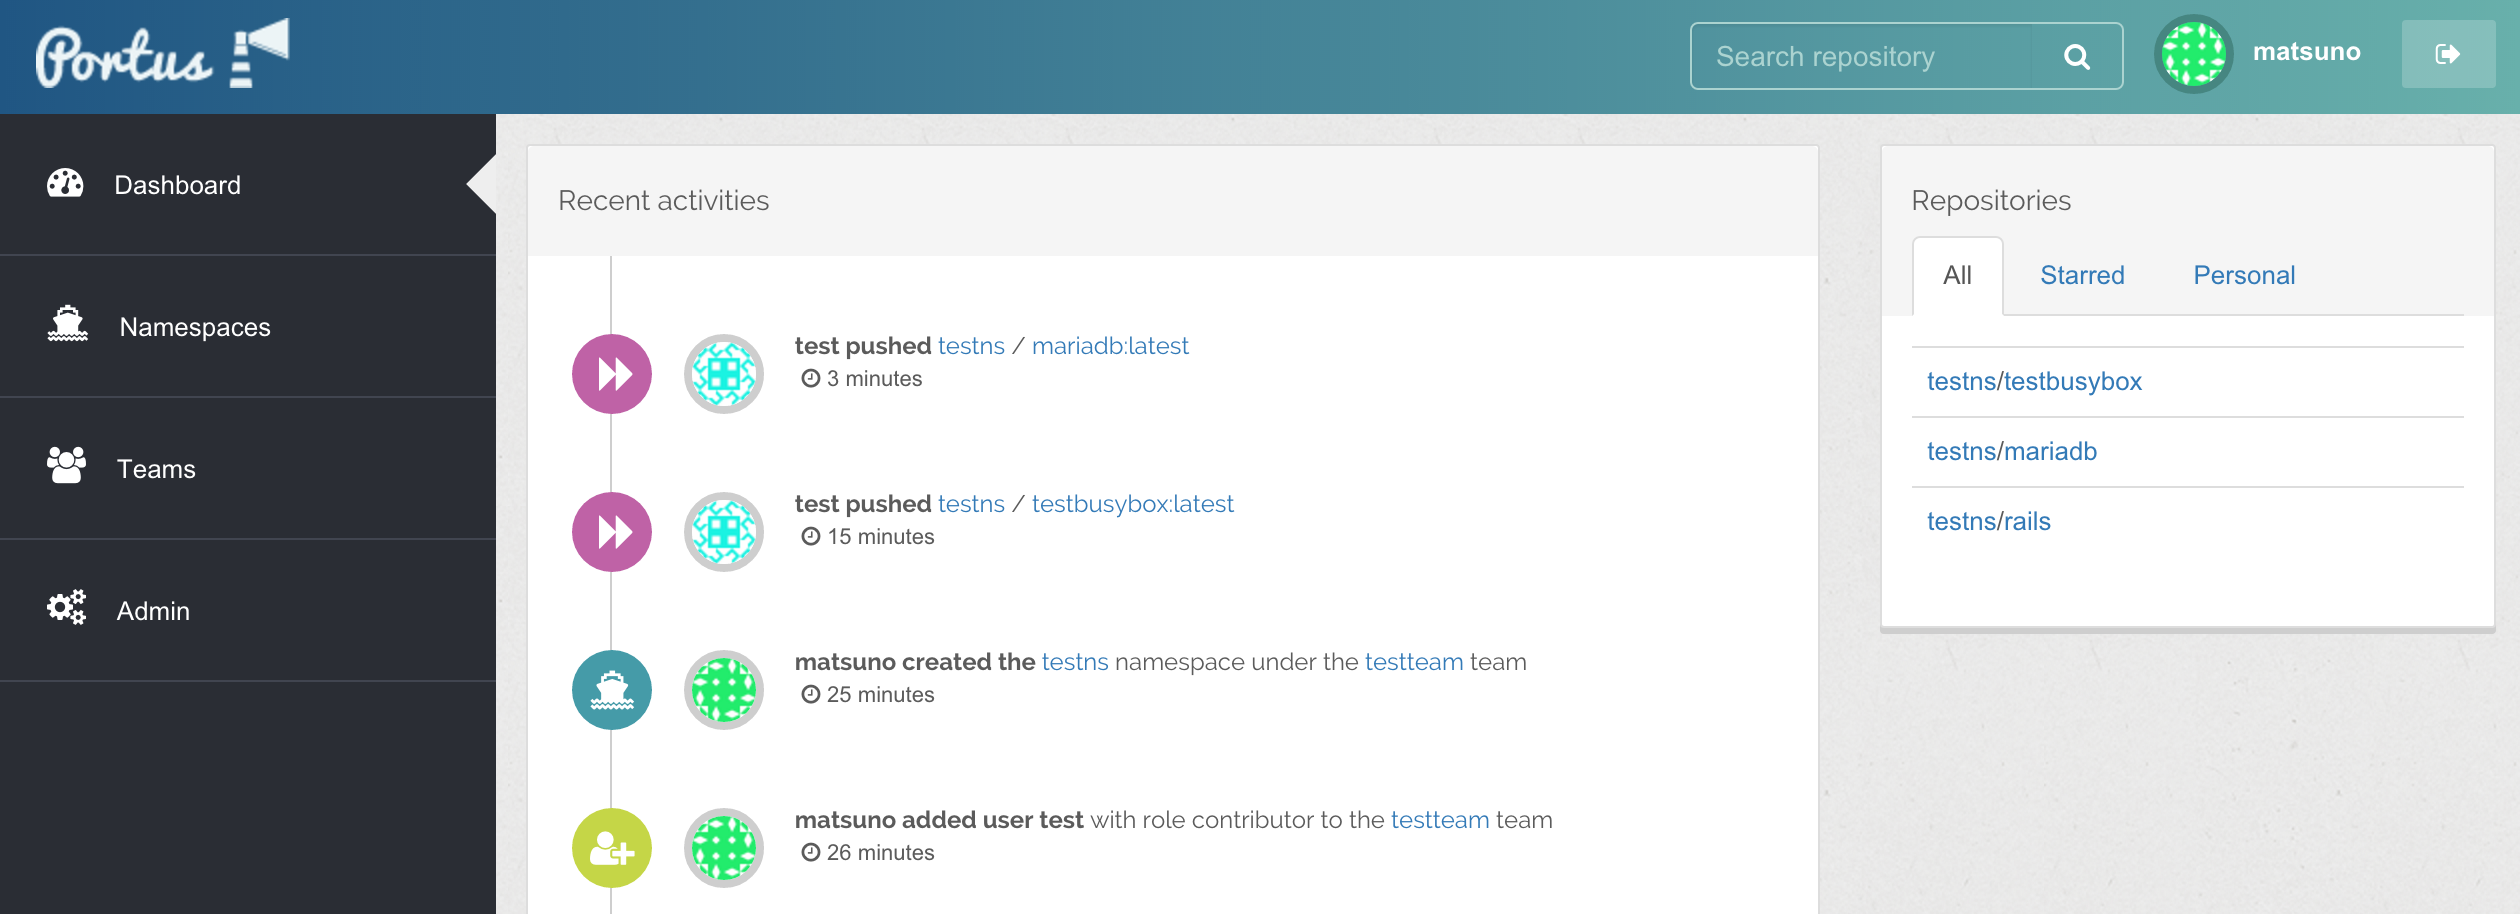
DcokerRegistryのWEB UI
DockerRegistryはそれ単体では、UIを持っておらず、どこに何が保存されているのかわかりにくいです。
Portusなら、直感的なUIで保存されているDockerの一覧を見ることができます。
もちろん保存されているイメージは検索可能なので、使い勝手がいいです!
ユーザ管理、チーム管理、Namespace管理
Portusの認証はユーザ単位で行います。
ユーザは特定のチームに加えることができます。
そしてチームにはNamespaceを設定することができます。
※ dockerregistry.com:5000/<namespace>/<image_name>
したがってユーザは以下のNamespaceを持つことができます。
| Namespace | デフォルト公開範囲 | デフォルトで作成される |
|---|---|---|
| <registry domain> | Portusに参加している全ユーザ | ○ |
| <team name> | Teamに属している全ユーザ | ○ |
| <namespace> | Teamに属している全ユーザ | × |
| <user name> | 自分のみ | ○ |
それぞれのNamespaceは「公開」に設定することが可能です。
Namespaceは自由に作成可能です。
ユーザには、チームに対してそれぞれOwner,Contributor,Viewerという3つの権限を与えることができます。
PortusはLDAPにも対応しています!!
DockerRegistryの権限管理
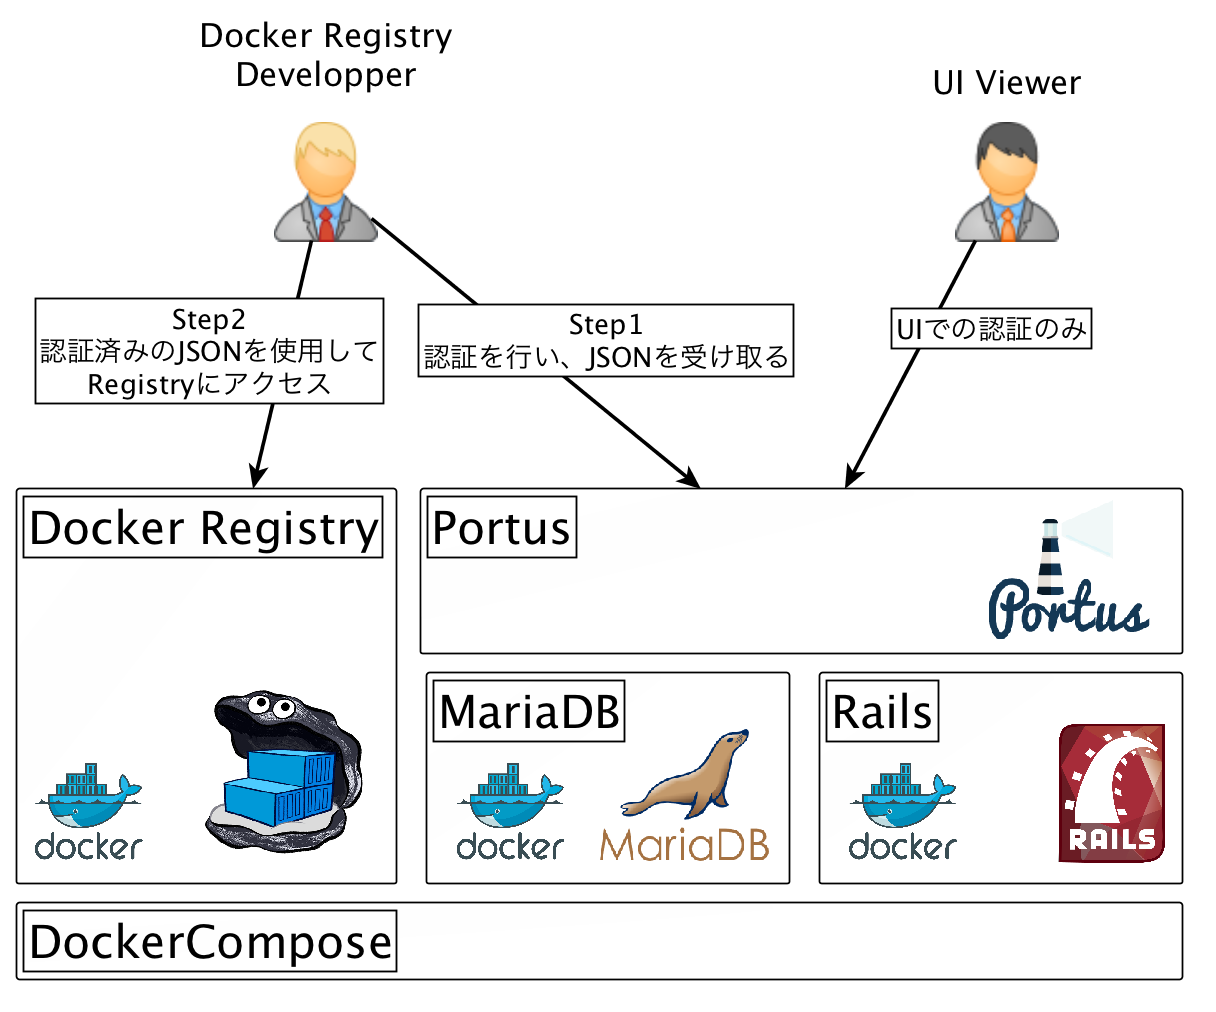
PortusはDockerRegistryの認証基盤としても活躍します。
Portusで設定したユーザ、チームの権限そのままにRegistryの認証を管理できます。
DockerRegistryにPush、Pullを行う際には、まずPortusの認証を義務付け、認証が完了したユーザのみRegistryにアクセスできるようになります。
認証にはJWTを利用しており、有効時間も設定可能です。
イメージのメタデータ管理
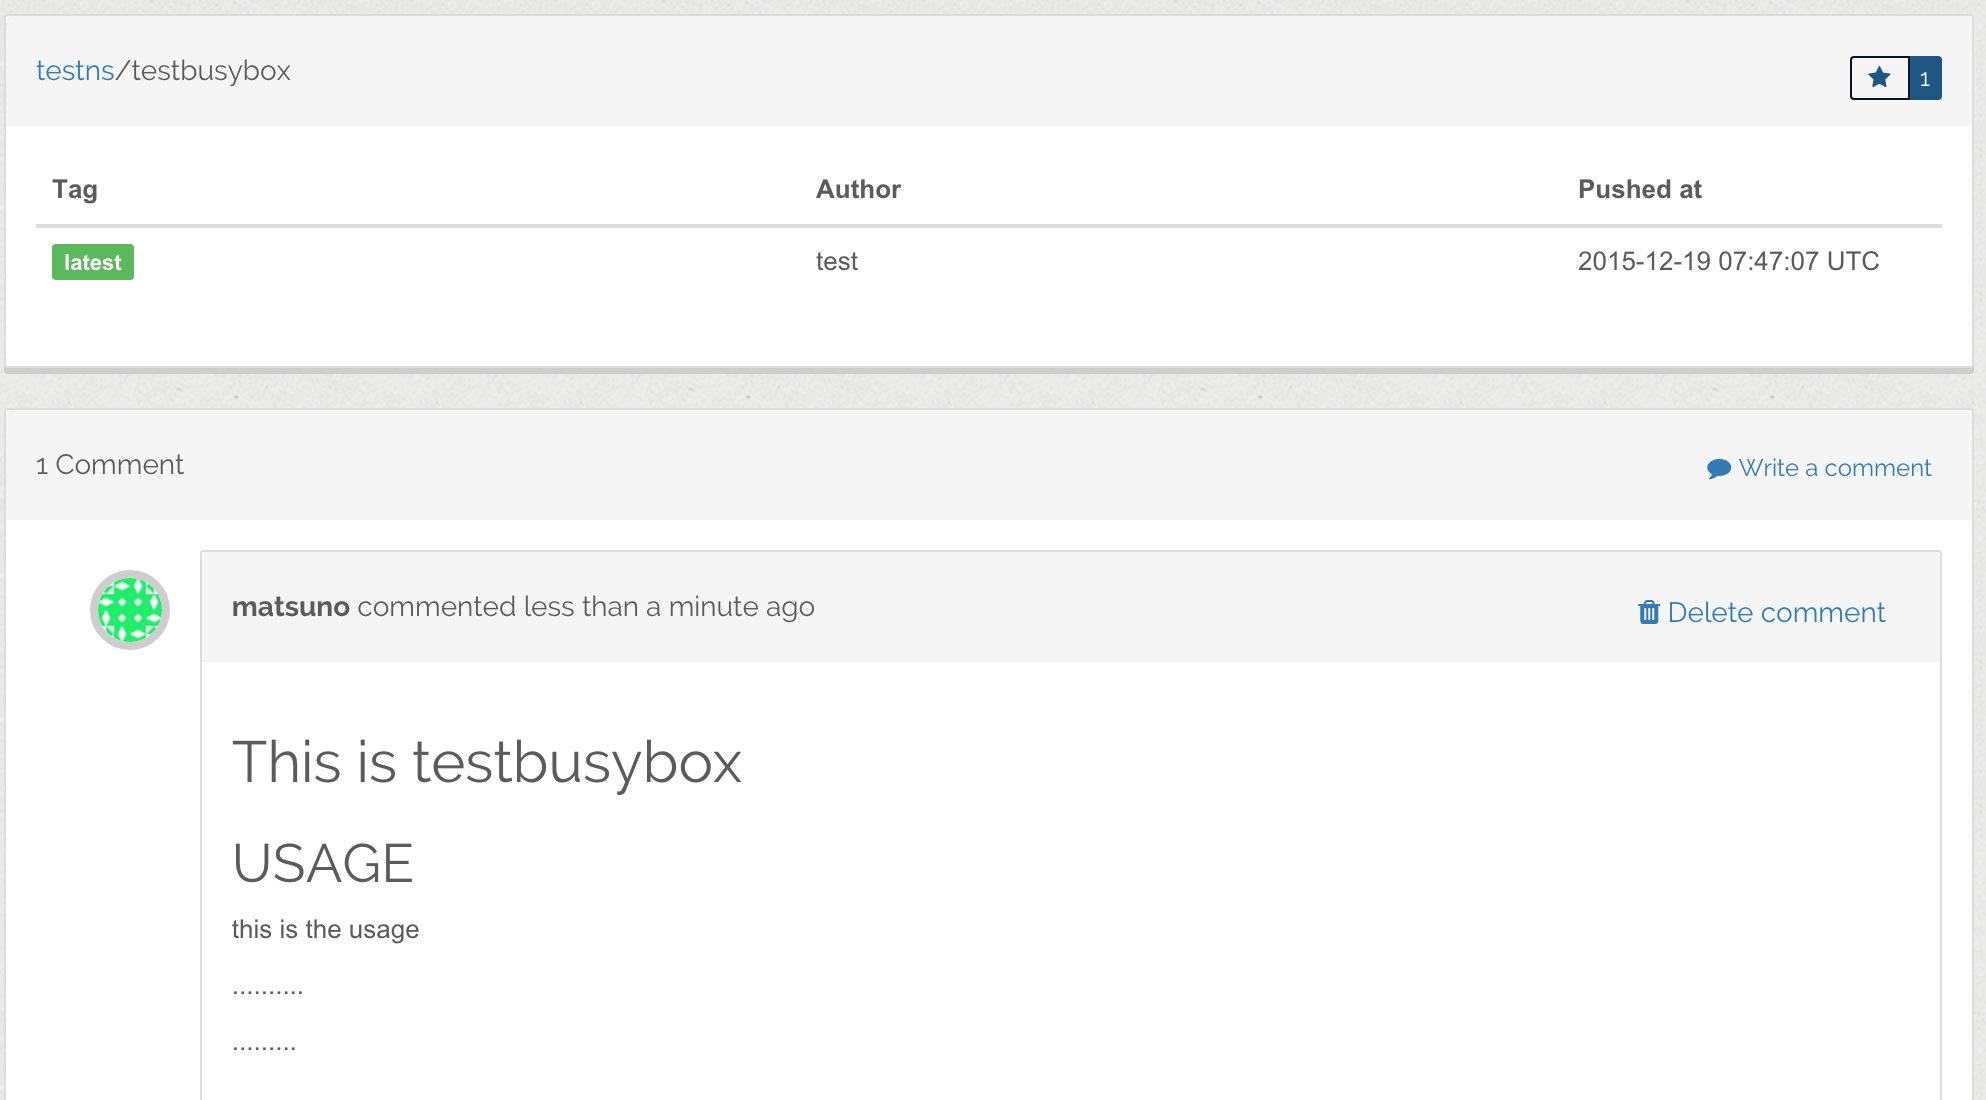
Portusに登録されているイメージには、スターを付けることができます。
Githubと同様に、スターをつけたイメージの一覧も参照できます。
さらに、それぞれのイメージにコメントを残すこともできます。
READMEを書く場所がないので、このコメントで代用するのだと思います。
Portusのいけてないところ
- とにかく遅い → 改善を期待
- バグ多い → これからに期待
- README書きたい
まぁ使ってみるのが早いです。
ということでここからはPortusのHelloWorld
さくっと試してみよう!
今回は公式でも紹介されているDockerComposeを使用した構築を行います。
しかし、このDockerComposeは本番環境として使用する目的で作られたものではありませんので、本番では使用しないでください。
あくまでお試しということで。
環境
| 項目 | バージョン |
|---|---|
| OS | OSX 10.11.2 |
| Dcoker | 1.9.1 |
| Dcoker Machine | 0.5.1 (7e8e38e) |
| Dcker Compose | 1.5.2, build 7240ff3 |
構成
docker-compose
Portusをさくっと試すにはDockerComposeが一番簡単!
ということで、DockerComposeをダウンロード
- DcokerComposeダウンロード
$ sudo sh -c "curl -L https://github.com/docker/compose/releases/download/1.5.2/docker-compose-`uname -s`-`uname -m` > /usr/local/bin/docker-compose"
- 実行権限付与
$ sudo chmod +x /usr/local/bin/docker-compose
- 確認
$ docker-compose version

docker-compose version 1.5.2, build 7240ff3
docker-py version: 1.5.0
※ DockerComposeのバージョンが1.5.1だと面倒なので、避けたい。
Docker compose 1.5.1 has an upstream bug which causes Portus to not function correctly.
If you've tried to run Portus with 1.5.1, remove the docker/registry/config.yml and docker/environment files and upgrade to the latest version of Docker compose.
Portus ダウンロード
DockerComposeなどの設定ファイルはすべてGitHubに書いてあるので、まるまるCloneして実行する。
- Git Clone
$ git clone https://github.com/SUSE/Portus.git $HOME/Portus
- セットアップ
$ $HOME/Portus/compose-setup.sh

The setup will destroy the containers used by Portus, removing also their volumes.
Are you sure to delete all the data? (Y/N) Y

......

###################
#     SUCCESS     #
###################

Make sure port 3000 and 5000 are open on host 192.168.99.100

Open http://192.168.99.100:3000 with your browser and perform the following steps:

  1. Create an admin account
  2. You will be redirected to a page where you have to register the registry. In this form:
    - Choose a custom name for the registry.
    - Enter 192.168.99.100:5000 as the hostname.
    - Do *not* check the "Use SSL" checkbox, since this setup is not using SSL.

Perform the following actions on the docker hosts that need to interact with your registry:

  - Ensure the docker daemon is started with the '--insecure-registry 192.168.99.100:5000'
  - Perform the docker login.

To authenticate against your registry using the docker cli do:

  $ docker login -u <portus username> -p <password> -e <email> 192.168.99.100:5000

To push an image to the private registry:

  $ docker pull busybox
  $ docker tag busybox 192.168.99.100:5000/<username>busybox
  $ docker push 192.168.99.100:5000/<username>busybox
※ メッセージにもあるように、このセットアップは、前回のPortusのデータをすべて削除します。
Portus 設定
- insecure registry追加
私はDockerMachineでDockerを管理しているので、以下のように設定を追加
$ docker-machine ssh dev
EXTRA_ARGS='
--label provider=virtualbox
--insecure-registry 192.168.99.100:5000

'
CACERT=/var/lib/boot2docker/ca.pem
DOCKER_HOST='-H tcp://0.0.0.0:2376'
DOCKER_STORAGE=aufs
DOCKER_TLS=auto
SERVERKEY=/var/lib/boot2docker/server-key.pem
SERVERCERT=/var/lib/boot2docker/server.pem
$ exit
$ docker-machine restart dev
PortusのDockerは停止してしまうが、この他にもやることがあるので、一旦停止したまま
- Registryの設定ファイル修正
私の環境では、そのままではちゃんと動かなかったため、設定ファイルの編集をします。
他の環境でも一度Registryの設定ファイルを確認することをお勧めします。
特にrealm、serviceがバグっていることがある
version: 0.1
loglevel: info
storage:
  filesystem:
    rootdirectory: /registry_data
  delete:
    enabled: true
http:
  addr: 0.0.0.0:5000
  debug:
    addr: 0.0.0.0:5001
auth:
  token:
    realm: http://192.168.99.100:3000/v2/token
    service: 192.168.99.100:5000
    issuer: portus.test.lan
    rootcertbundle: /registry/portus.crt
notifications:
  endpoints:
    - name: portus
      url: http://web:3000/v2/webhooks/events
      timeout: 500ms
      threshold: 5
      backoff: 1s
こんな感じに編集
- restart
$ docker-compose -f $HOME/Portus/docker-compose.yml restart
Portus 動作確認
- ユーザ作成
http://192.168.99.100:3000にアクセスすればUIが表示されます。
そこで以下の作業を行います。
- Adminユーザ作成
- Registry登録
- 一般ユーザ(test)作成
- チーム(testteam)作成
- testをtestteamに参加させる
- testteamにNamespace(testns)作成
- Registry Push
docker login -u test -p <password> -e <mail> 192.168.99.100:5000

WARNING: login credentials saved in $HOME/.docker/config.json
Login Succeeded
ログインが成功すると、$HOME/.docker/config.jsonに認証情報が保存されます。
{
  auths: {
    192.168.99.100:5000: {
      auth: <JWT Token>,
      email: <mail>
    }
  }
}
  $ docker pull busybox
  $ docker tag busybox 192.168.99.100:5000/testns/busybox
  $ docker push 192.168.99.100:5000/testns/busybox
これで完了!!
最後に
まだ安定した感じではありませんが、使えなくはありません!
PrivateDockerRegistryをUIなしで消耗している方!
この機会にぜひ利用してみてください!
※ この記事について何か間違いなどございましたら、ご指摘いただければと思います。


