前々回の記事:「JavaScript用物理エンジン、Matter.jsをとりあえず動かす」
前回の記事:「Renderで生成されるcanvasにidをつけたい」
の続きです。
Matter.jsを動かすところまでできて、canvasにidをつけて、さて何をするかというと、canvas上を跳ね回る図形を生成しまくってカラフルな画面を作ってみようと思います。
まずは手短にコードから。
index.html
<html lang="ja">
<head>
    <meta charset="UTF-8">
    <meta name="viewport" content="width=device-width, initial-scale=1.0">
    <meta http-equiv="X-UA-Compatible" content="ie=edge">
    <script src="https://ajax.googleapis.com/ajax/libs/jquery/3.2.1/jquery.min.js"></script>
    <link rel="stylesheet" href="./dist/css/style.css">
    <title>さんぷる</title>
</head>
<body>
    <canvas id="action"></canvas>
    <!-- matter.js関連のスクリプトはここに書く -->
    <script src="https://cdnjs.cloudflare.com/ajax/libs/matter-js/0.10.0/matter.min.js"></script>
    <script src="./dist/js/matterJs.js"></script>

    <div id="actionButtons">
        <button id="action-button">create block</button>
    </div>
</body>
</html>
style.css(もとはsassで書いてます)
body {
  font-family: Arial, Helvetica, sans-serif;
  font-size: 16px;
}

.clear {
  clear: both;
}

body {
  font-family: Arial, Helvetica, sans-serif;
  margin: 0px;
  padding: 0px;
  background-color: #282A2D;
  font-size: 12px;
}

button {
  cursor: pointer;
  border: none;
  border-radius: 10px;
}

canvas#action {
  position: absolute;
  background-color: #F5F3F4;
  top: 56;
  left: 0;
  width: 650px;
  height: 400px;
}

# actionButtons {
  width: 100%;
  height: 40px;
}

# actionButtons button {
  background-color: #80CBC4;
  color: white;
  width: auto;
  height: 30px;
  margin-top: 8px;
  margin-right: 5px;
  border-radius: 5px;
  border: none;
}

# actionButtons button:hover {
  background-color: #18829F;
}

# actionButtons button:active {
  background-color: #115e73;
}

# actionButtons button img {
  width: 20px;
  height: 20px;
}
matterJs.js
// 使用モジュール
var Engine = Matter.Engine,
    Render = Matter.Render,
    World = Matter.World,
    Bodies = Matter.Bodies,
    Composite = Matter.Composite,
    Body = Matter.Body;

// エンジン生成
var engine = Engine.create(),
        world = engine.world;

// レンダリング対象のキャンバスを取得
var canvas = document.getElementById('action');

// canvasのサイズ
var winWidth = 650;
var winHeight = 400;

// レンダリング設定
var render = Render.create({
    canvas: canvas,
    engine: engine,
    options: {
        width: winWidth,
        height: winHeight,
        background: 'FFF',
        wireframeBackground: '#FFF',
        wireframes: false,
        showAngleIndicator: false
    }
});


// 壁
var ground = Bodies.rectangle(winWidth/2, winHeight+5, winWidth, 10, { isStatic: true });
var wallL = Bodies.rectangle(-10, winHeight/2, 10, winHeight+20, { isStatic: true });
var wallR = Bodies.rectangle(winWidth+10, winHeight/2, 10, winHeight+20, { isStatic: true });
var ceiling = Bodies.rectangle(winWidth/2, -10, winWidth, 10, {isStatic: true});
World.add(world, [ground, wallL, wallR, ceiling]);

// エンジンの実行
Engine.run(engine);
// 描画実行
Render.run(render);

// オブジェクトの削除
var bodyArray = [];
function remove(body){
    bodyArray.push(body);
    Composite.remove(world, bodyArray[0]); // 一番古いのから削除
    bodyArray.shift();
}

// ボタンを押したときに図形を増やす
$(document).on('click', '#action-button',function() {
    $('#action').action('bound');
});

// プラグイン
(function($){
    var methods = {
        bound: function(){
            // 図形生成
            var obj = Bodies.rectangle(80, winHeight, 30, 30,{
                restitution: 1.2, // バウンドの威力
            });

            // 上に飛び出す
            Body.applyForce( obj, {x: obj.position.x, y: obj.position.y}, {x: 0.02, y: -0.05});
            World.add(engine.world, [obj]);

            // 5秒で消す
            setInterval(()=>{
                remove(obj);
            },5000);
            return this;
        },
    };
    $.fn.action = function(method){
        if ( methods[method] ) {
            return methods[ method ].apply( this, Array.prototype.slice.call( arguments, 1 ));
          } else if ( typeof method === 'object' || ! method ) {
            return methods.init.apply( this, arguments );
          } else {
            $.error( 'Method ' +  method + ' does not exist on jQuery.tooltip' );
          }
    };
})(jQuery);
解説していきます。
index.html
cssやmatterJs.jsのファイルのパスは適宜変更してください。
それ以外はURLを貼るだけでOKです。
完成するとこんな画面になります。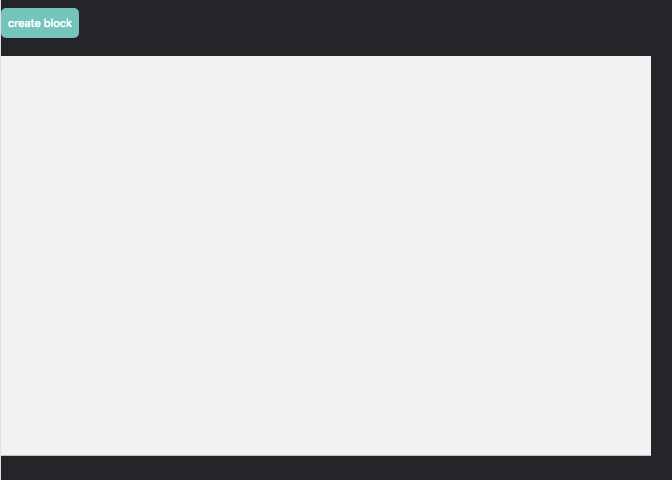
そして上の「create block」ボタンを連打すると…
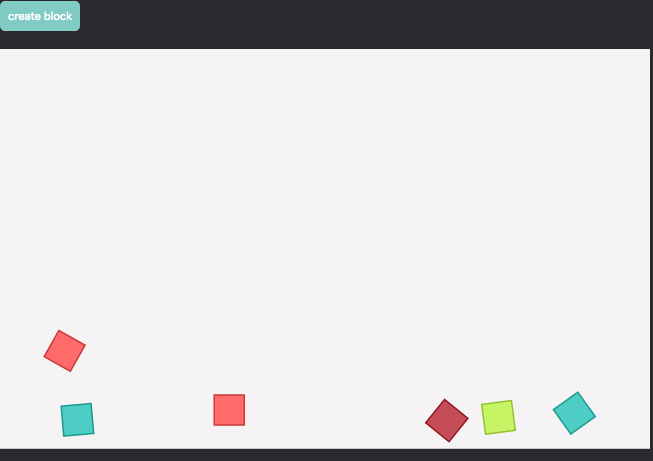
こんなふうにカラフルな図形がバウンドしてcanvas内を跳ね回ります。図形のカラーはmatter.jsデフォルトのものっぽいです。何も指定しないとこの状態になります。他に、お好みでテクスチャを貼ったりすることもできます。
matterJs.js
図形の描画までは前回の記事で書いたので、解説するのはここくらいです。
Body.applyForce( obj,
    {x: obj.position.x, y: obj.position.y}, // オブジェクトの初期位置
    {x: 0.02, y: -0.05} // 描画時に加える力の方向
);
World.add(engine.world, [obj]); // オブジェクトを追加
これを加えると斜め右上に飛んでいきます。
上記に記述した3つのファイルを作成して動かしてみるのが一番手っ取り早いと思います。
コメントをたくさん書いたのであんまり解説することがないです。
matter.jsを使うとお手軽に物理演算を使った描画ができます。PCのブラウザでもスマホでもサクサク動いて記述もシンプルなので、ちょっと変わったUIを作るのに使えると思います。
物理演算というとゲームがまっさきに思い浮かぶと思いますが、これを使ったwebサービスなんかも考えると楽しそうです。(実際matter.jsを使ったサービスが作りかけなのですが、リリースまで持っていけるか謎なので、ひとまず手順だけ残しておきます)