Elasticsearchのプラグインを自作しようと思い色々調べたので、そのメモを残します。
環境
まず使うものです。開発言語はJavaです。Elasticsearchもjavaで作成されているので。ビルドツールはgradleがメインぽいのですが、私がgradleに慣れてなくて、今回はmavenにします(ここは妥協したところ)
- java8
- maven
- elasticsearch6系
参考
今回はここのコードを参考にしました。
まるっきり同じだとつまらないので、少しだけ変えて見ました。
実装
まずはpluginとして最初に呼ばれるクラスです。
package org.elasticsearch.plugin.example;

import org.elasticsearch.cluster.metadata.IndexNameExpressionResolver;
import org.elasticsearch.cluster.node.DiscoveryNodes;
import org.elasticsearch.common.settings.ClusterSettings;
import org.elasticsearch.common.settings.IndexScopedSettings;
import org.elasticsearch.common.settings.Settings;
import org.elasticsearch.common.settings.SettingsFilter;
import org.elasticsearch.plugins.ActionPlugin;
import org.elasticsearch.plugins.Plugin;
import org.elasticsearch.rest.RestController;
import org.elasticsearch.rest.RestHandler;

import java.util.List;
import java.util.function.Supplier;

import static java.util.Collections.singletonList;

public class ExamplePlugin extends Plugin implements ActionPlugin {
    @Override
    public List<RestHandler> getRestHandlers(final Settings settings,
                                             final RestController restController,
                                             final ClusterSettings clusterSettings,
                                             final IndexScopedSettings indexScopedSettings,
                                             final SettingsFilter settingsFilter,
                                             final IndexNameExpressionResolver indexNameExpressionResolver,
                                             final Supplier<DiscoveryNodes> nodesInCluster) {

        return singletonList(new ExampleDogAction(settings, restController));
    }
}
このpluginとして最初に呼ばれるクラスはsrc/main/resources/plugin-descriptor.propertiesに定義します。
version=${project.version}
description=${project.description}
name=example-plugin
classname=org.elasticsearch.plugin.example.ExamplePlugin
java.version=1.8
elasticsearch.version=${elasticsearch.version}
で、このExamplePluginから実際呼ばれて処理をするクラスはExampleDogActionクラスになります。
package org.elasticsearch.plugin.example;

import org.elasticsearch.client.node.NodeClient;
import org.elasticsearch.common.Table;
import org.elasticsearch.common.settings.Settings;
import org.elasticsearch.rest.BytesRestResponse;
import org.elasticsearch.rest.RestController;
import org.elasticsearch.rest.RestRequest;
import org.elasticsearch.rest.action.cat.AbstractCatAction;
import org.elasticsearch.rest.action.cat.RestTable;

import static org.elasticsearch.rest.RestRequest.Method.GET;
import static org.elasticsearch.rest.RestRequest.Method.POST;

/**
 * Example of adding a cat action with a plugin.
 */
public class ExampleDogAction extends AbstractCatAction {

    ExampleDogAction(final Settings settings, final RestController controller) {
        super(settings);
        controller.registerHandler(GET, "/_cat/example", this);
        controller.registerHandler(POST, "/_cat/example", this);
    }

    @Override
    public String getName() {
        return "rest_handler_dog_example";
    }

    @Override
    protected RestChannelConsumer doCatRequest(final RestRequest request, final NodeClient client) {
        final String message = request.param("message", "Hello from Dogt Example action");
Table table = getTableWithHeader(request);
        table.startRow();
        table.addCell(message);
        table.endRow();
        return channel -> {
            try {
                channel.sendResponse(RestTable.buildResponse(table, channel));
            } catch (final Exception e) {
                channel.sendResponse(new BytesRestResponse(channel, e));
            }
        };
    }

    @Override
    protected void documentation(StringBuilder sb) {
        sb.append(documentation());
    }

    public static String documentation() {
        return "/_cat/example\n";
    }

    @Override
    protected Table getTableWithHeader(RestRequest request) {
        final Table table = new Table();
        table.startHeaders();
        table.addCell("test", "desc:test");
        table.endHeaders();
        return table;
    }
}
実装は以上です。このpluginはコードに書いてある通りcat apiの処理を継承してます。
実際これをzipで固めてdockerやローカル、どちらでも良いのでElasticsearchを起動してこのpluginをinstallします。今回はdockerで起動したElasticsearchにこのpluginをinstallします。
FROM docker.elastic.co/elasticsearch/elasticsearch-oss:6.5.0

RUN elasticsearch-plugin install analysis-kuromoji
RUN elasticsearch-plugin install analysis-icu

ADD elasticsearch-example-plugin-6.5.0.1.zip /usr/share/elasticsearch/elasticsearch-example-plugin-6.5.0.zip
RUN /usr/share/elasticsearch/bin/elasticsearch-plugin install file:///usr/share/elasticsearch/elasticsearch-example-plugin-6.5.0.zip

COPY --chown=elasticsearch:elasticsearch elasticsearch.yml /usr/share/elasticsearch/config/elasticsearch.yml
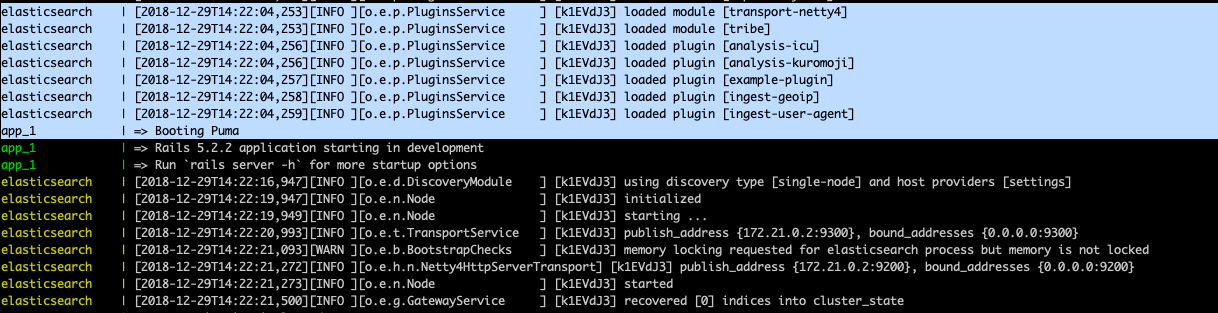
で、これでElasticsearchを起動する。そして起動ログの中で以下のように「loaded plugin [example-plugin]」 と表示されたら、無事install出来たことになります。
試しにapiを叩いて見ましょう。
$ curl -XGET 'localhost:9200/_cat/example'
Hello from Dogt Example action
以上のようにExampleDogActionのdoCatRequestメソッドの中で定義した通りの内容がコンソールに出力されます。
まずは、自作プラグインの第一歩ということでここまでにします。次回はもう一つ進化したpluginを作成して手順を書きたいと思います。