はじめに
Cognitoの開発者ガイドを見ていると、Amazon Verified Permissions(AVP)を使った認可の仕組みの記事がありました。
ちょっと便利そうなので検証してみます。
Amazon Verified Permissionsって?
概要はそのまま転記します。
Amazon Verified Permissions は、証明可能な正しい Cedar ポリシー言語を使用するフルマネージド型の認可サービスであるため、より安全なアプリケーションを構築できます。Verified Permissions を使用すると、開発者は 認可を外部化し、ポリシーのマネジメントを一元化することで、アプリケーションを迅速に構築できます。
Cedarで「誰が」「何を」「どのリソースに」の認可
AVPはCedar(シーダー)言語を使った、「誰が」「何を」「どのリソースに」を基本に認可を行います。
なお、Cedar言語は、Amazonが開発したポリシー記述専用の言語のようです。
以下みたいな直観的な書き方で、認可の制御を行うことができ、これをポリシーと呼びます。
permit(
  principal is MyApp::User, // ユーザーは(誰が)
  action == MyApp::Action::"view", // 閲覧出来る(何を)
  resource is MyApp::Photo // 写真を(どのリソースに)
)
when {
  resource.owner == principal // リソースのオーナーが自身の場合
};
また、Cedar内のMyApp::Userなどの記載は下記スキーマで定義しておきます。
{
  "MyApp": {
    "entityTypes": {
      "User": {},
      "Photo": {
        "shape": {
          "type": "Record",
          "attributes": {
            "owner": { "type": "Entity", "name": "User" }
          }
        }
      }
    },
    "actions": {
      "view": {},
      "upload": {},
      "delete": {}
    }
  }
}
Cognito IDプールを使った認可との違い
「認可」と言えばCognitoのIDプールですが、IDプールでの認可はIAMポリシーで表現できるレベルの認可となり、AWSリソースへの認可が基本となってきます。
その一方で、AVPはAWSリソースよりは、ビジネスロジック寄りな認可が可能です。
やってみよう!
API Gateway と ID プロバイダーによるセットアップ
今回はシンプルなCognitoとAPI Gatewayとの統合で試してみます。
Cedarやを意識することなく、簡単にセットアップできるみたいです。

・・・新品です?
API Gatewayの指定
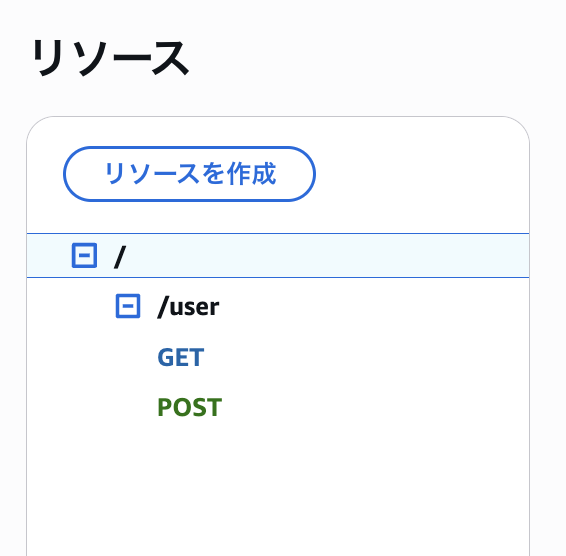
案内に従って、API Gatewayを設定します。

今回は以下のようなAPIのエンドポイントとし、Operatorの属性のメンバーはユーザ情報を取得はできるけど、登録はできない。みたいなケースを想定して作ってみます。
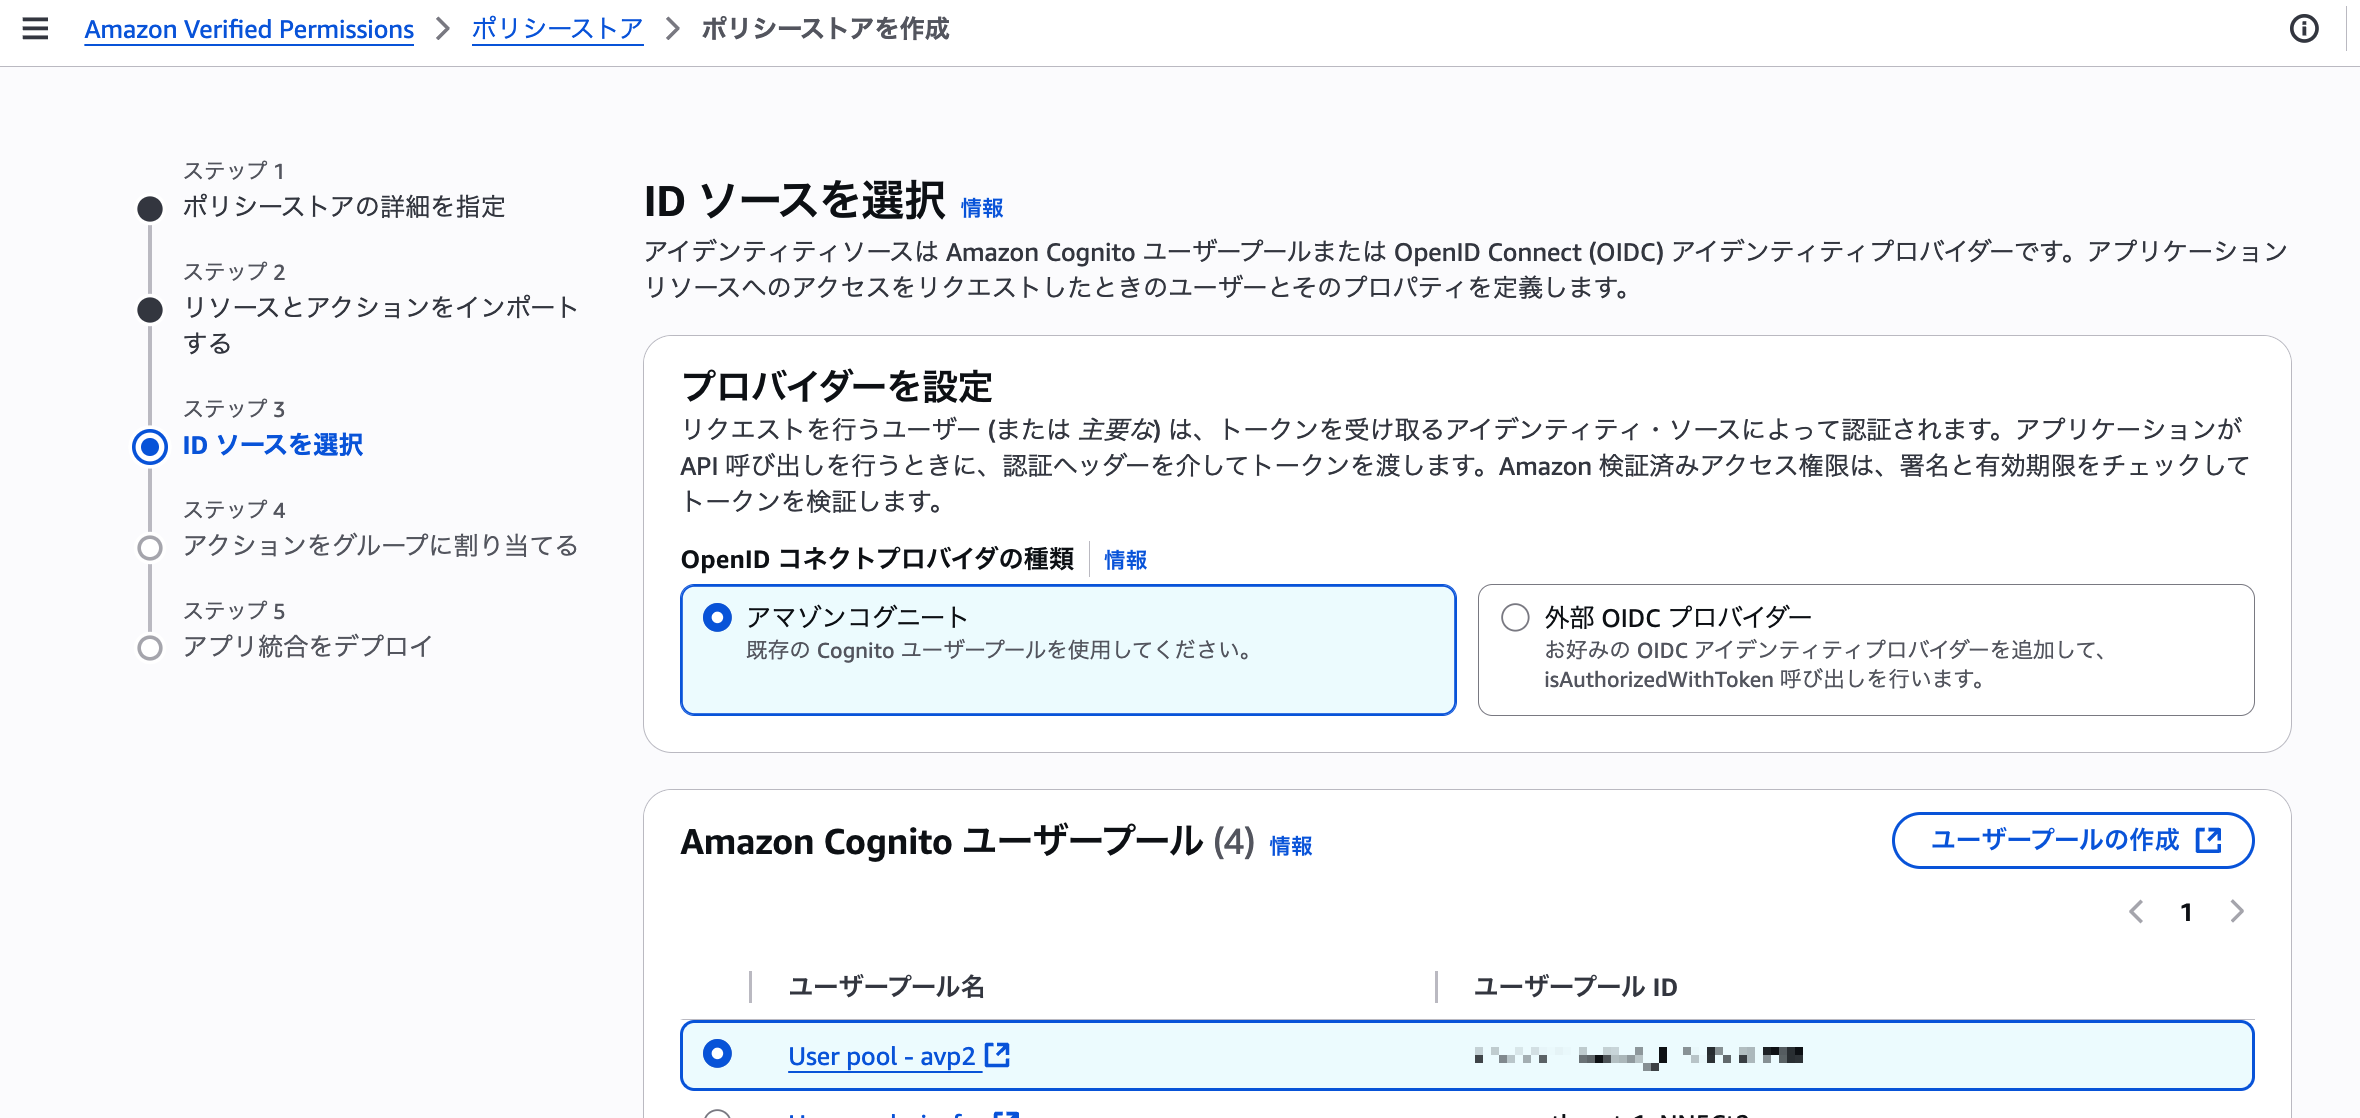
IDソースを指定
認証元を指定します。
今回は前述の通り、Cognitoで認証します。
また、AVPで利用するトークンを選択できます。
おすすめはアクセストークンとなっていますが、IDトークンのカスタム属性による認可もしたいので、今回はIDトークンを選びました。
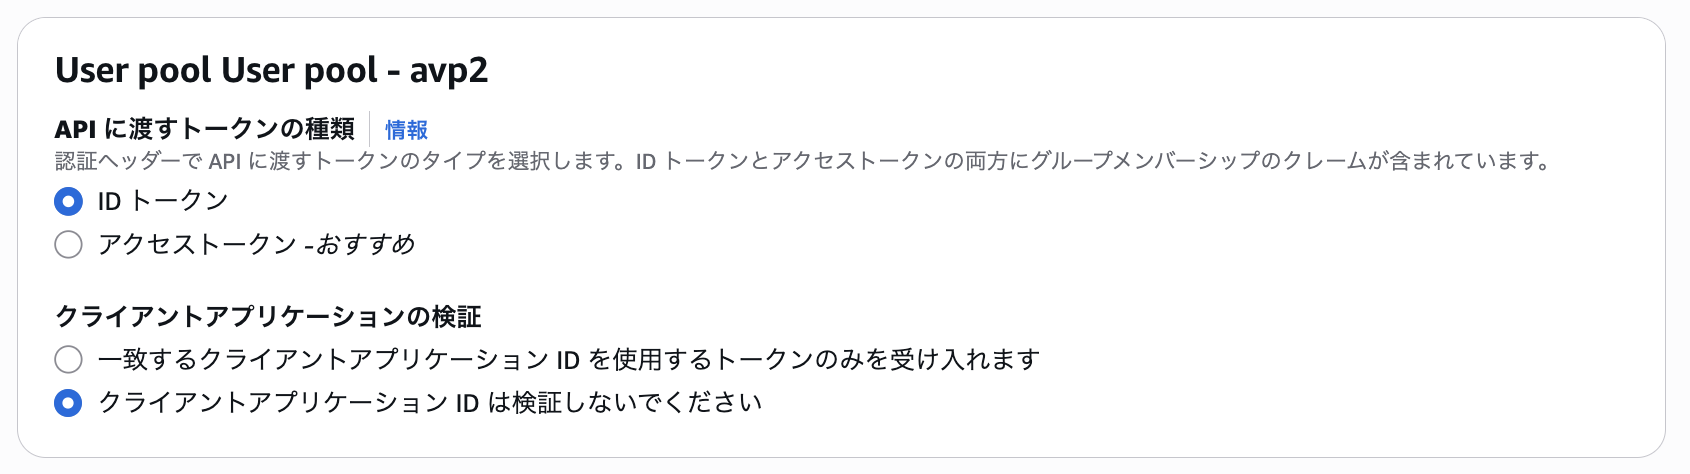
なお、今回のセットアップ手順はCognitoユーザグループごとの認可設定となりますが、グループ情報はID・アクセストークンどちらにも含まれています。

アクションをグループに割り当て
次に「誰に」「何を」を設定していきます。
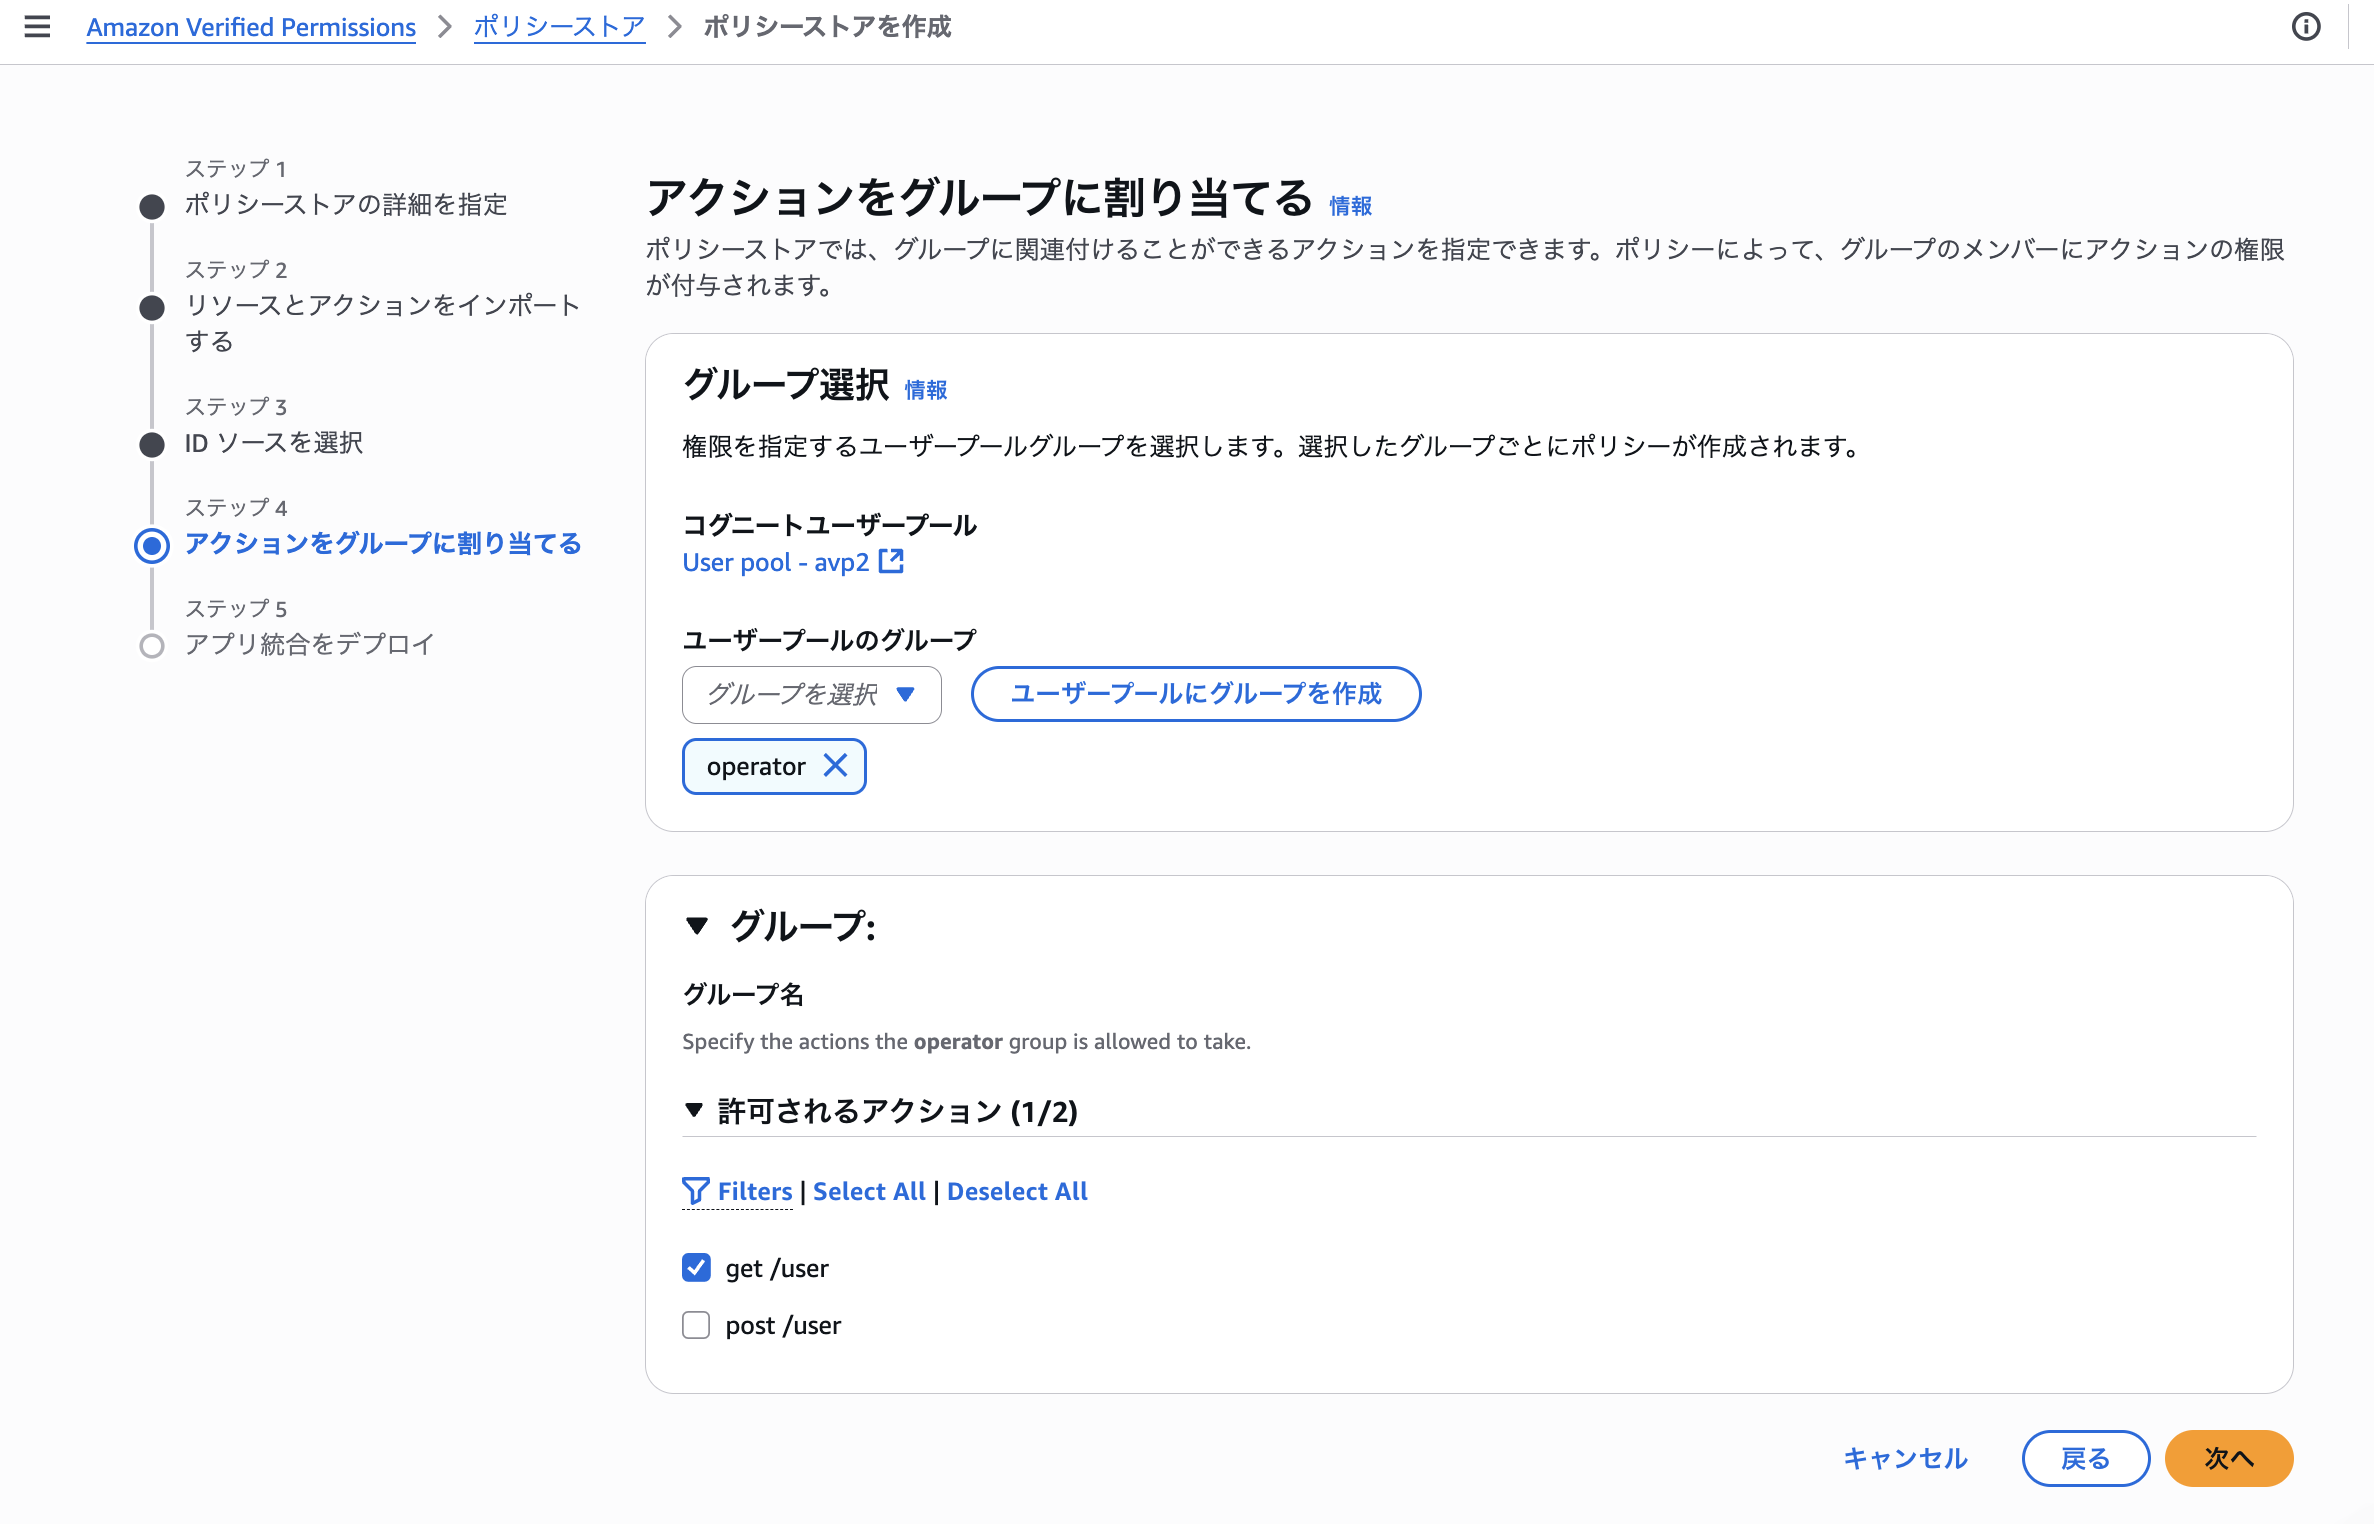
今回は、operatorのグループはget/userのみ許可するという権限にしました。
デプロイ
最後にデプロイします。
ここの説明見ると分かりますが、この仕組みは裏で認可をしてくれるわけではなく、Lambdaオーソライザの作成を代行してくれるみたいな仕組みです。
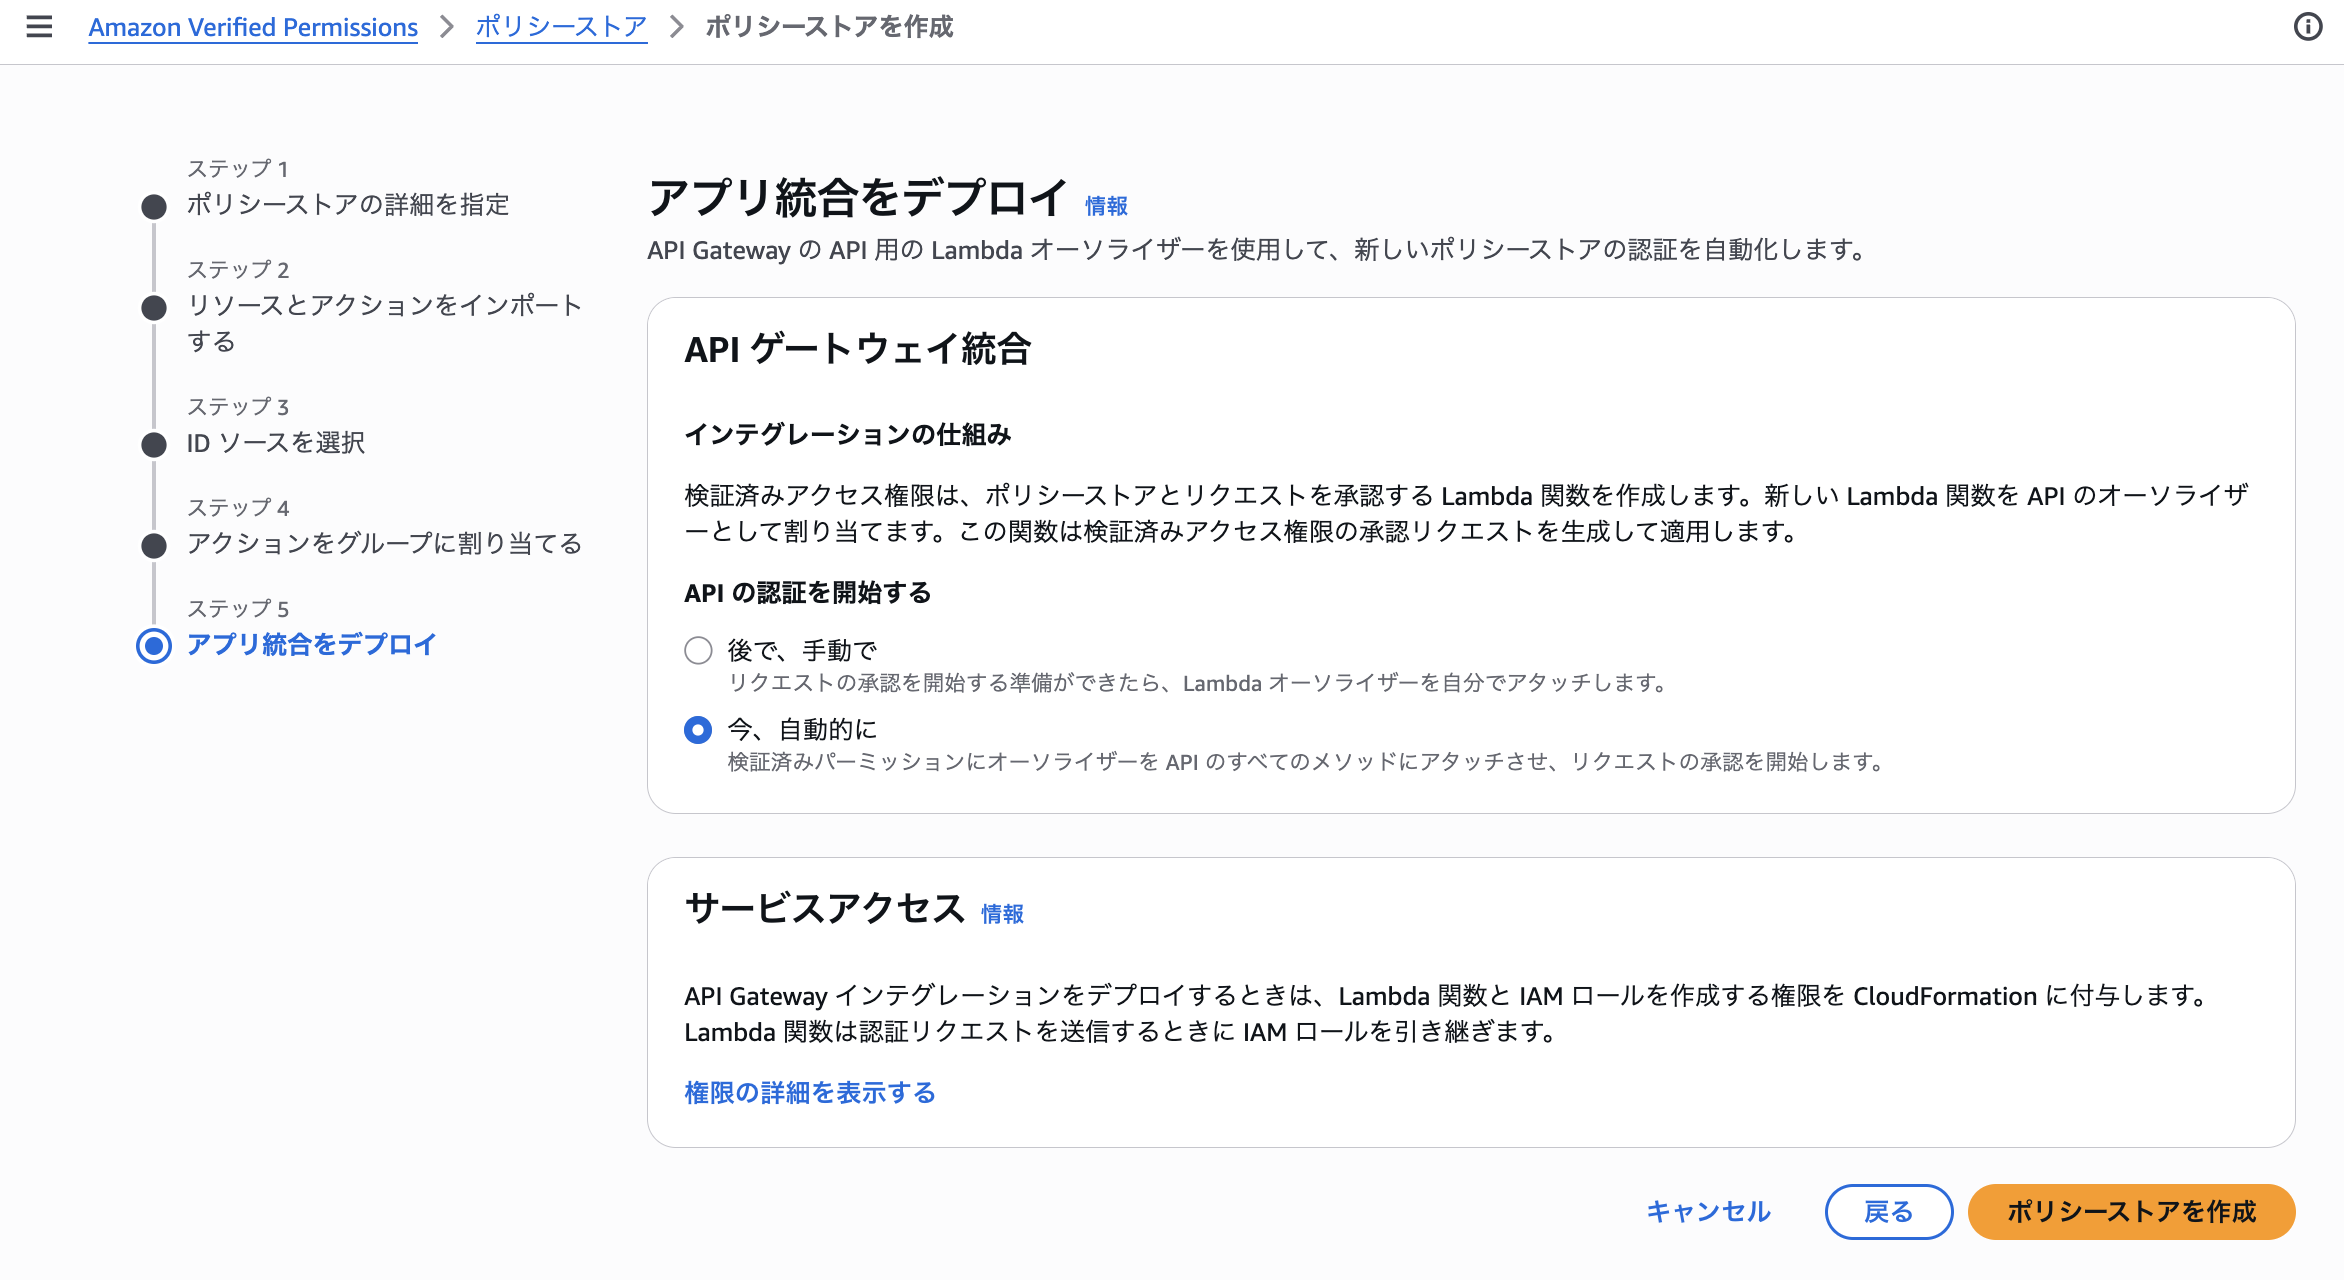
デプロイ開始後は以下の表示の通り、進捗を見ることができますが、最後の2つはいつまで待っても、進行中のままです。
最大1時間かかるとか記載もあるのですが、体感数分レベルです。
(AVPは全体的にUIが少し変ですね。)

スキーマ
デプロイ後に、各種作成した内容を確認してみます。
まずはスキーマ。
{
    "VerifiedPermissions": {
        "entityTypes": {
            "User": {
                "shape": {
                    "type": "Record",
                    "attributes": {}
                },
                "memberOfTypes": [
                    "UserGroup"
                ]
            },
            "UserGroup": {
                "shape": {
                    "attributes": {},
                    "type": "Record"
                }
            },
            "Application": {
                "shape": {
                    "attributes": {},
                    "type": "Record"
                }
            }
        },
        "actions": {
            "get /user": {
                "appliesTo": {
                    "context": {
                        "type": "Record",
                        "attributes": {}
                    },
                    "principalTypes": [
                        "User"
                    ],
                    "resourceTypes": [
                        "Application"
                    ]
                }
            },
            "post /user": {
                "appliesTo": {
                    "context": {
                        "type": "Record",
                        "attributes": {}
                    },
                    "principalTypes": [
                        "User"
                    ],
                    "resourceTypes": [
                        "Application"
                    ]
                }
            }
        }
    }
}
ポリシー
次はポリシー。
permit (
    principal in
        VerifiedPermissions::UserGroup::"ap-northeast-1_XXXXXXXX|operator",
    action in [VerifiedPermissions::Action::"get /user"],
    resource
);
Lamdbaオーソライザ
最後にAPI Gatewayを見てみると、AVPAuthorizerというオーソライザができてました。
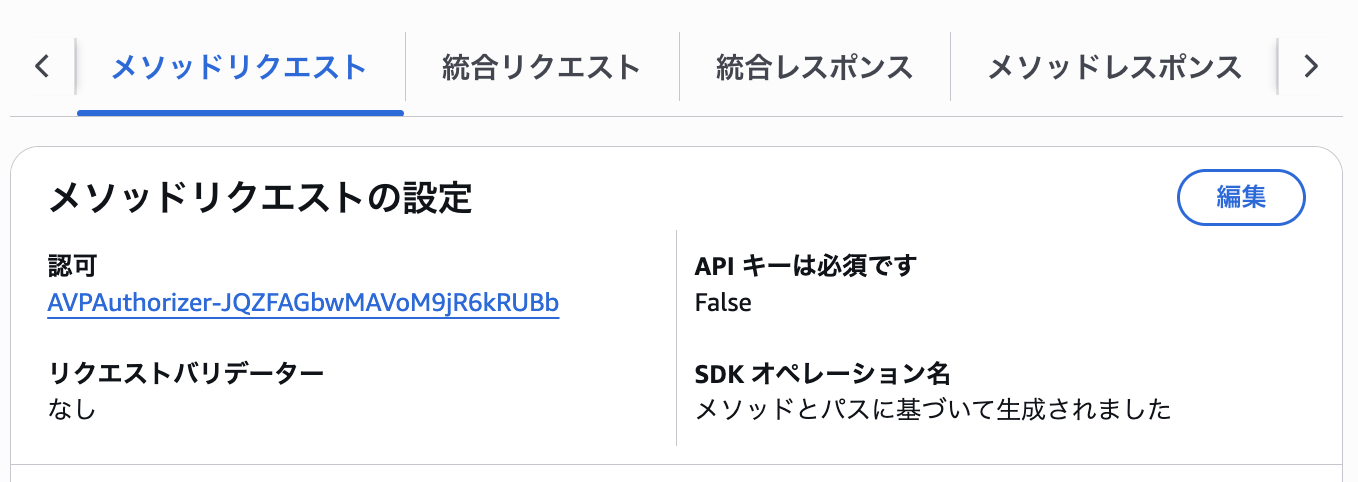
AuthorizationにIDトークンを入れると良いみたい。

なお、オーソライザは以下のようなソースでした。(Node.js 20.x)
const { VerifiedPermissions } = require('@aws-sdk/client-verifiedpermissions');
const policyStoreId = process.env.POLICY_STORE_ID;
const namespace = process.env.NAMESPACE;
const tokenType = process.env.TOKEN_TYPE;
const resourceType = `${namespace}::Application`;
const resourceId = namespace;
const actionType = `${namespace}::Action`;

const verifiedpermissions = !!process.env.ENDPOINT
  ? new VerifiedPermissions({
    endpoint: `https://${process.env.ENDPOINT}ford.${process.env.AWS_REGION}.amazonaws.com`,
  })
  : new VerifiedPermissions();

function getContextMap(event) {
  const hasPathParameters = Object.keys(event.pathParameters).length > 0;
  const hasQueryString = Object.keys(event.queryStringParameters).length > 0;
  if (!hasPathParameters && !hasQueryString) {
    return undefined;
  }
  const pathParametersObj = !hasPathParameters ? {} : {
    pathParameters: {
      // transform regular map into smithy format
      record: Object.keys(event.pathParameters).reduce((acc, pathParamKey) => {
        return {
          ...acc,
          [pathParamKey]: {
            string: event.pathParameters[pathParamKey]
          }
        }
      }, {}),
    }
  };
  const queryStringObj = !hasQueryString ? {} : {
    queryStringParameters: {
      // transform regular map into smithy format
      record: Object.keys(event.queryStringParameters).reduce((acc, queryParamKey) => {
        return {
          ...acc,
          [queryParamKey]: {
            string: event.queryStringParameters[queryParamKey]
          }
        }
      }, {}),
    }
  };
  return {
    contextMap: {
      ...queryStringObj,
      ...pathParametersObj,
    }
  };
}

async function handler(event, context) {
  // https://docs.aws.amazon.com/apigateway/latest/developerguide/api-gateway-known-issues.html
  // > Header names and query parameters are processed in a case-sensitive way.
  // https://www.rfc-editor.org/rfc/rfc7540#section-8.1.2
  // > header field names MUST be converted to lowercase prior to their encoding in HTTP/2
  // curl defaults to HTTP/2
  let bearerToken =
    event.headers?.Authorization || event.headers?.authorization;
  if (bearerToken?.toLowerCase().startsWith('bearer ')) {
    // per https://www.rfc-editor.org/rfc/rfc6750#section-2.1 "Authorization" header should contain:
    //  "Bearer" 1*SP b64token
    // however, match behavior of COGNITO_USER_POOLS authorizer allowing "Bearer" to be optional
    bearerToken = bearerToken.split(' ')[1];
  }
  try {
    const parsedToken = JSON.parse(Buffer.from(bearerToken.split('.')[1], 'base64').toString());
    const actionId = `${event.requestContext.httpMethod.toLowerCase()} ${event.requestContext.resourcePath}`;

    const input = {
      [tokenType]: bearerToken,
      policyStoreId: policyStoreId,
      action: {
        actionType: actionType,
        actionId: actionId,
      },
      resource: {
        entityType: resourceType,
        entityId: resourceId
      },
      context: getContextMap(event),
    };

    const authResponse = await verifiedpermissions.isAuthorizedWithToken(input);
    console.log('Decision from AVP:', authResponse.decision);
    let principalId = `${parsedToken.iss.split('/')[3]}|${parsedToken.sub}`;
    if (authResponse.principal) {
      const principalEidObj = authResponse.principal;
      principalId = `${principalEidObj.entityType}::"${principalEidObj.entityId}"`;
    }

    return {
      principalId,
      policyDocument: {
        Version: '2012-10-17',
        Statement: [
          {
            Action: 'execute-api:Invoke',
            Effect: authResponse.decision.toUpperCase() === 'ALLOW' ? 'Allow' : 'Deny',
            Resource: event.methodArn
          }
        ]
      },
      context: {
        actionId,
      }
    }
  } catch (e) {
    console.log('Error: ', e);
    return {
      principalId: '',
      policyDocument: {
        Version: '2012-10-17',
        Statement: [
          {
            Action: 'execute-api:Invoke',
            Effect: 'Deny',
            Resource: event.methodArn
          }
        ]
      },
      context: {}
    }
  }
}

module.exports = {
  handler,
};
試してみる。
早速試してみます。
Authorizationヘッダなし
Authorizationヘッダなしでリクエストしてみます。
% curl --request GET 'https://xxxxxx.execute-api.ap-northeast-1.amazonaws.com/dev/user' \
--header 'Content-Type: application/json' \

{"message":"Unauthorized"}
Unauthorizedでした。
そもそもLambdaオーソライザの前で弾かれていますね。
不正なAuthorizationヘッダ
適当なAuthorizationヘッダを付与してみます。
% ID_TOKEN="dummy"
curl --request GET 'https://xxxxxx.execute-api.ap-northeast-1.amazonaws.com/dev/user' \
--header 'Content-Type: application/json' \
--header "Authorization: $ID_TOKEN"

{"Message":"User is not authorized to access this resource with an explicit deny"}%
User is not authorized to access this resource with an explicit denyでした。
Lambdaオーソライザで拒否されてますね。
正しいAuthorizationヘッダ
ユーザグループoparatorに属したユーザでログインし、取得したIDトークンでリクエストしてみます。
% ID_TOKEN=$(aws cognito-idp initiate-auth \
  --client-id 111112222223333344444 \
  --auth-flow USER_PASSWORD_AUTH \
  --auth-parameters USERNAME=user1,PASSWORD=password \
  | jq -r '.AuthenticationResult.IdToken')

curl --request GET 'https://xxxxx.execute-api.ap-northeast-1.amazonaws.com/dev/user' \
--header 'Content-Type: application/json' \
--header "Authorization: $ID_TOKEN"

{
  "id": 1,
  "type": "dog",
  "price": 99.99
}%
きちんと応答が返ってきました!
次にcurl --request GETのところをPOSTにしてみます。
curl --request POST 'https://xxxxx.execute-api.ap-northeast-1.amazonaws.com/dev/user' \
--header 'Content-Type: application/json' \
--header "Authorization: $ID_TOKEN"

{"Message":"User is not authorized to access this resource with an explicit deny
正しく拒否されていそうです!
まとめ
今回はAmazon Verified Permissionsを使った認可でした。
SDKが提供されているので、いろんな場面でこの認可が活用できそうです!
今の所、AWSリソースに関する認可以外はAVP使っても良さそうです!
誰かのお役にたてると嬉しいです〜!