Spring Bootを利用したプロジェクトの立ち上げ
開発環境が整った後のプロジェクトの立ち上げについての記事を書くよ。
事前準備
- eclipseをダウンロードしておく
- PostgreSQLをインストールして、利用可能な状態にしておく
以上が整っていれば、プロジェクトを立ち上げられるよ。
いざ、立ち上げへ
まずはEclipseを立ち上げて、ファイル -> 新規 -> プロジェクトをクリック。

そして、Spring Boot -> Springスターター・プロジェクトを選択し次へをクリック。

ここで名前を設定(今回はqiita_testとした)し、その他詳細設定をするよ。
今回はこのまま次へを選択。
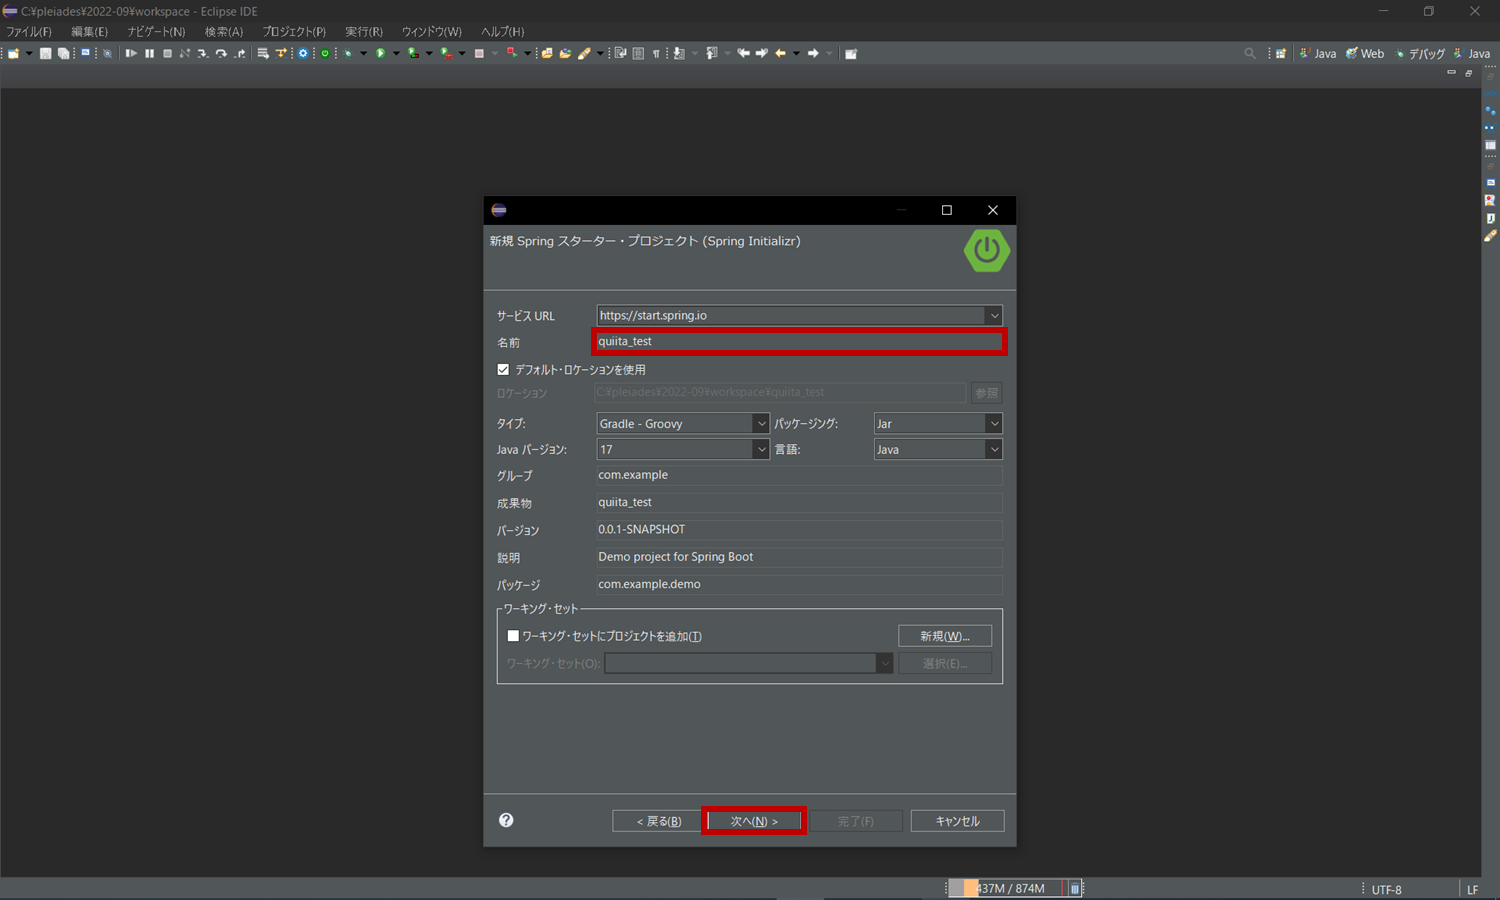
今回は赤枠のようなツールを利用して完了をクリック。

以上でSpringBootでの各種設定は完了だよ。
プロジェクトの作成が完了したら、以下のようにプロジェクトが作成できているはずだよ。

MVCモデルを使って、とりあえず画面だけ出るようにする
とりあえず画面を出すには、application.properties、Controllerクラスとhtmlファイルの作成をするよ。
application.propertiesの設定
以下のようにマスキングした部分に必要な情報を入力してね。
# DB接続情報
spring.datasource.driver-class-name=org.postgresql.Driver
spring.datasource.url=jdbc:postgresql:******
spring.datasource.username=******
spring.datasource.password=******
# SQL実行出力
spring.jpa.show-sql=true
# schema.sqlとdata.sqlの自動実行
spring.sql.init.mode=always
Controllerの作成
src/main/java -> com.example.demo配下にControllerパッケージを作成するよ。
まずはcom.example.demoまでいって、右クリックし、新規 -> パッケージを選択し、

名前をControllerとして作成。

パッケージを作成したら、作成したパッケージを右クリックして、新規 -> クラスを選択し、

名前をHelloControllerとし、完了をクリック。

作成したHelloController.javaを以下のように記載してね。
package com.example.demo.Controller;

import org.springframework.stereotype.Controller;
import org.springframework.web.bind.annotation.RequestMapping;
import org.springframework.web.bind.annotation.RequestMethod;

@Controller
public class HelloController {
	@RequestMapping(method = RequestMethod.GET)
	public String index() {
		return "hello";
	}
}
htmlファイルの作成
次にhtmlファイルの作成を行うよ。src/main/resources -> templatesを右クリックし、新規 -> その他 ->
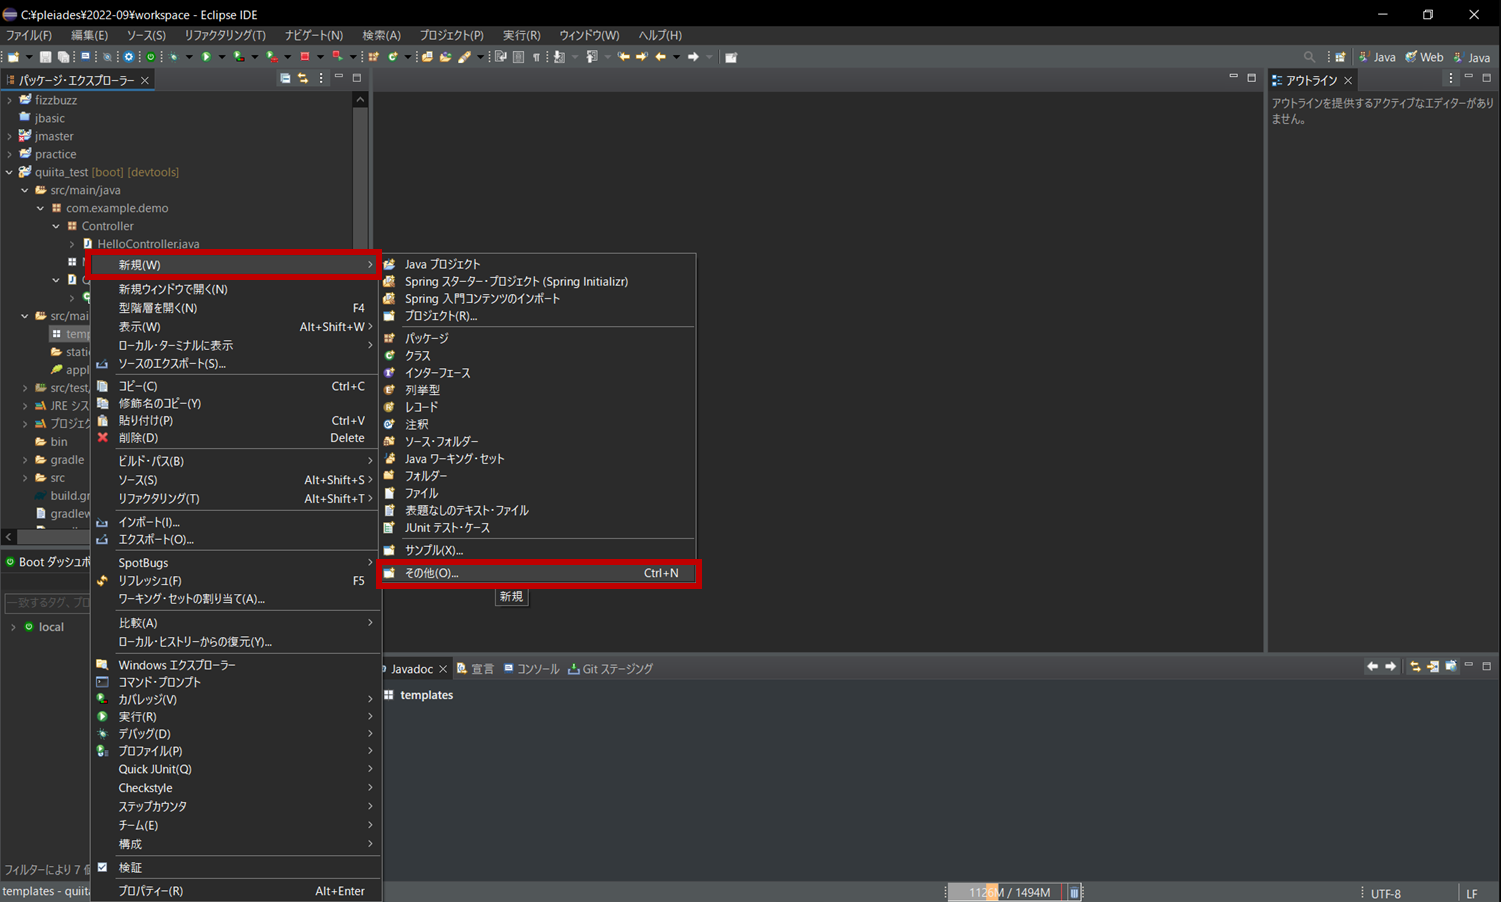
さらにHTMLファイルを選択し、次へ。

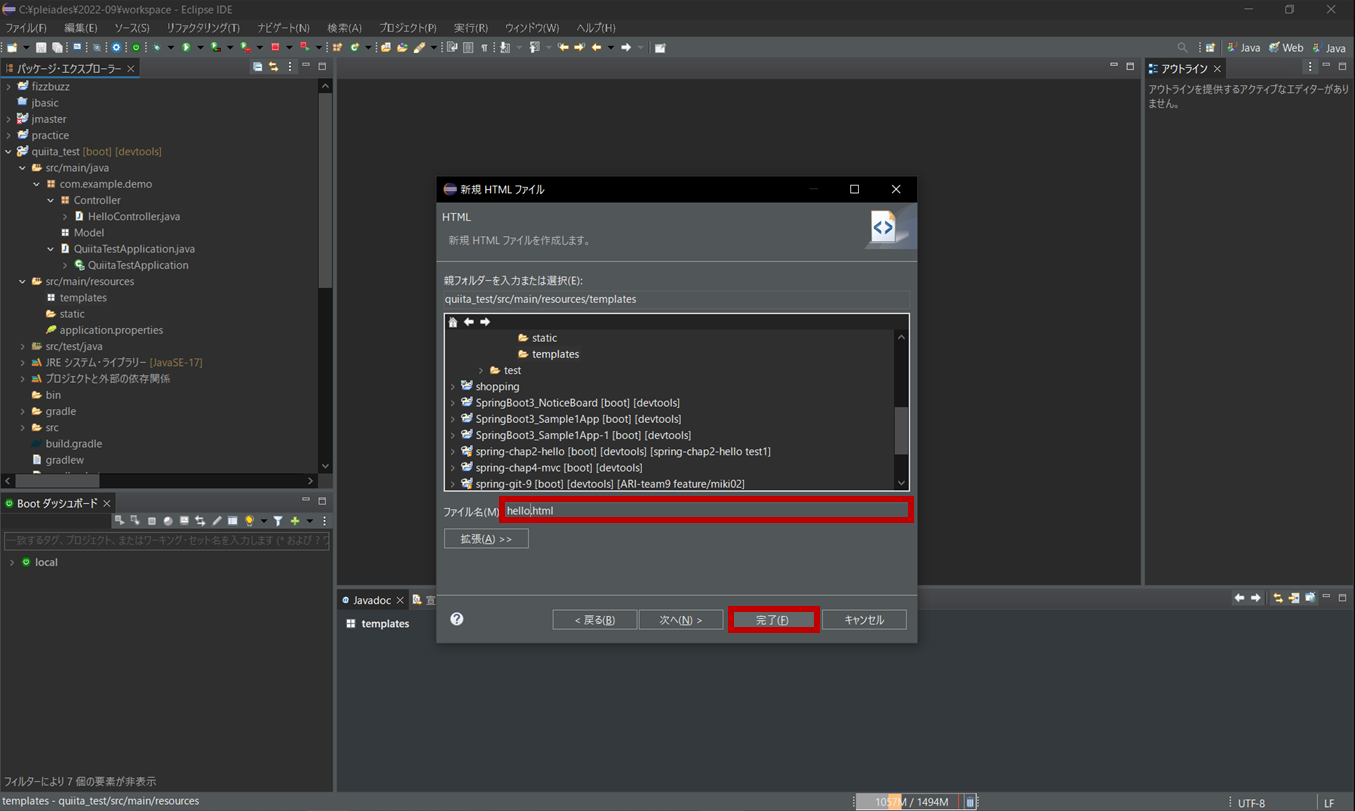
ファイル名をhello.htmlとし、完了。
以下のようにhello.htmlを修正してね。
<!DOCTYPE html>
<html xmlns:th="http://www.thymeleaf.org">
<head>
<meta charset="UTF-8">
<title>Insert title here</title>
</head>
<body>
	<p>Hello! Spring Boot!!</p>
</body>
</html>
Spring Bootの起動
htmlファイルの設定まで完了したら、とうとう起動するよ。
作成したプロジェクトqiita_testを右クリックし、実行 -> Spring Boot Appをクリック。

起動できたら、ブラウザでlocalhost:8080に接続して、画面を確認しよう。
以下の様に出力されていれば、無事完了だよ。

まとめ
Spring Bootでプロジェクトの作成をしたよ。
あとは自分が好きなようにプロジェクトを作成してみよう。