Swift Advent Calenderその2の12日目の記事です。
ライブラリを作成してSwift Package Manager, Carthage, CocoaPodsに対応して公開するところまでやってみたので、その手順を書きます。
1. framework作成
プロジェクト作成
$ mkdir UpdateChecker
$ cd UpdateChecker
$ swift package init --type library
$ swift package generate-xcodeproj
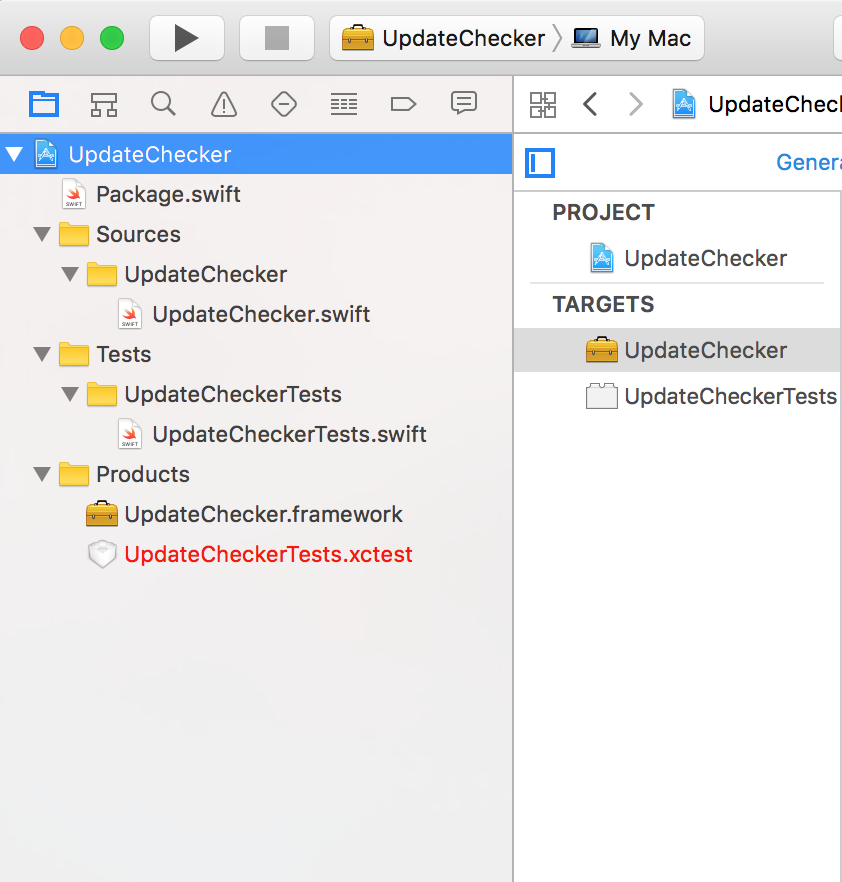
ファイル構成
ソース追加
以前書いたソースを使用します。
・【Swift3】最新versionのインストールを促すアラートの表示
Example作成
$ mkdir Example
$ cd Example
Build Settings
・ProjectとtargetsのBase SDKとSupported PlatformsをiOSに変更
・skip installをNoに変更
WorkSpace追加
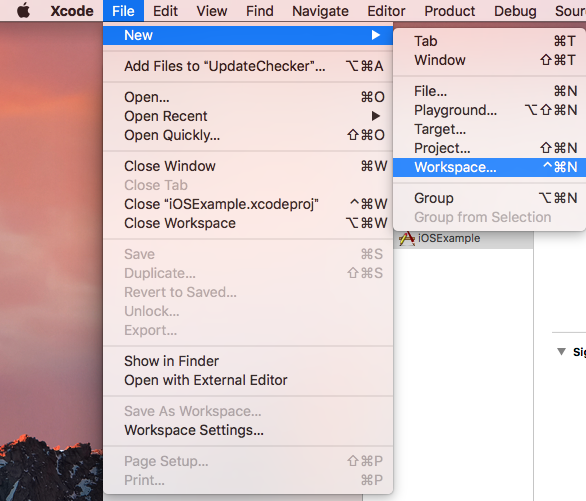
メニューからWorkspaceを選択して追加します。
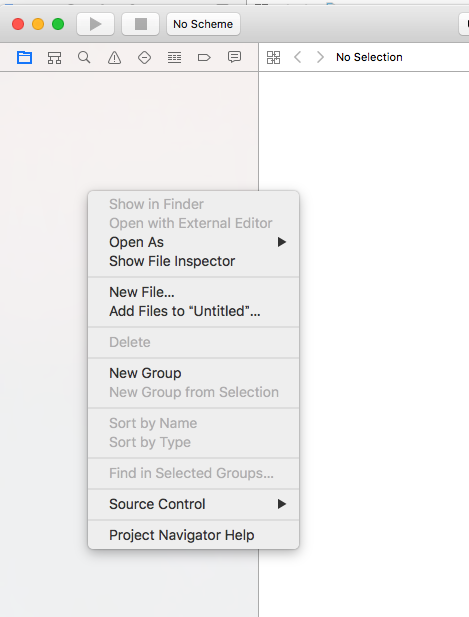
左側のプロジェクトナビゲータで右クリックして、メニューから「Add Files to "UpdateChecker"」を選択して、
UpdateChecker.xcodeprojと、Example/iOSExample.xcodeprojの2つを追加します。
追加し終わったら、workspaceを開き直しましょう。
Framework追加
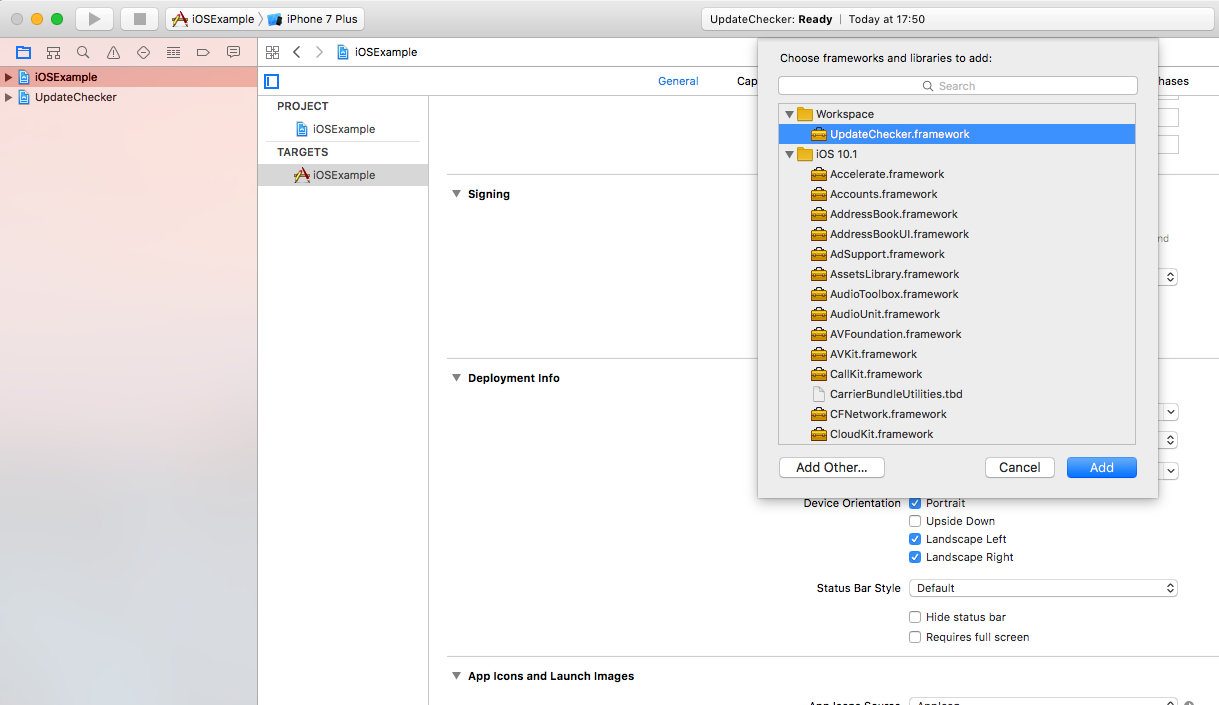
ExampleプロジェクトのEmbedded Binariesに、UpdateChekerのframeworkを追加します。
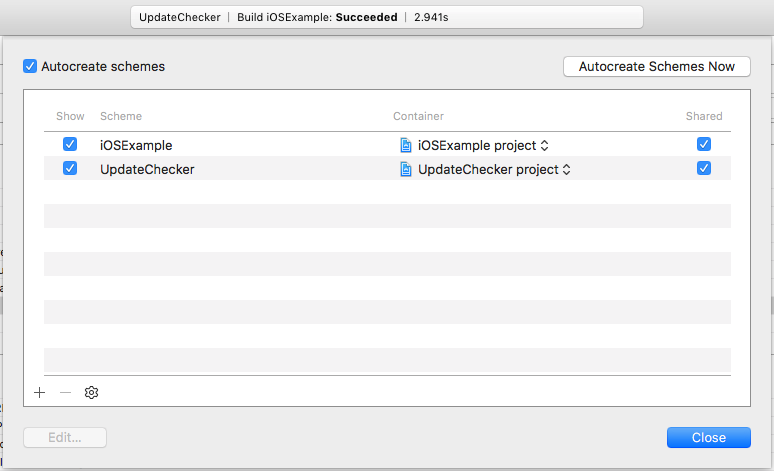
2. Shemeをシェア
Manage Shemesを開いて、sharedにチェックを入れましょう。
3. Swift Package Manager&Carthage対応
・ここまでの流れで対応完了しています。
4. Githubに公開
現在までの部分をコミット&プッシュします。
まずは余計なファイルをプッシュしないように.gitignoreを編集します。
僕はこんな感じにしました。
# Mac OS X
.DS_Store

## Build generated
build/
DerivedData

## Various settings
*.pbxuser
!default.pbxuser
*.mode1v3
!default.mode1v3
*.mode2v3
!default.mode2v3
*.perspectivev3
!default.perspectivev3
xcuserdata

## Other
*.xccheckout
*.moved-aside
*.xcuserstate
*.xcscmblueprint

## Obj-C/Swift specific
*.hmap
*.ipa

## Playgrounds
timeline.xctimeline
playground.xcworkspace

# Swift Package Manager
.build/

# Carthage
Carthage/Build
.gitignoreの編集終わったらコミットとプッシュします。
git init
git add -A
git commit -m "first commit"
git remote add origin git@github.com:s0hno/UpdateChecker.git
git push -u origin master
リリース
1, GithubのライブラリURLにアクセスして、releaseタブを押します。
2, Draft a new releaseボタンを押します
3, Tag versionを入力したらPublish releaseを押して、公開完了です。
5. CocoaPods対応
podspec作成
まずはCocoaPodsに対応するにあたり、podspecファイルを作成します。
僕は以下のような感じで作りました。
Pod::Spec.new do |s|
  s.name = 'UpdateChecker'
  s.version = '1.0.0'
  s.summary = 'update check.'
  s.homepage = 'https://github.com/s0hno/UpdateChecker'
  s.social_media_url = 'https://github.com/s0hno/UpdateChecker'
  s.authors = { 'Shohei Ohno' => 'hoge@gmail.com' }
  s.source = { :git => 'https://github.com/s0hno/UpdateChecker.git', :tag => s.version }
  s.ios.deployment_target = '8.0'
  s.source_files = 'Sources/*.swift'
  s.license = {
    :type => "MIT",
    :text => <<-LICENSE
      Copyright (c) 2016 Shohei Ohno
      Permission is hereby granted, free of charge, to any person obtaining a copy of this software and associated documentation files (the "Software"), to deal in the Software without restriction, including without limitation the rights to use, copy, modify, merge, publish, distribute, sublicense, and/or sell copies of the Software, and to permit persons to whom the Software is furnished to do so, subject to the following conditions:
      The above copyright notice and this permission notice shall be included in all copies or substantial portions of the Software.
      THE SOFTWARE IS PROVIDED "AS IS", WITHOUT WARRANTY OF ANY KIND, EXPRESS OR IMPLIED, INCLUDING BUT NOT LIMITED TO THE WARRANTIES OF MERCHANTABILITY, FITNESS FOR A PARTICULAR PURPOSE AND NONINFRINGEMENT. IN NO EVENT SHALL THE AUTHORS OR COPYRIGHT HOLDERS BE LIABLE FOR ANY CLAIM, DAMAGES OR OTHER LIABILITY, WHETHER IN AN ACTION OF CONTRACT, TORT OR OTHERWISE, ARISING FROM, OUT OF OR IN CONNECTION WITH THE SOFTWARE OR THE USE OR OTHER DEALINGS IN THE SOFTWARE.
    LICENSE
  }
end
podspecファイルを作成したら記述が正しいかlintをかけます。
lintの準備として、SwiftのどのVersion使うか.swift-versionに記述します。"3.0"の部分はご自身のswiftのVersionに
合わせてください。
$ `echo "3.0" > .swift-version`
デフォルトで3.0を使用するらしいですが、lint実行時に毎回以下のようにアラート文が表示されてしまうので3.0と書きました。
[!] The validator for Swift projects uses Swift 3.0 by default, if you are using a different version of swift you can use a `.swift-version` file to set the version for your Pod. For example to use Swift 2.3, run:
    `echo "2.3" > .swift-version`.
準備が完了したので以下コマンドでlintを実行します。UpdateChecker.podspec passed validation.が表示されたら成功です。
pod spec lint UpdateChecker.podspec
CocoaPodsに登録
以下コマンドでアカウント登録とpodspecファイルが問題なくpushができれば、CocoaPods対応完了です。
pod trunk register hoge@gmail.com 'Shohei Ohno'
pod trunk push UpdateChecker.podspec
さいごに
3つのライブラリ管理ツールに対応するのは、手間がかかるのかなとやる前は思っていましたが、Swift Package Manager, Carthageはほとんど対応作業いらないですし、CocoaPodsも.podspecを作成してpod trunkにプッシュするだけなので楽でした。これからライブラリ作成して公開する人の参考になればと思います。
今回のソースはこちらにあがっています。
