Django Girls Tutorial の 英語版 では Heroku ではなく、 PythonAnywhere を使ってデプロイしている。これが、 Heroku よりもかなり簡単だったのでそのメモ。
Django Girls Tutorial 英語版、日本語版ともに、 2018/05/28 時点の情報を元にしています。
準備
「ログインページを作ろう(Django admin)」までは、日本版とほぼ同じ1だが、 mysite/settings.py の最後に以下の行を追加する。
STATIC_URL = '/static/'
STATIC_ROOT = os.path.join(BASE_DIR, 'static')

ALLOWED_HOSTS = ['127.0.0.1', '.pythonanywhere.com']
デプロイ!
Git
Git はインストールされているとする。
Git リポジトリの作成
日本語版デプロイ!の Git の項目と同様に、
Git リポジトリの作成:
$ git init
Initialized empty Git repository in ~/djangogirls/.git/
$ git config --global user.name "Your Name"
$ git config --global user.email you@example.com
.gitignore の作成:
*.pyc
*~
__pycache__
myvenv
db.sqlite3
/static
.DS_Store
最初のコミット:
$ git add --all .
$ git commit -m "My Django Girls app, first commit"
を行う。
GitHub にコードをプッシュ
GitHub.com に行き、ユーザー名、メールアドレス、パスワードを入力し、"Sign up for GitHub" をクリックしてアカウントを作成する。
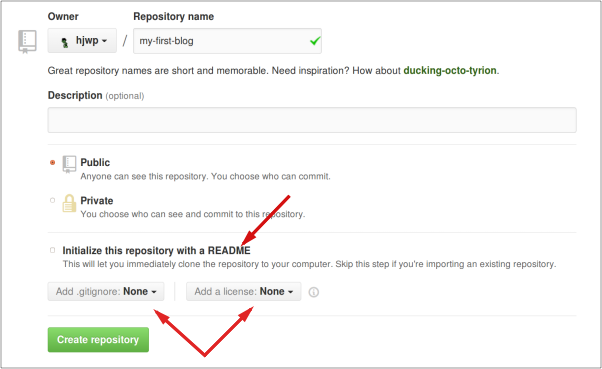
ログイン後、"Start a project" をクリックし、新しいリポジトリを作成する。ここではリポジトリ名を "my-first-blog" とし、 "initialize with a README" のチェックボックスは外したままとする。また、 "Add .gitignore:" と "Add a license:" も "None" のままとして、"Create repository" をクリックする。
次のページで、作成されたリポジトリの URL (https://github.com/<your-github-username>/my-first-blog.git)を覚えておく。
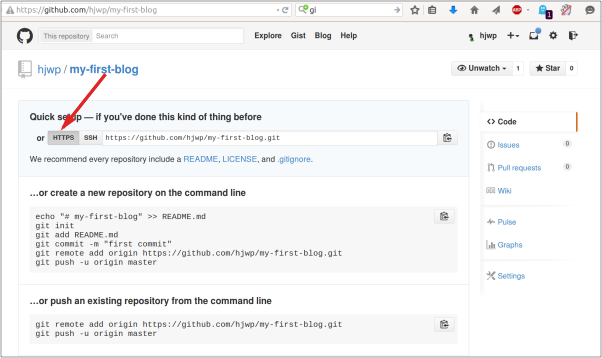
コマンドラインで以下のコマンドを実行し、コードを GitHub にプッシュする。
$ git remote add origin https://github.com/<your-github-username>/my-first-blog.git
$ git push -u origin master
PythonAnywhere の設定
アカウントの作成
pythonanywhere.com に行き、右上の "Pricing & signup" をクリックし、次のページ中央の "Create a Beginner account" をクリックする。ユーザー名、メールアドレス、パスワードを入力し、"Register" をクリックしてアカウントを作成する。
API トークンの作成
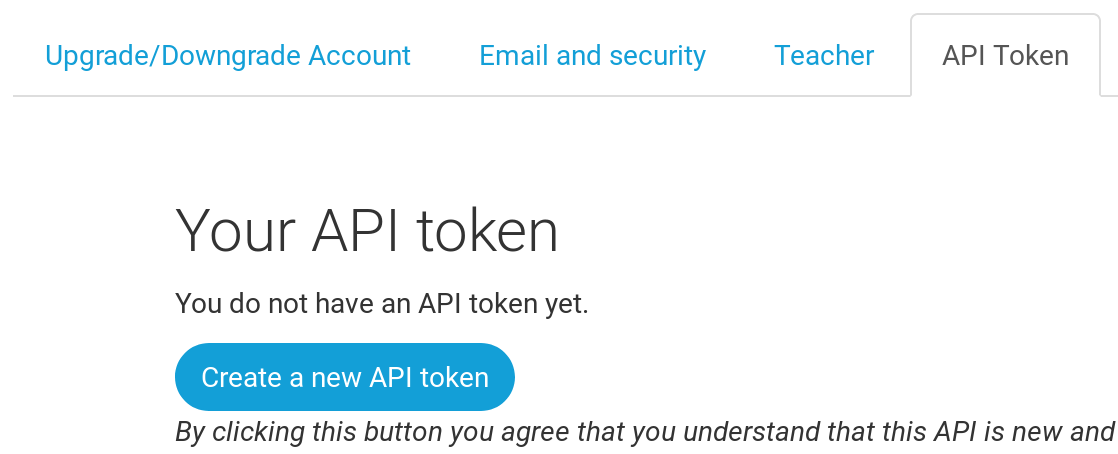
PythonAnywhere にログイン後、右上の "Account" をクリックし、 "API Token" タブ、 "Create a new API token" の順にクリックする。
PythonAnywhere の設定
PythonAnywhere の Dashboard に戻り、左の "Consoles" 内の "$ Bash" をクリックする。
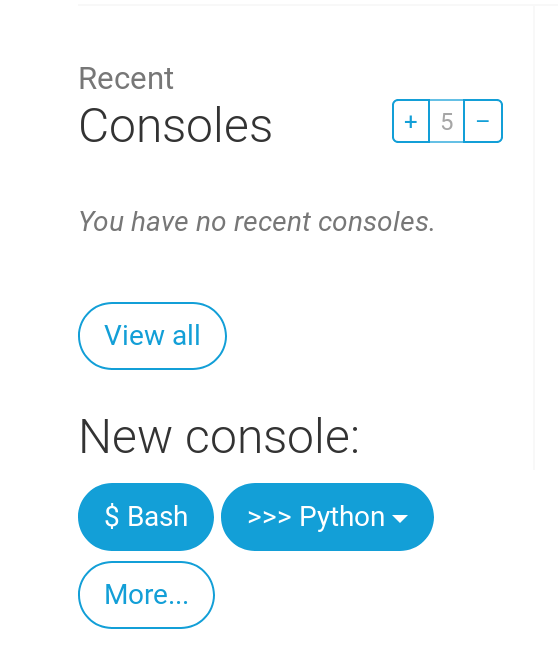
表示されたコマンドライン(以下、PythonAnywhereコマンドラインと呼ぶ)上で以下のコマンドを実行し、 PythonAnywhere 用のツールをダウンロードする。
$ pip3.6 install --user pythonanywhere
次に、以下のコマンドで先ほど GitHub にプッシュしたコードをダウンロードする。
$ pa_autoconfigure_django.py https://github.com/<your-github-username>/my-first-blog.git
このコマンドは終了まで少々時間がかかるが、
- コードのダウンロード
- virtualenv による Python 環境の作成
-
manage.py migrateコマンドの実行
まで自動的に行ってくれる。
pa_autoconfigure_django.py が無事終了したら、
$ python manage.py createsuperuser
で blog のスーパーユーザーを作成する。
ページの表示
PythonAnywhereコマンドラインページの右上のハンバーガーメニューから、 "Web" をクリックする。表示された画面上部の "Configuration for" に続くリンク "XXX.pythonanywhere.com" の URL に admin/ を付けてページを開くと、 PythonAnywhere にデプロイされた blog ページが表示される。
-
たとえば、blog/models.py 内の
models.ForeignKeyの引数が違うが、第二引数はデフォルト値になっているので django 1.11 を使用している場合には問題ないと思われる(Django、on_deleteを使う(django2.0から必須))。 ↩