初めに
Adobe社から発表されている公式のガイド(Adobe Commerce 日本語UIロケールキットに基づき、日本語化してみます。なお当方の環境は以下の通りです。
- Ubuntu 18.04.6 LTS
- Magento 2.3.5
上記をGoogle Cloud Compute Engine上に構築しています。
composerを使ってExtentionのインストール
Adobeのページにはザクっと7行ほどで記載してあります。
まず、Magentoがインストールされたディレクトリに移動し、Composerを使用してロケールキットをインストールします。
$ su - magento_user
Password:
$ cd /var/www/html
$ composer require magentoj/language-ja_jp
(途中略)
Writing lock file
Generating autoload files
75 packages you are using are looking for funding.
Use the `composer fund` command to find out more!
PHP CodeSniffer Config installed_paths set to ../../phpcompatibility/php-compatibility,../../codeception,../../magento/magento-coding-standard
データベースを更新します。
$ php bin/magento setup:upgrade
Cache cleared successfully
File system cleanup:
/var/www/html/generated/code/Amazon
/var/www/html/generated/code/Composer
(途中略)
Enabling caches:
Current status:
Array
(
    [layout] => 1
    [block_html] => 1
    [full_page] => 1
)

Nothing to import.
Please re-run Magento compile command. Use the command "setup:di:compile"
「もう一度コンパイルして」と言われているのでコンパイルします。
$ php bin/magento setup:di:compile
Compilation was started.
App action list generation... 8/8 [====================] 100% 57 secs 351.0 MiB
Generated code and dependency injection configuration successfully.
キャッシュをクリアします。
$ php bin/magento cache:flush
Magento管理画面での操作
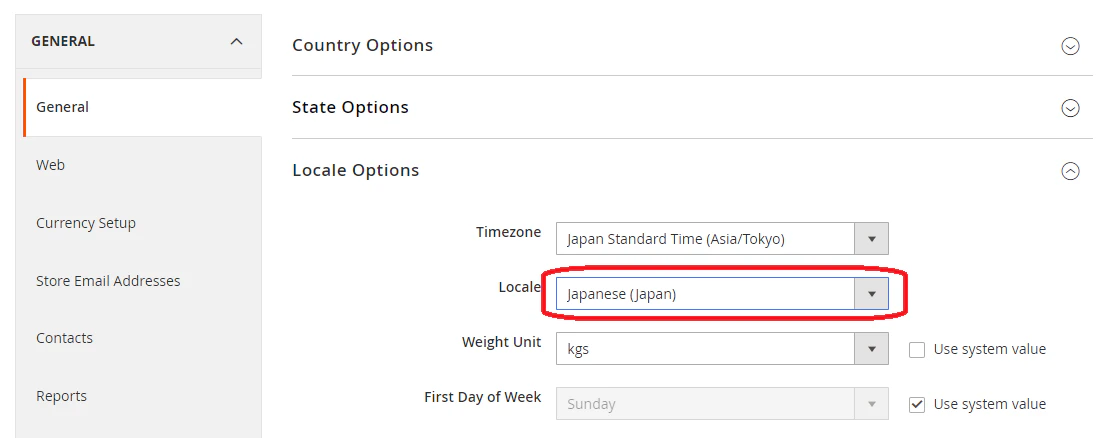
管理画面にはいり、Stores - Configurationを選択します。

General - Locale OptionsのLocaleでJapanese(Japan)を選択し、"Save Config"をクリックします。
ロケール設定を変更してもすぐには反映されないので、キャッシュをリフレッシュします。

"Flaush Magento Cache"をクリックします。


Storeを見ると、日本語化されています。

