iOSのページ遷移といったらNavigationController(Bar)を用いた遷移だと私は思っています。
Navigation Controllerを用いたページ遷移に関してまとめられたqiita記事があまりなかったので、今回備忘録として残すことにしました。
Navigation Controllerに関しては、こちらの記事をご覧ください。
因みに、Navigation Controllerの追加方法は、Navigation Controllerの管理下にしたいViewを選択しながら、メニューからEditor→Embed In→NavigationControllerを選ぶ。
この記事で理解できること
- Navigation Controllerを用いた、ページ遷移の仕方
ページ遷移の種類
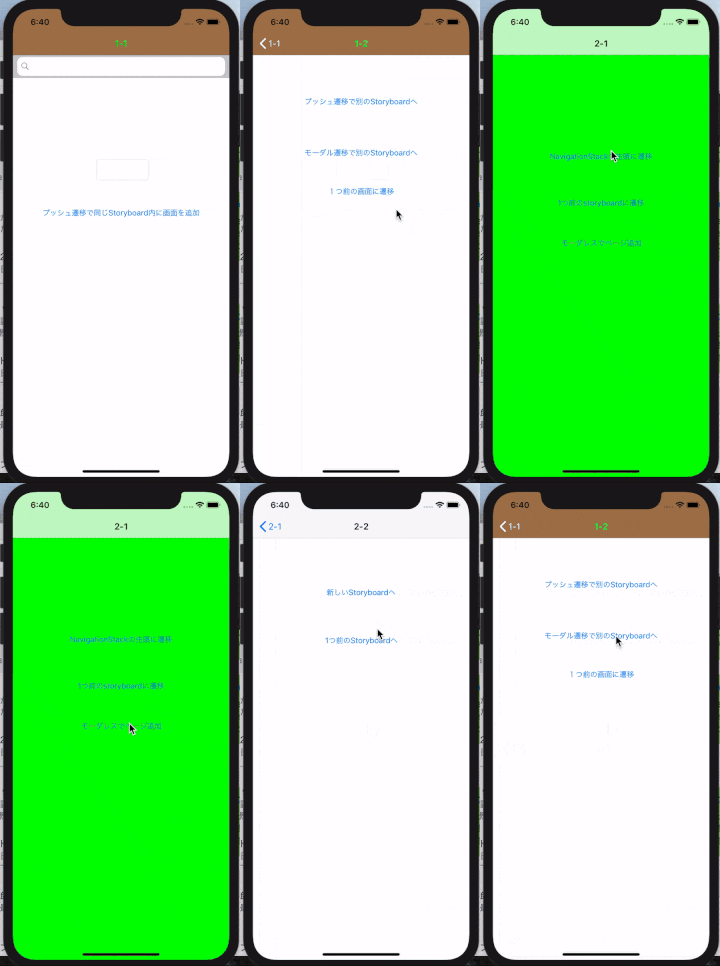
【Navigation Controllerを用いたページ遷移には2種類あります】
モーダル遷移とプッシュ遷移の使い分け
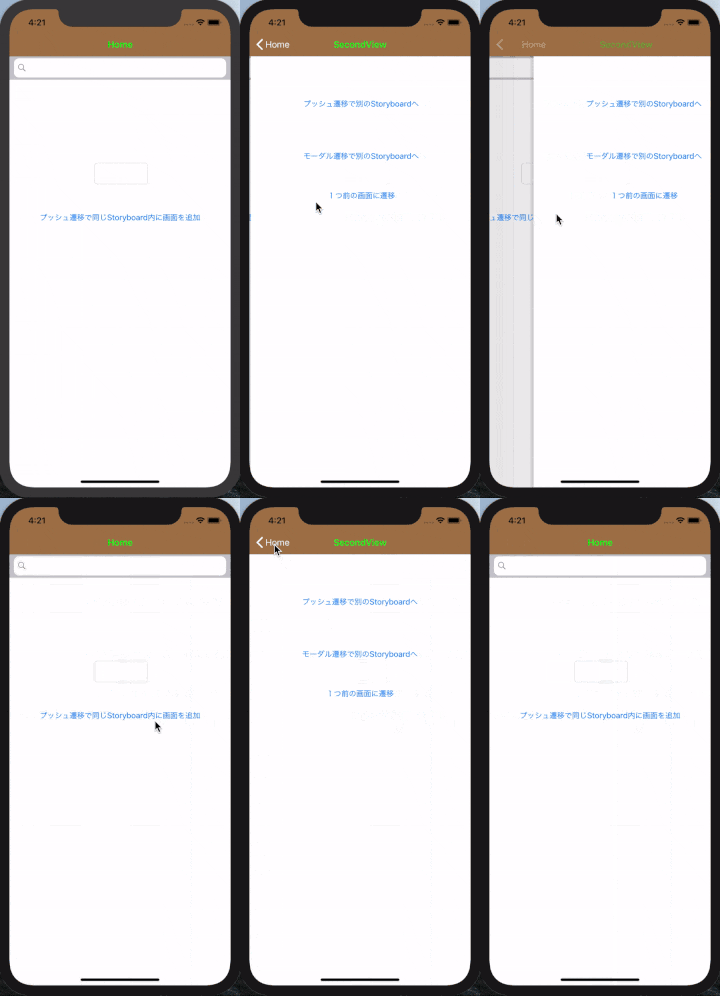
プッシュ遷移
私は基本的にアプリ内ではプッシュで画面を遷移すべきだと思う。なぜなら、上のgifでもやっているように、スワイプで前の画面に戻ることができるからだ。
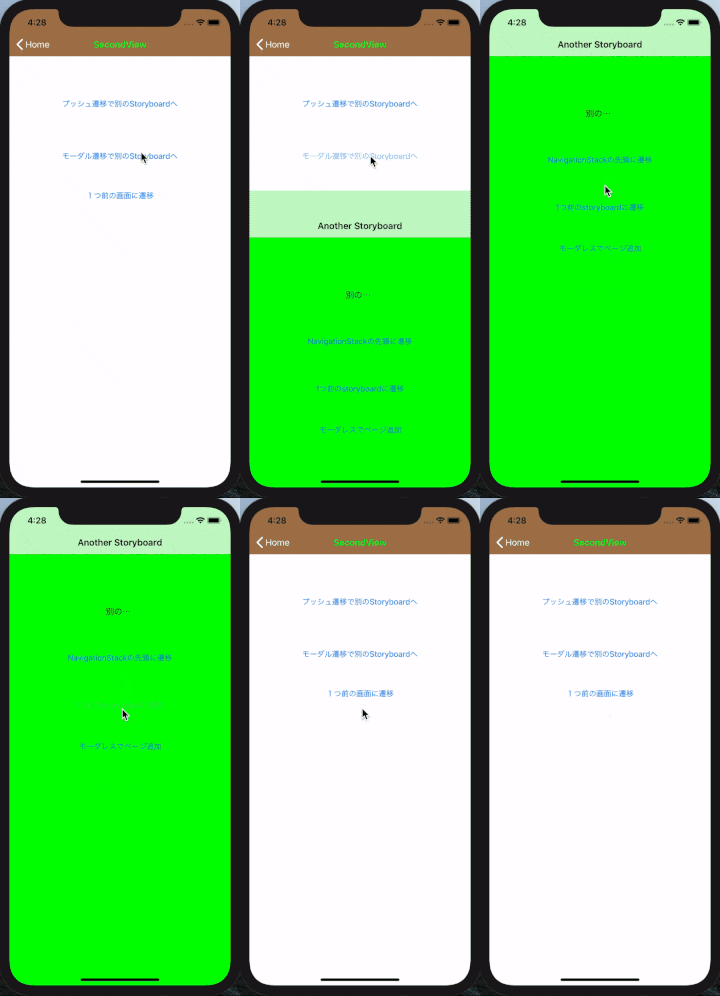
モーダル遷移
モーダルで遷移した場合、元の画面には、それ用に作られた操作を実行しない限り、元の画面には戻ることができないので、"前の画面に簡単に戻って欲しくない時"に用いるべきだと思う。
開発環境
- macOS Mojave バージョン10.14.4
- Xcode Version 10.2 (10E125)
- Swift 5.0
【プッシュ遷移の仕方】
(事前にNavigation Controllerは追加されている前提です)
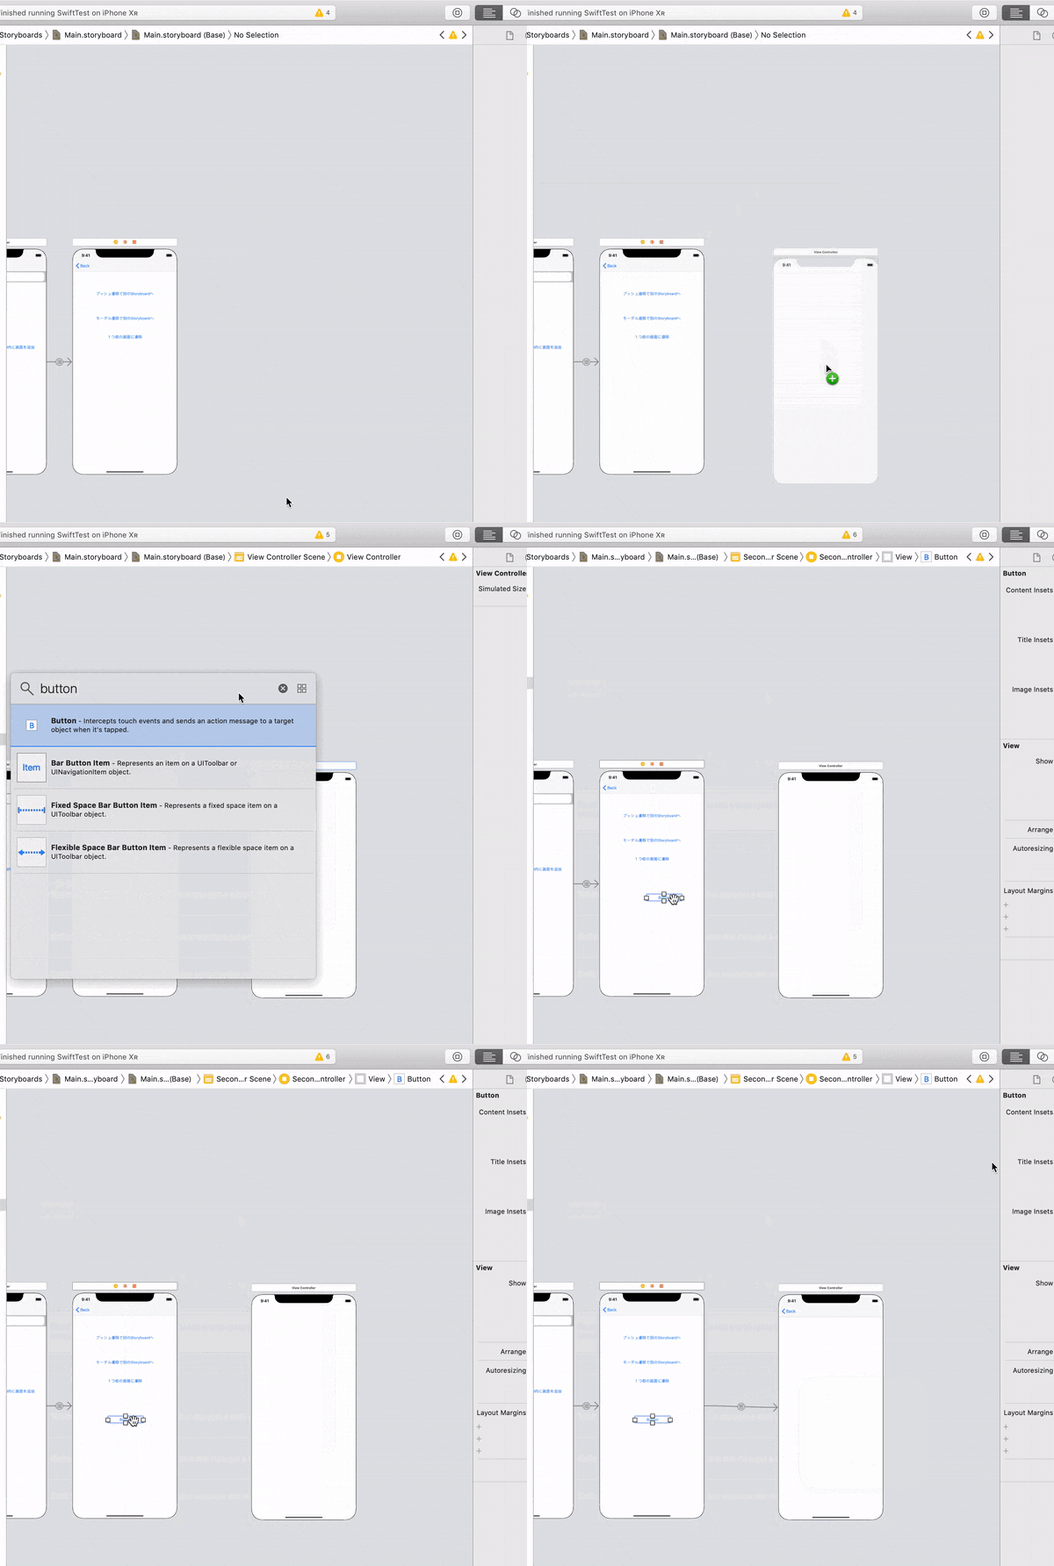
遷移元と同じStoryboard内で遷移する場合(ソースコードなしver)
以下のように、ボタン, 次の画面となるViewControllerをsegueで繋げるだけで完了
遷移元と同じStoryboard内で遷移する場合(ソースコードありver)
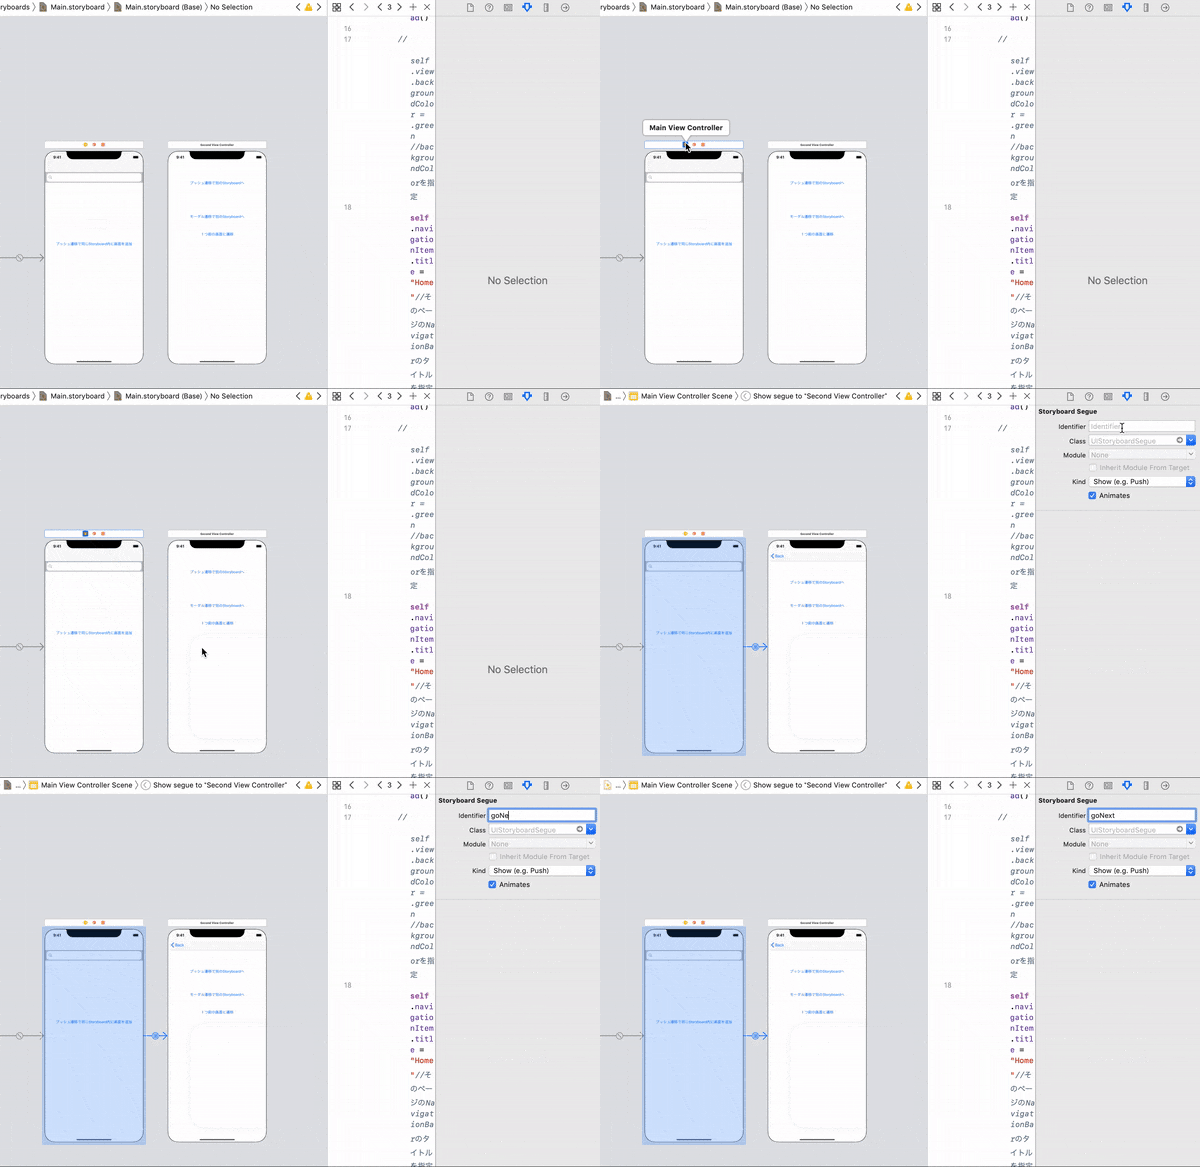
1. segueの作成
- ViewController上部のアイコンから遷移先のView上までcontrolを押しながらドラッグする。
- セグエの種類を選ぶポップアップが出現するのでShowを選び。
- 2つの画面の間にsegueのアイコンが現るのでクリックして選択状態にし、identifierを設定する。今回は"goNext"に設定。
2. segueのアクションをソースコードに追加
(buttonをソースコードに紐付けといてください)
@IBAction func goNextButton(_ sender: Any) {
    performSegue(withIdentifier: "goNext", sender: nil)
}
遷移元と異なるStoryboardへ遷移する場合
今回は、Main.StoryboardのSecondViewController→Second.StoryboardのSecondMainViewControllerにプッシュ遷移します。
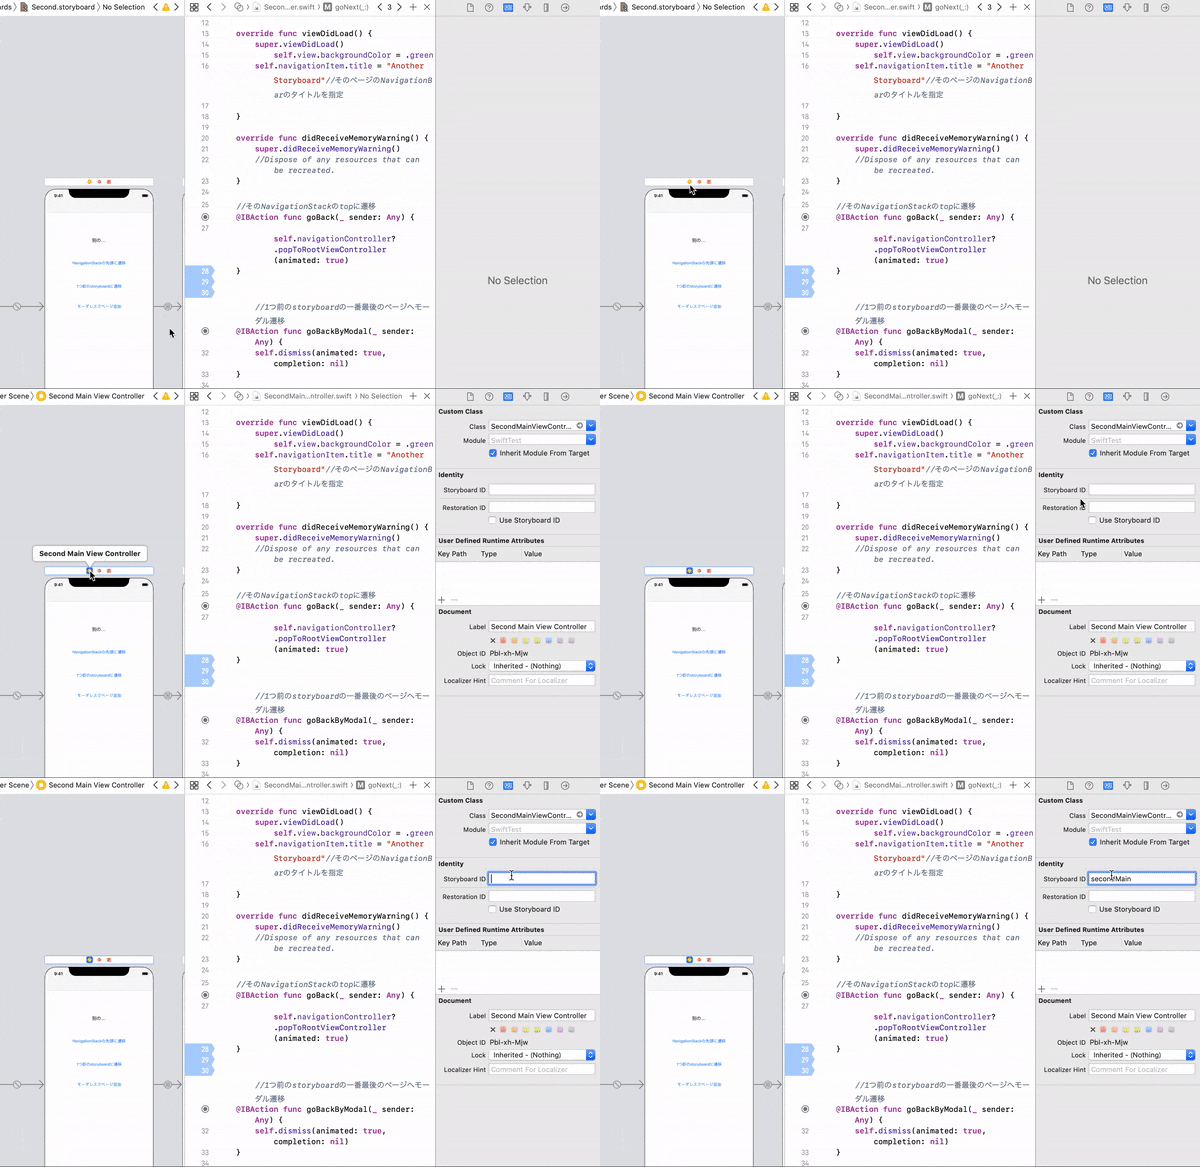
1. 遷移先(遷移元とは異なるStoryboard)のViewControllerのStoryboardIDを設定する
(これは同一のStoryboard内ではユニークである必要がある)
今回は、Second.Storyboard内のSecondMainViewControllerに"secondMain"というStoryboardIDを設定しました。
2. ページ遷移のアクションを遷移元のソースコードに追加
@IBAction func moveAnotherStoryboard(_ sender: Any) {
    let storyboard: UIStoryboard = UIStoryboard(name: "Second", bundle: nil)//遷移先のStoryboardを設定
    let nextView = storyboard.instantiateViewController(withIdentifier: "secondMain") as! SecondMainViewController//遷移先のViewControllerを設定
    self.navigationController?.pushViewController(nextView, animated: true)//遷移する
}
プッシュ遷移で、今いるNavigation Stackの先頭のViewに遷移する(戻る)場合
仮に、FirstViewController→SecondViewController→ThirdViewControllerの順にプッシュ遷移してきて、今ThirdViewControllerにいる場合に、FirstViewControllerに戻ると設定します。
ページ遷移のアクションを遷移元のソースコードに追加
@IBAction func popButton(_ sender: Any) {
    self.navigationController?.popToRootViewController(animated: true)
}
【モーダル遷移の仕方】
モーダル遷移を使う場合は、基本的に遷移元と遷移先のStoryboardが異なる場合が多いと思うので、そのやり方を掲載します。
別のstoryboardの先頭のViewに遷移する場合
今回は、Main.StoryboardのSecondViewController→Second.StoryboardのSecondMainViewControllerにモーダル遷移する場合を考えます。
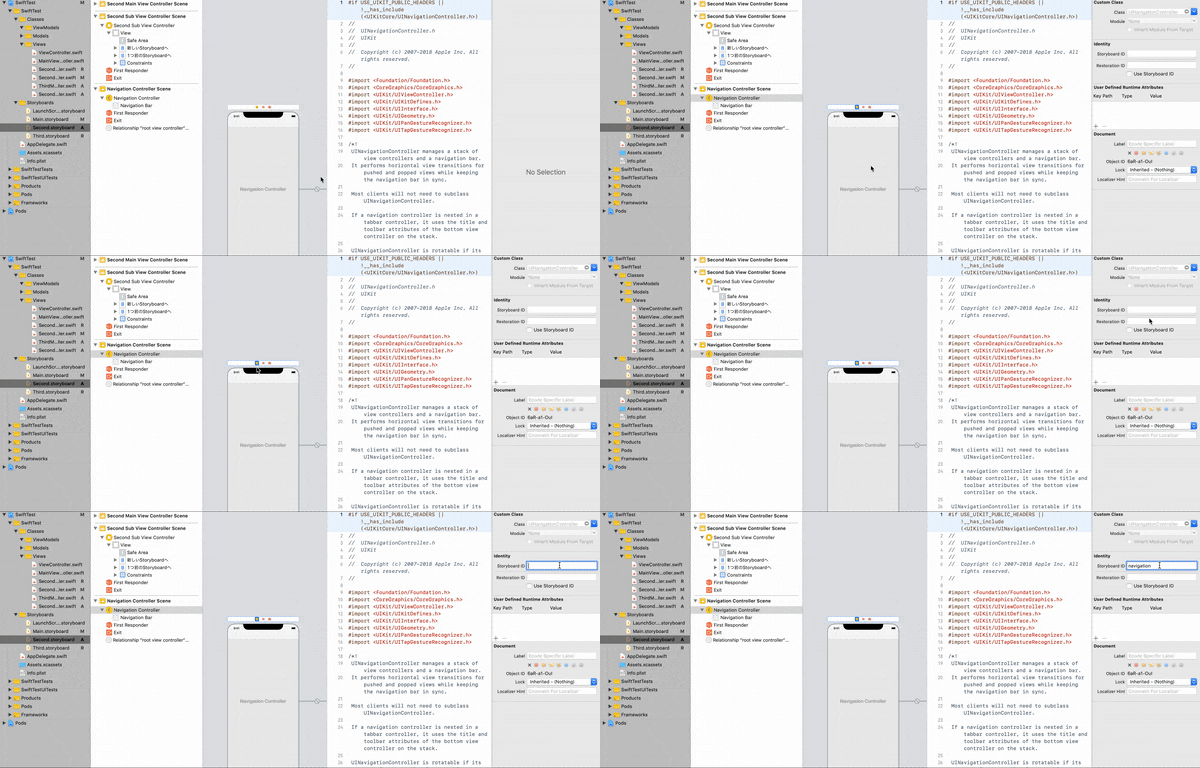
1. 遷移先のNavigationControllerのidentity(StoryboardID)を設定する
2.ページ遷移のアクションを遷移元のソースコードに追加
@IBAction func button(_ sender: Any) {
    let storyboard: UIStoryboard = UIStoryboard(name: "Second", bundle: nil)//遷移先のStoryboardを設定
    let navigationController = storyboard.instantiateViewController(withIdentifier: "navigation") as! UINavigationController//遷移先のNavigationControllerを設定
    self.present(navigationController, animated: true, completion: nil)//遷移する
}
1つ前のstoryboardの一番最後のViewへモーダル遷移
今回は、Main.Storyboard内の(FirstViewController→SecondViewController)→Second.Storyboard内の(FirstViewController→SecondViewController)の順にStoryboard内はPush遷移、Storyboard間はモーダル遷移してきて、現在Second.Storyboard内のSecondViewControllerにいるとします。
以下のソースコードで行なっている遷移は、Second.Storyboard内のSecondViewController→Main.Storyboard内のSecondViewControllerに遷移することです。
@IBAction func backToStoryboard(_ sender: Any) {
    self.dismiss(animated: true, completion: nil)
}
最後に
最後まで読んでいただきありがとうございます。
Swift初心者ですが、RxSwift, RxCocoaを使ってMVVMで開発を進めていきたいと思います。
参考
【Swift/iOS】遷移元画面への戻り方
https://capibara1969.com/203/
【iOS】画面遷移の基礎【Swift3.0】
https://qiita.com/fromage-blanc/items/b3cb0e7833a1d5659463
Xamarin.Forms Navigation Overview
http://www.nuits.jp/entry/2017/05/27/170909
Swiftでの画面遷移についてまとめ
https://qiita.com/superman9387/items/c006ced215352f28a7b9
