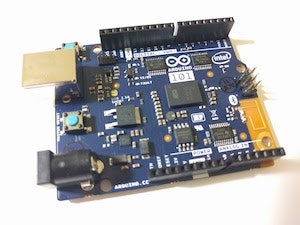
Arduino101って何?
ArudinoのプラットフォームにIntel社製のチップCurieを載せることによりBluetoothだったり、各種センサが手軽に使えちゃうArudinoです。
儀式:Lチカ
ヒョンなキッカケでArduino101をゲットしたのですが、封も空けずに何となく放置して大事に保管していました。とはいえ、これまたヒョンなキッカケで触りたくなります。
で、やるなら「Lチカ」となるわけですが少し色をつけてBLE MIDI Lチカをやってみました。
サンプル
Arudinoの良い所はサンプルがIDEに組み込まれていて、パパっとパクる参考にすることができるところ。今回はBLE MIDIなのですが、実はまだサンプルには組み込まれておらず、これもまたヒョンなキッカケからGithubからサンプルを掘り当てました。
サンプルファイルはここにあります。
ということで、サンプルを書き換えていきます。
BLE MIDI Lチカコード
ほぼサンプルの流用で、midiCharacteristicWritten()のMethodだけを変更しました。挙動はせっかくMIDIなのでMIDI感を味わえるように以下のように変更しています。
- 0x90:点灯
- それ以外:消灯
それからLチカなのでPINの番号とかの指定もしています。
int LED_PIN=13;
pinMode(LED_PIN, OUTPUT);
そして、LチカをコントロールするアプリはもちろんWeb MIDI APIを使ったものを用意しました。
MIDIメッセージを出す為のWebアプリ
# include <CurieBLE.h>

# define TXRX_BUF_LEN              20 //max number of bytes
# define RX_BUF_LEN                20 //max number of bytes
uint8_t rx_buf[RX_BUF_LEN];
int rx_buf_num, rx_state = 0;
uint8_t rx_temp_buf[20];
uint8_t outBufMidi[128];

//Buffer to hold 5 bytes of MIDI data. Note the timestamp is forced
uint8_t midiData[] = {0x80, 0x80, 0x00, 0x00, 0x00};

BLEPeripheral midiDevice; // create peripheral instance

BLEService midiSvc("03B80E5A-EDE8-4B33-A751-6CE34EC4C700"); // create service

// create switch characteristic and allow remote device to read and write
BLECharacteristic midiChar("7772E5DB-3868-4112-A1A9-F2669D106BF3", BLEWrite | BLEWriteWithoutResponse | BLENotify | BLERead, 5);

int LED_PIN=13;

void setup() {
  Serial.begin(9600);

  BLESetup();
  Serial.println(("Bluetooth device active, waiting for connections..."));
}

void BLESetup()
{
  // set the local name peripheral advertises
  midiDevice.setLocalName("Auxren");
  midiDevice.setDeviceName("Auxren");

  // set the UUID for the service this peripheral advertises
  midiDevice.setAdvertisedServiceUuid(midiSvc.uuid());

  // add service and characteristic
  midiDevice.addAttribute(midiSvc);
  midiDevice.addAttribute(midiChar);

  // assign event handlers for connected, disconnected to peripheral
  midiDevice.setEventHandler(BLEConnected, midiDeviceConnectHandler);
  midiDevice.setEventHandler(BLEDisconnected, midiDeviceDisconnectHandler);

  // assign event handlers for characteristic
  midiChar.setEventHandler(BLEWritten, midiCharacteristicWritten);
  // set an initial value for the characteristic
  midiChar.setValue(midiData, 5);

  // advertise the service
  midiDevice.begin();

  pinMode(LED_PIN, OUTPUT);
}

void loop() {
}

void midiDeviceConnectHandler(BLECentral& central) {
  // central connected event handler
  Serial.print("Connected event, central: ");
  Serial.println(central.address());
}

void midiDeviceDisconnectHandler(BLECentral& central) {
  // central disconnected event handler
  Serial.print("Disconnected event, central: ");
  Serial.println(central.address());
}

void midiCharacteristicWritten(BLECentral& central, BLECharacteristic& characteristic) {
  if((midiChar.value())[2]==0x90) {
    digitalWrite(LED_PIN, HIGH);
  } else {
    digitalWrite(LED_PIN, LOW);
  }
}
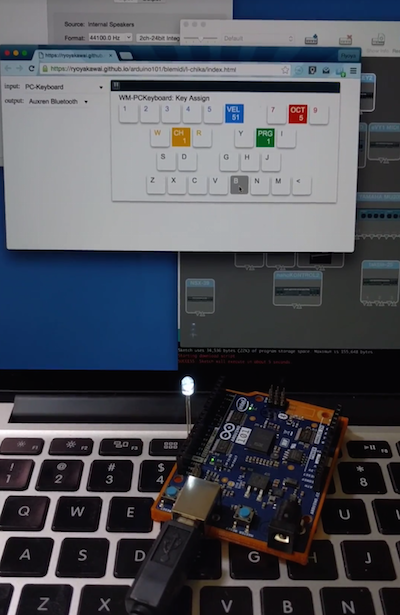
動作中の映像
ブレててスミマセン><
MacとBLE MIDIで接続するのが少し面倒なので、映像をご参考にしてください。(画像をクリックすると動画が見られます)
おまけ
Webアプリどうなってるの?と、気になってる方はこちらをご参照ください。