Spring Securityは、Springプロジェクトの1つで、主に
Webアプリケーションにセキュリティの機能を追加するためのフレームワークです。
自分のプロジェクトでは、以前からずっと使っているんですが、自分の会社の若手向けに改めて整理するため、まずはチュートリアルから改めてやってみました。
こちらの内容になりますが、Springのバージョンが変わったのでdeprecatedになったメソッド等もあったので少し書き換えています。
環境
Eclipse Version: 2019-03 (4.11.0)
Java 11
Spring Boot 2.1.5
Spring Security 5.1.5
準備
新規プロジェクトを作成する
- Eclipseを起動する
- ファイル > 新規 > プロジェクトを選択
- ウィザードで、「Spring スターター・プロジェクト」を選択
-「次へ」を押下 - 名前は適当設定、Javaバージョン「11」、「Gradle」を選択し「次へ」を押下
- 「DevTools」「セキュリティー」「Web」「Thymleaf」を選択し、「完了」を押下
画面を作る
画面は、src/main/resources/templatesの下に作成します。
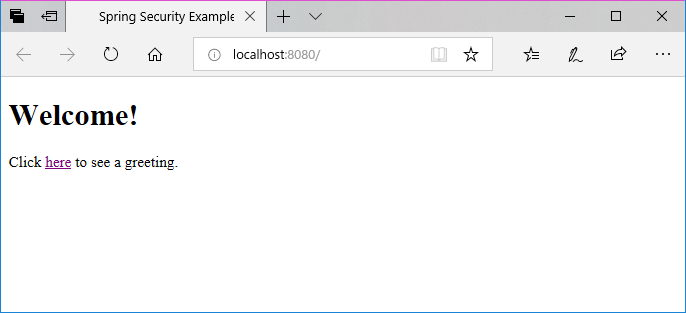
home.html
hello.htmlへのリンクを持つ画面。未認証の状態でも参照なページ。
<!DOCTYPE html>
<html xmlns="http://www.w3.org/1999/xhtml"
	xmlns:th="https://www.thymeleaf.org"
	xmlns:sec="https://www.thymeleaf.org/thymeleaf-extras-springsecurity3">
<head>
<title>Spring Security Example</title>
</head>
<body>
	<h1>Welcome!</h1>

	<p>
		Click <a th:href="@{/hello}">here</a> to see a greeting.
	</p>
</body>
</html>
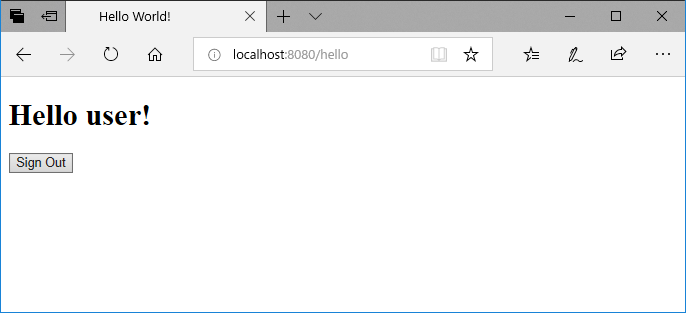
hello.html
認証がOKになったユーザのみ参照できるページ。
<!DOCTYPE html>
<html xmlns="http://www.w3.org/1999/xhtml" xmlns:th="https://www.thymeleaf.org"
      xmlns:sec="https://www.thymeleaf.org/thymeleaf-extras-springsecurity3">
    <head>
        <title>Hello World!</title>
    </head>
    <body>
        <h1 th:inline="text">Hello [[${#httpServletRequest.remoteUser}]]!</h1>
        <form th:action="@{/logout}" method="post">
            <input type="submit" value="Sign Out"/>
        </form>
    </body>
</html>
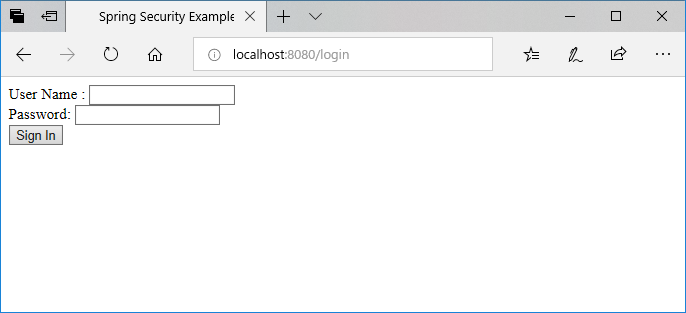
login.html
ログインのための情報を入力するための画面。もちろん未認証でも参照できます。
<!DOCTYPE html>
<html xmlns="http://www.w3.org/1999/xhtml" xmlns:th="https://www.thymeleaf.org"
      xmlns:sec="https://www.thymeleaf.org/thymeleaf-extras-springsecurity3">
    <head>
     <title>Spring Security Example </title>
    </head>
    <body>
        <div th:if="${param.error}">
            Invalid username and password.
        </div>
        <div th:if="${param.logout}">
            You have been logged out.
        </div>
        <form th:action="@{/login}" method="post">
            <div><label> User Name : <input type="text" name="username"/> </label></div>
            <div><label> Password: <input type="password" name="password"/> </label></div>
            <div><input type="submit" value="Sign In"/></div>
        </form>
    </body>
</html>
htmlを表示するための設定
通常だとControllerクラスがあるのですが、htmlを表示するだけなので省略しています。でも、Spring MVCに認識させるためには必要なクラスです。
@Configuration
public class MvcConfig implements WebMvcConfigurer {

	public void addViewControllers(ViewControllerRegistry registry) {
		registry.addViewController("/home").setViewName("home");
		registry.addViewController("/").setViewName("home");
		registry.addViewController("/hello").setViewName("hello");
		registry.addViewController("/login").setViewName("login");
	}
}
はい。ここまでで準備は完了。
Spring Securityの設定
さてここからが本題。
Spring Securityの動作を定義するConfigクラスです。
以前はXMLでの記述が主流でしたが、最近?ではJavaクラスに定義する方法が一般的になってます。
@Configuration
@EnableWebSecurity
public class WebSecurityConfig extends WebSecurityConfigurerAdapter {
    @Override
    protected void configure(HttpSecurity http) throws Exception {
        http
            .authorizeRequests()
                .antMatchers("/", "/home").permitAll()    // アクセス制限のないURL
                .anyRequest().authenticated()                // その他は認証済みでしかアクセスできない
                .and()
            .formLogin()
                .loginPage("/login").permitAll()               // ログイン画面の設定 アクセス制限なし
                .and()
            .logout()
                .permitAll();
    }

    @Override
    protected void configure(AuthenticationManagerBuilder auth) throws Exception {

        // パスワード
        String password = passwordEncoder().encode("password");

        // インメモリの認証を行うための設定
        auth.inMemoryAuthentication()
                .passwordEncoder(passwordEncoder())
                .withUser("user").password(password).roles("USER");
    }

    @Bean
    public PasswordEncoder passwordEncoder() {
        return new BCryptPasswordEncoder();
    }

}
チュートリアルだと、
   @Bean
    @Override
    public UserDetailsService userDetailsService() {
        UserDetails user =
             User.withDefaultPasswordEncoder()
                .username("user")
                .password("password")
                .roles("USER")
                .build();

        return new InMemoryUserDetailsManager(user);
    }
で、インメモリの認証を設定していますが、「User.withDefaultPasswordEncoder()」がDeprecatedとなっているので、違う方法で記述しています。
起動
さて、ここまで来たらEclipseでSpringBootアプリケーションを起動しましょう。
そのあとブラウザにアクセスします。こちら
hereのリンクをクリック
User Name、Passwordを入力して、「Sign In」を押下
はい。できました。
さいごに
まずはSpring Securityのさわりが分かるようにHelloWorldをやってみました。ひと昔前なら、Filter使ってごちゃごちゃしていたことを、簡単に実現できたのかなと思います。
Spring Securityには、機能がまだまだたくさんあるので、徐々にいろいろ紹介したいと思います。


