結論 → xcodeにデフォルトで搭載されているsegmentedcontrolを使うより簡単じゃん!
Gunosy、SmartNewsの様なページ上部のタブをスワイプで切り替えることが出来るタブバーを簡単に導入することの出来るUIライブラリのPagingMenuControllerの使い方を紹介したいと思います。
PagingMenuControllerを導入する
ソースコードはGitHubに公開されています。
https://github.com/kitasuke/PagingMenuController
こちらからソースコードをダウンロードするかCocoaPodsからxcodeプロジェクトに追加してください。
source 'https://github.com/CocoaPods/Specs.git'
platform :ios, '8.0'
use_frameworks!

pod 'PagingMenuController'
swiftファイルでPagingMenuControllerを使う
import PagingMenuController
ViewControllerを作る
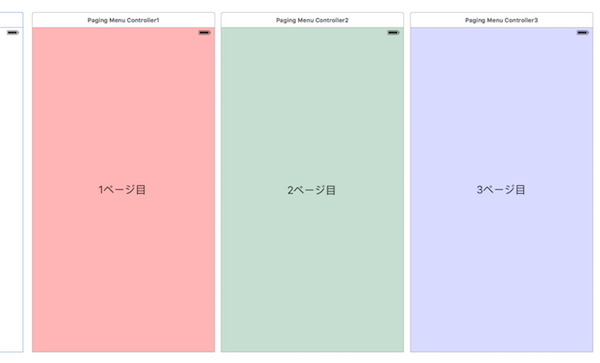
storyboardでViewControllerを3つ追加します。
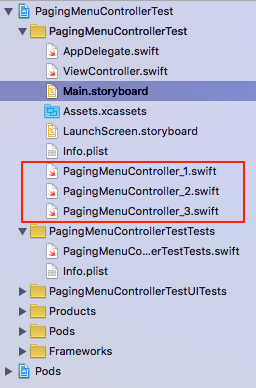
プロジェクトに最初からあるViewController.swiftと同じ階層にPagingMenuController_1.swift、PagingMenuController_2.swift、PagingMenuController_3.swiftというファイルを作ります。
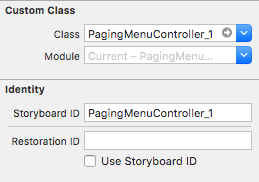
次にstoryboardで作ったViewControllerそれぞれのCustom ClassとStoryboard IDPagingMenuController_1、PagingMenuController_2、PagingMenuController_3に変更します。
ViewController.swiftを編集する
import UIKit
import PagingMenuController

class ViewController: UIViewController {

    override func viewDidLoad() {
        super.viewDidLoad()
        // Do any additional setup after loading the view, typically from a nib.


        //1ページ目で表示させるコントローラーを指定する
        let page_1 = self.storyboard?.instantiateViewControllerWithIdentifier("PagingMenuController_1") as! PagingMenuController_1
        page_1.title = "1ページ目"

        //2ページ目で表示させるコントローラーを指定する
        let page_2 = self.storyboard?.instantiateViewControllerWithIdentifier("PagingMenuController_2") as! PagingMenuController_2
        page_2.title = "2ページ目"

        //3ページ目で表示させるコントローラーを指定する
        let page_3 = self.storyboard?.instantiateViewControllerWithIdentifier("PagingMenuController_3") as! PagingMenuController_3
        page_3.title = "3ページ目"
        let viewControllers = [page_1, page_2, page_3]


        //表示オプション
        let options = PagingMenuOptions()   //オプションをインスタンス化

        //最初に表示させるページ番号
        options.defaultPage = 0

        //スワイプでページ間を移動させるか
        options.scrollEnabled = true

        //メニューバーの背景色
        options.backgroundColor = UIColor.whiteColor()

        //選択中のメニューバーの背景色
        options.selectedBackgroundColor = UIColor.whiteColor()

        //メニューのフォントサイズ
        options.font = UIFont.systemFontOfSize(14)

        //選択中のメニューのフォントサイズ
        options.selectedFont = UIFont.systemFontOfSize(14)

        //メニューの位置
        options.menuPosition = .Top

        //メニューの高さ
        options.menuHeight = 44

        //メニューのマージン
        options.menuItemMargin = 5

        //ページ移動をするときのアニメーションスピード
        options.animationDuration = 0.3

        //選択中のメニューの下線の色
        options.menuItemMode = .Underline(height: 3, color: UIColor.blackColor(), horizontalPadding: 0, verticalPadding: 0)

        //メニューの表示のされ方
        options.menuDisplayMode = .SegmentedControl


        let pagingMenuController = PagingMenuController(viewControllers: viewControllers, options: options)
        pagingMenuController.view.frame.origin.y += 20
        pagingMenuController.view.frame.size.height -= 20

        self.addChildViewController(pagingMenuController)
        self.view.addSubview(pagingMenuController.view)
        pagingMenuController.didMoveToParentViewController(self)
    }

    override func didReceiveMemoryWarning() {
        super.didReceiveMemoryWarning()
        // Dispose of any resources that can be recreated.
    }


}
表示オプションでメニューの背景色、フォントサイズ、位置を変更することが出来ます。
class PagingMenuController_1: UIViewController {

    override func viewDidLoad() {
        super.viewDidLoad()
        // Do any additional setup after loading the view, typically from a nib.
    }

    override func didReceiveMemoryWarning() {
        super.didReceiveMemoryWarning()
        // Dispose of any resources that can be recreated.
    }


}
PagingMenuController_1.swiftは何も書く必要がなければそのままでOKです。
出来上がりはこんな感じになります。
ぜひ使ってみてください!
この記事の内容に間違いや質問があればコメントをしていただけたらと思います!


