はじめに
CloudStackを理解するために、CloudStackを構築したのですが、そのときに多少つまづいたため、この記事を書くことにしました。
CloudStackを構築する方法は色々ありますが、今回はDockerを利用します。
開発環境
MacBook Pro (Mojave 10.14.6)
Docker (19.03.13)
docker-compose (1.27.4)
CloudStackシミュレータとは
CloudStackシミュレータとは、CloudStackが公式として提供しているDockerイメージです。
シミュレータは管理DB以外が1つのコンテナ内で動作しています。(CloudStackについて理解が浅いため、間違っている場合はご指摘していただけますと幸いです。)
シミュレータのイメージはDocker Hubに登録されているため、今回はそれを利用します。
https://hub.docker.com/r/cloudstack/simulator
実際に動かしてみた
docker pull cloudstack/simulator
docker run --name cloudstack -d -p 8080:8080 cloudstack/simulator
公式通りに動かしてみて http://localhost:8080/client にアクセスしてみましたが、下の画像のようにエラーが発生してしまいました。
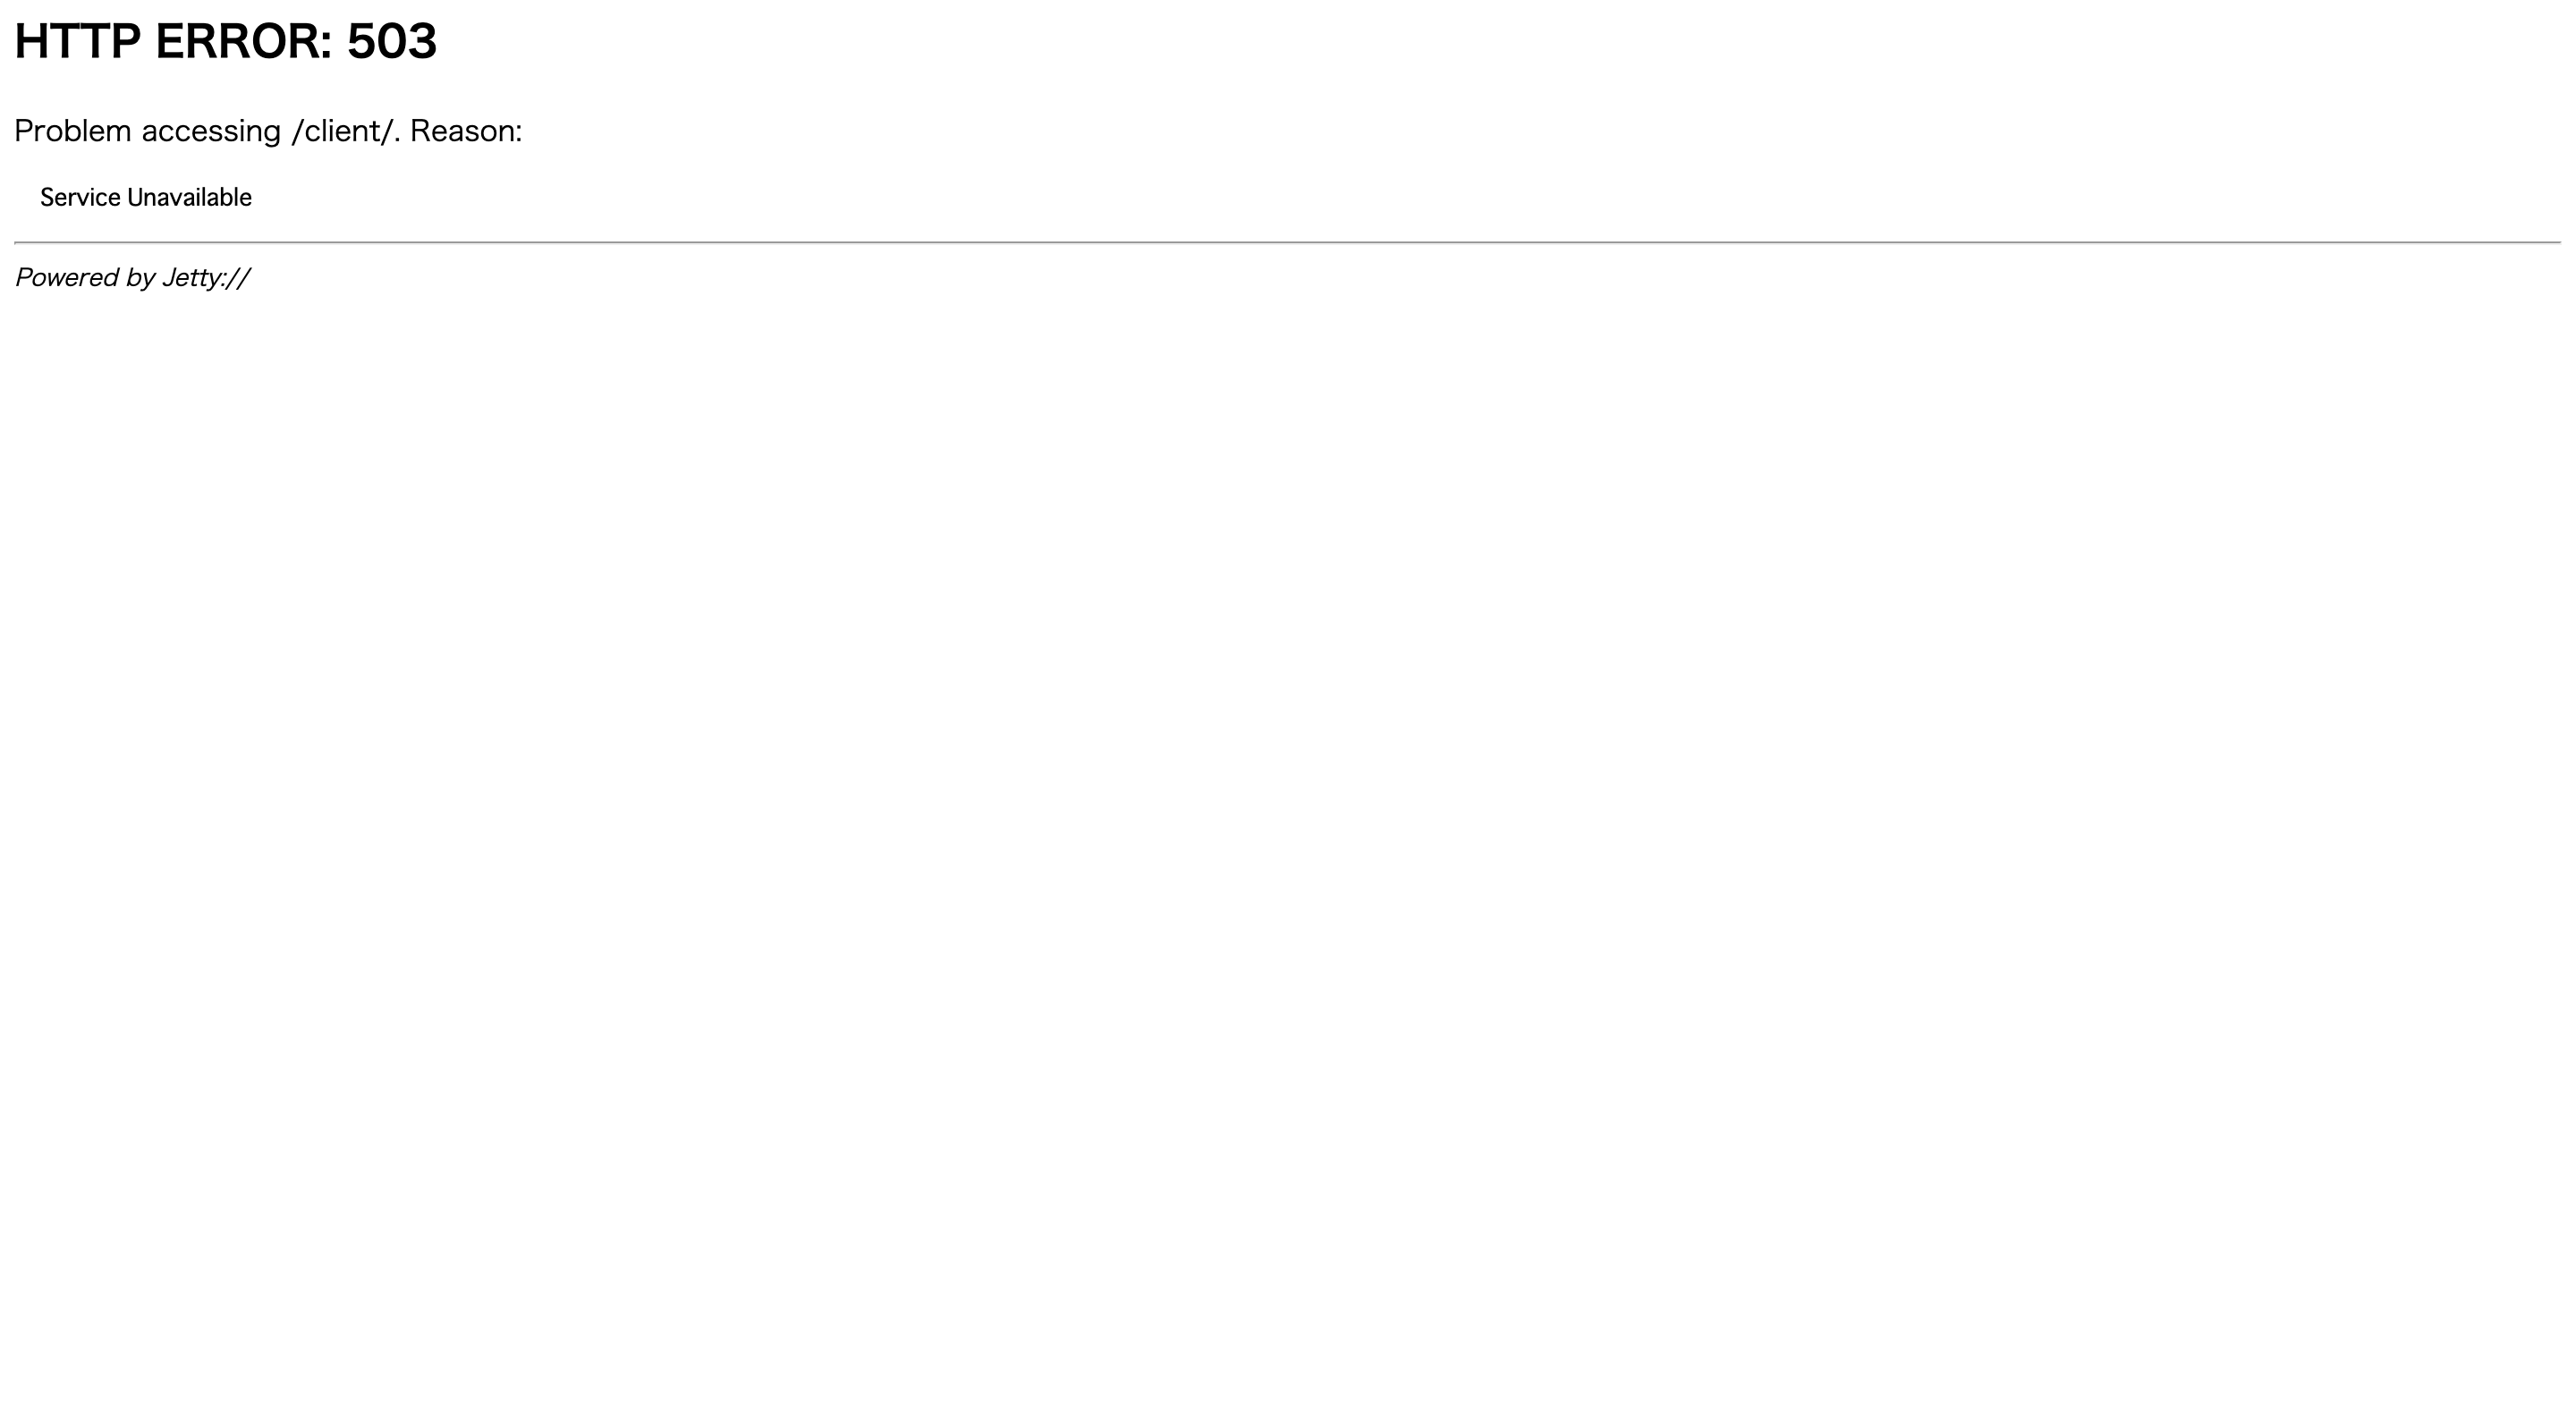
これだけ見ても何が起きているか分からなかったため、どのようなエラーが発生しているかを確認してみることにしました。
docker run --name cloudstack -p 8080:8080 cloudstack/simulator

ERROR [c.c.u.d.Merovingian2] (main:null) (logid:) Unable to get a new db connection
com.mysql.jdbc.exceptions.jdbc4.MySQLNonTransientConnectionException: Could not create connection to database server. Attempted reconnect 3 times. Giving up.
パッと見だとMySQLに接続できないらしい?ので、色々と調べてみると上記のエラーに関するissueが挙げられていました。
ただ、issueはcloseされていたため、Docker Hubのイメージが古いと思い、Latest releaseから構築することとしました。
ここから本題
ということで、公式リポジトリのLatest releaseを利用していきます。
Dockerに関するファイルはtools/docker配下にあります。
ビルド時にDockerに関するファイル以外も必要となるため、そのままcloneしてください。
Docker-composeを動かします。
おそらく、このコマンドを実行することでCloudStackの管理DBを起動させていると思います。
docker-compose -f tools/docker/docker-compose.yml up -d
次に、Dockerfileからイメージをビルドしますが、cloneしてきたDcokerfileだとpipのエラーが発生するため、そこを修正します。
# Licensed to the Apache Software Foundation (ASF) under one
# or more contributor license agreements.  See the NOTICE file
# distributed with this work for additional information
# regarding copyright ownership.  The ASF licenses this file
# to you under the Apache License, Version 2.0 (the
# "License"); you may not use this file except in compliance
# with the License.  You may obtain a copy of the License at
#
#   http://www.apache.org/licenses/LICENSE-2.0
#
# Unless required by applicable law or agreed to in writing,
# software distributed under the License is distributed on an
# "AS IS" BASIS, WITHOUT WARRANTIES OR CONDITIONS OF ANY
# KIND, either express or implied.  See the License for the
# specific language governing permissions and limitations
# under the License.
#
# CloudStack-simulator build

FROM ubuntu:16.04

MAINTAINER "Apache CloudStack" <dev@cloudstack.apache.org>
LABEL Vendor="Apache.org" License="ApacheV2" Version="4.13.1.0"

ARG DEBIAN_FRONTEND=noninteractive

RUN apt-get -y update && apt-get install -y \
    genisoimage \
    libffi-dev \
    libssl-dev \
    git \
    sudo \
    ipmitool \
    maven \
    openjdk-8-jdk \
    python-dev \
    python-setuptools \
    python-pip \
    python-mysql.connector \
    supervisor

RUN apt-get install -qqy mysql-server && \
    apt-get clean all && \
    mkdir /var/run/mysqld; \
    chown mysql /var/run/mysqld

RUN echo '''sql_mode = "STRICT_TRANS_TABLES,NO_ZERO_IN_DATE,NO_ZERO_DATE,ERROR_FOR_DIVISION_BY_ZERO,NO_AUTO_CREATE_USER,NO_ENGINE_SUBSTITUTION"''' >> /etc/mysql/mysql.conf.d/mysqld.cnf

COPY tools/docker/supervisord.conf /etc/supervisor/conf.d/supervisord.conf
COPY . ./root
WORKDIR /root
RUN ls

RUN mvn -Pdeveloper -Dsimulator -DskipTests clean install

# この行を追加してください
RUN pip install --upgrade pip

RUN find /var/lib/mysql -type f -exec touch {} \; && \
    (/usr/bin/mysqld_safe &) && \
    sleep 5; \
    mvn -Pdeveloper -pl developer -Ddeploydb; \
    mvn -Pdeveloper -pl developer -Ddeploydb-simulator; \
    MARVIN_FILE=`find /root/tools/marvin/dist/ -name "Marvin*.tar.gz"`; \
    pip install $MARVIN_FILE

VOLUME /var/lib/mysql

EXPOSE 8080 8096

CMD ["/usr/bin/supervisord"]
イメージを分かりやすくするために、タグ名をCloudStackのバージョンと同じものを指定してビルドします。
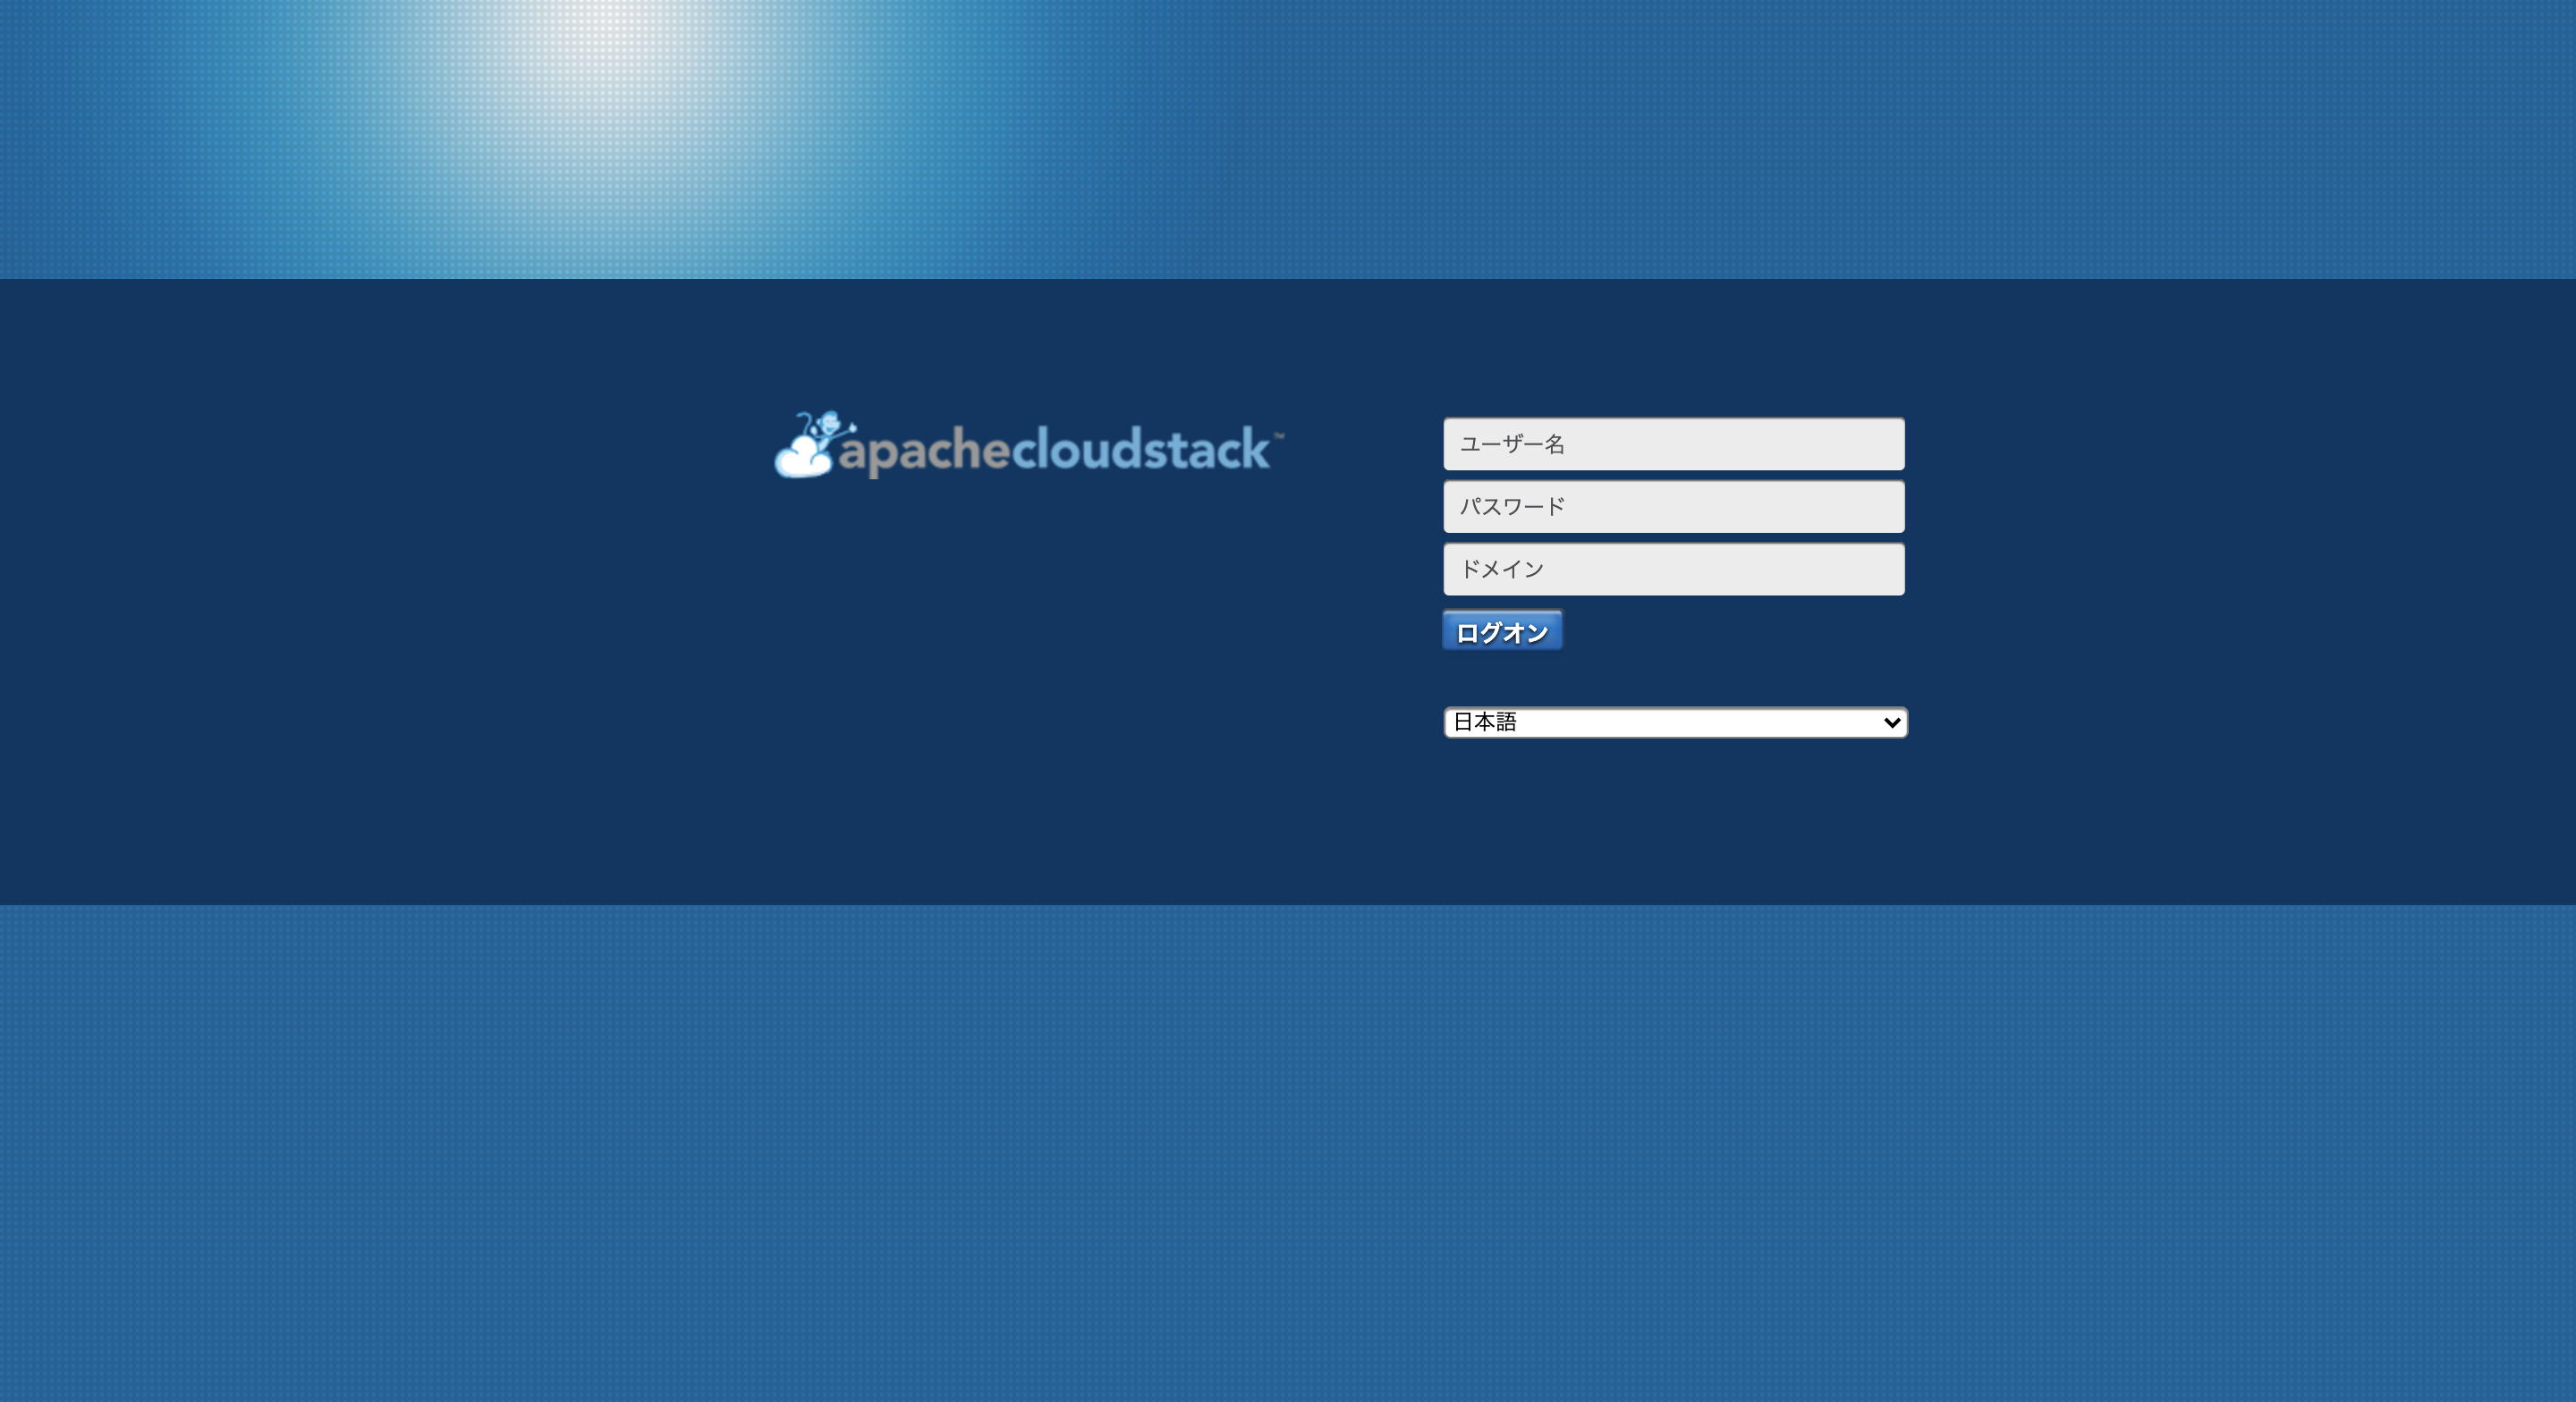
ビルドしたイメージを利用してコンテナを立ち上げて、 http://localhost:8080/client にアクセスできれば成功です。
立ち上がるまでに時間がかかるため、正しく動作しているか確認したい場合は-dオプションを外しても良いかもしれません。
docker build -t cloudstack/simulator:4.13.1.0 . -f tools/docker/Dockerfile
docker run --name cloudstack -d -p 8080:8080 cloudstack/simulator:4.13.1.0
アクセスできたときの画面です。
最後に
記事では簡単に紹介していますが、リファレンスが少なかったため色々と試行錯誤していました。
この記事が私と同じようにつまづいている方の助けになれば幸いです。