@ttdodaさんよりコメントにてご指摘をいただき編集させていただきました。
ありがとうございました!
※私自身@ttdodaさんからご指摘いただいて知ったのですがGitHubはhttpsのアクセストークンでの接続を推奨しているようです。そちらの方法は最後に記載していますので興味のある方は参照ください。
2021年8月13日githubでhttpsでgit pushなどのコマンドが使えなくなりました。
git pushなどを実行すると以下のメッセージが表示されるようになりました。
remote: Support for password authentication was removed on August 13, 2021. Please use a personal access token instead.
remote: Please see https://github.blog/2020-12-15-token-authentication-requirements-for-git-operations/ for more information.
これはざっくり言うとGitHubへの接続方式の一つhttpsによる認証ができなくなりましたよという内容で
HTTPSでの認証でアカウントパスワードが使えなくなったというものです。
影響範囲の詳細はエラーメッセージ内のURLを参照してください。
https://github.blog/2020-12-15-token-authentication-requirements-for-git-operations/
※以下exampleは自分の環境の値に置き換えて試してみて下さい。
ローカルからリモートの設定を確認
ローカルとはプッシュする時のプッシュ元
リモートとはプッシュした時のプッシュ先
のことです。
ローカルの多くは自分が操作しているPCの事を指します。
以下のコマンドは自分が操作しているPCのgitを設定している
ディレクトリのルート(一番上の階層)で打ちます。
$ git remote -v
origin  https://github.com/example/sample_app.git (fetch)
origin  https://github.com/example/sample_app.git (push)
これでリモートにhttpsで接続していることが確認されました。
gitのリモートを変更します。
ここで一つ確認をします。

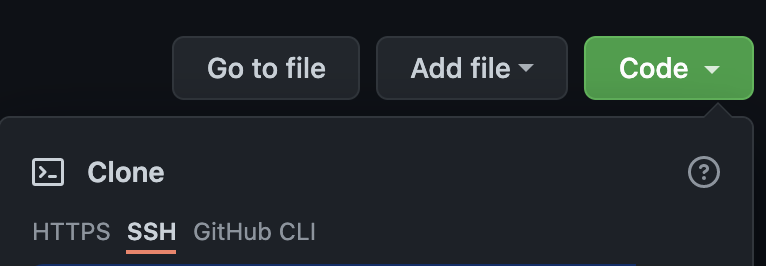
↑これはGitHub上のリモートリポジトリ画面のCodeをクリックすると表示されるのですが
画像のところでsshのアドレスが表示されていない場合はGitHubにkeyが登録されていない可能性があります。
一度以下のアドレスにアクセスしてみて登録がなければ先に登録を行ってみて下さい。
https://github.com/settings/ssh
アドレスが取れた場合はローカルにて以下を打ちます。
$ git remote set-url origin git@github.com:example/example_app.git

#以下のコマンドで変更されたか確認します。変更されていれば成功です。
$ git remote -v
origin  git@github.com:example/example_app.git (fetch)
origin  git@github.com:example/example_app.git (push)
あとは以下の手順でssh keyを新たに作成して登録すればpushができるようになると思います。
GitとGitHubをSSHで接続する
どうしてもhttpsでgit pushがしたい|GitHub推奨
そんな時はトークンが使えます。
1.GitHubでログインした状態で画面右上の[ユーザーアイコン]をクリックします。
2.[Settings]をクリックします。
3.[Developer settings] をクリックします。
4.[Personal access tokens]をクリックします。
5.[Generate new token] をクリックします。
6.トークンの名前(任意)、有効期限、権限を設定してトークンを作成します。

自分の場合は↑のように設定しましたがチェックをはずすと権限を絞れます。
7.トークンが表示されますのでメモします。画面遷移すると確認できなくなりますのでご注意下さい。
このトークンをパスワードの代わりに使うとhttpsでgit pushができました。
(検証環境 : cloud9 → GitHub)