こういうのなんて言うんだっけ?と、この説明的なタイトルになったんですが
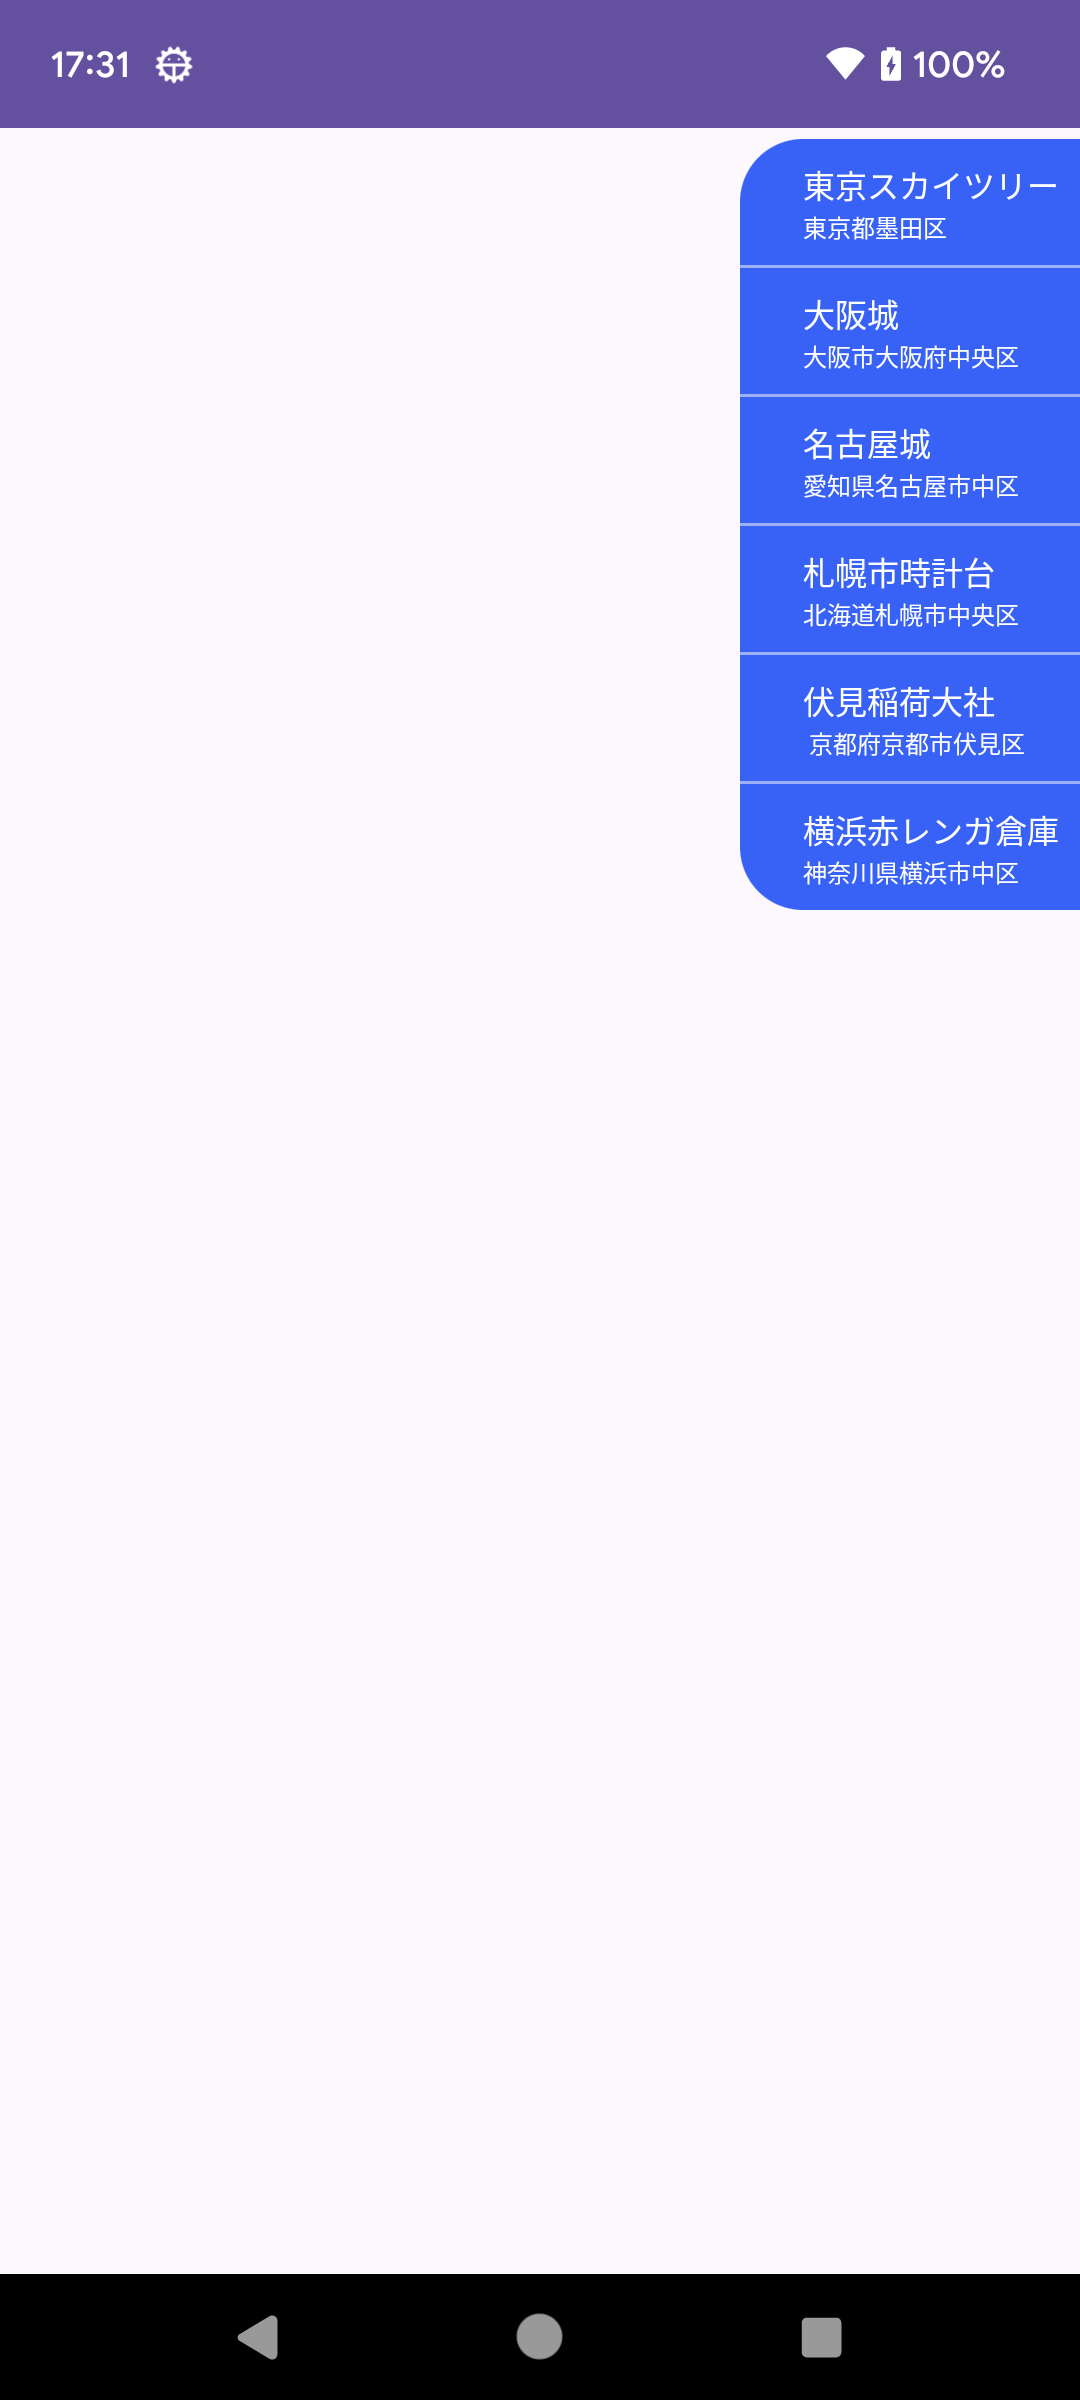
要するに以下のようなメニューを作りたいなー、どうやればいいんだ?
って考えたので記事にしておこうと思います。
RecyclerView でリストを作る
アニメーションを除けばそんなに難しい要素もなく、リストを作って選択肢以外の消去と全表示ができればいけそうですね。
リストの作り方はいくつかあるでしょうが、RecyclerViewを使うのが簡単でしょうか。
以下は単にRecyclerViewの使い方説明になります。
リストアイテムの layout を作ります。最初に提示したような表示にしたいので、高さ固定で、幅はwrap_contentにしています。
<?xml version="1.0" encoding="utf-8"?>
<androidx.constraintlayout.widget.ConstraintLayout
    xmlns:android="http://schemas.android.com/apk/res/android"
    xmlns:app="http://schemas.android.com/apk/res-auto"
    android:layout_width="wrap_content"
    android:layout_height="48dp"
    android:paddingEnd="8dp"
    android:paddingStart="24dp"
    android:paddingVertical="8dp"
    >

    <TextView
        android:id="@+id/name"
        android:layout_width="wrap_content"
        android:layout_height="wrap_content"
        app:layout_constraintBottom_toTopOf="@id/description"
        app:layout_constraintStart_toStartOf="parent"
        app:layout_constraintTop_toTopOf="parent"
        android:textAppearance="@style/MaterialAlertDialog.Material3.Title.Text"
        android:textColor="@color/white"
        android:textSize="12sp"
        />

    <TextView
        android:id="@+id/description"
        android:layout_width="wrap_content"
        android:layout_height="wrap_content"
        app:layout_constraintBottom_toBottomOf="parent"
        app:layout_constraintStart_toStartOf="parent"
        app:layout_constraintTop_toBottomOf="@id/name"
        android:textAppearance="@style/MaterialAlertDialog.Material3.Body.Text"
        android:textColor="@color/white"
        android:textSize="9sp"
        />
</androidx.constraintlayout.widget.ConstraintLayout>
各要素のデータを保持する data class を作り
private data class Menu(
    val name: String,
    val description: String,
)
ViewHolder を作ります
private class MenuViewHolder(
    val binding: ItemMenuBinding
) : RecyclerView.ViewHolder(binding.root)
ListAdapterを以下のように実装します。
private class MenuAdapter(
    activity: Activity,
    private val list: List<Menu>,
) : ListAdapter<Menu, MenuViewHolder>(
    object : DiffUtil.ItemCallback<Menu>() {
        override fun areItemsTheSame(o: Menu, n: Menu): Boolean = o.name == n.name
        override fun areContentsTheSame(o: Menu, n: Menu): Boolean = o == n
    }
) {
    private val inflater = LayoutInflater.from(activity)
    init {
        submitList(list)
    }
    override fun onCreateViewHolder(parent: ViewGroup, viewType: Int): MenuViewHolder =
        MenuViewHolder(ItemMenuBinding.inflate(inflater, parent, false))

    override fun onBindViewHolder(holder: MenuViewHolder, position: Int) {
        val menu = getItem(position)
        holder.binding.name.text = menu.name
        holder.binding.description.text = menu.description
    }
}
角丸背景をRecyclerView全体の背景にする
メニューの背景はshapeで作ってみます。左上と左下に角丸を設定しておきます。
<?xml version="1.0" encoding="utf-8"?>
<shape
    xmlns:android="http://schemas.android.com/apk/res/android"
    android:shape="rectangle"
    >
    <corners android:bottomLeftRadius="24dp" android:topLeftRadius="24dp" />
    <solid android:color="@color/md_blue_A700" />
</shape>
これをRecyclerViewの背景に設定します。
<?xml version="1.0" encoding="utf-8"?>
<androidx.constraintlayout.widget.ConstraintLayout
    xmlns:android="http://schemas.android.com/apk/res/android"
    xmlns:app="http://schemas.android.com/apk/res-auto"
    android:layout_width="match_parent"
    android:layout_height="match_parent"
    >

    <androidx.recyclerview.widget.RecyclerView
        android:id="@+id/menu"
        android:layout_width="wrap_content"
        android:layout_height="wrap_content"
        android:background="@drawable/bg_menu"
        android:layout_marginTop="4dp"
        app:layoutManager="androidx.recyclerview.widget.LinearLayoutManager"
        app:layout_constraintEnd_toEndOf="parent"
        app:layout_constraintTop_toTopOf="parent"
        />

</androidx.constraintlayout.widget.ConstraintLayout>
ここまで作ったAdapterを設定します。
val adapter = MenuAdapter(this, menus)
binding.menu.adapter = adapter
val decoration = VerticalDividerItemDecoration(this)
decoration.setDrawable(R.drawable.divider)
binding.menu.addItemDecoration(decoration)
※VerticalDividerItemDecorationについては以下の記事を参照。最後の要素にdividerを表示しないDividerItemDecorationです。
ここまでで、展開した状態のメニューが表示されます。
選択で展開・折りたたみ動作をさせる
各項目をタップして展開・折りたたみ、折りたたみ時には選択項目だけ残すという動作を実装します。
private var expand = false
private var selected: Int = 0

init {
    submitList(listOf(list[selected]))
}

override fun onBindViewHolder(holder: MenuViewHolder, position: Int) {
    val menu = getItem(position)
    holder.binding.name.text = menu.name
    holder.binding.description.text = menu.description
    holder.binding.root.setOnClickListener {
        onClick(holder.adapterPosition)
    }
}

private fun onClick(position: Int) {
    expand = !expand
    if (expand) {
        submitList(list)
    } else {
        submitList(listOf(list[position]))
        selected = position
    }
}
初期選択項目は横着して0固定です。 submitList で選択した項目だけのリストを設定しておきます。
クリックされたときにリスト内の位置は、 adapterPosition で取得可能です。
クリックされたら、展開・折りたたみを反転して、展開するなら全項目、折りたたむなら選択された項目だけをsubmitします。
RecyclerViewのitemAnimatorが動くと不自然なので無効化しておきましょう。
binding.menu.itemAnimator = null
これで動作としては完成です。
展開・折りたたみアニメーションを行う
アニメーションなしだと、寂しい以前に何をしているのかよく分からない感じになるので、展開・折りたたみアニメーションを追加しましょう。
アニメーションの実装方法にもいろいろありますが、この場合、 TransitionManager を使うのが楽です。 TransitionManager を使うために親Viewが必要なので、 onAttachedToRecyclerView で Adapter の attach 先の RecyclerView を保持するようにしておきましょう。
private var recyclerView: RecyclerView? = null

override fun onAttachedToRecyclerView(recyclerView: RecyclerView) {
    this.recyclerView = recyclerView
}

override fun onDetachedFromRecyclerView(recyclerView: RecyclerView) {
    this.recyclerView = null
}
では、 submitList の前に beginDelayedTransition を実行するようにします。
private fun onClick(position: Int) {
    val recyclerView = recyclerView ?: return
    expand = !expand
    if (expand) {
        submitList(list) {
            TransitionManager.beginDelayedTransition(recyclerView)
        }
    } else {
        submitList(listOf(list[position])) {
            TransitionManager.beginDelayedTransition(recyclerView, ChangeBounds())
        }
        selected = position
        onSelected(position)
    }
}
折りたたむ場合は、そのままだと余計な動きが見えたので、 ChangeBounds() だけに調整しています。
外部タップで閉じる
動作に対する期待値として、メニューが展開しているとき、外部をタップした場合、キャンセル扱いになってほしいですね。
いくつか方法はあると思いますが、DecorViewにViewを貼り付け、そこでタップを監視してみましょう
private val rect = Rect()
@SuppressLint("ClickableViewAccessibility")
private val view: View = View(activity).also {
    it.setOnTouchListener { _, event ->
        val recyclerView = recyclerView ?: return@setOnTouchListener false
        if (!recyclerView.getGlobalVisibleRect(rect)) return@setOnTouchListener false
        if (!rect.contains(event.rawX.toInt(), event.rawY.toInt())) {
            onCancel()
        }
        false
    }
}

private fun watchOutside(enable: Boolean) {
    val decorView = (activity.window.decorView as ViewGroup)
    if (enable) {
        decorView.addView(view)
    } else {
        decorView.removeView(view)
    }
}
private fun onClick(position: Int) {
    val recyclerView = recyclerView ?: return
    expand = !expand
    watchOutside(expand)
    if (expand) {
        submitList(list) {
            TransitionManager.beginDelayedTransition(recyclerView)
        }
    } else {
        submitList(listOf(list[position])) {
            TransitionManager.beginDelayedTransition(recyclerView, ChangeBounds())
        }
        selected = position
        onSelected(position)
    }
}
private fun onCancel() {
    val recyclerView = recyclerView ?: return
    if (!expand) return
    expand = false
    watchOutside(false)
    submitList(listOf(list[selected])) {
        TransitionManager.beginDelayedTransition(recyclerView, ChangeBounds())
    }
}
DecorView に貼り付けたViewでTouchイベントを監視します。 OnTouchListener で false を返すと、次の優先度の View へイベントが配信されるため、他の操作ができなくなるということはありません。
RecyclerView のグローバル領域を getGlobalVisibleRect() で取得し、 MotionEvent のrawX rawY で同様にグローバル座標でのタッチイベントを比較することでタッチされた場所がRecyclerViewの内側か外側かを判定しています。 RecyclerViewn の外側をタップされた場合は、キャンセルを通知します。
これで、最初に示したようなアニメーション付きで、展開・折りたたみする単一選択メニューを作ることができました。
ちょっと思いつきでこの記事を書いたこともあって考慮漏れなどあるかもしれません。おかしなことをやっていたらご指摘田だけ増すとありがたいです。
以上です。