初投稿です。JSPやサーブレットでの古いWEBアプリしか触ったことがないので
今時のWEBアプリの勉強ついでに書いてみます。
Angular
Googleが開発しているフロントエンドJavaScriptフレームワーク。実装はTypeScriptで行う
MVC(Model View Controller) や MVW (Model-View-Whatever)モデルを構築できるらしい
ルーティングもやってくれるからこれだけで簡単にWEBアプリが作れる
Angular CLI
Angular開発用のコマンドラインツール
Node.js上で動く(Node.js 6.9以上 npm 3.x以上)
各コンポーネントの自動生成やサーバーの起動などをやってくれる
初期構築/チュートリアル
環境
- Windows10 pro
- PowerShell
- Node 10.16.3 LTS
- npm 6.9.0
インストール
npmでAngular-cliを取得
オプション-gでグローバルインストール
> npm install -g @angular/cli
ワークスペースと初期アプリの構築
適当な作業ディレクトリに移動してAngula-cliのコマンドで初期構築
> ng new my-app
Would you like to add Angular routing? (y/N)と聞かれるのでy
必要なライブラリその他がインストールが終わったらcd my-appでディレクトリを移動する。
lsしてみると色々とファイルが作成されている
/myapp
- src
- .editorconfig
- .gitignore
- angular.json
- browserslist
- karma.conf.js
- package.json
- package-lock.json
- README.md
- tsconfig.app.json
- tsconfig.json
- tsconfig.spec.json
- tslint.json
- .git
- e2e
- node_modules
ng serveでWEBサーバを起動
> ng serve
(中略)
** Angular Live Development Server is listening on localhost:4200, open your browser on http://localhost:4200/ **
i 「wdm」: Compiled successfully.
4200番ポートでサーバが起動したのでブラウザで開くとAngularなページが表示される
localhost:4200
編集してみる
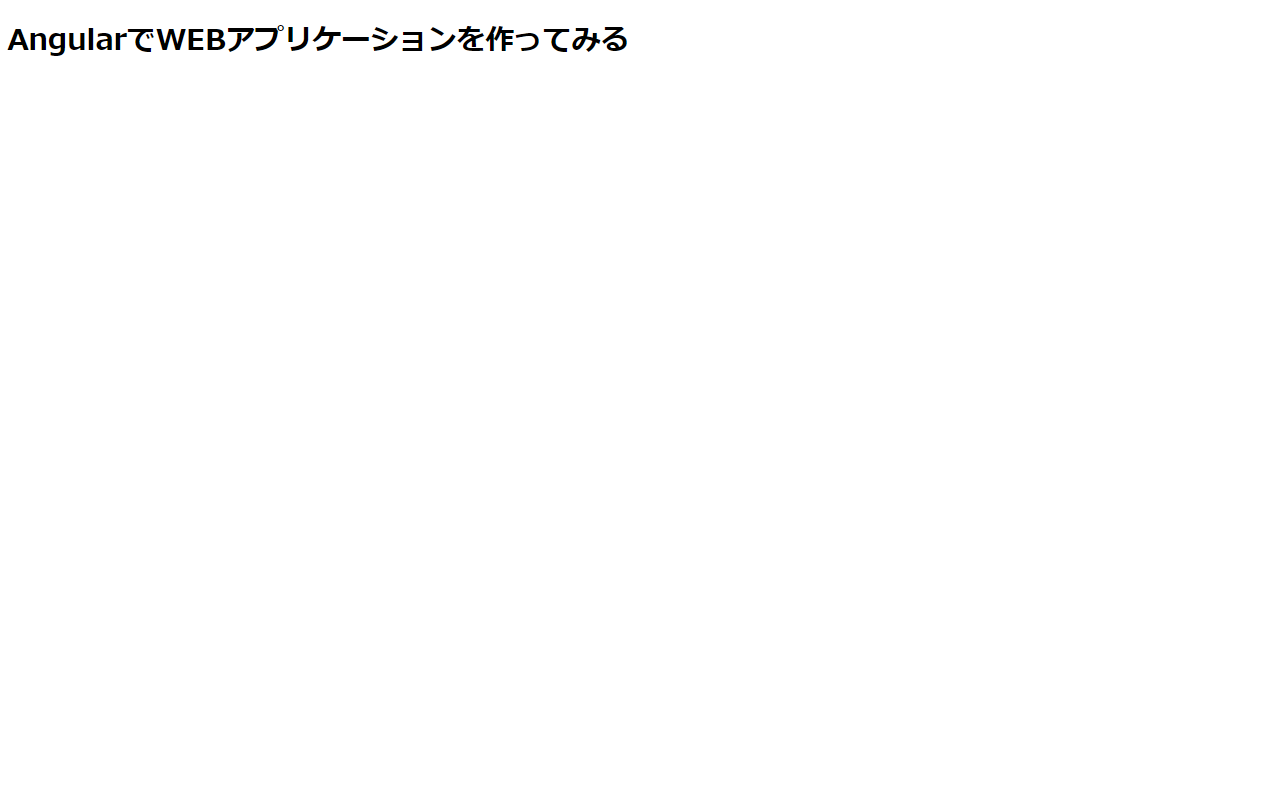
実体はsrc/app/app.component.htmlなので開いて編集する
※既存のソースはすべて消去
<h1>AngularでWEBアプリケーションを作ってみる</h1>
保存するとng serveのシェルで自動コンパイルが実行される
i 「wdm」: Compiling...

Date: 2019-10-06T03:47:14.667Z - Hash: 14dbbd95520c919d3d31
4 unchanged chunks
chunk {main} main.js, main.js.map (main) 23.1 kB [initial] [rendered]
Time: 120ms
i 「wdm」: Compiled successfully.
ブラウザを見に行くとページが更新されている
 |
|---|
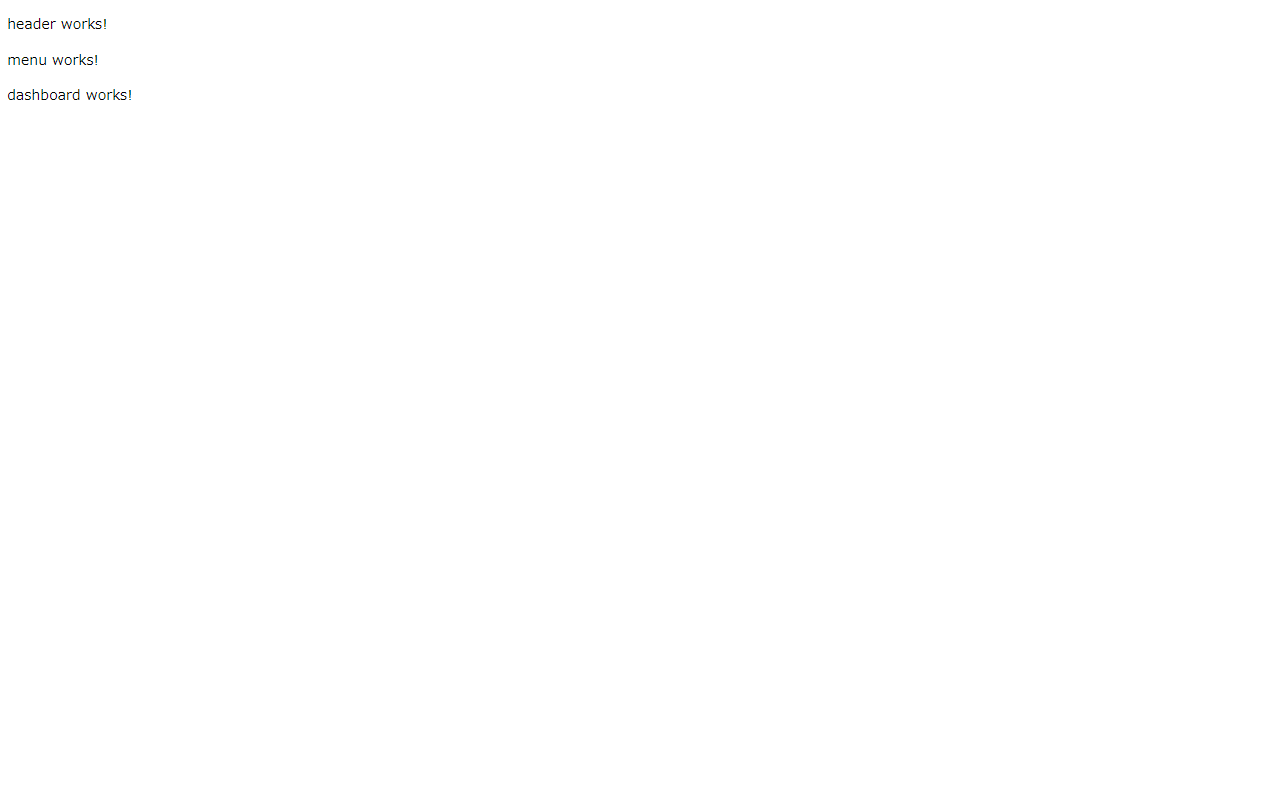
コンポーネントを追加
Angularはコンポーネントという画面を構成する部品を作って組み合わせる仕組みらしいので、
さっそくng generate componentしてみる
(ng serveで起動したプロセスはファイルの更新を検知して自動ビルド→デプロイをやってくれるようなので殺さず、
新しくコンソールを開いて作業する)
> ng g component header
CREATE src/app/header/header.component.html (21 bytes)
CREATE src/app/header/header.component.spec.ts (628 bytes)
CREATE src/app/header/header.component.ts (269 bytes)
CREATE src/app/header/header.component.css (0 bytes)
UPDATE src/app/app.module.ts (475 bytes)
> ng g component menu
CREATE src/app/menu/menu.component.html (19 bytes)
CREATE src/app/menu/menu.component.spec.ts (614 bytes)
CREATE src/app/menu/menu.component.ts (261 bytes)
CREATE src/app/menu/menu.component.css (0 bytes)
UPDATE src/app/app.module.ts (549 bytes)
> ng g component dashboard
CREATE src/app/dashboard/dashboard.component.html (24 bytes)
CREATE src/app/dashboard/dashboard.component.spec.ts (649 bytes)
CREATE src/app/dashboard/dashboard.component.ts (281 bytes)
CREATE src/app/dashboard/dashboard.component.css (0 bytes)
UPDATE src/app/app.module.ts (643 bytes)
※g は generate の省略系
app.component.htmlに生成したコンポーネントを記述
<app-header></app-header>
<app-menu></app-menu>
<app-dashboard></app-dashboard>
保存すると、画面に反映される
画面
 |
|---|
コンポーネントの編集
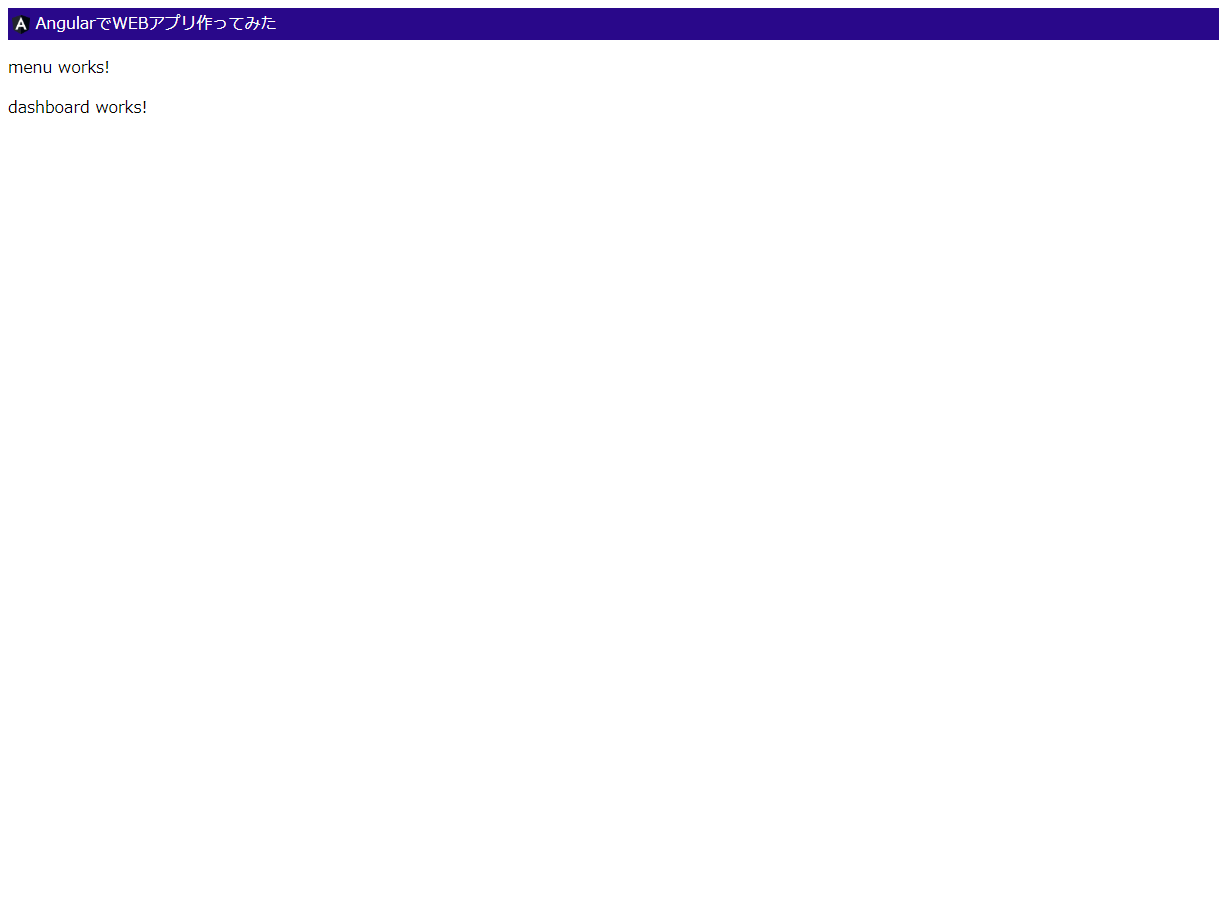
ヘッダー
src/app/headerに生成されたhtmlとcssを編集する
<p>header works!</p>
↓
<div class="header">
  <img src="../favicon.ico" alt="Angular"> AngularでWEBアプリ作ってみた
</div>
Angularに内蔵されているWEBサーバが元々持っているfaviconを利用
.header {
    padding: 4px;
    background-color: #29088A; /*背景は紺色*/
    color: #FFF;               /*文字は白色*/
  }
  .header img {
    width: 18px;
    vertical-align: middle;
  }
ページのヘッダー部分に自動的に反映される
画面
 |
|---|
(ブラウザF5は押していない。勝手に反映されてる。すごい)
メニュー
同様にsrc/app/menuのファイルを修正する
<div class="menu">
        <ul>
        <li><a href="/">Dashboard</a></li>
        </ul>
</div>
.menu {
    background-color: #CED8F6; /*背景は薄青*/
  }
  .menu li {
    padding: 4px 8px;
    display: inline-block;
  }
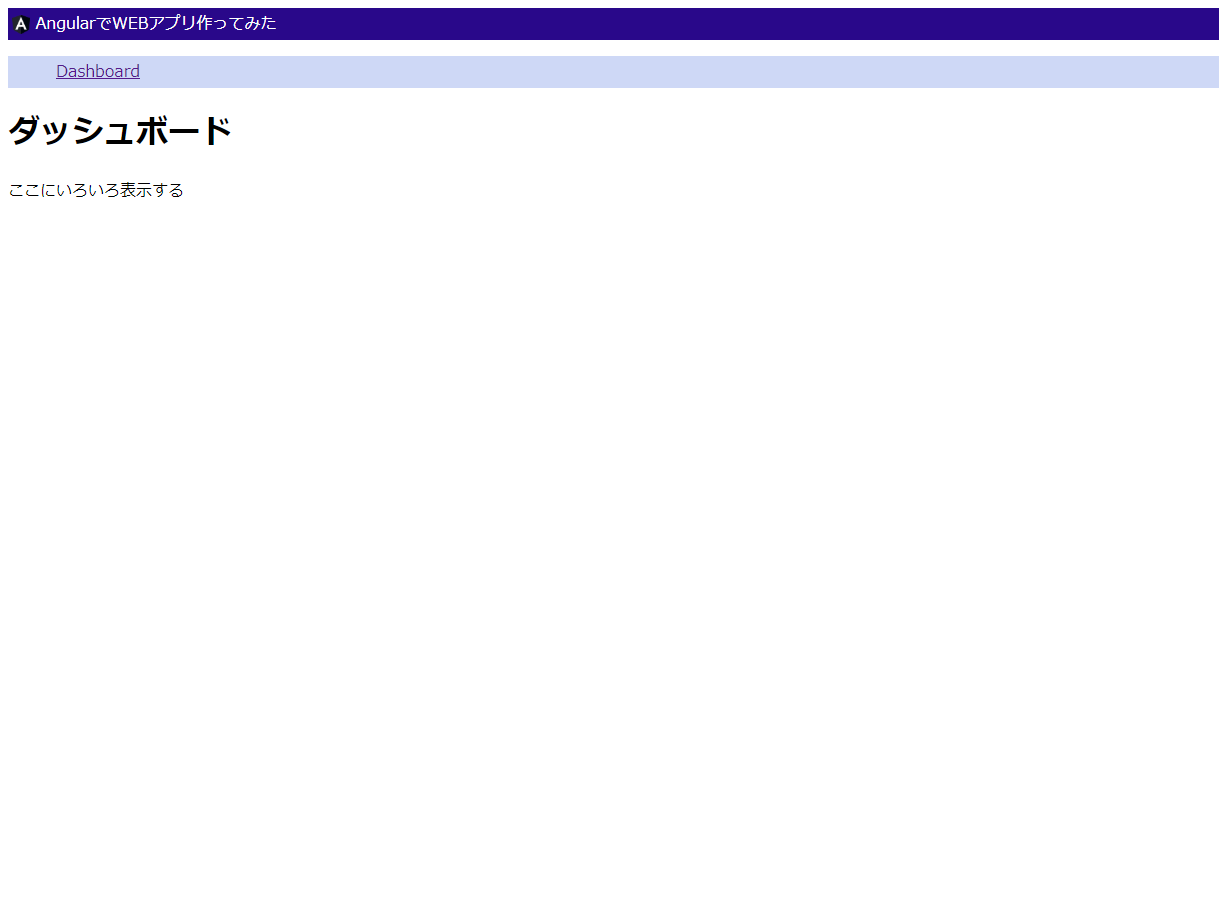
ダッシュボード
同様にsrc/app/dashboardも
<h1>ダッシュボード</h1>
ここにいろいろ表示する
編集後の画面
少しずつWebアプリっぽくなってきた
画面・機能を追加する
ここからは、Webアプリとしての機能を作る
無料で気象情報を提供してくれるAPIサービスのOpenweathermapを使って
登録した都市の天気を表示する機能を作ってみる
コンポーネントを追加
ng g componentで登録画面用と編集画面用のコンポーネントを生成する
> ng g component city/city-add
> ng g component city/city-edit
ルーティング設定
公式サイトのチュートリアル‘はng generate module app-routing --flat --module=appしろとあるが、既にsrc/app/にapp-routing-module.tsがあったのでそれを編集
import { NgModule } from '@angular/core';
import { Routes, RouterModule } from '@angular/router';

/* 追加 */
import { DashboardComponent } from './dashboard/dashboard.component';
import { CityAddComponent } from './city/city-add/city-add.component';
import { CityEditComponent } from './city/city-edit/city-edit.component';

const routes: Routes = [
  /* 追加 */
  { path: '', redirectTo: '/dashboard', pathMatch: 'full' },
  { path: 'dashboard', component: DashboardComponent },
  { path: 'city/add', component: CityAddComponent},
  { path: 'city/:id/edit', component: CityEditComponent},
];

@NgModule({
  imports: [RouterModule.forRoot(routes)],
  exports: [RouterModule]
})
export class AppRoutingModule { }
トップ画面のHTMLを修正してルーティング用コンポーネントを指定
<app-header></app-header>
<app-menu></app-menu>
<div class="main">
    <router-outlet></router-outlet>
</div>
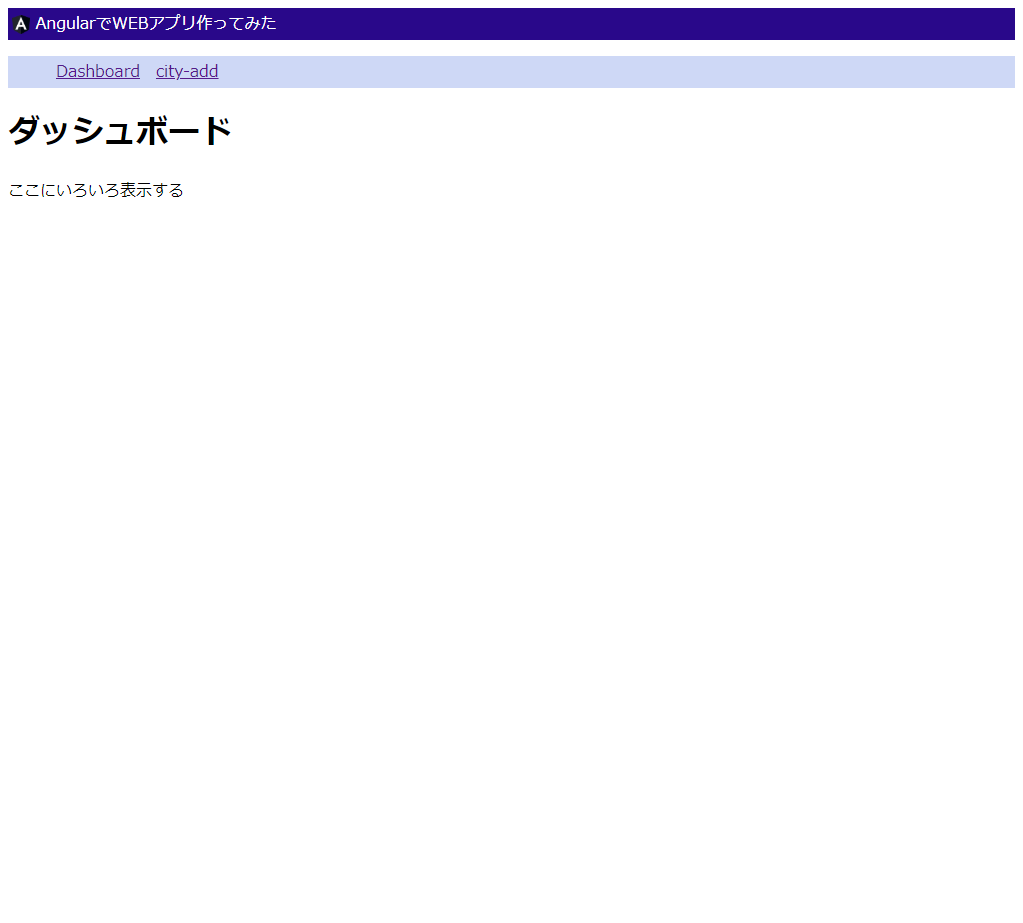
リンクの作成
メニュー画面を修正して都市名登録画面へのリンクを作成する
ついでにダッシュボードへのリンクも<a href>から<a routerLink>に変えておく
<div class="menu">
    <ul>
    <li><a href="/">Dashboard</a></li>
    <li><a routerLink="/city/add">city-add</a></li>
    </ul>
</div>
メニューのリンクを押下するとcity-addコンポーネントが動作するようになる
画面

都市オブジェクトの作成
都市名を登録するためのオブジェクト(クラス)をsrc/app/cityに作成する
export class City {
    id: number;       /* 連番 */
    name: string;     /* 都市名 */
    weather: string;  /* 天気を取得して格納する */
  }
サービスを作成
ng g serviceコマンドでサービスを生成する
> ng g service city/city
app.module.tsにサービスを追加する
import { BrowserModule } from '@angular/platform-browser';
import { NgModule } from '@angular/core';
 :
 :
/* 追加 */
import { CityService } from './city/city.service';
 :
 :
  imports: [
    BrowserModule,
    AppRoutingModule,
  ],
  providers: [
    /* 追加 */
    CityService
  ],
  bootstrap: [AppComponent]
})
export class AppModule { }
サービスに登録処理/取得処理を実装する
import { Injectable } from '@angular/core';
/* 追加 */
import { City } from './city';

@Injectable({
  providedIn: 'root'
})
export class CityService {
  /* 追加 */
  cities: City[];

  constructor() {
    /* 追加 */
    this.cities = [];
 }

  /* 追加 */
  addCity(city: City): void {
    var id: number;
    id = this.cities.length + 1;

    /* idを設定 */
    city.id = id;

    /* 配列に追加 */
    this.cities.push(city);
  }

  /* 追加 */
  getCities(): City[]{
    return this.cities;
  }
}
登録用の画面を作成
app.modules.tsにフォーム用部品FormsModuleを組み込む
 :
 :
/* 追加 */
import { FormsModule } from '@angular/forms';

@NgModule({
 :
 :
  imports: [
    BrowserModule,
    AppRoutingModule,
    /* 追加 */
    FormsModule
  ],
 :
 :
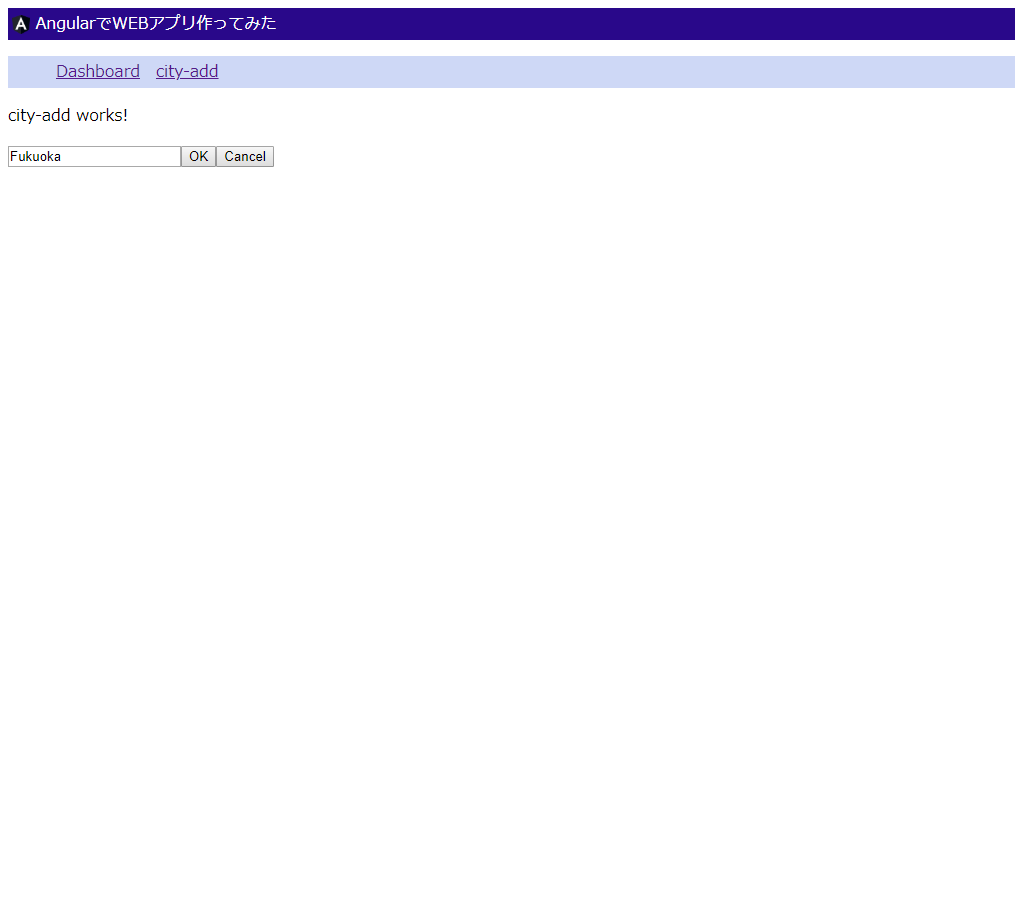
city-add.component.htmlを編集して登録用のフォームを作成する
<p>city-add works!</p>
<form #f="ngForm" (ngSubmit)="onSubmit(f.value)">
    <input type="text" name="name" [(ngModel)]="name">
    <button type="submit">OK</button>
    <button routerLink="/dashboard">Cancel</button>
</form>
city-add.component.tsに登録処理の呼び出しを実装
import { Component, OnInit } from '@angular/core';
/* 追加 */
import { Router } from '@angular/router';
import { City } from './city';
import { CityService } from '../city.service';

@Component({
  selector: 'app-city-add',
  templateUrl: './city-add.component.html',
  styleUrls: ['./city-add.component.css']
})
export class CityAddComponent implements OnInit {

  constructor(
    /* 追加 */
    private router: Router,
    private service: CityService
  ) { }

  ngOnInit() {
  }

  /* 追加 */
  onSubmit(form: any): void {
    // フォームの値を取得
    let name = form.name;
    // Cityクラスのインスタンスを生成して名前を指定
    var city: City = new City;
    city.name = name;
    // 天気はとりあえず'-'を設定
    city.weather = '';

    // サービスの都市登録メソッドに渡す
    this.service.addCity(city);

    // ダッシュボードに遷移
    this.router.navigate(['dashboard']);
  }
}
これでいったん登録処理は完成
画面

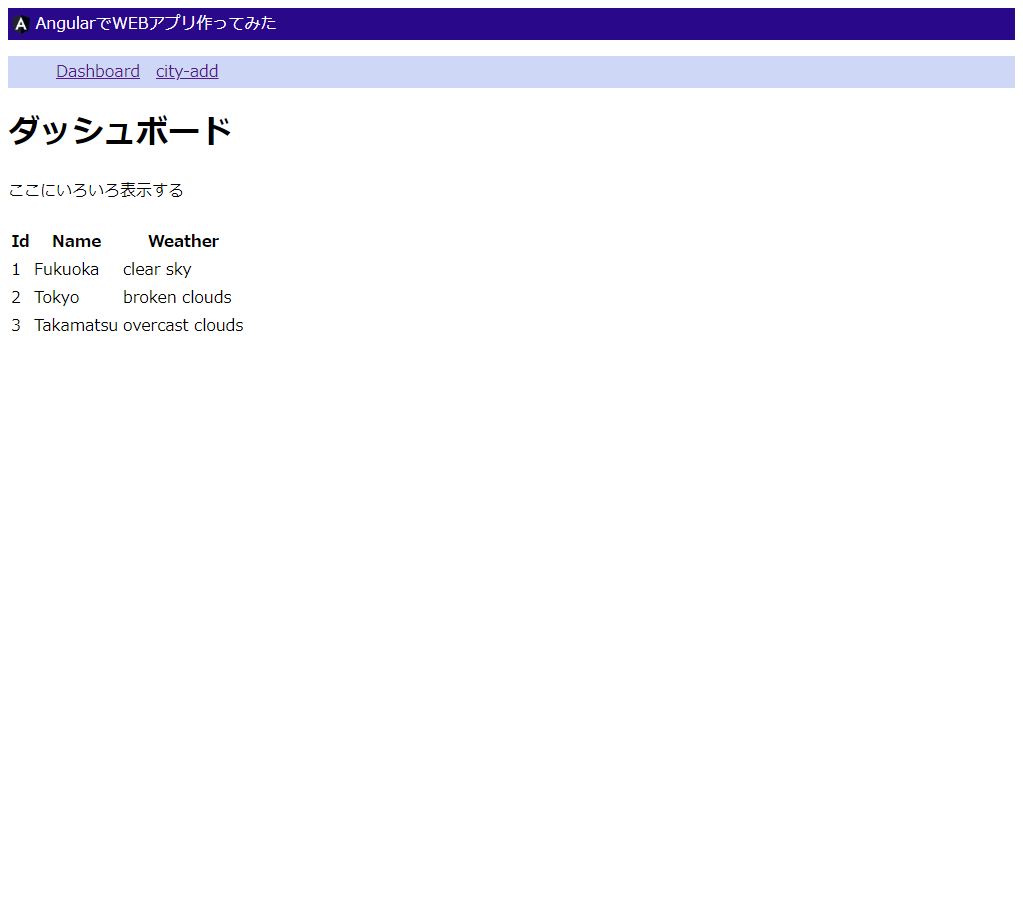
ダッシュボードに登録内容を表示
city.service.tsに登録内容が保持されているはずなので、ダッシュボードで表示してみる
都市一覧を取得
dashboard.component.tsにサービスから値を取得する処理を実装する
import { Component, OnInit } from '@angular/core';
/* 追加 */
import { ActivatedRoute, Router } from '@angular/router';
import { City } from '../city/city';
import { CityService } from '../city/city.service';

@Component({
  selector: 'app-dashboard',
  templateUrl: './dashboard.component.html',
  styleUrls: ['./dashboard.component.css']
})
export class DashboardComponent implements OnInit {
  /* 追加 */
  cities: City[];

  constructor(
    /* 追加 */
    private router: Router,
    private service: CityService
  ){ }

  /* 追加 */
  ngOnInit() {
    this.cities = this.service.getCities();
  }

}
ダッシュボードに表示
dashboard.component.htmlを編集して表示の仕組みを作る
(*ngIfを使って登録件数が0以外の場合のみテーブル作成)
<h1>ダッシュボード</h1>
ここにいろいろ表示する
<div *ngIf="cities.length !== 0">
    <br>
    <table>
        <tr><th>Id</th><th>Name</th><th>Weather</th></tr>
        <tr *ngFor="let city of cities">
            <td>{{city.id}}</td>
            <td>{{city.name}}</td>
            <td>{{city.weather}}</td>
        </tr>
    </table>
</div>
画面
適当に登録

OKボタンでダッシュボードに遷移

やったぜ
外部APIとの連携
登録時にOpenweathermapのAPIを叩いて天気を取得する仕組みを実装する
HTTP通信用モジュールを追加
app.module.tsを編集し、HttpModuleを読み込む
ついでにこれから作成するHttp用サービスHttpServiceも追加しておく
 :
 :
/* 追加 */
import { HttpClientModule } from '@angular/common/http';
import { HttpService } from './HttpService';

@NgModule({
 :
 :
  imports: [
    BrowserModule,
    AppRoutingModule,
    FormsModule,
    /* 追加 */
    HttpClientModule
  ],
  providers: [
    CityService,
    /* 追加 */
    HttpService
  ],
  bootstrap: [AppComponent]
})
export class AppModule { }
HTTP通信の専用サービスを作成
共通なのでsrc/app/直下に作成
import { Injectable } from '@angular/core';
import { HttpClient } from '@angular/common/http';
import { Observable } from 'rxjs';

@Injectable()
export class HttpService {

    constructor(private http: HttpClient) { };

    /* 受け取ったURLにリクエストを発行 */
    getWeatheritemsbyCity(apiEndPoint: string): Observable<any> {
        return this.http.get(apiEndPoint);
    };

}
都市名サービスを修正
city.service.tsを修正
import { Injectable } from '@angular/core';
import { City } from './city';

/* 追加*/
import { HttpService } from '../HttpService';


@Injectable({
  providedIn: 'root'
})
export class CityService {
  /* 追加 */
  environment = {
    production: false,
    appId: '<OpenweathermapのAPIキー>',
    baseUrl: 'http://api.openweathermap.org/data/2.5/'
  };

  cities: City[];

  constructor(
    /* 追加 */
    private service: HttpService
   ) {
    this.cities = [];
   }

  addCity(city: City): void {
    var id: number;
    id = this.cities.length + 1;

    /* idを設定 */
    city.id = id;

    /* OpenweathermapのAPIを呼び出す処理を追加 */
    //var result: any;
    var apiEndPoint: string = this.environment.baseUrl
    + 'weather?q=' + city.name
    + '&appid=' + this.environment.appId;

    this.service.getWeatheritemsbyCity(apiEndPoint)
    .subscribe(res => {
      var weather = res.weather[0].description;
      // 天気を設定して配列に追加
      city.weather = weather;
      this.cities.push(city);
    }, err => {
      console.log(err);
    }, () => {

    });
  }

  getCities(): City[]{
    return this.cities;
  }
}
これで一通り完成!
動作確認
トップ画面から登録画面へ遷移して適当な都市の名前を登録
→ダッシュボードに天気が表示される
ホーム画面(ダッシュボード)
都市名登録画面
ホーム画面に戻る

何件か登録してみる
福岡:晴れ
東京:曇り(千切れ雲)
高松:曇り(どんよりした雲)
さいごに
思ったより長くなってしまった。
かろうじて動く程度のアプリなので、時間を見つけて修正したい
現状のまとめ
できたこと
・簡単な画面遷移(初期→登録→初期)
・フォームでの値の入力
・登録結果の一覧表示
・外部APIとの連携
できてないこと
・登録結果の保存(WEBサーバを再起動したら消える)
・登録内容の編集
・エラー処理
参考にしたサイト
以下のページを参考にさせていただきました。大変感謝です。
・Angular公式
・とほほのWWW入門 - Angular入門
・How To Use the OpenWeatherMap API to Make a Weather App in Angular
(長くなりすぎたので記事分割しようかな、、、)