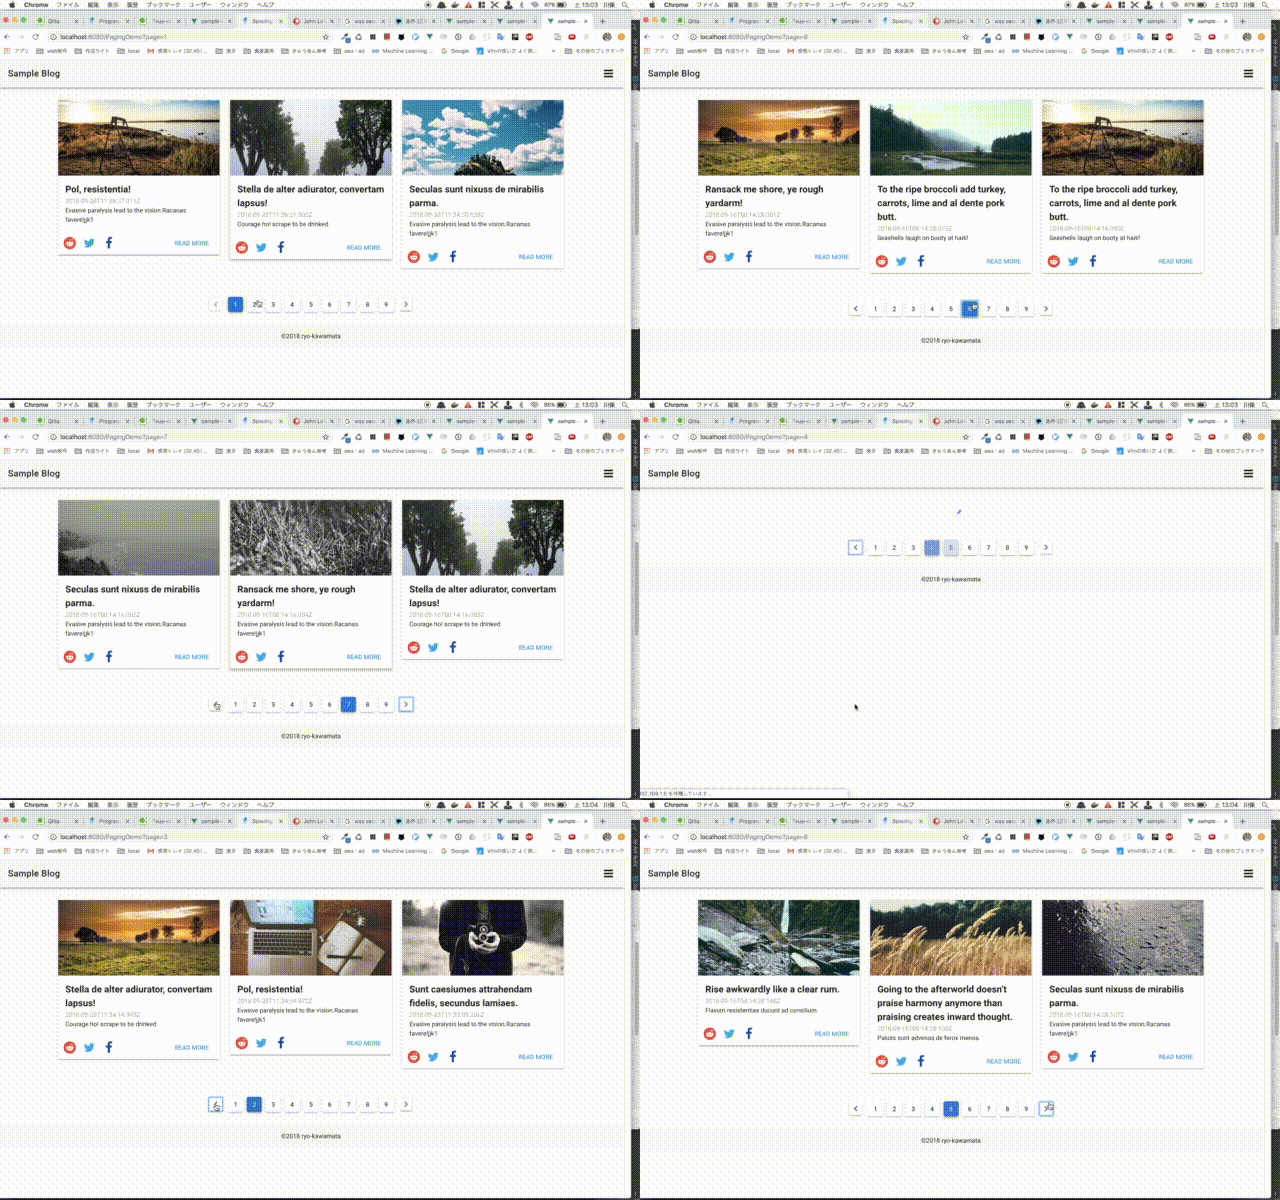
ページネーションの実装も、vue-routerとapollo、vuetifyを使うと比較的簡単に実装できました。
デモはこちら。
https://vue-sample-blog.firebaseapp.com/pagingDemo
全コードはこちら。
https://github.com/kawamataryo/vue-sample-blog/blob/master/src/views/PagingDemo.vue
HeadLessCMS + GraphQL + Vue.js でSPA(ブログ)を作ってみる
で作成したブログを元に使っています。
前提
下のようなGraphQLのスキーマを想定します
# sample blog post
type Post {
    #The status of the record
    status: Status!
    id: ID!
    createdAt: DateTime!#The time the record was updated
    updatedAt: DateTime!
    title: String
    description: String
    content: String
    thumbnail: Asset
}
ページング用のクエリの作成
postモデルのレコード数(投稿総数)とページ単位での取得用のクエリを用意します。
import gql from 'graphql-tag'

// postモデルのレコード数を取得
export const MAX_POST_COUNT = gql`
    query maxPostCount{
        postsConnection {
            aggregate {
                count
            }
        }
    }
`

// ページ単位で取得
export const FEACH_POST_BY_PAGE = gql`
    query feachPostByPage($displayUnit: Int, $page: Int) {
        posts(first: $displayUnit, skip: $page, orderBy: createdAt_DESC) {
            id
            title
            content
            description
            createdAt
            thumbnail {
                url
            }
        }
    }
`
簡単にクエリの説明です。
まず総数の取得は、、
    query maxPostCount  {
        # model名の複数形+Connection
        postsConnection  {
            # 集計の意味
            aggregate {
                # 総数を取得
                count
            }
        }
    }
page単位の取得は、、
    query feachPostByPage($displayUnit: Int, $skip: Int) {
        # first = 最初から何件取得するか? $displayUnitで指定
     # skip = 抜かす件数 $skipで指定
        # orderBy = 並び順 createdAtの降順
        posts(first: $displayUnit, skip: $skip, orderBy: createdAt_DESC) {
            ...
        }
    }
なお、この部分はお使いのGraphQLのAPIサーバーの定義により異なるかもしれません。
GraphCMSの場合は、上記で取得できました。
vuetifyへの組み込み
サンプルコード
あとはvietifyのテンプレートに流し込めば終了です。
<template>
  <div>
    <v-container grid-list-xl>
      <!-- ローディングアイコン-->
      <div class="text-xs-center" v-if="loading">
        <v-progress-circular
            :size="50"
            color="primary"
            indeterminate
        ></v-progress-circular>
      </div>
      <!--投稿一覧-->
      <v-layout row wrap v-if="!loading">
        <PostCard
            v-for="post in posts"
            v-bind:key="post.id"
            :post=post
        ></PostCard>
      </v-layout>
      <!--ページネーション-->
      <div class="text-xs-center mt-5">
        <v-pagination
            v-model="pageNumber"
            :length="pageLength"
        ></v-pagination>
      </div>
    </v-container>
  </div>
</template>

<script>
  import HomeMainVisual from '../components/HomeMainVisual'
  import PostCard from '../components/PostCard'
  import {FEACH_POST_BY_PAGE, MAX_POST_COUNT} from "../constants/graphql"

  export default {
    name: "PostList",
    components: {
      PostCard,
      HomeMainVisual
    },
    data: () => ({
      pageNumber: 1, // 表示するページ番号
      pageDisplayUnit: 3, // 1ページの表示件数
      maxPostCount: 0, // 投稿総数(初期化で0)
      posts: [], // 投稿一覧
      loading: 0, // 通信の状態 apolloで制御
    }),
    mounted() {
      // マウント後に、vue-routerでクエリーパラムを取得
      // 取得したクエリーパラムを表示ページに設定
      let queryPage = this.$route.query.page
      this.pageNumber = queryPage != null ? parseInt(queryPage) : 1
    },
    watch: {
      // watchでpageNumberの状態を監視
      // pageNumberがページネーションのクリックで変化したときに、
      // vue-routerでページを変化させる
      pageNumber: function (newNumber) {
        this.$router.push({name: 'PagingDemo', query: {page: newNumber}})
      }
    },
    computed: {
      // 投稿総数を、1ページの表示件数で割ることで総ページ数を計算
      pageLength: function () {
        return Math.ceil(this.maxPostCount / this.pageDisplayUnit)
      }
    },
    apollo: {
      // 投稿総数の取得
      maxPostCount: {
        query: MAX_POST_COUNT,
        update(data) {
          return data.postsConnection.aggregate.count
        }
      },
      // ページごとの投稿を取得
      posts: {
        query: FEACH_POST_BY_PAGE,
        variables() {
          return {
            page: (this.$route.query.page - 1) * this.pageDisplayUnit,
            displayUnit: this.pageDisplayUnit
          }
        }
      },
    }

  }
</script>

<style>
  .v-pagination__navigation .v-icon {
    font-size: 1rem !important;
  }
</style>
解説
vuetifyとapolloのみでも見た目的にはページングはOKなのですが、URLが変化せず、
実質ajaxで読み込むスライドショーのような状態になってしまいます。
なので、vue-routerを連動させることで、プラウザの戻る、進むの対応、URLでのページ単位のアクセスを実装しています。
それを担っているのが、mountと、watchの処理です。
まず、vueのライフサイクルでDOMにアクセスが可能になるmoutedで、pageNumber(表示ページ)をURLのクエリパラーメーターより取得して設定しています。
(三項分岐で判定し、パラメーターがない場合は1ページ目として設定)
    mounted() {
      let queryPage = this.$route.query.page
      this.pageNumber = queryPage != null ? parseInt(queryPage) : 1
    },
さらにwatchでpageNumberの状態を監視。
pageNumberがページネーションのUIコンポーネントのクリックで変化したときに、vue-routerでページを変化させるという処理を実行しています。
    watch: {
      pageNumber: function (newNumber) {
        this.$router.push({name: 'PagingDemo', query: {page: newNumber}})
      }
    },
あとは、それぞれの変数に、データをバインディングして、Apolloで取得。表示という流れです。
おまけ
1件あたりの表示件数を設定しているpageDisplayUnitもリアクティブにすれば、このようなUXも表現もできます。
(使い所は不明)
スライダーで変更する1ページの表示数に追随して、ページリンクも変化しています。
jQueryで実装しようとすると大変だと思うのですが、vueならとても簡易に実装できて驚愕です。

