以前までは、リアルタイム同期のwebアプリ※はwebsockets等を使用しなくては実現できませんでした。
でも今の時代にはFirebaseがあります!!!
FirebaseのFirestoreを使えば、リアルタイム同期のwebアプリを本当に数行で構築できてしまいます。
今回はそのサンプルとしてFirestoreとvue.jsを使い、リアルタイムでコメントが同期されるチャットを作成してみました。
この手の記事は既に色々あり、何番煎じかわからないのですが、Firebaseに初めて触る人でも理解できるよう、
わかりやすさ重視でスクショを多めに掲載しています。
※ ここでいうリアルタイム同期は、プラウザをリロードせずとも常に他のクライアントで加えた変更が反映されること
どんなwebアプリ?
リアルタイムでコメントが同期されるチャットアプリです。
- コメントの追加
- コメントの削除
が可能です。
ユーザー認証はありません。
上記gifの右と左は別プラウザでwebアプリを開いています。
どちらかでおこなった操作が別の方にもリロードなしで、同期されるのがわかると思います。
以下デモサイト
https://vue-chat-sample.firebaseapp.com/
firebaseの設定
まず、今回のwebアプリのインフラ、バックエンドとなるFirebaseの設定を行います。
プロジェクトの作成
まず、Firebaseの管理画面でプロジェクトを作成します。
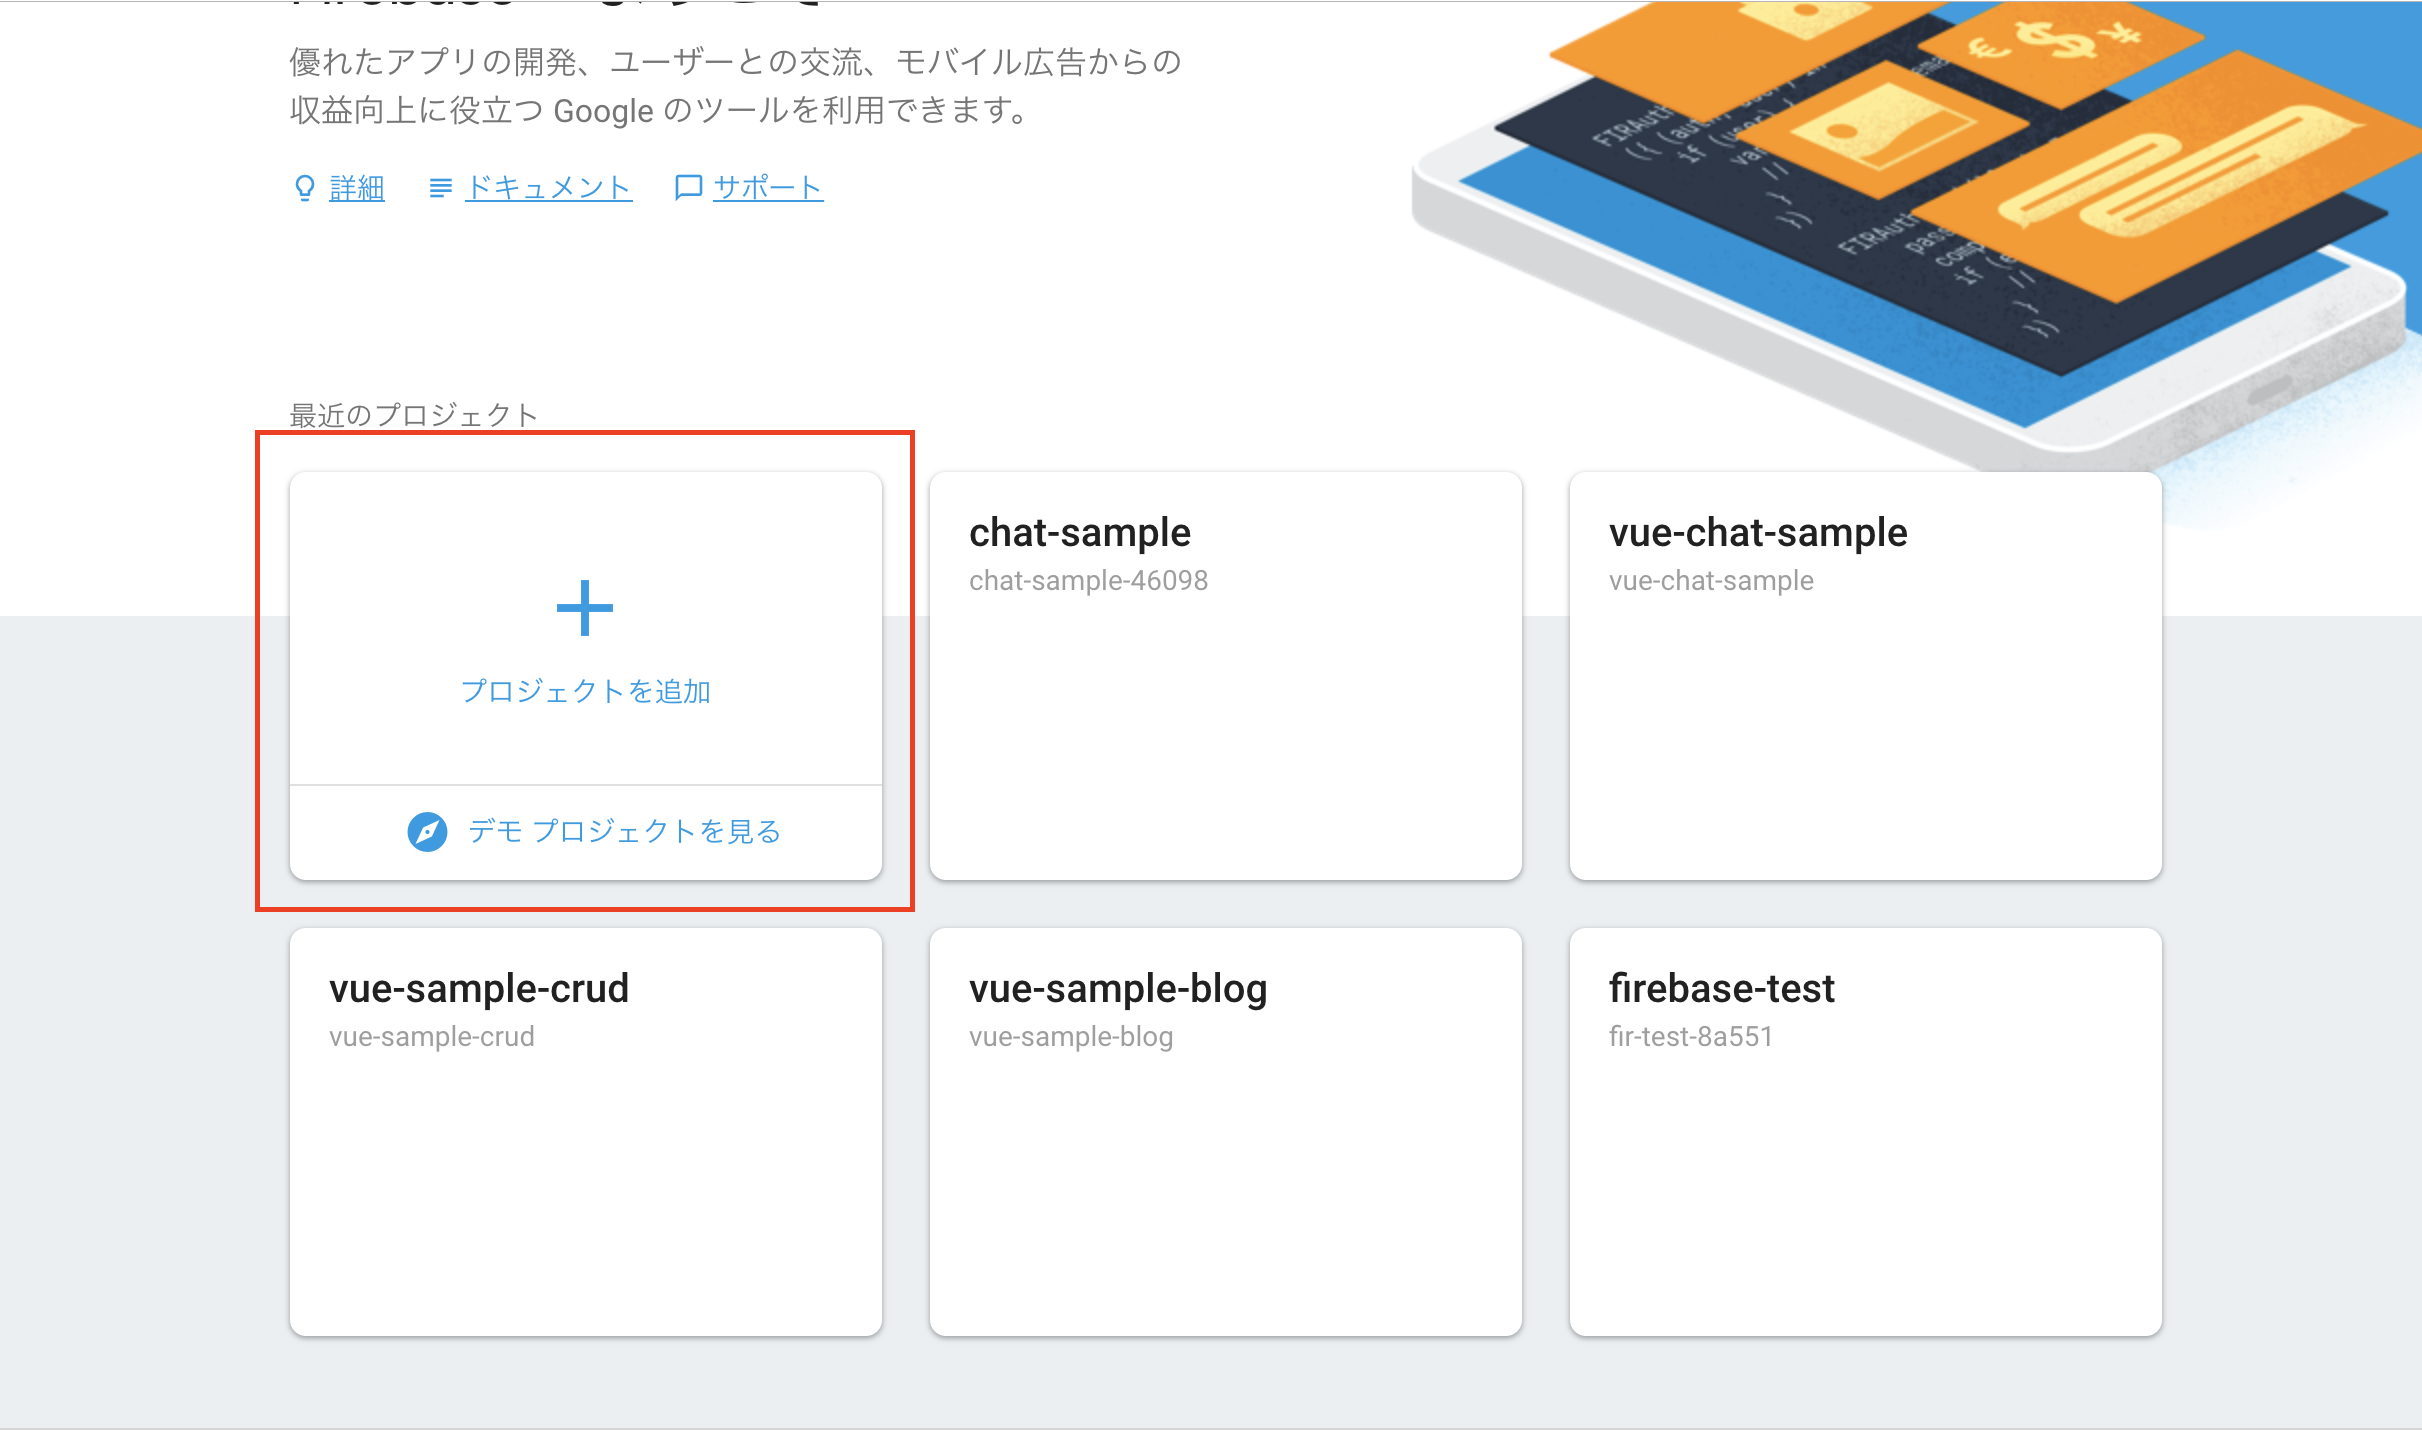
プロジェクト名、アナリティクスの地域を選択してください。
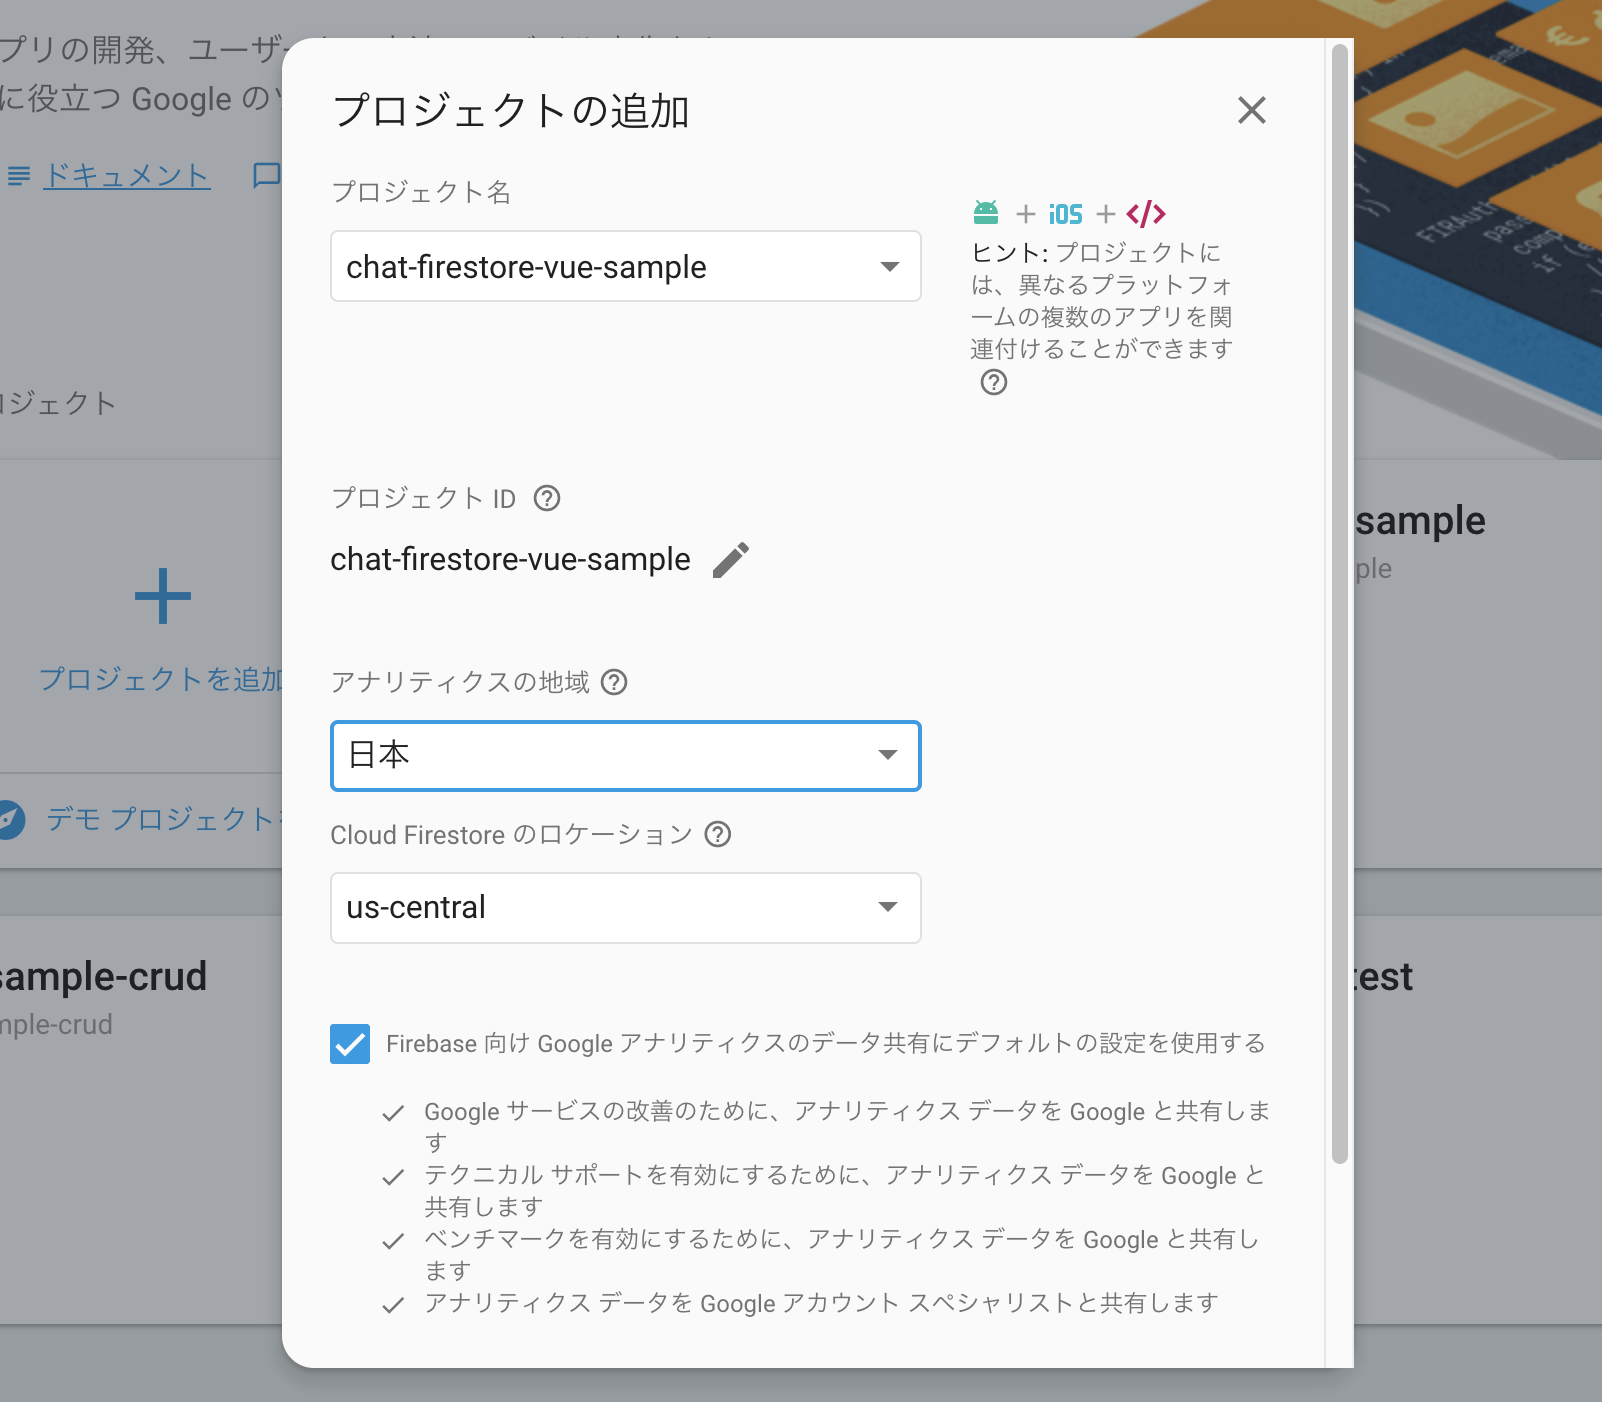
これでプロジェクトの作成はOKです。
Firestoreの設定
次にDBとなるFirestoreを設定します。
FirebaseのDBは、RealTimeDatabaseとFirestoreの二種類がありますが、
今回はRealTimeDatabaseの上位互換であるFirestoreを使います。
コンソール左メニューのDatabaseを選択して作成をクリックします。

まずセキュリティルールを聞かれますが、今回は認証もない、テストアプリなので、「テストモードで開始」にチェックを入れて有効化してください。

次にコレクションの開始というダイアログが表示されるので、今回使う「comments」コレクションを作成します。
コレクションはRDBでいうテーブルみたいなものですね。

そして最初のドキュメント(RDBでいうレコード)を追加します。
以下画像の内容で入力しました。avatarの画像URLはloremPicsum使っています。
createdAtのみtimestamp型にしてください。

追加完了すると以下のようにコレクションにドキュメントが追加されていることが確認出来ると思います。

以上でFireStore側の設定は完了です。
vue.jsでの掲示板作成
つづいてwebアプリのフロントをvue.jsで作成しています。
プロジェクト作成
プロジェクトの作成は、vue-cli3を使って行います。
任意のディレクトリで作成していください。
選択肢はデフォルトでOKです。
$ vue create sample-chat
プロジェクトに移動して、起動してみましょう。
vueのデフォルト画面が表示されればプロジェクトの作成は完了です。
$ cd ample-chat
$ yarn serve
プラグインのインストール
次に各種プラグインを追加していきます。
vuetifyの追加
見た目が良いほうがやる気でるのでvue-componetライブラリのvuetifyを追加します。
こちらはvue-cliでコマンド一つです。
選択肢もデフォルトで大丈夫です。
$ vue add vuetify
vue-cli側でmain.jsへの追記なども行われるので、コマンド実行後、main.jsは以下の状態になっているはずです。
import '@babel/polyfill'
import Vue from 'vue'
import './plugins/vuetify'
import App from './App.vue'

Vue.config.productionTip = false

new Vue({
  render: h => h(App)
}).$mount('#app')
vuefireの追加・設定
次に今回の主であるfirebaseをvue上で使うためのプラグインvuefireをインストールします。
こちらはyarnで追加します。firebasも同時に追加します。
なおvuefireは@nextをつけてfirestore対応版を選択してください。
$ yarn add vuefire@next firebase
次にfirestoreの設定を追加します。
設定ファイルのfirebase.jsを作成します。
$ vi src/plugins/firebase.js
以下を記述します。
import Vue from 'vue'
import VueFire from 'vuefire'
import firebase from 'firebase/app';
import 'firebase/firestore';

Vue.use(VueFire)

const firebaseApp = firebase.initializeApp({
  // ここにfirebaseのapi情報をコピペします。


});

export const db = firebaseApp.firestore();
続いて、api情報をfirebaseのコンソールより取得します。
コンソールの左メニュー project overviewの右設定アイコン > プロジェクトの設定から、
下部アイコン「ウェブアプリにFirebaseを追加」を選択します。

開かれるダイアログの以下スクショ赤枠の部分をコピーしてください。

これを先程作成したfirebase.jsに追記します。
...

const firebaseApp = firebase.initializeApp({
  // ここにfirebaseのapi情報をコピペします。
    apiKey: "xxxxxxxxxxxxxxxx",
    authDomain: "xxxxxxxxxxxxxxxx",
    databaseURL: "xxxxxxxxxxxxxxxx",
    projectId: "xxxxxxxxxxxxxxxx",
    storageBucket: "xxxxxxxxxxxxxxxx",
    messagingSenderId: "xxxxxxxxxxxxxxxx"
});

...
そして最後にmain.jsにfirebase.jsの読み込みを追加します。
import Vue from 'vue'
import '@babel/polyfill'
import './plugins/vuetify'
+ import './plugins/firebase'
import App from './App.vue'

Vue.config.productionTip = false


new Vue({
  render: h => h(App)
}).$mount('#app')
以上でプロジェクトの設定は完了です。
チャットコンポーネントの作成
続いてmainとなるチャットコンポーネントを作成します。
$ vi src/components/ChatBoard.vue
以下を記述します。
<template>
  <v-list three-line>
    <template v-for="(comment, index) in comments">
      <v-list-item
          :key="index"
          avatar
      >
        <v-list-item-avatar>
          <img :src="comment.avatar">
        </v-list-item-avatar>

        <v-list-item-content>
          <v-list-item-subtitle class="text--primary subheading">{{comment.content}}</v-list-item-subtitle>
          <v-list-item-subtitle>
            {{comment.createdAt.toDate().toLocaleString()}}
          </v-list-item-subtitle>
        </v-list-item-content>

        <v-list-item-action>
        </v-list-item-action>
      </v-list-item>
      <v-divider :key="comment.id"></v-divider>
    </template>
  </v-list>
</template>

<script>
  import {db} from '../plugins/firebase';

  export default {
    name: "ChatBoard",
    data: () => ({
      comments: [],
    }),
    firestore() {
      return {
        // firestoreのcommentsコレクションを参照
        comments: db.collection('comments').orderBy('createdAt')

      }
    },
  }
</script>
そして、App.vueでChatBoardコンポーネントを読み込むように設定します。
vuetifyのデフォルトが色々記述されていると思うのでが、それはすべて削除で以下のようにしてください。
<template>
  <v-app>
    <v-container>
      <ChatBoard/>
    </v-container>
  </v-app>
</template>

<script>
  import ChatBoard from './components/ChatBoard'

  export default {
    name: 'App',
    components: {
      ChatBoard
    },
  }
</script>
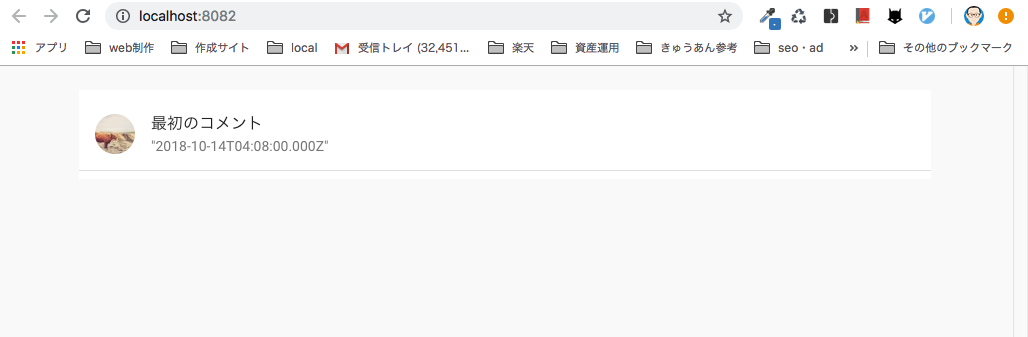
その状態でyarn serveを実行すると、、、
$ yarn serve

このように画面が表示されればChatLineのコンポーネント作成は完了です。
解説
firebaseからのデータ読み込みは下記で行えます。
    firestore() {
      return {
        データを入れる変数名: db.collection('コレクション名').クエリ
      }
    }
今回はFirestoreの設定で追加した、commentsコレクションをorderByでcreatedAtの昇順で取得し、comments変数に設定しています。
ちなみに降順の場合は以下のように記述します。
db.collection('comments').orderBy('createdAt', 'desc')
あとは、template側で、v-forでcommentsを参照することで、ドキュメントが表示できます。
めちゃくちゃシンプルですね。
Formコンポーネントの作成
続いて新規でレコードを追加するためのFormコンポーネントを実装します。
$ vi src/components/Form.vue
Formに以下を記述します。
説明用にコメントを多めにしています。
<template>
  <div>
    <!--フォームの表示ボタン-->
    <v-btn
        color="blue"
        dark
        center
        fab
        fixed
        right
        @click="showCreateForm"
    >
      <v-icon>comment</v-icon>
    </v-btn>
    <v-dialog v-model="displayForm" max-width="500px">
      <!--コメント入力フォーム-->
      <v-card>
        <v-container>
          <h2>コメント追加</h2>
          <v-form ref="form" v-model="valid" lazy-validation>
            <v-text-field
                v-model="inputComment"
                :rules="commentRules"
                label="コメント"
                required
            ></v-text-field>
            <v-btn
                :disabled="!valid"
                @click="addComment"
            >
              投稿する
            </v-btn>
          </v-form>
        </v-container>
      </v-card>
    </v-dialog>
  </div>
</template>

<script>
  import {db} from '../plugins/firebase';

  export default {
    name: 'CreateForm',
    data: () => ({
      // form入力データ
      inputComment: "",
      // バリデーション
      valid: true,
      commentRules: [
        v => !!v || 'コメントは必須項目です',
      ],
      // Formダイアログの表示可否
      displayForm: false,
    }),
    methods: {
      // コメント追加
      addComment() {
        const now = new Date()
        // コメントをFirestoreへ登録
        db.collection('comments').add({
          content: this.inputComment,
          avatar: 'https://picsum.photos/50?image=' + (Math.floor(Math.random() * 400) + 1),
          createdAt: now
        })
        // ダイアログを閉じる
        this.hideCreateForm()
      },
      // Formの初期化
      clear() {
        this.$refs.form.reset()
      },
      // Formダイアログの表示
      showCreateForm() {
        this.displayForm = true
      },
      //
      // Formダイアログの非表示
      hideCreateForm() {
        this.clear()
        this.displayForm = false
      },
    },
  }
</script>
そして作成したForm.vueをApp.vueで読み込みます。
<template>
  <v-app>
    <v-container>
      <ChatBoard/>
+     <ChatForm/>
    </v-container>
  </v-app>
</template>

<script>
  import ChatBoard from './components/ChatBoard'
+ import ChatForm from './components/Form'

  export default {
    name: 'App',
    components: {
      ChatBoard,
+     ChatForm
    },
  }
</script>
以上で完了です。
yarn serveを実行すると以下のような画面が表示されるはずです。
色々コメントを追加してみましょう。
解説
コメントの追加は以下のように記述します。
これだけで追加できます。
db.collection(コレクション名).add({ フィールド名: 値 })
Delete機能の追加
最後にコメントの削除機能を追加します。
ChatBoard.vueを以下のように修正します。
<template>
  <v-list three-line>
    <template v-for="(comment, index) in comments">
      <v-list-item
          :key="index"
          avatar
      >
        <v-list-item-avatar>
          <img :src="comment.avatar">
        </v-list-item-avatar>

        <v-list-item-content>
          <v-list-item-sub-title class="text--primary subheading">{{comment.content}}</v-list-item-subtitle>
          <v-list-item-sub-title>
             {{comment.createdAt.toDate().toLocaleString()}}
+            <v-icon color="red" @click="deleteComment(comment.id)" small>delete</v-icon>
          </v-list-item-subtitle>
          </v-list-item-subtitle>
        </v-list-item-content>

        <v-list-item-action>
        </v-list-item-action>
      </v-list-item>
      <v-divider :key="comment.id"></v-divider>
    </template>
  </v-list>
</template>

<script>
  import {db} from '../plugins/firebase';

  export default {
    name: "ChatBoard",
    data: () => ({
      comments: [],
    }),
    firestore() {
      return {
        // firestoreのcommentsコレクションを参照
        comments: db.collection('comments').orderBy('createdAt')
      }
    },
+    methods: {
+      deleteComment(id) {
+        if (!confirm('コメントを削除してよろしいですか?')) {
+          return
+        }
+        db.collection('comments').doc(id).delete()
+      },
+    },

  }
</script>
コメント削除のメソッドと、コメント削除アイコンを追加するだけです。
解説
削除は以下のように記述します。
db.collection('コレクション名').doc('ドキュメントのid').delete()
comment.idでドキュメントのidを取得してそれをdeleteComment関数に引数として渡しています。
以上でchatアプリの実装は完了です。
ここまでのコードは以下リポジトリにあります。
https://github.com/kawamataryo/vue-firebase-chat-sample
Firebaseへのデプロイ
最後にここまで作ったアプリをFirebaseにデプロイして、一般に公開できるようにします。
これもコマンドライン上で簡単に行えます。
まずプロジェクトをビルドします。
$ yarn build
そしてFirebaseの初期化を行います。
(事前にfirebase-cliをnpm -gで追加しておいてください。)
$ firebase init
すると以下選択肢があらわれるので順に設定してください。
# どの機能を利用するか?Hostingを選びます。

? Which Firebase CLI features do you want to setup for this folder? Press Space to select features, then Enter to confirm yo
ur choices.
 ◯ Database: Deploy Firebase Realtime Database Rules
 ◯ Firestore: Deploy rules and create indexes for Firestore
 ◯ Functions: Configure and deploy Cloud Functions
❯◉ Hosting: Configure and deploy Firebase Hosting sites
 ◯ Storage: Deploy Cloud Storage security rules

# どのプロジェクトにデプロイするか。Firebaseの設定で作成したプロジェクト名を選びます。

? Select a default Firebase project for this directory:
  [dont setup a default project]
❯ vue-chat-sample (vue-chat-sample)
  [create a new project]

# どのディレクトリをアクセスポイントにするか? distと入力します。

? What do you want to use as your public directory? (public) dist

# シングルページアップとして設定するか? yesと入力します

Configure as a single-page app (rewrite all urls to /index.html)? yes

# index.htmlを上書きするか? no(デフォルト選択)を入力します

File dist/index.html already exists. Overwrite? No
以上で完了です。
あとは以下コマンドでデプロイできます。
$ firebase deploy --only hosting
完了後最後に表示されるHosting URLにアクセスすればアプリが表示されているはずです。
雑感
いやー。Firebaseすごい。
DBの導入のしやすさ、デプロイの簡易さ。vueとの連携のしやすさ。
エンジニアになる前、初めてRailsアプリを作り、Herokuにデプロイ出来たときの感動を思いだしました。
更にFirebaseを使いこなせるよう今後も学習したいです。
参考
Firebase × Vue.js で サクッとリアルタイム掲示板を作る
https://tanaken.me/web/791/
Full Stack Vue.js with Firestore
https://medium.com/vue-mastery/full-stack-vue-js-with-firestore-62e2fe2ec1f3
Firestore の Timestamp の仕様変更による警告と、その対処
https://qiita.com/teramotodaiki/items/b3592326579166003102