Vue.js 開発環境の構築手順と Storybook のインストール。
その後、Githubとの連携するまでの手順をまとめたメモ。
変更履歴
- 2023/02/02 :
.storybook/main.jsのバグフィックス - 2022/11/30:Storybook の webpack.config 及び、SampleButton.stories.js を変更
- 2022/05/12:Storybook の webpack.config について追記
用意したいもの
-
Vue.js@v3
- Vuex@v4
- Vue Router@v4
- vue-test-utils@v2
- webpack@v5
- chai@v4
- Nightwatch.js@v2
- Storybook
前提環境
- Github
- Git for Windows
- fnm
- Node.js
1. Githubにリモートリポジトリを作成
1.0. 前提
Git と Github はセットアップ済みである事。
1.1. 手順
- github.comを開く
- [New]ボタンを押下して[Create a new repository]ページを表示する。
- [Repository name]に任意のリポジトリ名を入力する
- [Repository name]をメモしておく。
- 他の項目の入力は不要。
- [Create repository]を押下する
- リモートリポジトリのURLをメモしておく
2. Node.js のバージョンを確認
2.0. 前提
fnmとNode.js及びGitBashがセットアップ済み
1.1. fnmとNode.jsのバージョンを確認
必要に応じてfnm install [node version]でNode.jsをインストールするかfnm use [node version]でバージョンを切り替える。
# fnm のバージョン確認
$ fnm --version
fnm 1.31.0

# インストール済みの Node.js のバージョンを一覧表示
$ fnm list
* v14.19.1
* v16.14.2 default
* system

# 現在使用中の Node.js のバージョンを表示
$ fnm current
v16.14.2
別バージョンのNode.jsをインストールする場合
# exp.
$ fnm install v15

$ fnm use v15
2. Vue CLIの確認
2.1. インストールされているか確認
以下のコマンドを実行
# バージョンが表示されればOK
$ vue --version
@vue/cli 5.0.4
注意
@vue/cliはfnmで管理されるNote.js毎にインストールする必要があります。
# コマンド投下後、以下のメッセーじが表示される場合は
# @vue/cliをグローバルインストールする必要があります。
$ vue --version
bash: vue: command not found
Vue CLIをグローバルインストールする場合
# グローバルにインストール
$ npm install -g @vue/cli

# バージョンが表示されればOK
$ vue --version
@vue/cli 5.0.4
3. Vueプロジェクトの作成
ユーザーホームディレクトリ(%HOMEPATH%)以下にプロジェクトを作成する。
Github のリモートリポジトリ名=ローカルプロジェクト名となる。
参考
Vueプロジェクト作成と同時に必要なパッケージが自動でインストールされます
- Vue.js
- vue-router
- Vuex
- vue-test-utils
- babel
- webpack
- chai
- Nightwatch
3.1. vue createを実行
以下のコマンドを実行
# ユーザーのホームディレクトリに移動
$ cd ~

# @vue/cli の create コマンドを実行
$ vue create <リモートリポジトリ名>
以下、@vue/cliの対話に答えていく。
3.2. プリセットの選択
Vue CLI v5.0.4
? Please pick a preset: (Use arrow keys)
  Default ([Vue 3] babel, eslint)
  Default ([Vue 2] babel, eslint)
> Manually select features
Manually select featuresを選択してEnter
3.3. プロジェクトで使うパッケージの選択。
Vue CLI v5.0.4
? Please pick a preset: Manually select features
? Check the features needed for your project: (Press <space> to select, <a> to t
oggle all, <i> to invert selection, and <enter> to proceed)
 (*) Babel
 ( ) TypeScript
 ( ) Progressive Web App (PWA) Support
 (*) Router
 (*) Vuex
 ( ) CSS Pre-processors
 (*) Linter / Formatter
 (*) Unit Testing
>(*) E2E Testing
Babel,Router,Vuex,Linter / Formatter,Unit Testing,E2E Testingを選択してEnter。
3.4. Vue.jsのバージョンの選択
Vue CLI v5.0.4
? Please pick a preset: Manually select features
? Check the features needed for your project: Babel, PWA, Router, Vuex, CSS Pre-
processors, Linter, Unit, E2E
? Choose a version of Vue.js that you want to start the project with (Use arrow
keys)
> 3.x
  2.x
3.xを選択してEnter
3.5. Routerの履歴モードの選択
Vue CLI v5.0.4
? Please pick a preset: Manually select features
? Check the features needed for your project: Babel, Router, Vuex, Linter, Unit,
 E2E
? Choose a version of Vue.js that you want to start the project with 3.x
? Use history mode for router? (Requires proper server setup for index fallback
in production) (Y/n)
そのままEnter
3.6. リンター/フォーマッター設定の選択
Vue CLI v5.0.4
? Please pick a preset: Manually select features
? Check the features needed for your project: Babel, Router, Vuex, Linter, Unit,
 E2E
? Choose a version of Vue.js that you want to start the project with 3.x
? Use history mode for router? (Requires proper server setup for index fallback
in production) Yes
? Pick a linter / formatter config:
  ESLint with error prevention only
  ESLint + Airbnb config
  ESLint + Standard config
> ESLint + Prettier
ESLint + Prettierを選択してEnter
3.7. リントするタイミング的なのを選択
Vue CLI v5.0.4
? Please pick a preset: Manually select features
? Check the features needed for your project: Babel, Router, Vuex, Linter, Unit,
 E2E
? Choose a version of Vue.js that you want to start the project with 3.x
? Use history mode for router? (Requires proper server setup for index fallback
in production) Yes
? Pick a linter / formatter config: Prettier
? Pick additional lint features: (Press <space> to select, <a> to toggle all, <i
> to invert selection, and <enter> to proceed)
>(*) Lint on save
 ( ) Lint and fix on commit
Lint on saveを選択してEnter
3.8. Unit Test で使うフレームワークの選択
Vue CLI v5.0.4
? Please pick a preset: Manually select features
? Check the features needed for your project: Babel, Router, Vuex, Linter, Unit,
 E2E
? Choose a version of Vue.js that you want to start the project with 3.x
? Use history mode for router? (Requires proper server setup for index fallback
in production) Yes
? Pick a linter / formatter config: Prettier
? Pick additional lint features: Lint on save
? Pick a unit testing solution:
  Jest
> Mocha + Chai
Mocha + Chaiを選択してEnter
3.9. E2E Test で使うフレームワークの選択
Vue CLI v5.0.4
? Please pick a preset: Manually select features
? Check the features needed for your project: Babel, Router, Vuex, Linter, Unit,
 E2E
? Choose a version of Vue.js that you want to start the project with 3.x
? Use history mode for router? (Requires proper server setup for index fallback
in production) Yes
? Pick a linter / formatter config: Prettier
? Pick additional lint features: Lint on save
? Pick a unit testing solution: Mocha
? Pick an E2E testing solution:
  Cypress (Test in Chrome, Firefox, MS Edge, and Electron)
> Nightwatch (WebDriver-based)
  WebdriverIO (WebDriver/DevTools based)
Nightwatchを選択してEnter
3.10. E2E Test のターゲットブラウザの選択
Vue CLI v5.0.4
? Please pick a preset: Manually select features
? Check the features needed for your project: Babel, Router, Vuex, Linter, Unit,
 E2E
? Choose a version of Vue.js that you want to start the project with 3.x
? Use history mode for router? (Requires proper server setup for index fallback
in production) Yes
? Pick a linter / formatter config: Prettier
? Pick additional lint features: Lint on save
? Pick a unit testing solution: Mocha
? Pick an E2E testing solution: Nightwatch
? Pick browsers to run end-to-end test on (Press <space> to select, <a> to toggl
e all, <i> to invert selection, and <enter> to proceed)
>(*) Chrome
 ( ) Firefox
Chromeを選択してEnter
3.11. Babel, ESLintの設定をどこに記憶しておくかの選択
Vue CLI v5.0.4
? Please pick a preset: Manually select features
? Check the features needed for your project: Babel, Router, Vuex, Linter, Unit,
 E2E
? Choose a version of Vue.js that you want to start the project with 3.x
? Use history mode for router? (Requires proper server setup for index fallback
in production) Yes
? Pick a linter / formatter config: Prettier
? Pick additional lint features: Lint on save
? Pick a unit testing solution: Mocha
? Pick an E2E testing solution: Nightwatch
? Pick browsers to run end-to-end test on Chrome
? Where do you prefer placing config for Babel, ESLint, etc.? (Use arrow keys)
> In dedicated config files
  In package.json
In dedicated config filesを選択してEnter
3.12. ここまで選択してきた内容をプリセットとして保存するかの選択
Vue CLI v5.0.4
? Please pick a preset: Manually select features
? Check the features needed for your project: Babel, Router, Vuex, Linter, Unit,
 E2E
? Choose a version of Vue.js that you want to start the project with 3.x
? Use history mode for router? (Requires proper server setup for index fallback
in production) Yes
? Pick a linter / formatter config: Prettier
? Pick additional lint features: Lint on save
? Pick a unit testing solution: Mocha
? Pick an E2E testing solution: Nightwatch
? Pick browsers to run end-to-end test on Chrome
? Where do you prefer placing config for Babel, ESLint, etc.? In dedicated confi
g files
? Save this as a preset for future projects? (y/N)
いらないのでそのままEnter
3.13. 各パッケージの自動インストールを鑑賞する
Vue CLI v5.0.4
✨  Creating project in C:\Users\[user]\app\<リモートリポジトリ名>
�  Initializing git repository...
⚙️  Installing CLI plugins. This might take a while...
CLIとの対話した選択内容通りに、プロジェクトに必要なファイルとパッケージがローカルインストールされます。
情報
以下の様なメッセージがガンガン表示されますが、2022/04/27現在、問題になっていません。それでも気になるという方は、gitbashではなく、大人しくcmdで実行するかWindows PowerShellでvue createする事をお勧めします。
表示されるメッセージ
'Files' は、内部コマンドまたは外部コマンド、
操作可能なプログラムまたはバッチ ファイルとして認識されていません。
'Client' は、内部コマンドまたは外部コマンド、
操作可能なプログラムまたはバッチ ファイルとして認識されていません。
指定されたパスが見つかりません。
'Client' は、内部コマンドまたは外部コマンド、
操作可能なプログラムまたはバッチ ファイルとして認識されていません。
'Files' は、内部コマンドまたは外部コマンド、
操作可能なプログラムまたはバッチ ファイルとして認識されていません。
'Management' は、内部コマンドまたは外部コマンド、
操作可能なプログラムまたはバッチ ファイルとして認識されていません。
'Engine' は、内部コマンドまたは外部コマンド、
操作可能なプログラムまたはバッチ ファイルとして認識されていません。
指定されたパスが見つかりません。
指定されたパスが見つかりません。
'Management' は、内部コマンドまたは外部コマンド、
操作可能なプログラムまたはバッチ ファイルとして認識されていません。
'Engine' は、内部コマンドまたは外部コマンド、
操作可能なプログラムまたはバッチ ファイルとして認識されていません。
指定されたパスが見つかりません。
次のメッセージが表示されれば成功
⚓  Running completion hooks...

�  Generating README.md...

�  Successfully created project <リモートリポジトリ名>
�  Get started with the following commands:

 $ cd <リモートリポジトリ名>
 $ npm run serve
4. Vue.js プロジェクトが正しく作成されたか確認
4.1. ローカルWebサーバーの起動
指示どおりにコマンドを実行する
# ユーザーホームディレクトリに移動
$ cd ~

# vue create したプロジェクトディレクトリに移動
$ cd <リモートリポジトリ名>

# webpack-dev-server の起動
$ npm run serve
以下のメッセージが表示されれば成功
> <リモートリポジトリ名>@0.1.0 serve
> vue-cli-service serve

 INFO  Starting development server...


 DONE  Compiled successfully in 6677ms                                  18:20:23


  App running at:
  - Local:   http://localhost:8080/
  - Network: http://<ローカルIPアドレス>:8080/

  Note that the development build is not optimized.
  To create a production build, run npm run build.
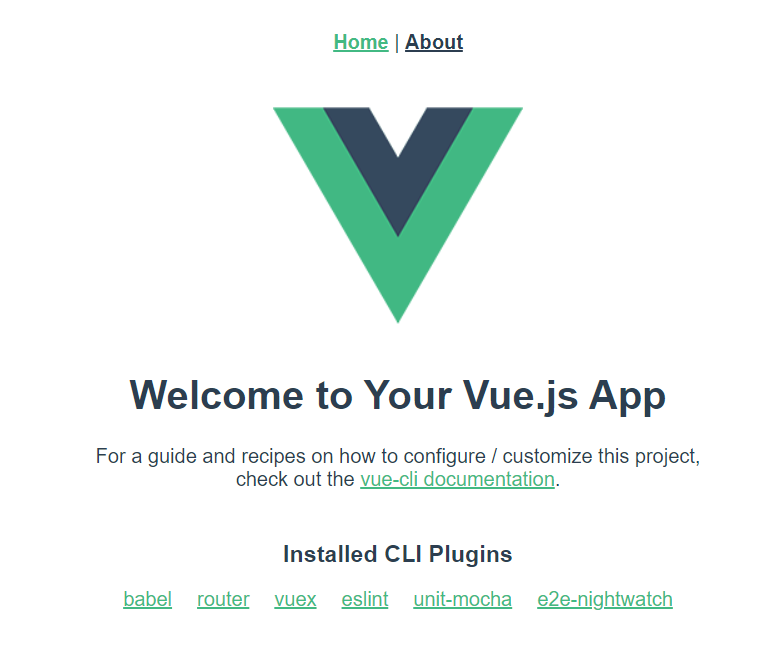
4.2. ローカルWebサーバーにアクセス
ブラウザで http://localhost:8080/にアクセスし、以下のページが表示されればOK。
4.3. ビルドを試す
ローカル Web サーバーを終了(gitbash で [Ctrl]+[C])してから以下のコマンドを実行
$ npm run build
以下の様なメッセージが表示されれば成功
> <リモートリポジトリ名>@0.1.0 build
> vue-cli-service build

All browser targets in the browserslist configuration have supported ES module.
Therefore we don't build two separate bundles for differential loading.


⠙  Building for production...

 DONE  Compiled successfully in 11277ms                                 18:31:02

  File                                 Size               Gzipped

  dist\js\chunk-vendors.782b98bb.js    110.74 KiB         39.69 KiB
  dist\js\app.ed97d224.js              16.01 KiB          9.55 KiB
  dist\js\about.e67f1df0.js            0.41 KiB           0.30 KiB
  dist\css\app.f1313ab2.css            0.42 KiB           0.26 KiB

  Images and other types of assets omitted.
  Build at: 2022-04-27T09:31:02.879Z - Hash: 17364c170869a7ab - Time: 11277ms

 DONE  Build complete. The dist directory is ready to be deployed.
 INFO  Check out deployment instructions at https://cli.vuejs.org/guide/deployme
nt.html
5. Storybook のインストール
注意
@vue/cliのと対話で選択したVue.jsのバージョンによってインストールされるwebpackのバージョンが異なります。
- Vue.js@v3.x = webpack@v5.x
- Vue.js@v2.x = webpack@v4.x
Storybook公式によるとStorybookは既に作成済みであるVue.jsプロジェクトにのみインストールでき、必要なパッケージを自動で認識し、インストールするとアナウンスされていますが、webpackについては認識しないらしくStorybookをインストールする時にbuilderが webpack@v4 なのか、wbpack@v5 なのか、別途指定する必要があります。(何も指定しない(=default)では webpack@4 になる様子)
Vue.js@3.x の環境にStorybookを何も指定せずインストールした場合、builderの指定が webpack@4 になる為、Storybookのローカルサーバー起動時にエラーになります(webpack@5 なのに webpack@4 として振る舞おうとして build エラー)。その場合、Storybookのbuilderを webpack@5 にアップグレードする必要があります。
Storybook Upgrade Guid | Github
https://gist.github.com/shilman/8856ea1786dcd247139b47b270912324
5.1 Storybookのインストール
5.1.1. Vue.js@v3.x の場合
以下コマンドを実行
$ npx sb init --builder webpack5
参考ページ:Storybook for Webpack 5
5.1.2 Vue.js@v2.x の場合
以下のコマンドを実行
$ npx sb init
参考ページ:Install Storybook
5.2. Storybook を起動する
以下のコマンドを投下する。
ビルド+Storybookローカルサーバーの起動まで行われます。
$ npm run storybook
5.3. Storybook のビルドを鑑賞する
> <リモートリポジトリ名>@0.1.0 storybook
> start-storybook -p 6006

info @storybook/vue3 v6.4.22
info
info => Loading presets
info => Using implicit CSS loaders
info => Using default Webpack5 setup
<i> [webpack-dev-middleware] wait until bundle finished

# ~・~・~ 中略 ~・~・~

╭────────────────────────────────────────────────────╮
│                                                    │
│   Storybook 6.4.22 for Vue3 started                │
│   8.1 s for preview                                │
│                                                    │
│    Local:            http://localhost:6006/        │
│    On your network:  http://<ローカルIP>:6006/    │
│                                                    │
╰────────────────────────────────────────────────────╯
5.4. Storybookローカルホストにブラウザでアクセスする
http://localhost:6006/にWebブラウザでアクセスする。というか勝手に起動する?
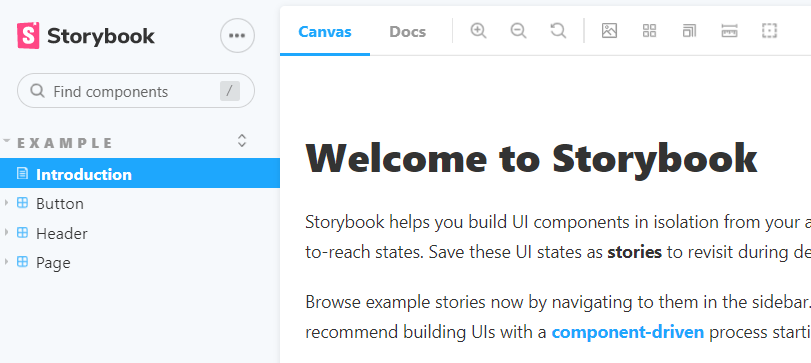
こんなページが表示されてればOK
5.6 Storybookのwebpack.configとVue.jsのwebpack.configを一部mergeする
Storybookのwebpack.configの内resolve.alias.@のみをVue.jsのwebpack.configのresolve.@とmergeします。(参考:Storybookのwebpack構成を拡張する)
注意
-
Vue.jsでは@はソースコードディレクトリのaliasとして割当されていますが、Storybookでは@をaliasとして認識してくれません。その結果、.vueファイル内でimport Button from "@/components/button"等の import 文はvue.jsの build では成功しますがStorybookの build ではエラーになります。 - 動的に生成される
vue.config.jsのaliasプロパティにある全てをStorybookのwebpack.configにmergeしてしまうと、Storybookのbuildとserver起動までは出来ますが、ComponentsをUI表示する際にエラーになります。その為、Storybookのwebpack.configには未割り当てであるaliasのみを抽出してmergeする必要があります。
//@ts-check
"use strict";

module.exports = {
  stories: ["../src/**/*.stories.mdx", "../src/**/*.stories.@(js|jsx|ts|tsx)"],
  addons: [
    "@storybook/addon-links",
    "@storybook/addon-essentials",
    "@storybook/addon-interactions",
  ],
  framework: "@storybook/vue3",
  core: {
    builder: "@storybook/builder-webpack5",
  },
+  webpackFinal: async (webpackConfig) => {
+    // @see https://www.npmjs.com/package/webpack-merge
+    const { merge } = require("webpack-merge");
+    // @see https://storybook.js.org/docs/vue/configure/webpack#extending-storybooks-webpack-config
+    const vueConfig = require("@vue/cli-service/webpack.config");
+
+    let webpackAlias = webpackConfig.resolve.alias;
+    let vueAlias = vueConfig.resolve.alias;
+
+    if (webpackAlias && vueAlias) {
+      Object.entries(vueAlias).forEach(([key, value]) => {
+        // Merge only if webpack has no corresponding alias assigned.
+        if (!webpackAlias[key]) {
+          webpackAlias = merge(webpackAlias, {
+            [key]: value,
+          });
+        }
+      });
+
+      webpackConfig.resolve.alias = webpackAlias;
+    }
+
+    // Return the altered config
+    return webpackConfig;
+  },
};
5.7 Storybookのサンプルを試す
ローカルリポジトリ内のディレクトリ/src/componentsにSampleButton.vueを作成し、以下のソースを書く。
<template>
  <button type="button" @click="buttonClick">{{ label }}</button>
</template>

<script>
export default {
  name: "sample-button",

  props: {
    label: String,
  },

  methods: {
    buttonClick: (e) => {
      window.alert(`I'm a ${e.target.textContent}`);
    },
  },
};
</script>
次に、ローカルリポジトリ内のディレクトリ/src/stories/components内にSampleButton.stories.jsを作成し、以下のコードを書く
// ”@”が"/src"として正しく認識されるかの確認
import SampleButton from "@/components/SampleButton";

export default {
  title: "Sample/Button",
  component: SampleButton,
};

const Template = (args) => ({
  components: { SampleButton },
  setup() {
    return { args };
  },
  template: '<sample-button v-bind="args" />',
});

export const Button1 = Template.bind({});
Button1.args = {
  label: "Button1",
};

export const Button2 = Template.bind({});
Button2.args = {
  label: "Button2",
};
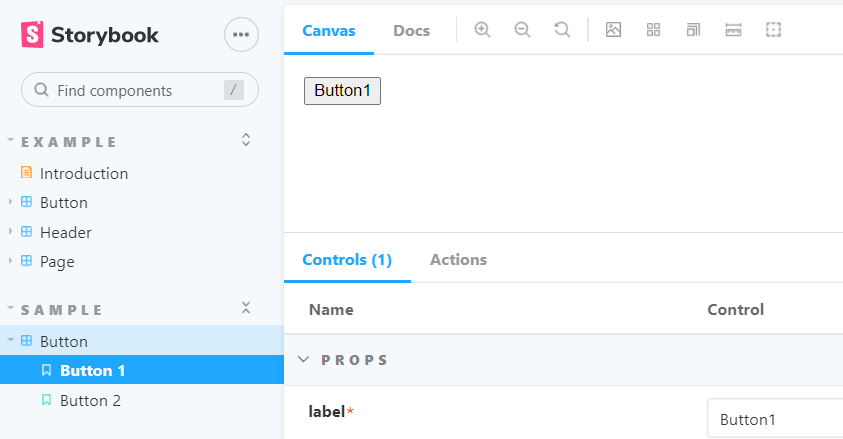
ここまでできたらnpm run storybookを実行
$ npm run storybook
http://localhost:6006/にアクセスし、以下の様なページがブラウザで表示されれば成功
6. VueプロジェクトをGithubのリモートリポジトリにpushする
以降、ローカルの Vue プロジェクトは Git 用語で言う処のリモートリポジトリになる。
6.1 git init
まず、ローカルの Vue プロジェクトをローカルリポジトリにする。
# ローカルリポジトリの初期化
$ git init
以下のメッセージが表示されればOK
Reinitialized existing Git repository in C:/Users/[user]/<リモートリポジトリ名>/.git/
6.2 git add
全ての変更をステージング
$ git add --all
6.3 git commit
コミットの作成
$ git commit -m "first commit"
6.4 リモートリポジトリにgit push
# main ブランチに切り替え
$ git branch -M main

# ローカルリポジトリにリモートリポジトリを関連付け
# https://github.com/~ は、リモートリポジトリを新規作成した際に表示されている
$ git remote add origin https://github.com/<Githubユーザー名>/<リモートリポジトリ名>.git

# リモートリポジトリにpush
$ git push -u origin main
6.5 githubを確認
- github.comにアクセス
- push したリモートリポジトリを開く
- README.mdが以下のようになってれば成功

了
参考