概要
tablesorter.jsはhtmlのtableにソート機能やフィルタ機能を追加できるjQueryになります。
こちらの記事で作成したテーブルにtablesorterを使用してソート機能とフィルタ機能を追加してみたいと思います。
サイトには様々なサンプルがありますので、参考にしてみてください。
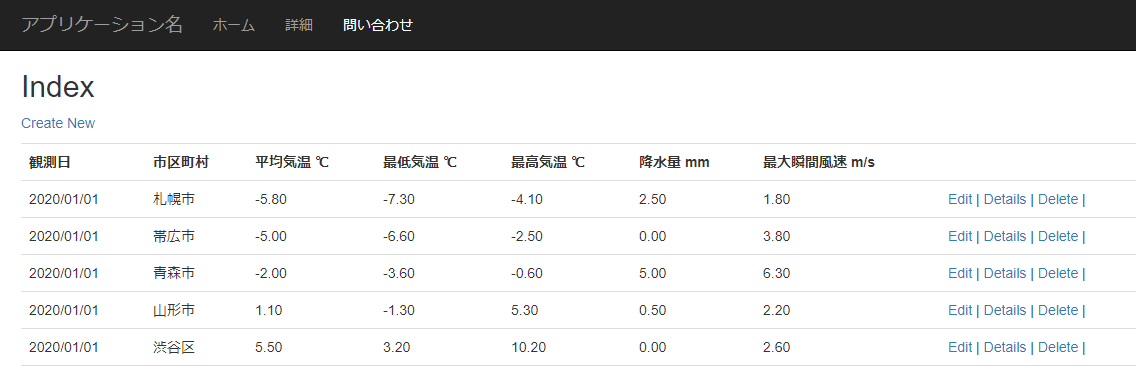
追加前のページ
追加後のページ

環境
- Visual Studio 2019
- .Net Framework 4.8
- Tablesorter 2.31.3
tablesorterの追加
ダウンロード
サイトからファイルをダウンロードします。

またはGitHubからでもOK。

プロジェクトに追加
zipファイルを解凍後、distディレクトリ内のcssディレクトリとjsディレクトリのファイルをプロジェクトに追加します。
- プロジェクトのContentディレクトリとScriptsディレクトリにtablesorterディレクトリを作成
- Content\tablesorterにcssの内容をコピー
- Scripts\tablesorterにjsの内容をコピー
- ソリューションエクスプローラ上で、Content\tablesorterとScripts\tablesorterをプロジェクトに含める
| 追加前 | 追加後 |
|---|---|
 |
 |
 |
 |
コード
変更前
@model IEnumerable<MySqlTestWebApp.weather>

@{
    ViewBag.Title = "Index";
}

<h2>Index</h2>

<p>
    @Html.ActionLink("Create New", "Create")
</p>
<table class="table">
    <tr>
        <th>
            @Html.DisplayNameFor(model => model.observational_day)
        </th>
        <th>
            @Html.DisplayNameFor(model => model.city.name)
        </th>
        <th>
            @Html.DisplayNameFor(model => model.temperature_ave)
        </th>
        <th>
            @Html.DisplayNameFor(model => model.temperature_min)
        </th>
        <th>
            @Html.DisplayNameFor(model => model.temperature_max)
        </th>
        <th>
            @Html.DisplayNameFor(model => model.precipitation)
        </th>
        <th>
            @Html.DisplayNameFor(model => model.wind_speed)
        </th>
        <th></th>
    </tr>

    @foreach (var item in Model)
    {
        <tr>
            <td>
                @Html.DisplayFor(modelItem => item.observational_day)
            </td>
            <td>
                @Html.DisplayFor(modelItem => item.city.name)
            </td>
            <td>
                @Html.DisplayFor(modelItem => item.temperature_ave)
            </td>
            <td>
                @Html.DisplayFor(modelItem => item.temperature_min)
            </td>
            <td>
                @Html.DisplayFor(modelItem => item.temperature_max)
            </td>
            <td>
                @Html.DisplayFor(modelItem => item.precipitation)
            </td>
            <td>
                @Html.DisplayFor(modelItem => item.wind_speed)
            </td>
            <td>
                @Html.ActionLink("Edit", "Edit", new { observationalDay = item.observational_day, cityID = item.city_id }) |
                @Html.ActionLink("Details", "Details", new { observationalDay = item.observational_day, cityID = item.city_id }) |
                @Html.ActionLink("Delete", "Delete", new { observationalDay = item.observational_day, cityID = item.city_id }) |
            </td>
        </tr>
    }

</table>
変更後
@model IEnumerable<MySqlTestWebApp.weather>

@{
    ViewBag.Title = "Index";
}

<h2>Index</h2>

<p>
    @Html.ActionLink("Create New", "Create")
</p>

<button class="reset-filter-button">Reset Filter</button>

<table id="table" class="tablesorter">
    <thead>
        <tr>
            <th>
                @Html.DisplayNameFor(model => model.observational_day)
            </th>
            <th>
                @Html.DisplayNameFor(model => model.city.name)
            </th>
            <th>
                @Html.DisplayNameFor(model => model.temperature_ave)
            </th>
            <th>
                @Html.DisplayNameFor(model => model.temperature_min)
            </th>
            <th>
                @Html.DisplayNameFor(model => model.temperature_max)
            </th>
            <th>
                @Html.DisplayNameFor(model => model.precipitation)
            </th>
            <th>
                @Html.DisplayNameFor(model => model.wind_speed)
            </th>
            <th></th>
        </tr>
    </thead>
    <tbody>
        @foreach (var item in Model)
        {
            <tr>
                <td>
                    @Html.DisplayFor(modelItem => item.observational_day)
                </td>
                <td>
                    @Html.DisplayFor(modelItem => item.city.name)
                </td>
                <td>
                    @Html.DisplayFor(modelItem => item.temperature_ave)
                </td>
                <td>
                    @Html.DisplayFor(modelItem => item.temperature_min)
                </td>
                <td>
                    @Html.DisplayFor(modelItem => item.temperature_max)
                </td>
                <td>
                    @Html.DisplayFor(modelItem => item.precipitation)
                </td>
                <td>
                    @Html.DisplayFor(modelItem => item.wind_speed)
                </td>
                <td>
                    @Html.ActionLink("Edit", "Edit", new { observationalDay = item.observational_day, cityID = item.city_id }) |
                    @Html.ActionLink("Details", "Details", new { observationalDay = item.observational_day, cityID = item.city_id }) |
                    @Html.ActionLink("Delete", "Delete", new { observationalDay = item.observational_day, cityID = item.city_id }) |
                </td>
            </tr>
        }
    </tbody>
</table>

<div id="pager" class="pager">
    <button type="button" class="first"><<</button>
    <button type="button" class="prev"><</button>
    <span class="pagedisplay"></span>
    <button type="button" class="next">></button>
    <button type="button" class="last">>></button>
    <select class="pagesize" title="Select page size">
        <option value="10">10</option>
        <option value="20">20</option>
        <option value="30">30</option>
        <option value="40">40</option>
    </select>
    <select class="gotoPage" title="Select page number"></select>
</div>

@section scripts {
    <link href="~/Content/tablesorter/theme.blue.css" rel="stylesheet" />
    <script src="~/Scripts/tablesorter/jquery.tablesorter.combined.min.js"></script>
    <script src="~/Scripts/tablesorter/extras/jquery.tablesorter.pager.min.js"></script>

    <script type="text/javascript">
        $(document).ready(function () {
            $("table").tablesorter({
                theme: 'blue',
                widthFixed: true,
                widgets: ['zebra', 'columns', 'filter', 'pager', 'resizable', 'stickyHeaders'],
                //フィルタのリセットボタンを追加する場合に設定する。
                widgetOptions: {
                    filter_reset: 'button.reset-filter-button',
                    resizable: true,
                }
            });
            $("table").tablesorterPager({
                container: $(".pager"),
            });
        });
    </script>
}
tableの設定
tableにidとclassを設定し、theadとtbodyを追加します。
<!-- idとclassを設定 -->
<table id="table" class="tablesorter">
    <!-- theadを追加 -->
    <thead>
        <tr>
        ...略
        </tr>
    </thead>
    <!-- tbodyを追加 -->
    <tbody>
        @foreach (var item in Model)
        {
            <tr>
            ...略
            </tr>
        }
    </tbody>
</table>
**class="tablesorter-blue"**とすることで使用するスタイルの設定を行うことができます。
もしくはjavascriptで設定出来ます。
<table id="table" class="tablesorter-blue">
リセットボタン
フィルタのリセットボタンを追加します。

<button class="reset-filter-button">Reset Filter</button>
スライダー
ページ操作に使用するスライダーを追加します。

<div id="pager" class="pager">
    <!-- 戻るボタン -->
    <button type="button" class="first"><<</button>
    <button type="button" class="prev"><</button>
    <!-- 表示ページ -->
    <span class="pagedisplay"></span>
    <!-- 進むボタン -->
    <button type="button" class="next">></button>
    <button type="button" class="last">>></button>
  <!-- ページサイズ(1ページに何行表示させるか)のコンボボックス -->
    <select class="pagesize" title="Select page size">
      <!-- コンボボックスの値を設定 -->
        <option value="10">10</option>
        <option value="20">20</option>
        <option value="30">30</option>
        <option value="40">40</option>
    </select>
    <!-- 指定ページへのジャンプ用のコンボボックス -->
    <select class="gotoPage" title="Select page number"></select>
</div>
cssとjsファイル読み込み
tablesorter用のcssファイルとjsファイルを読み込みます。
※_Layout.cshtmlのheadなどで読み込んでもOKです。
Visual Studioではソリューションエクスプローラーから対象のファイルをドラッグ&ドロップで追加できます。
<!-- スタイルシート 使用するスタイルのスタイルシートを読み込んでください。-->
<link href="~/Content/tablesorter/theme.blue.css" rel="stylesheet" />
<!-- フィルタやソートなど用 -->
<script src="~/Scripts/tablesorter/jquery.tablesorter.combined.min.js"></script>
<!-- pagerを使用する場合に必要 -->
<script src="~/Scripts/tablesorter/extras/jquery.tablesorter.pager.min.js"></script>
tablesorterの設定
$("table").tablesorterがテーブル部分の設定、$("table").tablesorterPagerがページの部分の設定です。
themeプロパティで使用するスタイルの設定を行うことができます。
tablesorterのwidgetsにfilterを設定することでフィルタ機能を追加できます。
tablesorterPagerのcontainerにスライダーを設定します。
<script type="text/javascript">
    $(document).ready(function () {
        $("table").tablesorter({
            //スタイルを設定(theme.blue.css)
            theme: 'blue',
            widthFixed: true,
            //zebra:1行ごとに色を変える
            //columns:選択した列の色を変える
            //filter:列にフィルタ機能を追加する
            //resizable:列のリサイズをする
            //stickyHeaders:スクロールの際にヘッダを固定する
            widgets: ['zebra', 'columns', 'filter', 'pager', 'resizable', 'stickyHeaders'],
            //フィルタのリセットボタンを追加する場合に設定する。
            widgetOptions: {
                filter_reset: 'button.reset-filter-button',
                resizable: true,
            }
        });
        //pagerの設定
        $("table").tablesorterPager({
            container: $(".pager"),
        });
    });
</script>
まとめ
今回紹介したtablesorterを使用することで、htmlテーブルに簡単にフィルタ、ソート、ページ機能を追加することができました。
tablesorterを使用するための記述をするだけでhtmlテーブルに便利な機能を追加することができ、さらにさまざまなスタイルも用意されていて、まさに至れり尽くせりという感じです。
参考
https://mottie.github.io/tablesorter/docs/index.html#Examples
https://beiznotes.org/install-tablesorter/