こんにちは。Ryoです。
今回はRaspberry Pi 3を使用してVPNサーバーを構築します。
なぜやるのか
先日、上海に行きました。その際に香港SIMを使用してネットサーフィンをしていたのですが、一部の国内サイトよりアクセスを弾かれてしまいました。(*ローソンIDのログインページにアクセスできませんでした。)
次回渡航時にアクセスできるように、自宅にVPNサーバーを構築します。
環境
Raspberry Pi 3
Raspbian GNU/Linux 9.6 (stretch)
MacBook Pro 13インチ 2015
ソフトバンク光 BBユニット
Buffalo WCR-1166DS ルーター
Pixel 3a via ソフトバンク4G
補足
RasbianとSSHの導入は割愛します。
1~3はクライアントの設定で使用するので、メモしといてください。
1.SoftEtherの導入
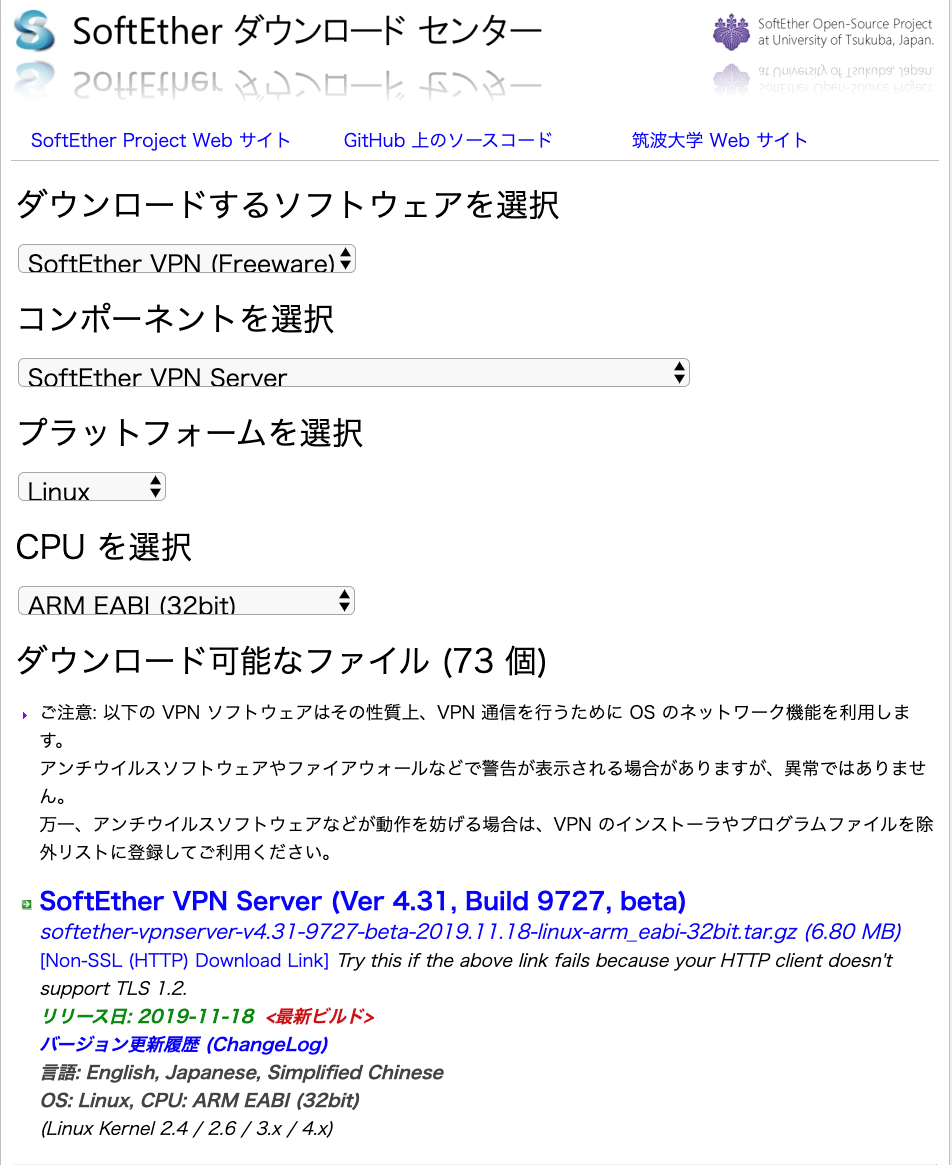
SoftEtherのファイルをダウンロードします。
Raspberry PiのIPアドレスをルーターで確認し、SCPコマンドでDLしたファイルを転送します
scp softether-vpnserver-v4.31-9727-beta-2019.11.18-linux-arm_eabi-32bit.tar.gz pi@"ラズパイのIPアドレス":~
転送したファイルをRaspberry Pi上で解凍します。
pi@raspberrypi:~ $ tar xf softether-vpnserver-v4.31-9727-beta-2019.11.18-linux-arm_eabi-32bit.tar.gz
解凍したディレクトリに入り、更に展開します。
pi@raspberrypi:~ $ cd vpnserver
pi@raspberrypi:~/vpnserver $ make
makeコマンドを打つといくつか質問を受けるので全て1を選択します。
展開が終わったらvpnserverディレクトリをusr/localに移動します。
rootユーザーでログインしていないため、sudoコマンドを使用します。
pi@raspberrypi:~ $ sudo mv vpnserver /usr/local
移動先に行き、パーミッションを設定します。
pi@raspberrypi:/usr/local/vpnserver $ chmod 600 *
pi@raspberrypi:/usr/local/vpnserver $ chmod 700 vpncmd vpnserver
権限設定ができたかどうかチェックします。
pi@raspberrypi:/usr/local/vpnserver $ ls -la
また、vpnserverがインストールできたか動作確認します。
pi@raspberrypi:/usr/local/vpnserver $ /usr/local/vpnserver/vpncmd
以下の3択を迫られるので3を選びます。
By using vpncmd program, the following can be achieved.

1. Management of VPN Server or VPN Bridge
2. Management of VPN Client
3. Use of VPN Tools (certificate creation and Network Traffic Speed Test Tool)

Select 1, 2 or 3: 3
checkコマンドを打ちます。
VPN Tools>check
以下のように、全てPassしていればインストールは上手くいっています。
If this operation environment check tool is run on a system and that system passes, it is most likely that SoftEther VPN software can operate on that system. This check may take a while. Please wait...

Checking 'Kernel System'...
              Pass
Checking 'Memory Operation System'...
              Pass
Checking 'ANSI / Unicode string processing system'...
              Pass
Checking 'File system'...
              Pass
Checking 'Thread processing system'...
              Pass
Checking 'Network system'...
              Pass

All checks passed. It is most likely that SoftEther VPN Server / Bridge can operate normally on this system.

The command completed successfully.
ctrl + cでVPN Toolsを終了します。
vpnserverの自動起動設定をします。
作成ディレクトリ
/etc/systemd/system/
ファイル名
vpnserver.service
スクリプトを作成します。
pi@raspberrypi:/usr/local/vpnserver $ sudo nano /etc/systemd/system/vpnserver.service
[Unit]
Description=SoftEther VPN Server
After=network.target network-online.target

[Service]
User=root
ExecStart=/usr/local/vpnserver/vpnserver start
ExecStop=/usr/local/vpnserver/vpnserver stop
Type=forking
RestartSec=3s
WorkingDirectory=/usr/local/vpnserver/
ExecStartPre=/sbin/ip link set dev eth0 promisc on

[Install]
WantedBy=multi-user.target
サービスを起動し、動作確認します。
pi@raspberrypi:/usr/local/vpnserver $ sudo systemctl start vpnserver
pi@raspberrypi:/usr/local/vpnserver $ systemctl status vpnserver.service
activeと表示されれば、動作しています。
Active: active (running) since Wed 2019-12-18 03:13:34 JST; 19s ago
サービスを自動起動します。
pi@raspberrypi:/usr/local/vpnserver $ sudo systemctl enable vpnserver.service
サービスが起動しているか確認。
pi@raspberrypi:~ $ systemctl status vpnserver.service
Active: active (running)
2.VPN Server Managerの設定
VPN Server ManagerをMacに導入し、VPN Serverの設定をします。
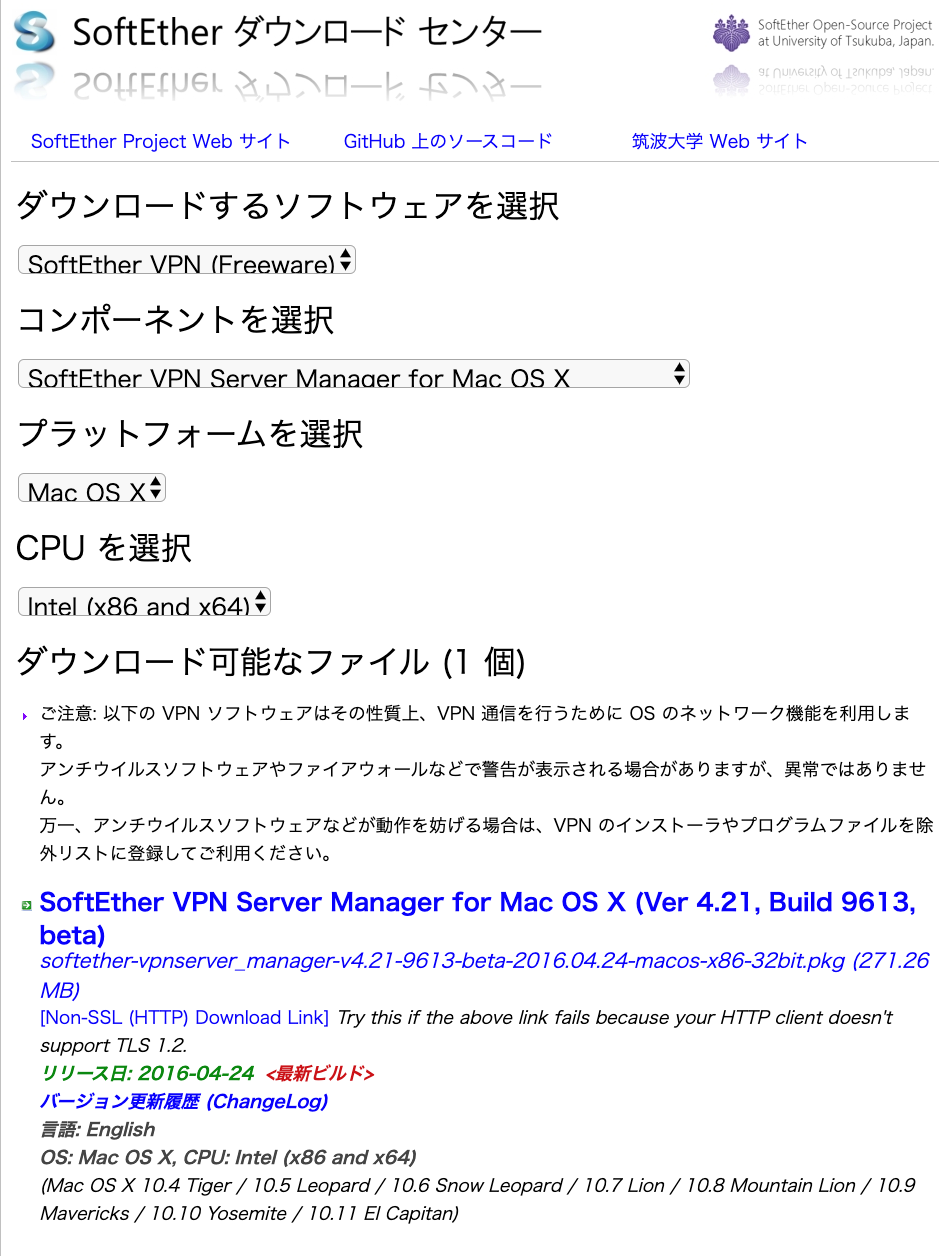
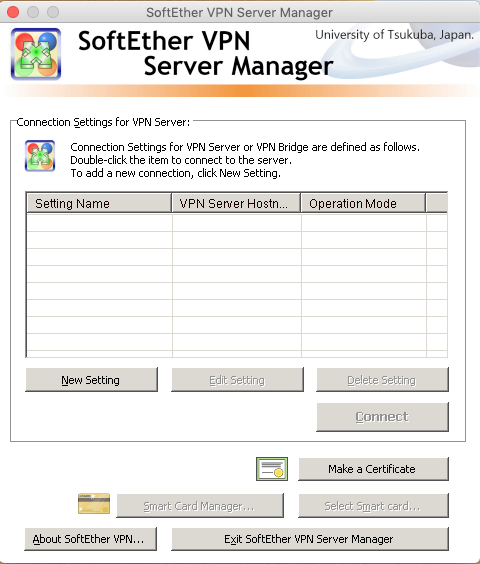
SoftEther VPN Server Managerを起動します。
New Settingをクリック。
Bridge Easy Setupで
Remote Access VPN Serverにチェックを入れNextをクリック。
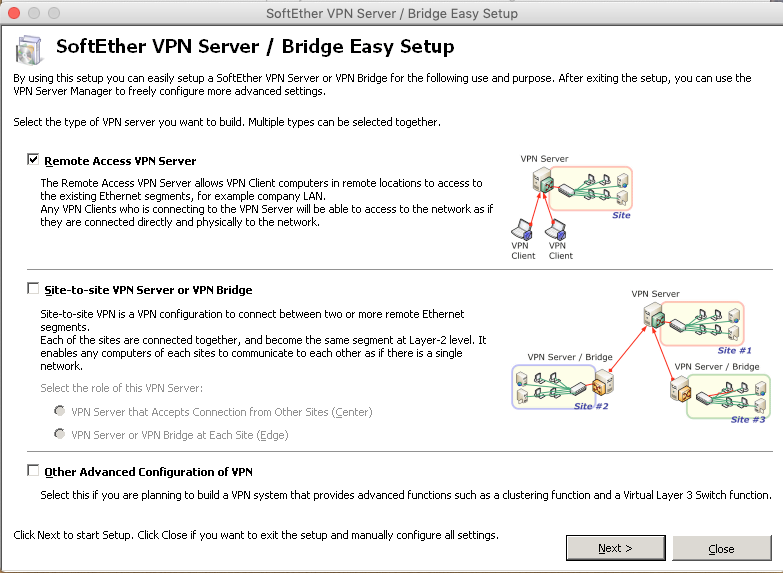
VPN Server、VPN Bridgeの設定を初期化していいか聞かれるが、はいをクリック。

Virtual Hub Nameに任意の名前を入れ、OKをクリック。

IPsec L2TPサーバーセッティングで、Enable L2TP Server Function(L2TP over IPsec)にチェック。
IPsec Common SettingsのIPsec Pre-Shared Key(*1)に任意のパスワードを入れる。
この時に、10文字以上のパスワードを設定するとAndroid端末でエラーの発生ありと警告を受けるので、9文字以下のパスワードを設定する。
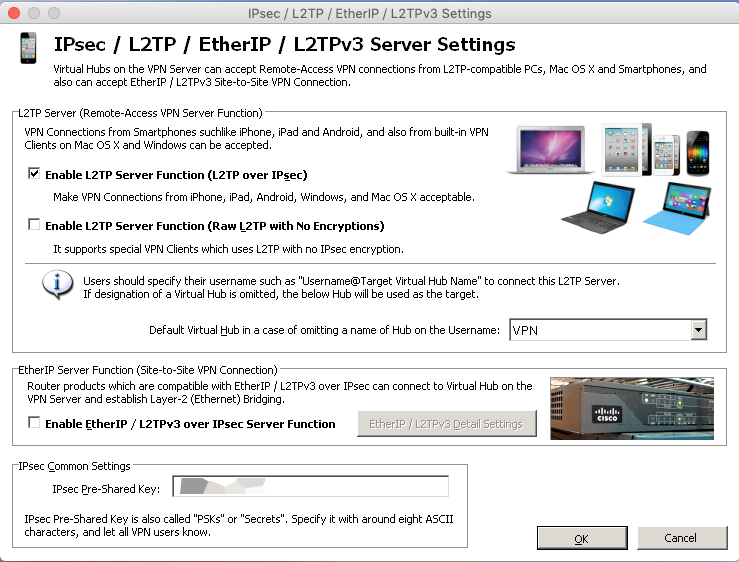
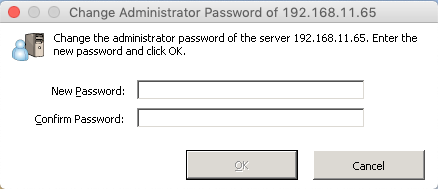
User Name(*2)、Password(*3)、Confirm Passwordに任意のものを設定する。
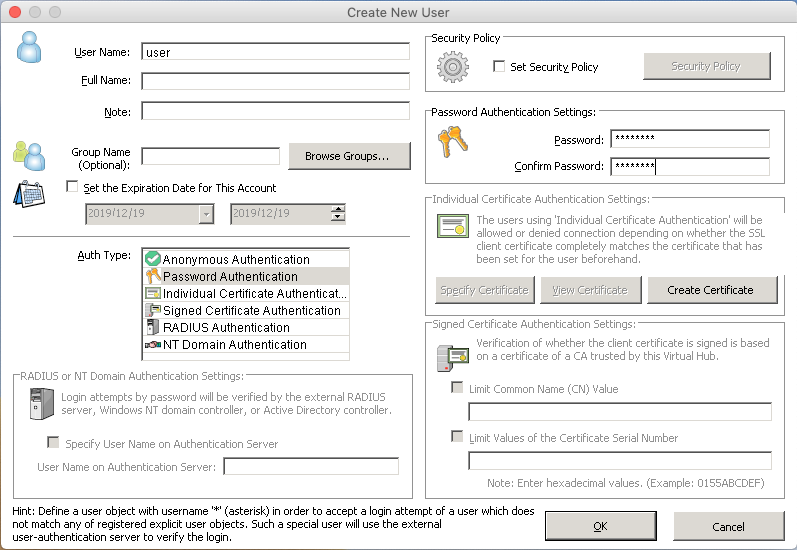
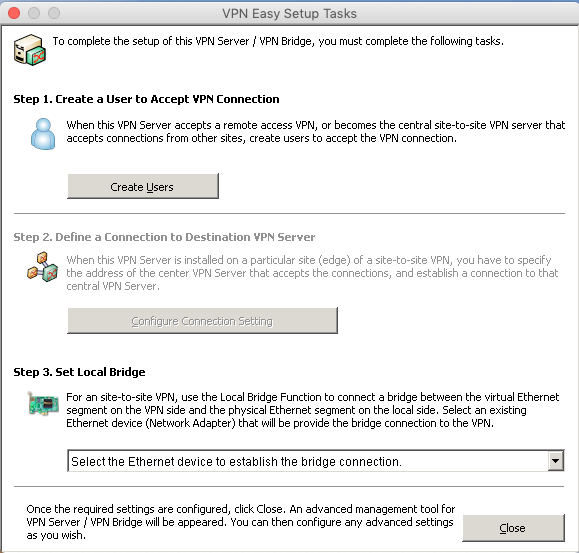
Local Bridge Settingをします。
Vitual Hubに仮想HUB名に任意の名前を記入します。
Bridge with New Tap Deviceにチェックを入れます。
LANアダプターはeth0を選択します。
New Tap Device Nameは任意の名前を記入します。

以上でVPN Server Managerの設定は終了。
ターミナルでraspberry piにSSHで接続し、ifconfigを叩く。
tap_ + New Tap Device Nameで設定した名前があればOK。
tap_softether: flags=4163<UP,BROADCAST,RUNNING,MULTICAST> mtu 1500
3.ローカルブリッジの設定
Raspberry Piでローカルブリッジの設定をする。
pi@raspberrypi:~ $ sudo apt install -y bridge-utils
Raspberry Piのネットワーク構成を編集します。
pi@raspberrypi:~ $ sudo nano /etc/network/interfaces
auto eth0
iface eth0 inet manual

# SoftEther VPN
auto br0
iface br0 inet static
address 192.168.11.64
netmask 255.255.255.0
gateway 192.168.11.1

bridge_ports eth0 tap_softether
bridge_maxwait 10
Rasbpberry Piを再起動します。
以上で、ローカルブリッジの設定は終了です。
残りのルーターとクライアント(Pixel 3a)の設定は検証が終わり次第、加筆します。
接続を確認したので追記します。(2020/03/19)
4.ルーターの設定
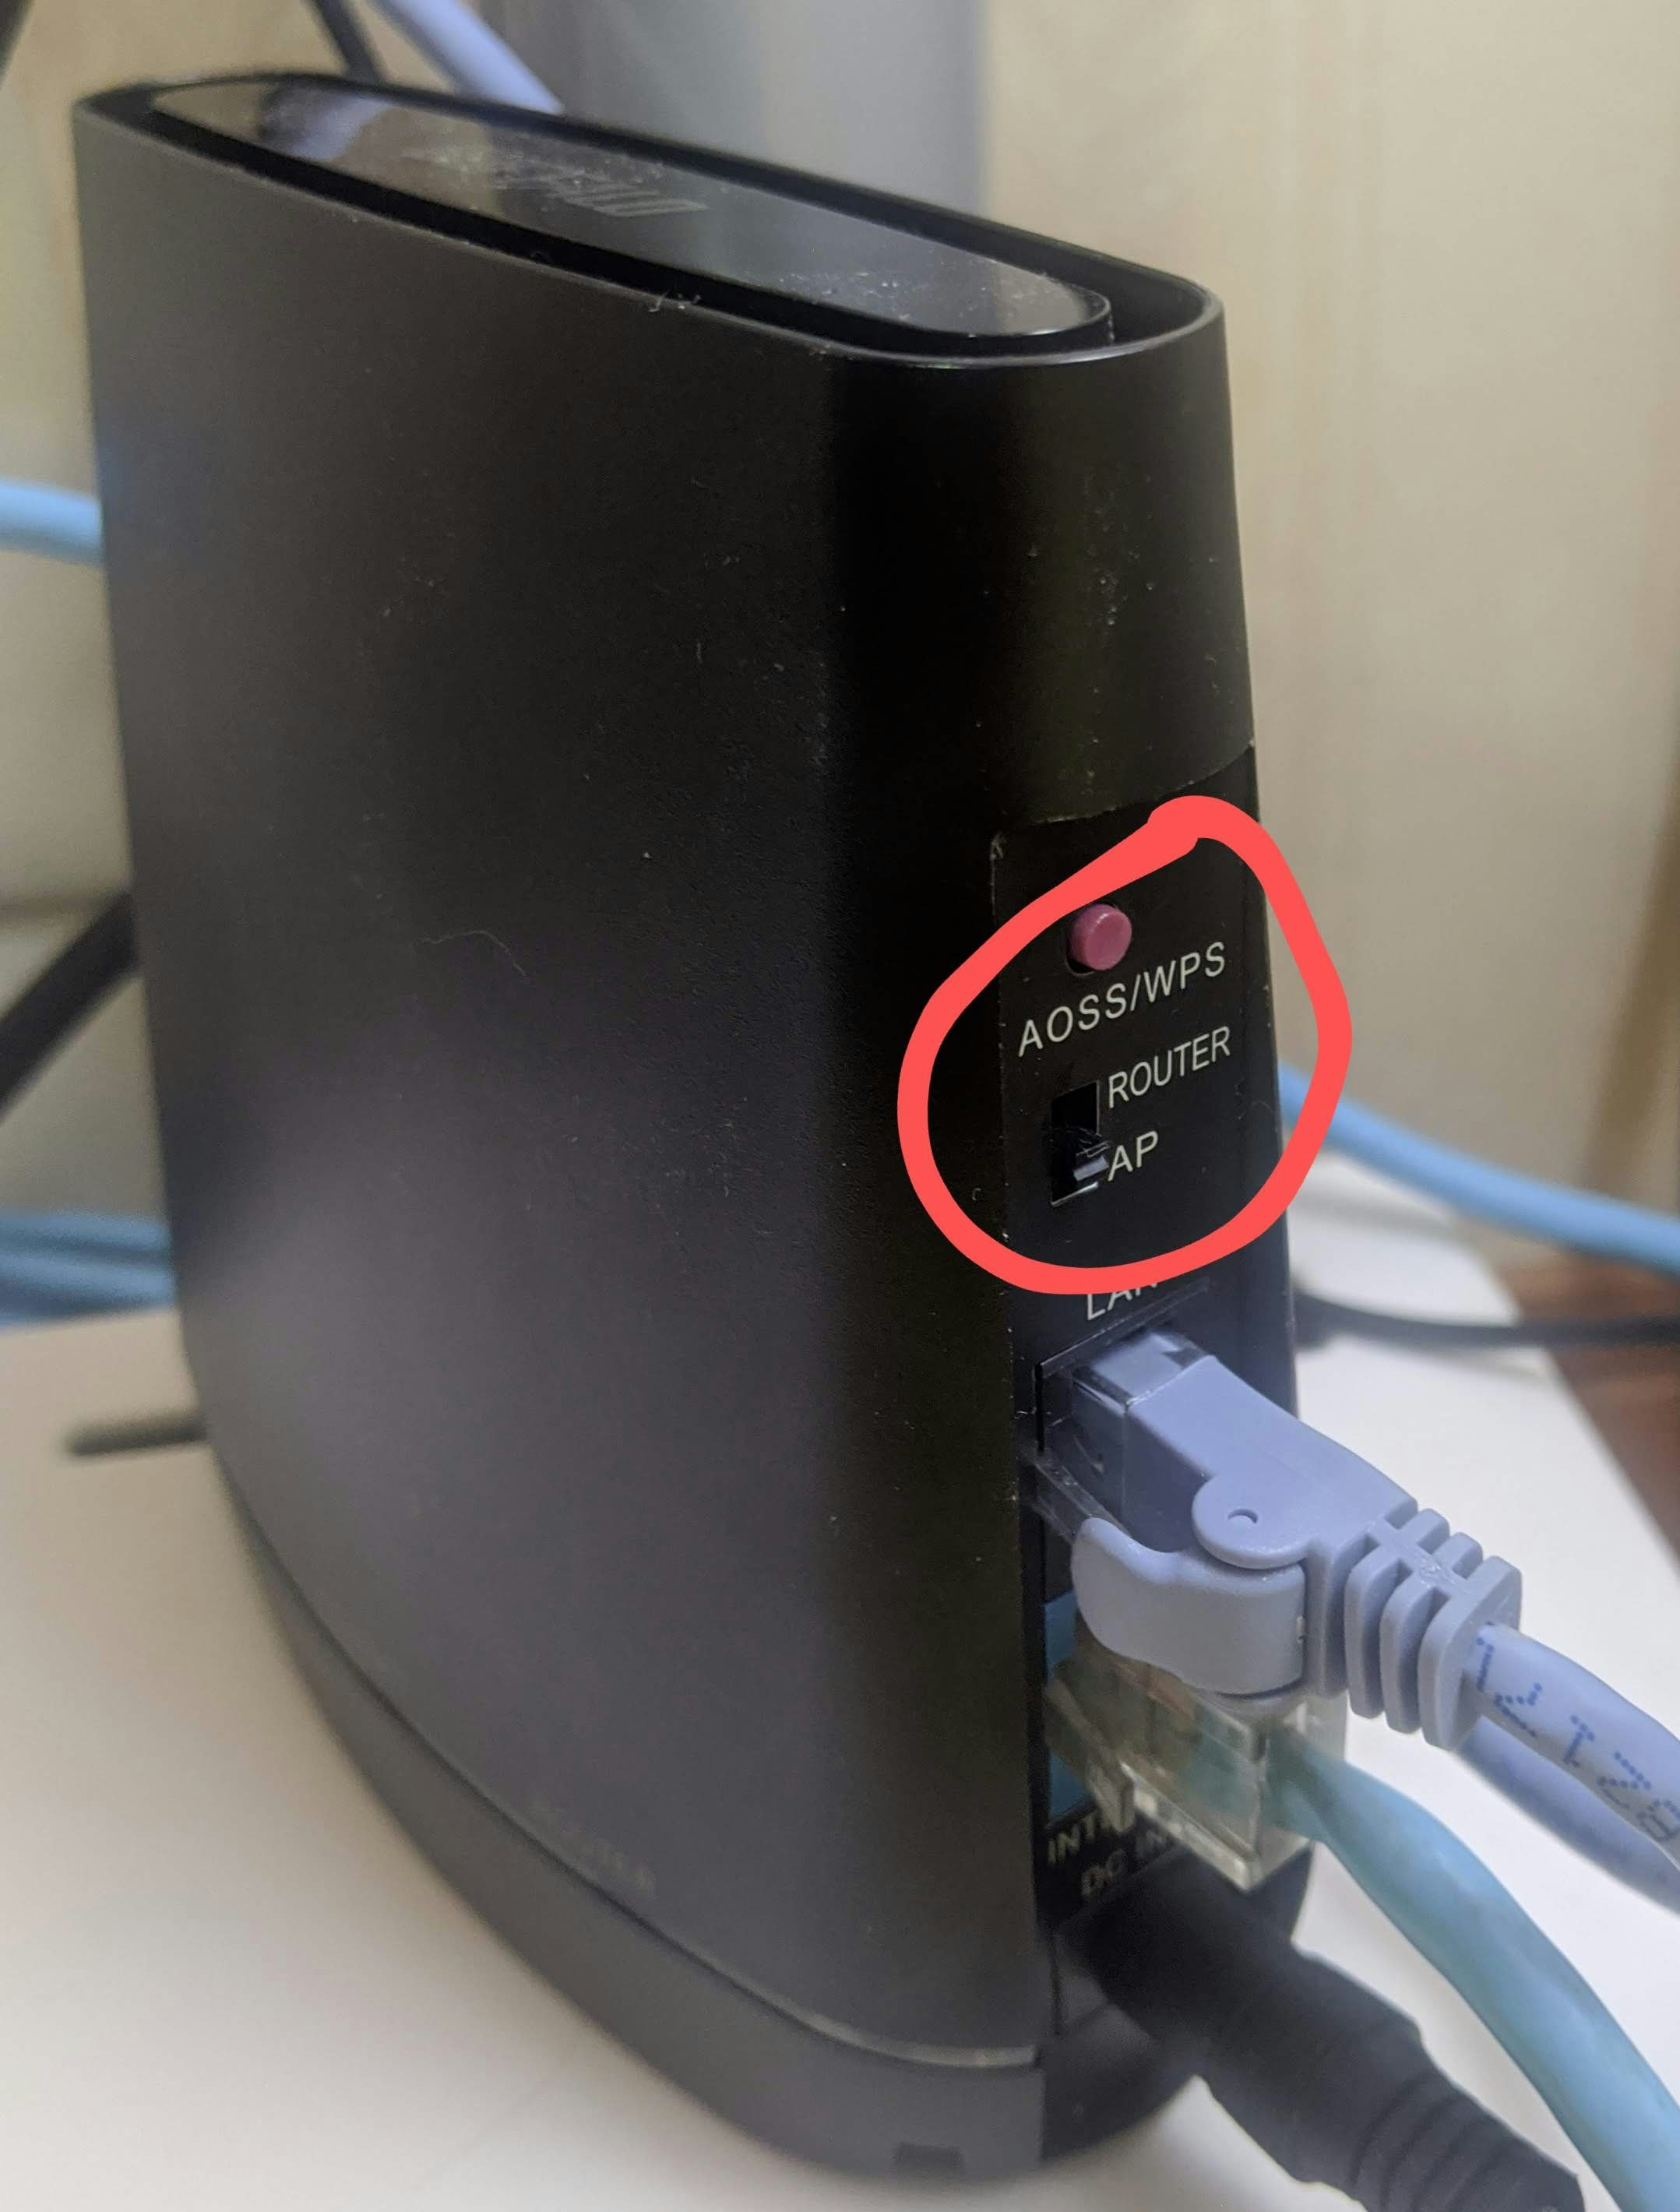
WCR-1166DSのモードのトグルをAPモードに合わせる。
*WCR-1166DS上ではルーターの設定はしません。
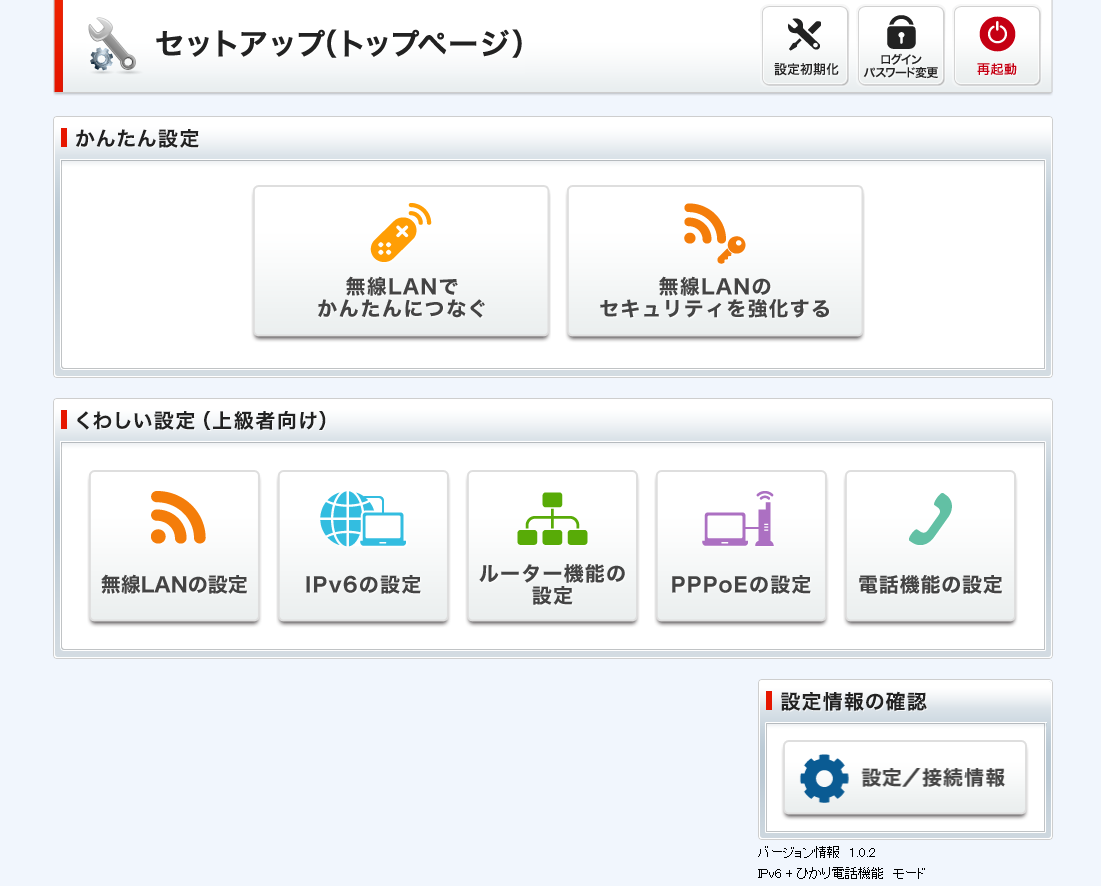
ブラウザから172.16.255.254にアクセスし、ソフトバンク光 BBユニットの設定画面にログイン。
(設定を変更していなければ、ID: user, PASS: userでログイン可能です。)
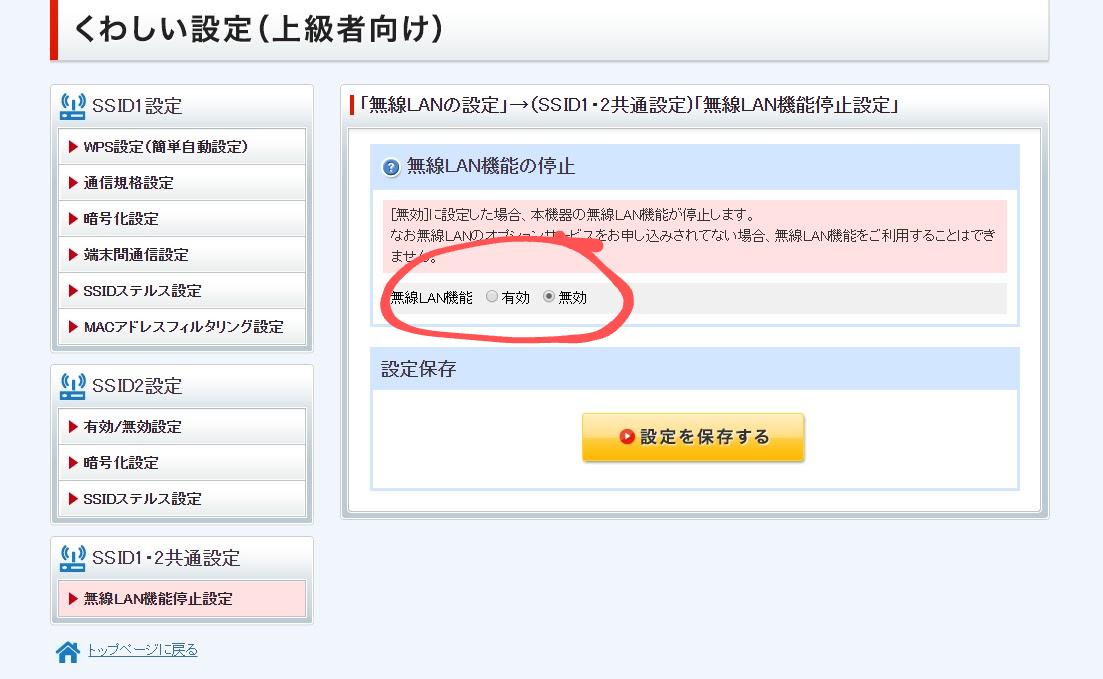
無線LANの設定-無線LAN機能停止設定より、ソフトバンク光 BBユニットの無線LAN機能を止めておく。
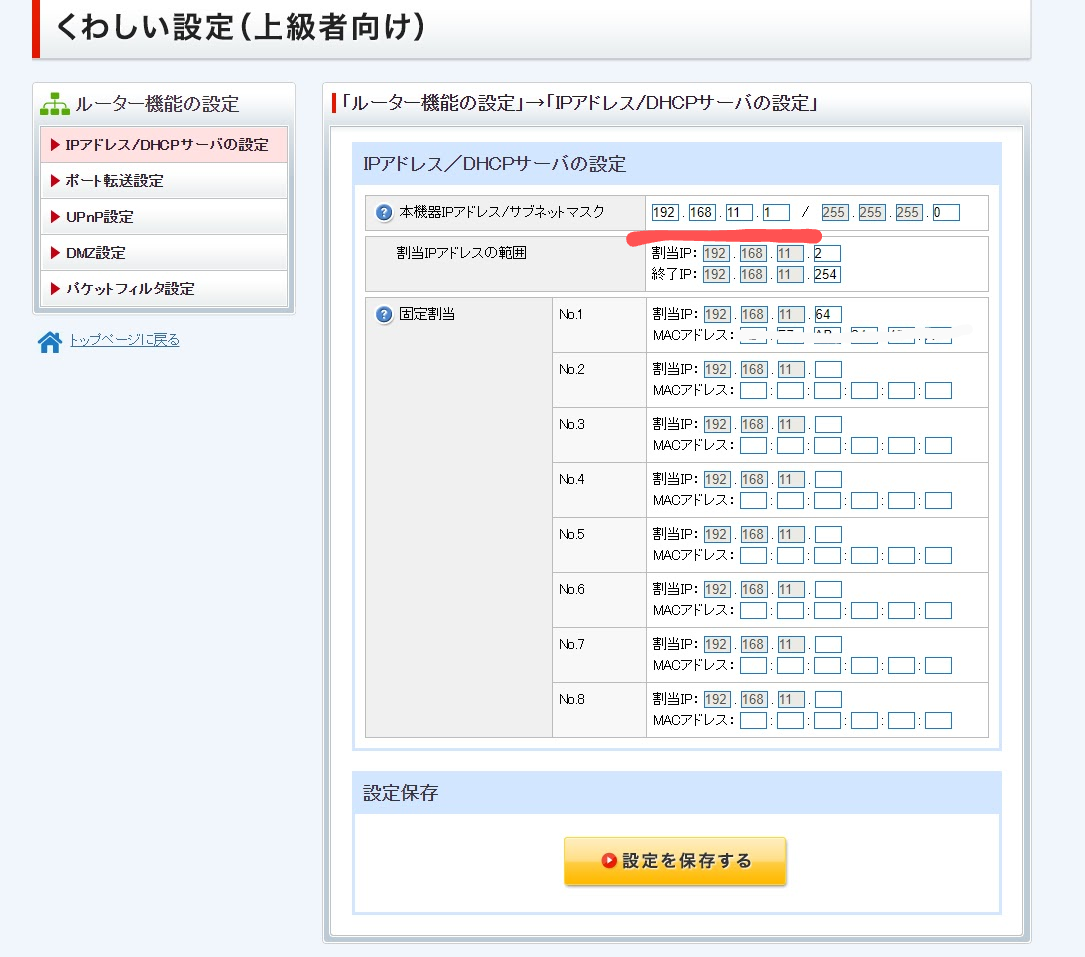
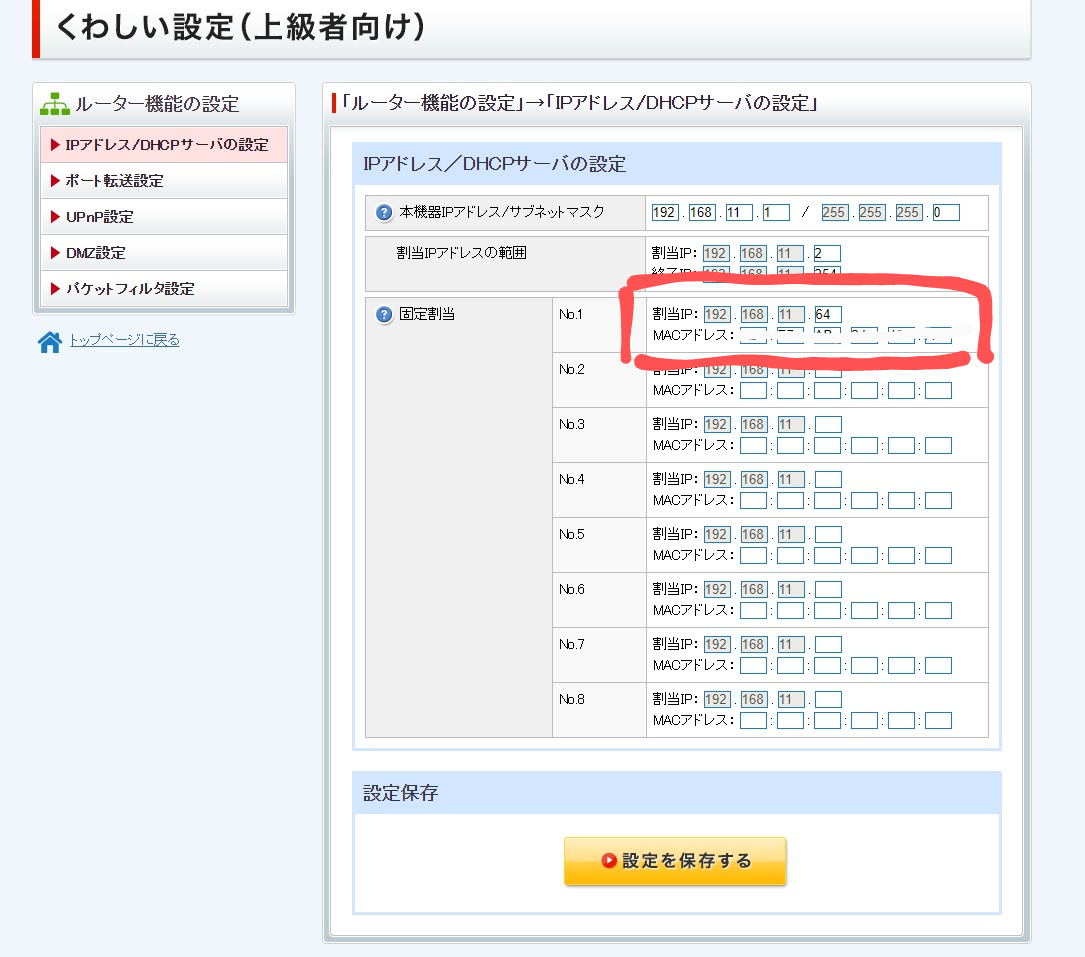
次に、ルーター機能の設定-IPアドレス/DHCPサーバの設定より、IPアドレスの割り当て範囲をラズパイのIPアドレスに合わせる。ソフトバンク光 BBルーターは初期設定で"192.168.3.1"より始まるが、Buffaloルーターは"192.168.11.1"から始まっていたため、本機器IPアドレス/サブネットマスクを"192.168.3.1"から"192.168.11.1"に変更。
同ページの固定割当でラズパイのIPアドレスを固定する。
pi@raspberrypi:~ $ ifconfig
中略
ether Macアドレス  txqueuelen 1000  (Ethernet)
ether以下のMacアドレスを確認し、固定割当にIPアドレスとMACアドレスを入力する。
ポート転送の設定をする。

有効、プロトコルUDP、ポートを500,4500、転送先IPアドレスを192.168.11.64で2ケ設定をする。
以上でルーターの設定は終わりです。
5.クライアント(Pixel3a)の設定
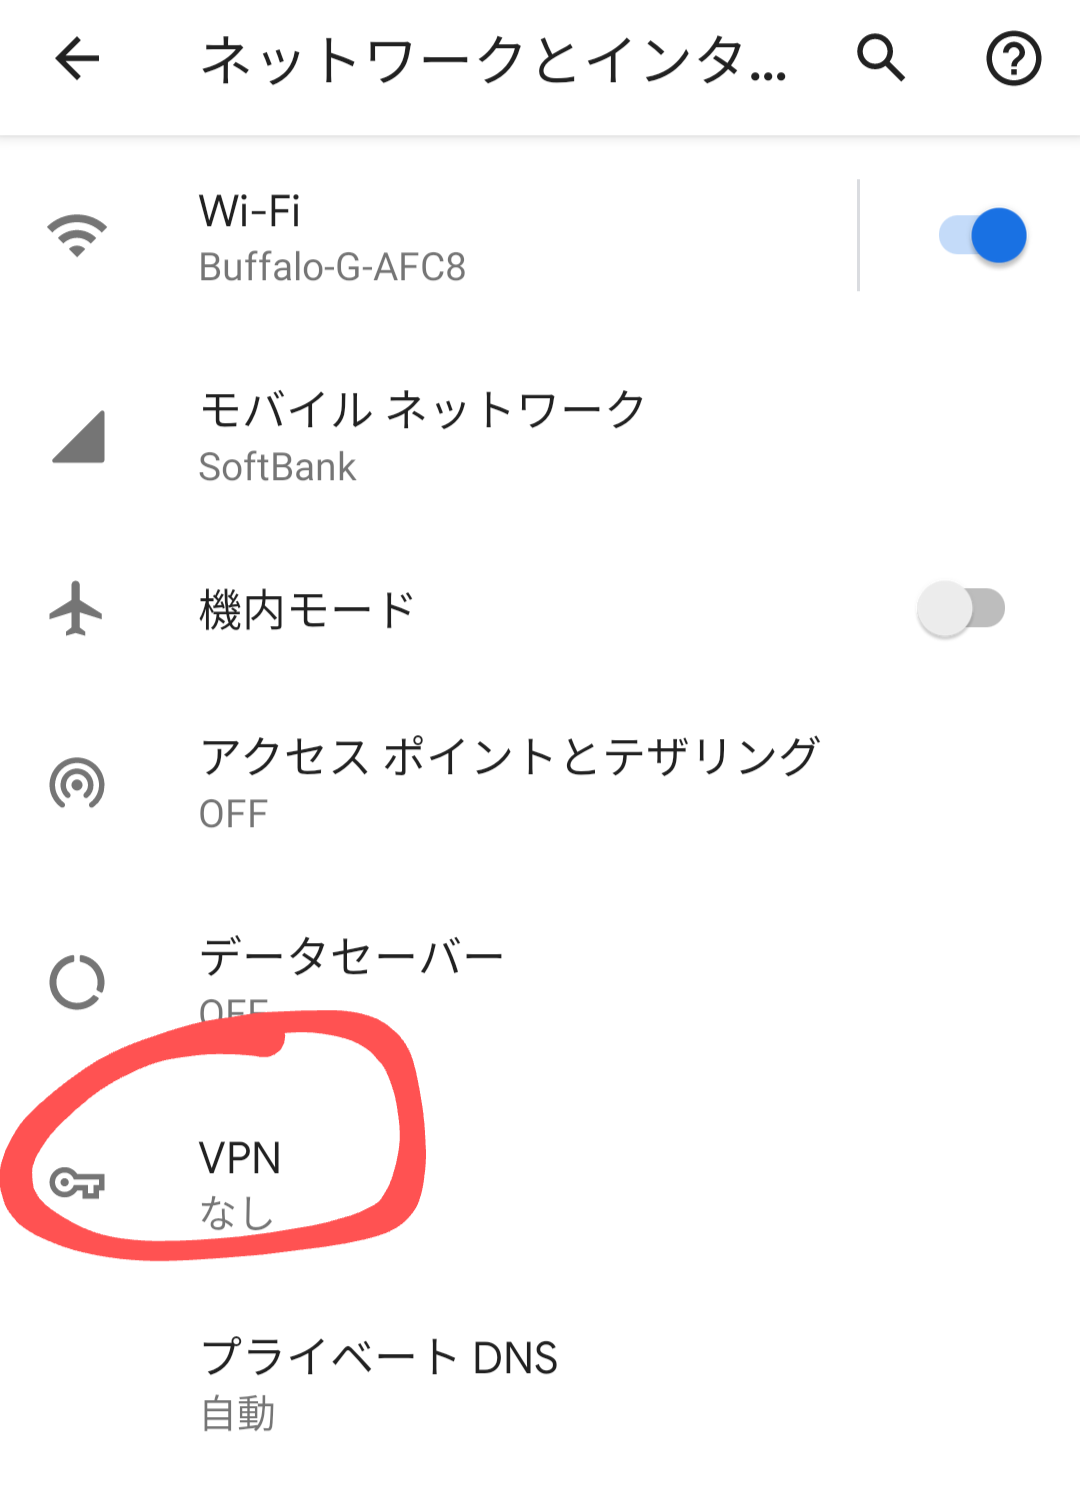
設定-ネットワークとインターネット-詳細設定-VPNをタップし、VPNの設定ページを開く。
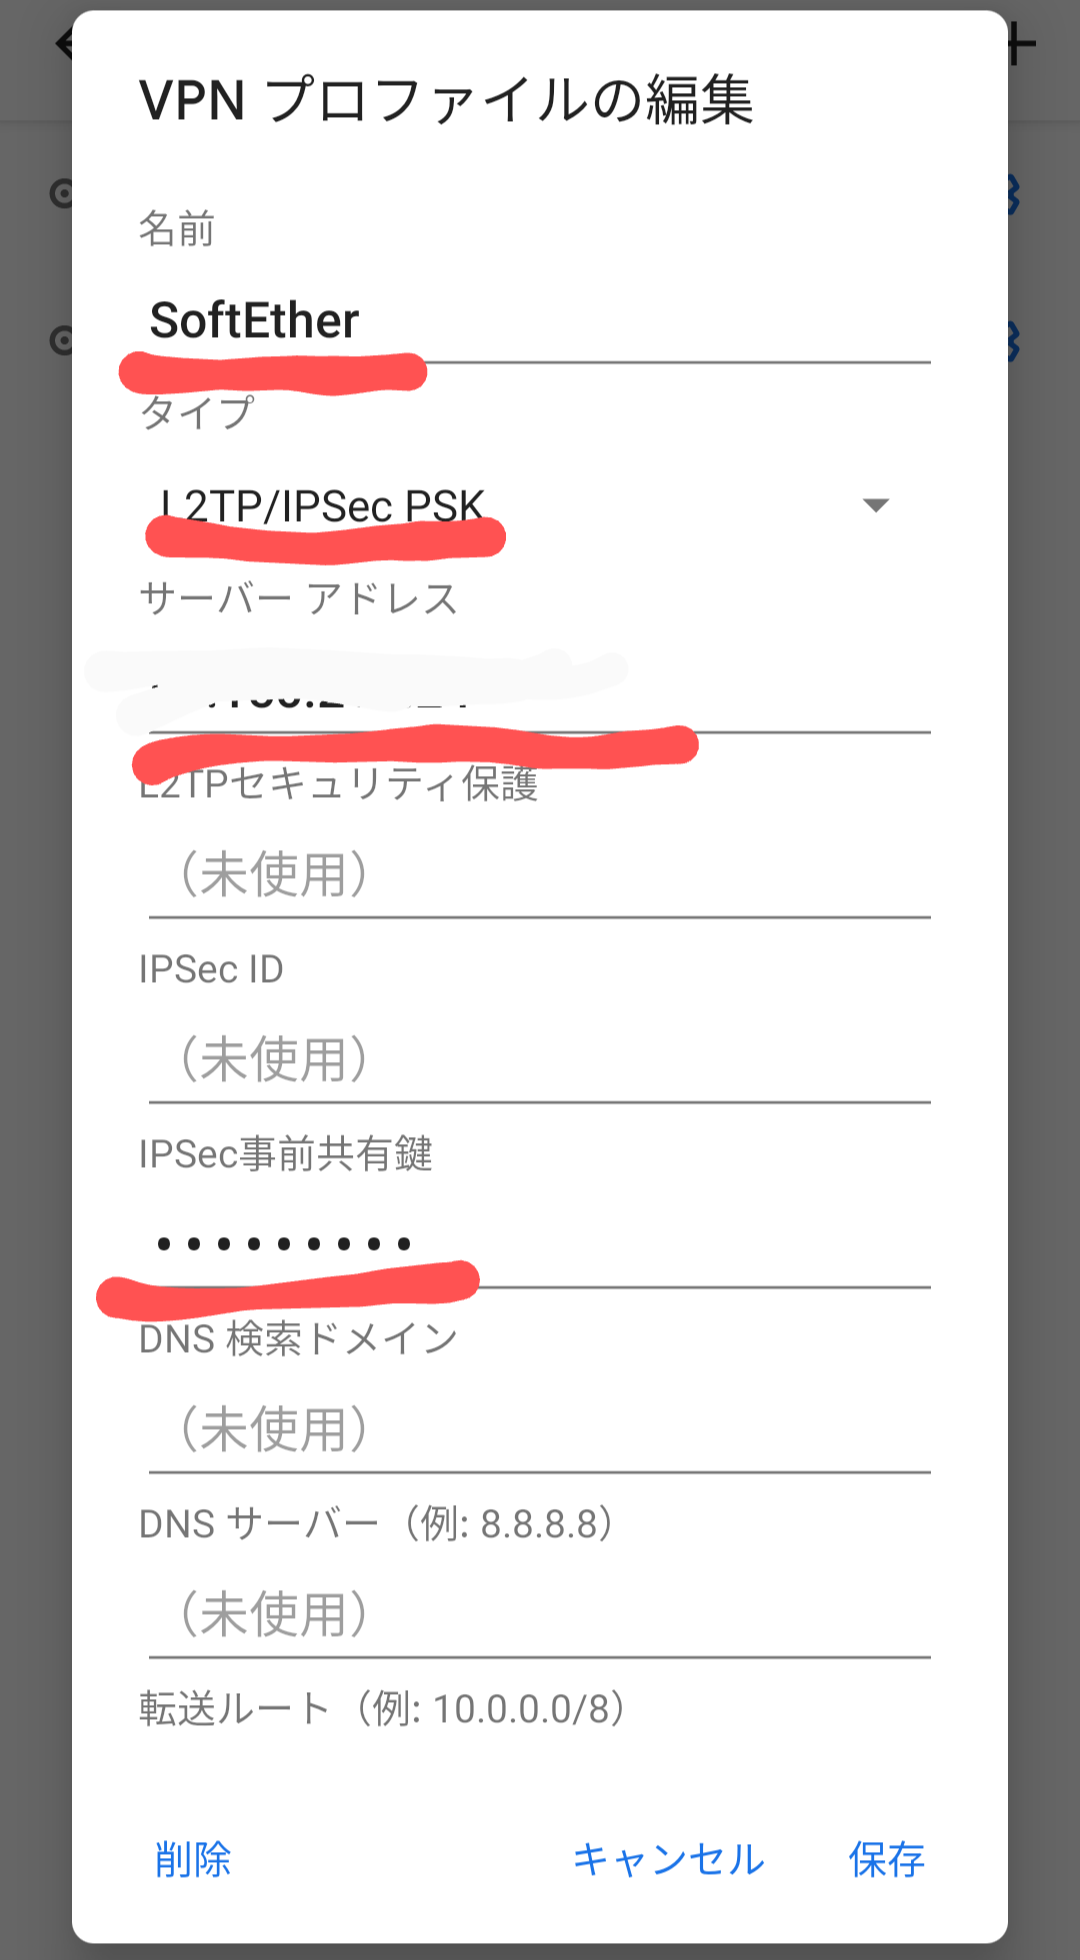
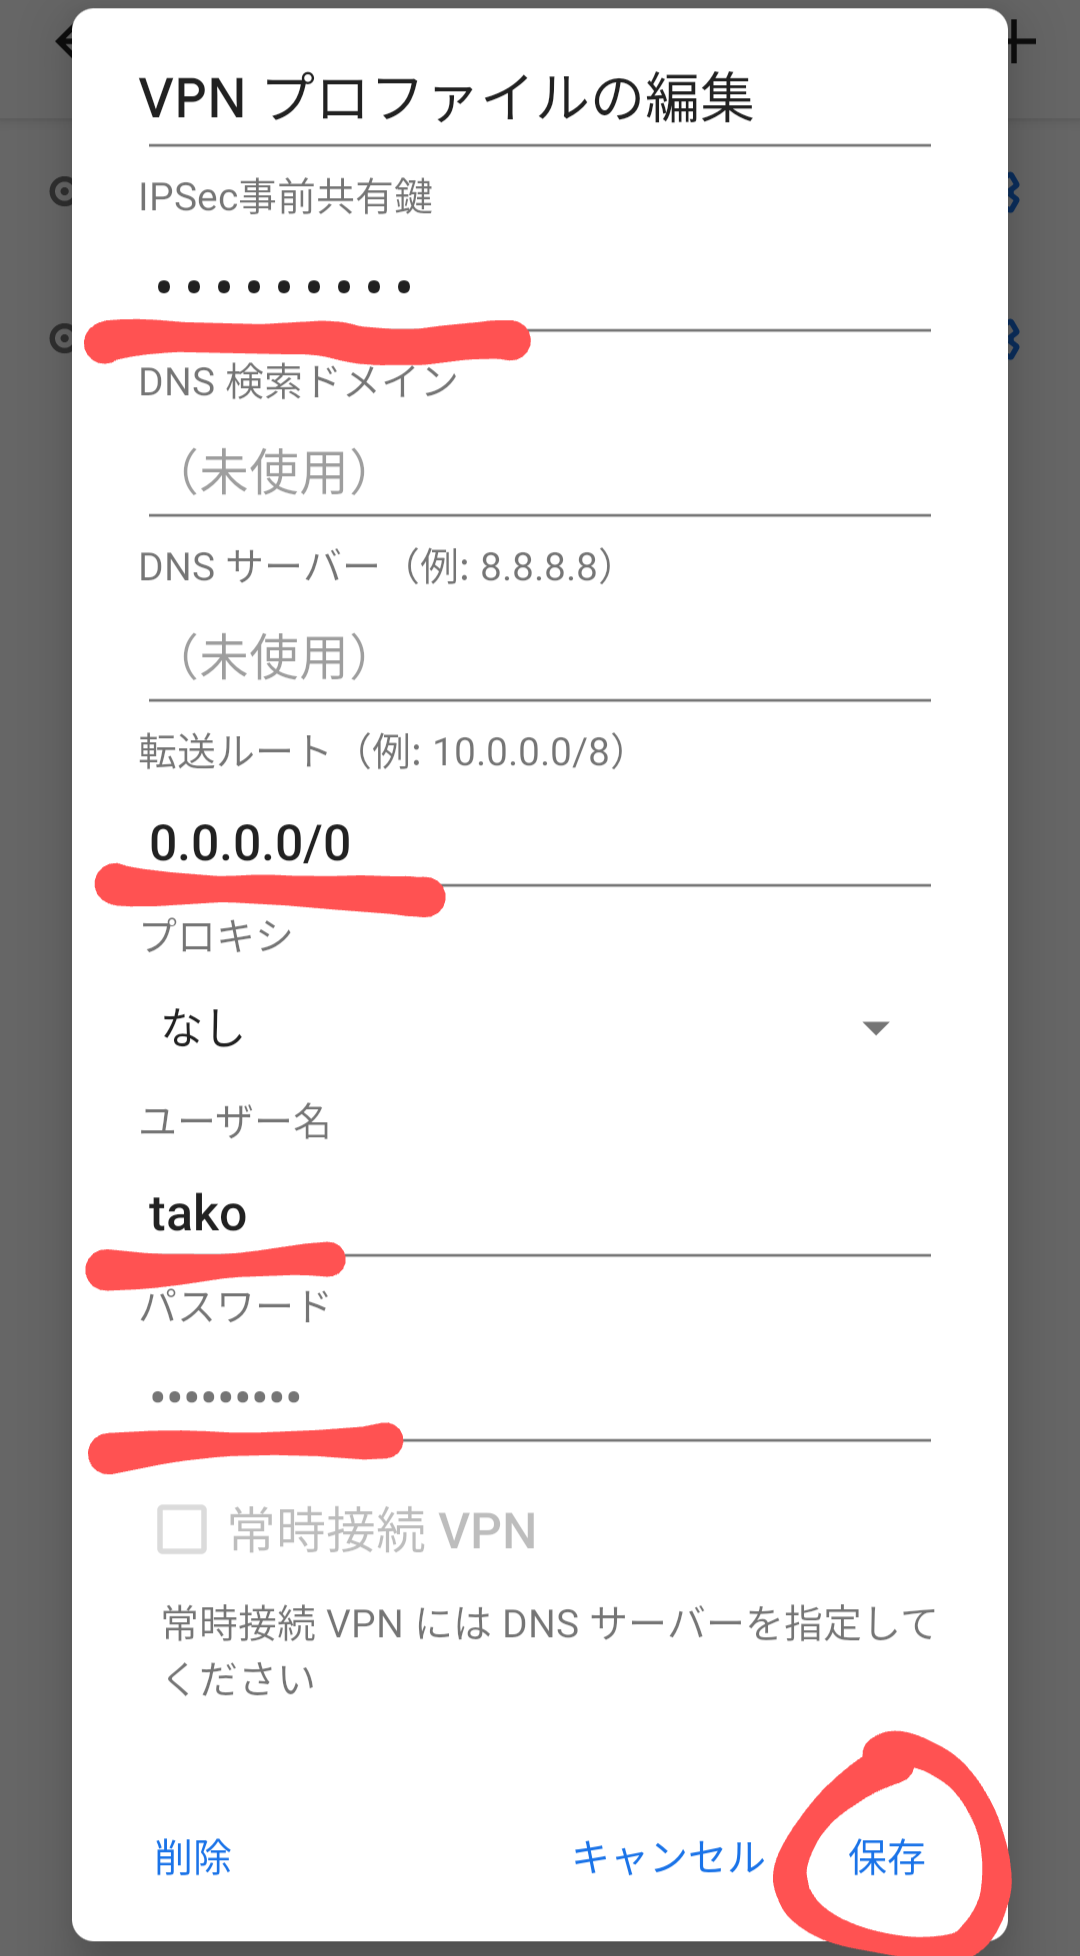
右上の+ボタンをタップ。プロファイルの編集が出来るので、以下の項目に入力する。
- 名前: 任意
- タイプ: L2TP/IPSec PSK
- サーバーアドレス: SoftEther Dynamic DNS FunctionのGlobal IPv4 Address
- IPSec事前共有鍵: SoftEtherで設定したIPsec Common SettingsのIPsec Pre-Shared Key(*1)
- 転送ルート: 0.0.0.0/0
- ユーザー名: SoftEtherで設定したユーザー(*2)
- パスワード: SoftEtherで設定したパスワード(*3)
以上を設定し、保存する。

設定後に、設定したプロファイルをタップし、接続できれば完了です。
お疲れさまでした。
今回のハマりどころはルーターの設定でした。無線ルーターを単なるAPにして、ソフトバンク光 BBユニットの設定を引き継がすという考えが無かったので、気が付くまでに時間がかかりました。
コロナウィルスの騒動が落ち着いたら、中国で接続出来るか確認します。
参考URL
Raspberry Piで作るSoftEther VPNの環境
Raspberry PiでのVPNサーバ構築
RaspberryPiとsoftetherでVPN
ポート開放のブリッジモードとは
