Rerunとは
Rerunについては下記の記事を参考にしてください.Pythonでの簡単な使い方もこちらで解説しています.
viewerの使い方はこちら
Blueprintsの使い方はこちら
今まではPythonでの使い方を主に解説してきたのですが,本記事ではC++での導入について解説します.
CMakeLists.txtの記述等はほぼ初心者なので更に良い書き方があるかも知れませんが,ドキュメントを参考に紹介します.
サンプルコードは以下で公開しています
ディレクトリ構成
cpp
├── CMakeLists.txt # 全体の設定を記述
├── Makefile # buildなどのコマンドを書いたMakefile
├── build # buildディレクトリ
│   ├── CMakeCache.txt
│   ├── CMakeFiles
│   ├── Makefile
│   ├── _deps
│   ├── arrow
│   ├── bin # 実行ファイル
│   │   ├── example0001
│   │   └── example0002
│   ├── cmake_install.cmake
│   ├── example0001
│   └── example0002
├── example0001 # プログラム例ごとのディレクトリ
│   ├── CMakeLists.txt # 各ディレクトリの個別の設定を記述
│   └── main.cpp
└── example0002
    ├── CMakeLists.txt
    └── main.cpp
例1 実行
CMakeLists.txt
cmake_minimum_required(VERSION 3.16...3.27)
project(cpp LANGUAGES CXX)

# Download the rerun_sdk
include(FetchContent)
FetchContent_Declare(rerun_sdk URL
    https://github.com/rerun-io/rerun/releases/latest/download/rerun_cpp_sdk.zip)
FetchContent_MakeAvailable(rerun_sdk)

add_subdirectory(example0001)
example0001/CmakeLists.txt
add_executable(example0001 main.cpp)

# rerun_sdk
target_link_libraries(example0001 PRIVATE rerun_sdk)
message(STATUS "rerun_sdk_SOURCE_DIR: ${rerun_sdk_SOURCE_DIR}")
target_include_directories(example0001 PRIVATE
    ${rerun_sdk_SOURCE_DIR}/src
)
set_target_properties(example0001 PROPERTIES
    RUNTIME_OUTPUT_DIRECTORY ${CMAKE_BINARY_DIR}/bin
)
example0001/main.cpp
#include <rerun.hpp>
#include <rerun/demo_utils.hpp>

using namespace rerun::demo;

int main() {
    // Create a new `RecordingStream` which sends data over TCP to the viewer process.
    const auto rec = rerun::RecordingStream("rerun_example_cpp");
    // Try to spawn a new viewer instance.
    rec.spawn().exit_on_failure();

    // Create some data using the `grid` utility function.
    std::vector<rerun::Position3D> points = grid3d<rerun::Position3D, float>(-10.f, 10.f, 10);
    std::vector<rerun::Color> colors = grid3d<rerun::Color, uint8_t>(0, 255, 10);

    // Log the "my_points" entity with our data, using the `Points3D` archetype.
    rec.log("my_points", rerun::Points3D(points).with_colors(colors).with_radii({0.5f}));
}
プロジェクトの構成情報を build/ ディレクトリに生成
cmake -B build
build/ディレクトリでビルドを実行
cmake --build build -j
実行ファイルを実行
./build/bin/example0001
実行すると以下のようなウィンドウが立ち上がる
例2 OpenCVも合わせて実行
CMakeLists.txt
cmake_minimum_required(VERSION 3.16...3.27)
project(cpp LANGUAGES CXX)

# Download the rerun_sdk
include(FetchContent)
FetchContent_Declare(rerun_sdk URL
    https://github.com/rerun-io/rerun/releases/latest/download/rerun_cpp_sdk.zip)
FetchContent_MakeAvailable(rerun_sdk)

+ # OpenCV (optional)
+ find_package(OpenCV REQUIRED)

add_subdirectory(example0001)
+ add_subdirectory(example0002)
example0002/CMakeLists.txt
add_executable(example0002 main.cpp)

# rerun_sdk
target_link_libraries(example0002 PRIVATE rerun_sdk)
message(STATUS "rerun_sdk_SOURCE_DIR: ${rerun_sdk_SOURCE_DIR}")
target_include_directories(example0002 PRIVATE
    ${rerun_sdk_SOURCE_DIR}/src
)
set_target_properties(example0002 PROPERTIES
    RUNTIME_OUTPUT_DIRECTORY ${CMAKE_BINARY_DIR}/bin
)

+ # OpenCV (optional)
+ target_link_libraries(example0002 PRIVATE ${OpenCV_LIBS})
+ target_include_directories(example0002 PRIVATE ${OpenCV_INCLUDE_DIRS})
example0002/main.cpp
#include <rerun.hpp>
#include <rerun/demo_utils.hpp>

#include <opencv2/opencv.hpp>

using namespace rerun::demo;

int main() {
    // RerunのRecordingStreamの設定
    const auto rec = rerun::RecordingStream("rerun_example_cpp_with_opencv");
    rec.spawn().exit_on_failure();

    // 3Dポイントと色のグリッドを生成
    std::vector<rerun::Position3D> points = grid3d<rerun::Position3D, float>(-10.f, 10.f, 10);
    std::vector<rerun::Color> colors = grid3d<rerun::Color, uint8_t>(0, 255, 10);

    // Rerunで3Dポイントをログ出力
    rec.log("my_points", rerun::Points3D(points).with_colors(colors).with_radii({0.5f}));

    // --- OpenCVを使った処理 ---
    // 画像を作成(サイズ: 400x400、白背景)
    cv::Mat image = cv::Mat::ones(400, 400, CV_8UC3);
    image.setTo(cv::Scalar(255, 255, 255));

    // 円を描画
    cv::circle(image, cv::Point(200, 200), 100, cv::Scalar(0, 0, 255), -1); // 赤い円

    // テキストを描画
    cv::putText(image, "OpenCV + Rerun", cv::Point(50, 50), cv::FONT_HERSHEY_SIMPLEX, 1.0, cv::Scalar(0, 0, 0), 2);

    // 画像はBGR -> RGBに変換してから送信
    cv::cvtColor(image, image, cv::COLOR_BGR2RGB);
    // OpenCVの画像データを std::vector<uint8_t> にコピー
    std::vector<uint8_t> img_data(image.data, image.data + image.total() * image.elemSize());

    // Rerunにログ(Image::from_rgb24 を使用)
    rec.log("opencv_image", rerun::Image::from_rgb24(img_data, { static_cast<uint32_t>(image.cols), static_cast<uint32_t>(image.rows) }));

    return 0;
}
cmake -B build
example0002のbuildを実行
cmake --build build --target example0002
実行ファイルを実行
./build/bin/example0002
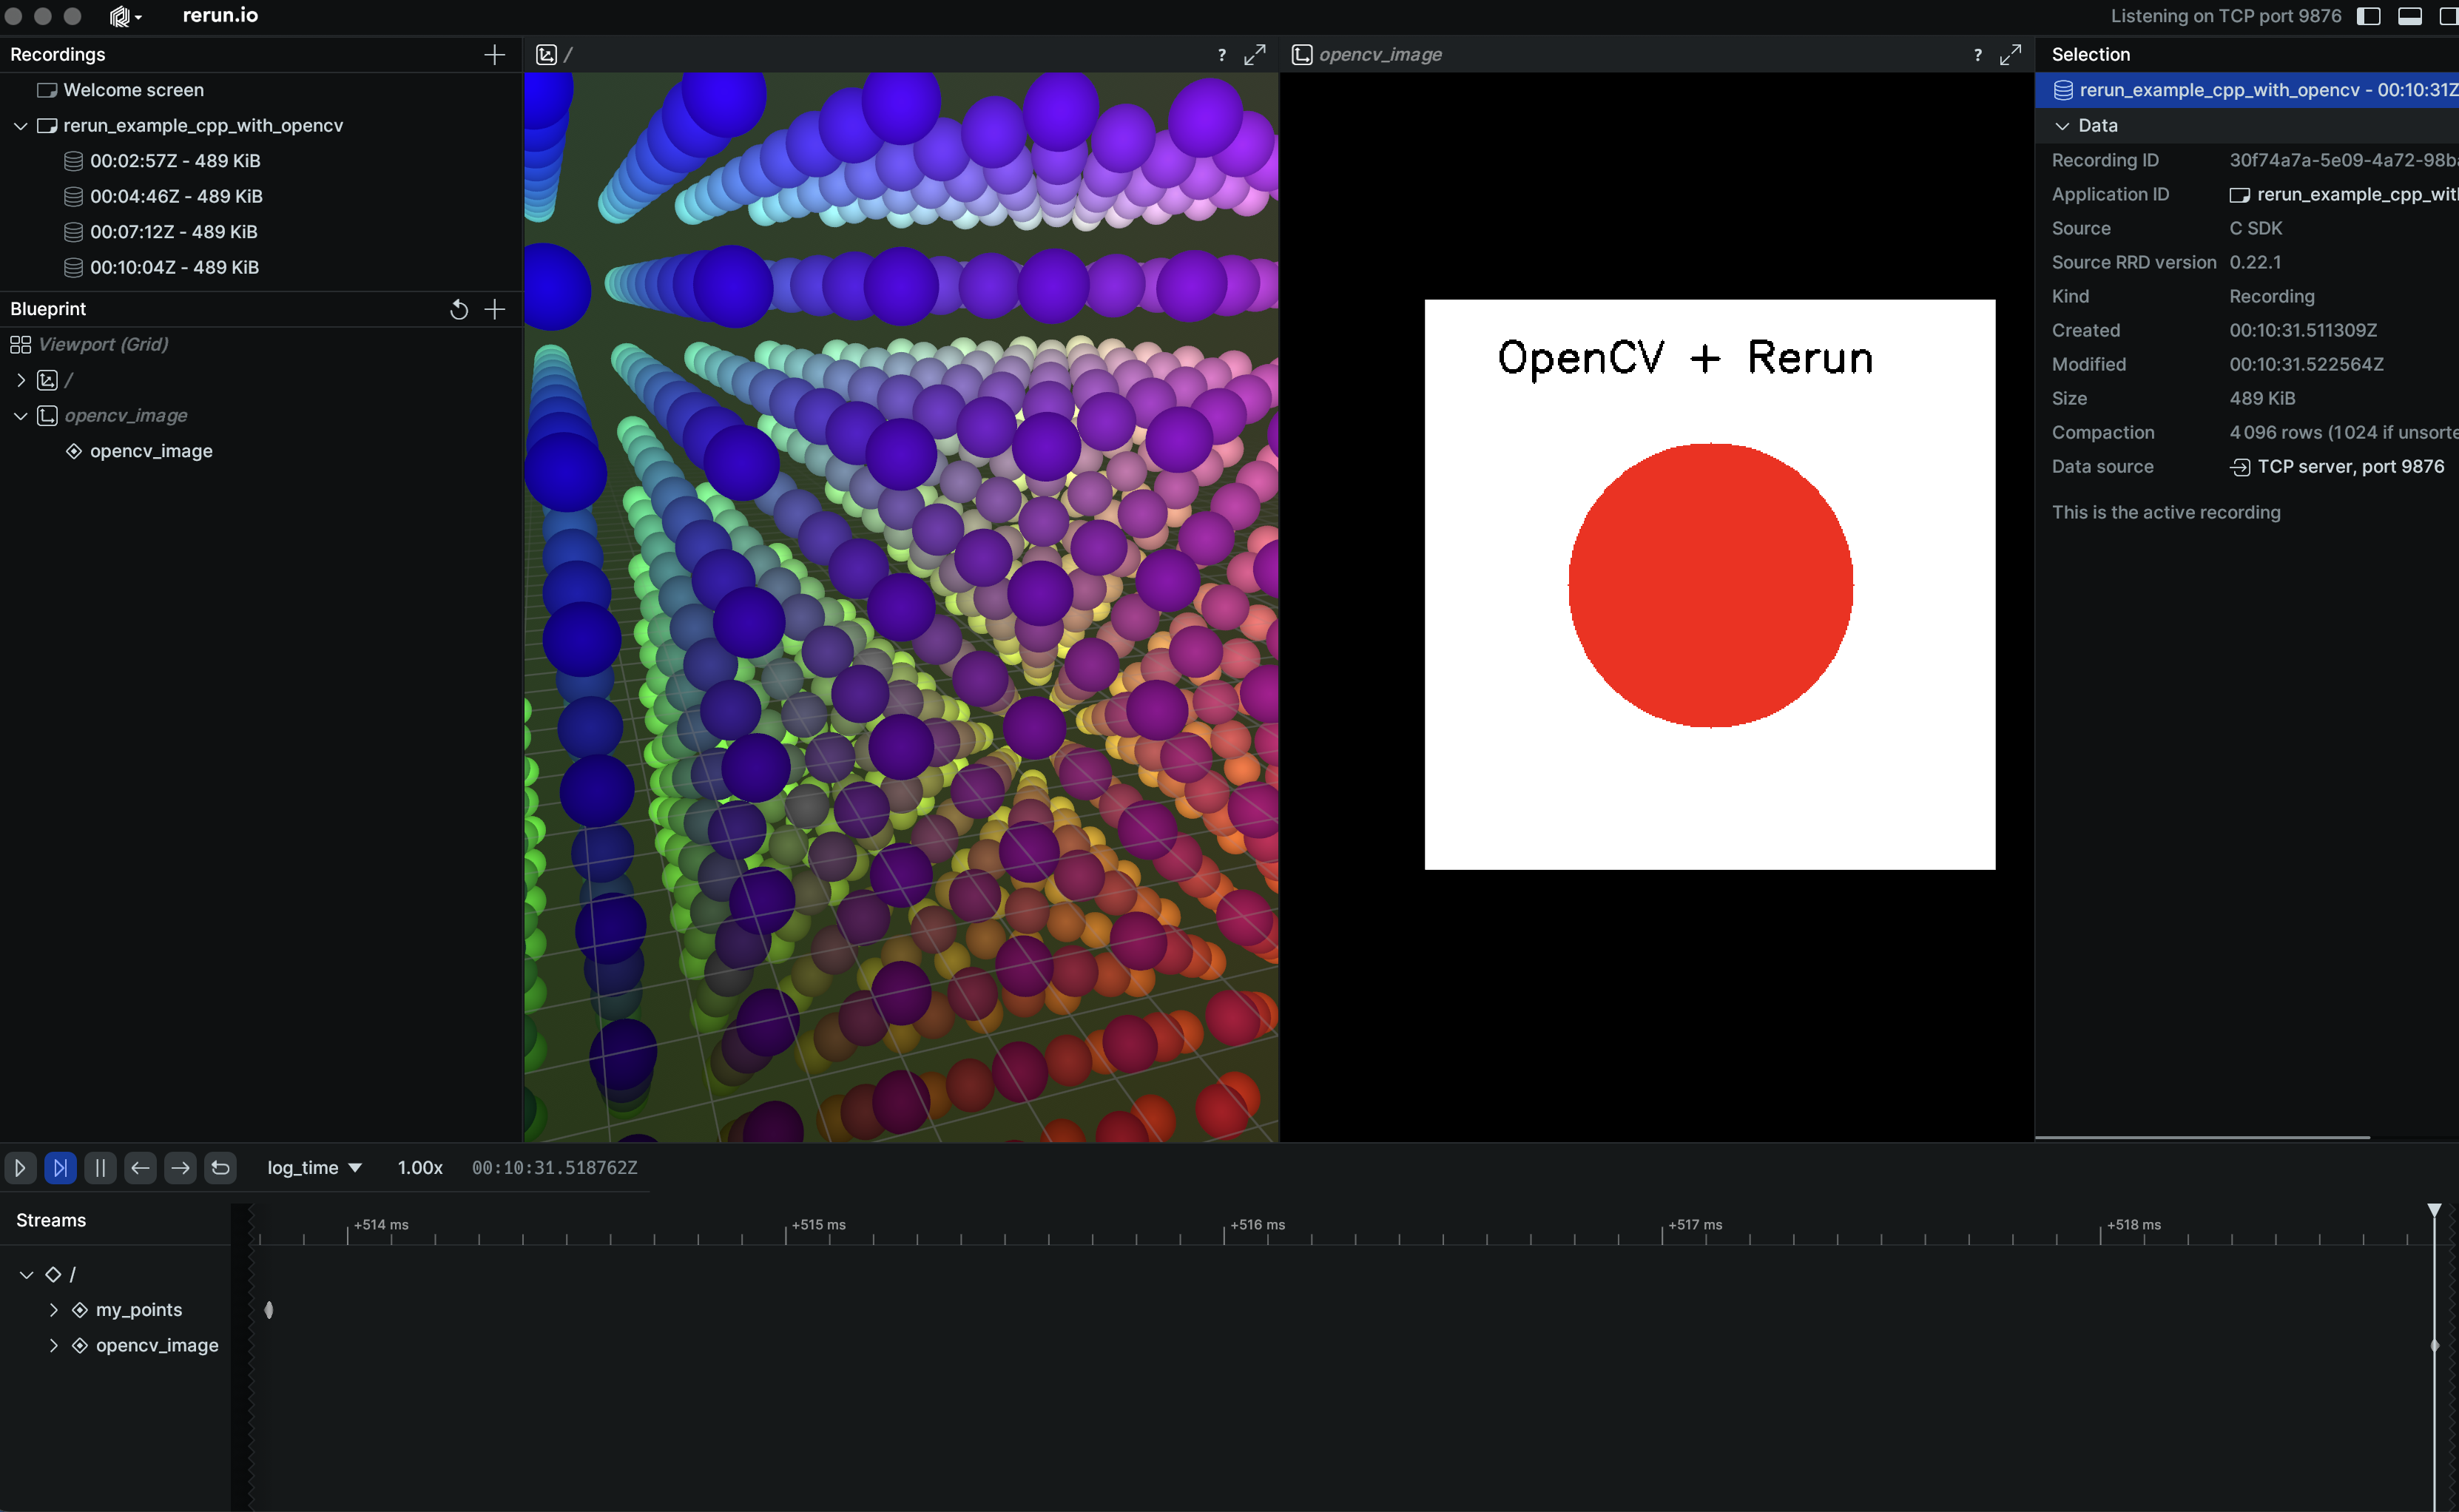
以下のようにOpenCVで描画した絵が表示される
おわりに
まだC++のAPIの細かい使い方は把握できていませんが,一番良く使うOpenCVと組み合わせた環境構築をすることが出来ました.
引き続きC++を勉強するとともに,C++のRerunについても勉強して紹介できればと思います
参考資料

