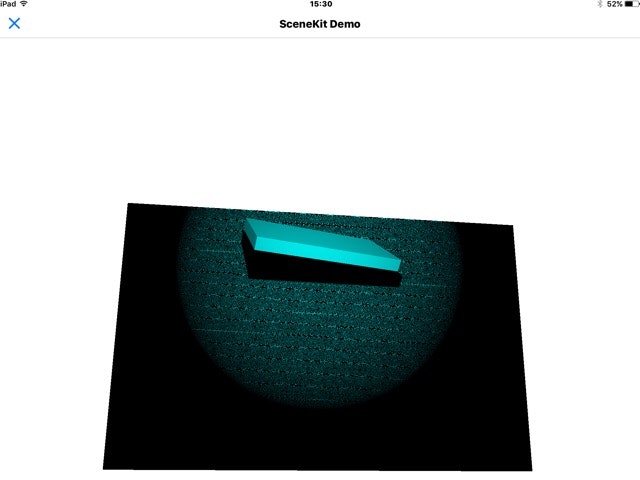
前回、sceneを使ってmotionセンサの値から回転直方体を描画させましたが、今回は、scenekitを使って描画します。
光があたって3次元で表示されるので前回より少しかっこいいです。

ソースは以下のとおり。
# coding: utf-8
from objc_util import *
import ui
import math
import motion
from scene import *
load_framework('SceneKit')
SCNView, SCNScene, SCNBox, SCNText, SCNNode, SCNLight, SCNCamera, SCNAction, SCNTransaction,UIFont= map(ObjCClass, ['SCNView', 'SCNScene', 'SCNBox', 'SCNText', 'SCNNode', 'SCNLight',  'SCNCamera', 'SCNAction','SCNTransaction','UIFont'])
class SCNVector3 (Structure):
    _fields_ = [('x', c_float), ('y', c_float), ('z', c_float)]
W=30
L=15
H=2.5

@on_main_thread
class MyScene (Scene):
    def setup(self):
        #motion start
        motion.start_updates()
    def draw(self):
        #motion update
        gravity_vectors=motion.get_attitude()
        pitch, roll, yaw = [x for x in gravity_vectors]
        self.box_node.runAction_(SCNAction.rotateToX_y_z_duration_(pitch,-roll,yaw,0))
    def make_view(self,mc):
        pitch,roll,yaw=0.0,0.0,0.0
        main_view_objc = mc
        scene_view = SCNView.alloc().initWithFrame_options_(((0, 0),(100, 100)), None).autorelease()
        scene_view.setAutoresizingMask_(18)
        scene_view.setAllowsCameraControl_(True)
        scene = SCNScene.scene()
        root_node = scene.rootNode()

        box= SCNBox.boxWithWidth_height_length_chamferRadius_(W, L,H,0)
        self.box_node = SCNNode.nodeWithGeometry_(box)
        self.box_node.setPosition_((0, 0, 0))

        base= SCNBox.boxWithWidth_height_length_chamferRadius_(100, 100, 4, 0)
        base_node = SCNNode.nodeWithGeometry_(base)
        base_node.setPosition_((0, 0, -20))

        light_node = SCNNode.node()
        light_node.setPosition_((0, 0, 70))
        light_node.setRotation_((0, 0, 1, -math.pi/2))
        light = SCNLight.light()
        light.setType_('spot')
        light.setCastsShadow_(True)
        light.setColor_(UIColor.cyanColor().CGColor())
        light_node.setLight_(light)

        camera = SCNCamera.camera()
        camera_node = SCNNode.node()
        camera_node.setCamera(camera)
        camera_node.setPosition((0, 0,80))
        camera_node.setRotation_((0, 0, 1, -math.pi*1/2))

        root_node.addChildNode_(camera_node)
        root_node.addChildNode_(self.box_node)
        root_node.addChildNode_(base_node)
        root_node.addChildNode_(light_node)

        scene_view.setScene_(scene)
        main_view_objc.addSubview_(scene_view)
if __name__ == "__main__":
    #set view
    main_view = ui.View()
    main_view_objc = ObjCInstance(main_view)
    main_view.name = 'SceneKit Demo'
    #run MyScene
    my_scene = MyScene()
    scene_view = SceneView()
    scene_view.scene = my_scene
    #make scenekit
    main_view_objc.addSubview_(scene_view)
    my_scene.make_view(main_view_objc)
    #present view
    main_view.present()
少し解説。
Scenkitを使うためにobjc_utilをimportして、scenekitのメソッドをmapします。
from objc_util import *

load_framework('SceneKit')
SCNView, SCNScene, SCNBox, SCNText, SCNNode, SCNLight, SCNCamera, SCNAction, SCNTransaction,UIFont= map(ObjCClass, ['SCNView', 'SCNScene', 'SCNBox', 'SCNText', 'SCNNode', 'SCNLight',  'SCNCamera', 'SCNAction','SCNTransaction','UIFont'])
def make_view(self,mc):以下でBox、Base、Light、Cameraをセットしていきます。
SCNView,SCNSene,rootNodeをまずセットします。
def make_view(self,mc):
        pitch,roll,yaw=0.0,0.0,0.0
        main_view_objc = mc
        scene_view = SCNView.alloc().initWithFrame_options_(((0, 0),(100, 100)), None).autorelease()
        scene_view.setAutoresizingMask_(18)
        scene_view.setAllowsCameraControl_(True)
        scene = SCNScene.scene()
        root_node = scene.rootNode()
Boxは、幅、高さ、長さ、コーナーのカーブの設定をします。
        box= SCNBox.boxWithWidth_height_length_chamferRadius_(W, L,H,0)
        self.box_node = SCNNode.nodeWithGeometry_(box)
        self.box_node.setPosition_((0, 0, 0))
Baseはboxの下に配置します。
        base= SCNBox.boxWithWidth_height_length_chamferRadius_(100, 100, 4, 0)
        base_node = SCNNode.nodeWithGeometry_(base)
        base_node.setPosition_((0, 0, -20))
lightノードとcameraノードをセットします。
lightは、今回はspotにセットにします。
cameraは視野に入るようにセットします。
        light_node = SCNNode.node()
        light_node.setPosition_((0, 0, 70))
        light_node.setRotation_((0, 0, 1, -math.pi/2))
        light = SCNLight.light()
        light.setType_('spot')
        light.setCastsShadow_(True)
        light.setColor_(UIColor.cyanColor().CGColor())
        light_node.setLight_(light)

        camera = SCNCamera.camera()
        camera_node = SCNNode.node()
        camera_node.setCamera(camera)
        camera_node.setPosition((0, 0,80))
        camera_node.setRotation_((0, 0, 1, -math.pi*1/2))
各ノードをrootノードに付け加えて,viewにセットすればscenekitの世界が完成します。
        root_node.addChildNode_(camera_node)
        root_node.addChildNode_(self.box_node)
        root_node.addChildNode_(base_node)
        root_node.addChildNode_(light_node)

        scene_view.setScene_(scene)
        main_view_objc.addSubview_(scene_view)
本来は、CADisplayLinkをセットして再描画させるのでしょうが、良くわからなかったので、今回は、sceneのdrawメソッドでレンダリングループさせます。box_nodeをrunActionを使って回転させます。
   def draw(self):
        #motion update
        gravity_vectors=motion.get_attitude()
        pitch, roll, yaw = [x for x in gravity_vectors]
        self.box_node.runAction_(SCNAction.rotateToX_y_z_duration_(pitch,-roll,yaw,0))
run(MyScene())のかわりに以下のコードでSceneを走らせます。
    #run MyScene
    my_scene = MyScene()
    scene_view = SceneView()
    scene_view.scene = my_scene
    main_view_objc.addSubview_(scene_view)
以上で、scenekitを使って、motionセンサの値からipadの動きで直方体をグルグルさせる方法の説明を終わります。
scenkitは物理シミュレーションなどいろいろおもしろそうです。