Intro
Jestが登場する以前は、JavaScriptのコードをテストするために、複数のテストライブラリを組み合わせて使用する必要がありました。例えば、Mocha + Expect + Sinonといったライブラリを使ってテストを行ったり、テストカバレッジを測定するためにIstanbulというライブラリを使用したりしていました。わぁ...聞くだけで、テストのために使用するライブラリが非常に多いことがわかります。
しかし、Jestが登場してからは、Test Runner、Matcher、Mocking、Coverage測定まで、すべてを提供してくれるため非常に便利になりました。
通常、テストライブラリは開発依存としてインストールします。
$ npm i -D jest
{
  "name": "jesttest",
  "version": "1.0.0",
  "description": "",
  "main": "index.js",
  "scripts": {
    "test": "jest"
  },
  "keywords": [],
  "author": "",
  "license": "ISC",
  "devDependencies": {
    "jest": "^27.5.1"
  }
}
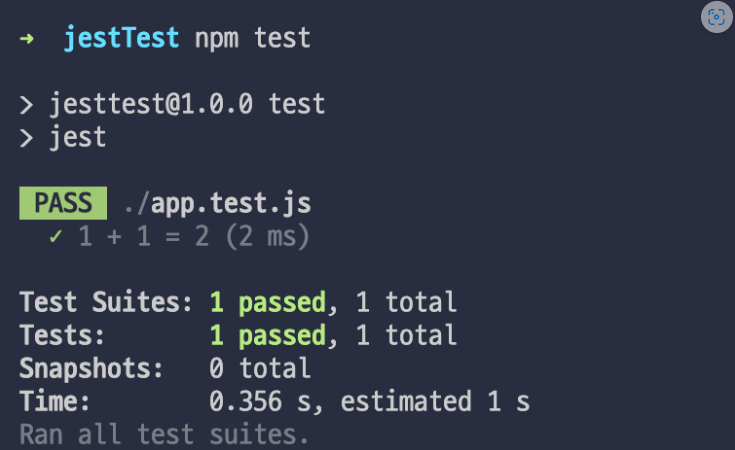
npm testを実行すると、プロジェクト内のすべてのテストファイルを見つけてテストを実行します。Jestは基本的にtest.jsで終わるファイルや、testディレクトリ内にあるファイルをすべてテストファイルとして認識します。特定のテストファイルだけを実行したい場合は、npm test {ファイルまたはパス}を入力します。
app.test.js
test("1 + 1 = 2",()=>{
    expect(1+1).toBe(2);
})

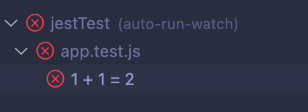
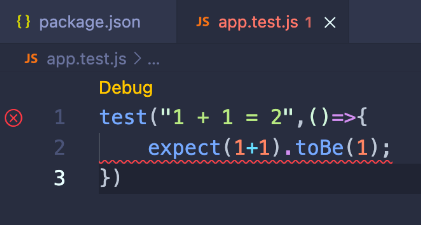
特に、VSCode のTest 機能を使用すると、あらかじめ単位テストされた結果が見られます。 もし間違った答えを書くとしたら? エラーでキャッチされて表示されます。
Matcher
Jestでは様々なMatcher関数を提供しています。
toBe
数値や文字などのオブジェクトではない基本型の値を比較する時に使用されます。
toEqual
基本型の値を使用する場合はtoBeとの違いはありませんが、オブジェクトのアドレス値を基準にチェックします。(Javaで言えば==とisEqual()の違い、JavaScriptでは==と===の違い)
var a = { bar: 'baz' },
    b = { foo: a },
    c = { foo: a };

    b.foo.bar === c.foo.bar // true
    b.foo.bar === a.bar //true
    c.foo === b.foo //true
    b === c // false
toStrictEqual
特定の要素にundefinedが出ることを許可しません。
const fn = {
    add : (num1, num2) => num1 * num2,
    makePerson: (name, age) =>({name, age, married:undefined})
}

test('strictEqualTest', () => {
    expect(fn.makePerson("Tomi", 10)).toStrictEqual({ name:"Tomi", age:10});
});
toBeTruthy() / toBeFalsy()
true or false とみなされると通過します。 0はfalseで 1はtrueで
test("number 0 is falsy but string 0 is truthy", () => {
  expect(0).toBeFalsy();
  expect("0").toBeTruthy();
});
toHaveLength() / toContain()
配列の長さをチェックします。 特定の元素が配列に含まれているかどうかをチェックします。
test("array", () => {
  const colors = ["Red", "Yellow", "Blue"];
  expect(colors).toHaveLength(3);
  expect(colors).toContain("Yellow");
  expect(colors).not.toContain("Green");
});
toMatch
正規式ベースのテストに使用します。
test("string", () => {
  expect(getUser(1).email).toBe("user1@test.com");
  expect(getUser(2).email).toMatch(/.*test.com$/);
});
toThrow()
例外が発生するかどうかをテストします。
function getUser(id) {
  if (id <= 0) throw new Error("Invalid ID");
  return {
    id,
    email: `user${id}@test.com`,
  };
}
//エラー発生ケースを実行する時、必ずexpectで包まないとテスト結果がpassedで出ない。
test("throw when id is non negative", () => {
  expect(() => getUser(-1)).toThrow();
  expect(() => getUser(-1)).toThrow("Invalid ID");
});
Mocking
単体テストを行う際、対象コードの依存部分を偽のものに置き換える手法があります。直接データを生成することが負担となる場合、モッキング(mocking)がよく使用されます。
I/O作業が含まれるテストは実行速度が低下するため、この部分を実行したと仮定してテストを行います。
モッキングは、実際のオブジェクトのように振る舞う偽のオブジェクトを生成するメカニズムを提供します。そして、偽のオブジェクトにどのような操作が行われたかを記憶するため、偽のオブジェクトが内部的にどのように使用されたかを検証することが可能です。この方法を用いることで、常に同じ結果を得るテストを作成することができます。
jest.fn()
jest は偽関数を生成できるようにjest.fn()関数を提供します。 toBeCalled関数を使用すると、偽関数が何回呼び出されたかを検証することができます。
const mockFn = jest.fn();

mockFn.mockReturnValue("I am a mock!");
console.log(mockFn()); // I am a mock!

mockFn.mockResolvedValue("I will be a mock!");
mockFn().then((result) => {
  console.log(result); // I will be a mock!
});

//fake callback
mockFn.mockImplementation((name) => `I am ${name}!`);
console.log(mockFn("Tomi"));


mockFn(["b", "c"]);
expect(mockFn).toBeCalledWith(["b", "c"]);
jest.spyOn()
jest.fn()と同様に機能しますが、実際にcallを実行します。
const calculator = {
  add: (a, b) => a + b,
};

const spyFn = jest.spyOn(calculator, "add");

const result = calculator.add(2, 3);

expect(spyFn).toBeCalledTimes(1);
expect(spyFn).toBeCalledWith(2, 3);
expect(result).toBe(5);
Example
一定の結果をリターンするmocking例です。
const axios = require("axios");
const userService = require("./userService");

test("findOne returns what axios get returns", async () => {
  axios.get = jest.fn().mockResolvedValue({
    data: {
      id: 1,
      name: "Tomi",
    },
  });

  const user = await userService.findOne(1);
  expect(user).toHaveProperty("id", 1);
  expect(user).toHaveProperty("name", "Tomi");
});
APIを実際にコールしながらテストを行う例です。
const axios = require("axios");
const userService = require("./userService");

test("findOne fetches data from the API endpoint", async () => {
  const spyGet = jest.spyOn(axios, "get");
  await userService.findOne(1);
  expect(spyGet).toBeCalledTimes(1);
  expect(spyGet).toBeCalledWith(`https://jsonplaceholder.typicode.com/users/1`);
});
Summary
jestを使いながら変更事項が生じた時、影響度把握に大きく役に立ちました。 皆さんはどんな経験がありましたか?