概要
[PDFShift] (https://pdfshift.io/?tab=javascript)というWebサービスを利用するとHTMLページをPDFファイルへ変換することができます。
このWebサービスの無料プランとNode.jsを利用してHTMLページをPDFファイルへ変換するプログラムを書きました。
- 無料プランは、コンバートは月に250回まで、1ドキュメント当たりのファイルサイズは1MBまでという制約があります。(2018/07時点)
環境
- Windows 10 Professional
- Node.js 8.11.3
- PDFShift 1.0.4
アカウントの作成
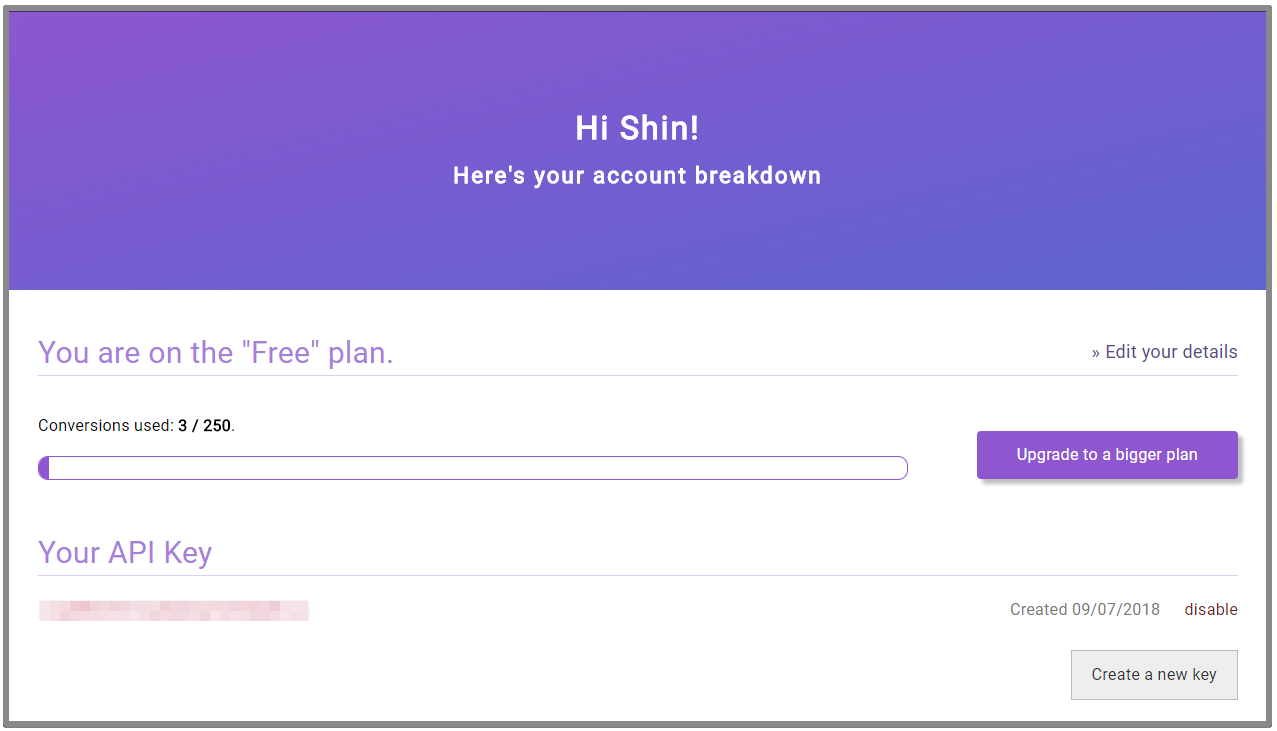
PDFShiftを利用するにはアカウントを作成してAPI Keyを取得する必要があります。
アカウントはメールアドレスがあれば登録できます。
アカウントを作成するとダッシュボードで、API Keyと現在の利用状況が確認できます。
PDFShiftの簡単な使い方を確認
PDF化する際に指定できるパラメータは[Documentation] (https://pdfshift.io/documentation)で確認できます。
以下はcurlでPDFShiftのAPIを呼び出した時のパラメータの指定方法です。
基本的な呼び出し方
APIのエンドポイントはhttps://api.pdfshift.io/v2/convert/です。
uオプションに取得したAPI KEYを指定します。curlのuオプションはbasic認証でユーザー名とパスワードをコロン(:)で区切って指定するものですが、PDFShiftのAPIを呼び出すときの使い方はユーザー名の部分にAPI KEYを指定しパスワードは無いので指定しません。なので文字列の末尾にコロンがくる形になりますが、コロンを省略するとパスワードを尋ねられるので省略はしないようにします。
sourceパラメータにはPDF化したいHTMLページのアドレスを指定します。
下記のコマンドを実行するとoオプションで指定したファイル名でHTMLページがPDFファイルとして保存されます。
curl -u "120d8e8a86d2....................:" \
     -d source="https://www.pdfshift.io/documentation" \
     "https://api.pdfshift.io/v2/convert/" -o result.pdf
マージンの指定
次のパラメータで、PDFファイルのマージンを指定することができます。
-d margin[top]="10px"
-d margin[bottom]="10px"
-d margin[right]="5px"
-d margin[left]="5px"
透かし(watermark)の指定
PDFファイルに透かしを指定することができます。指定する透かしは、テキストか画像ファイルが利用できます。画像ファイルの場合はURLを指定するのでインターネット上に公開されている必要があります。
テキスト
-d watermark[text]="Top Secret Top Secret Top Secret"
-d watermark[rotate]=40
-d watermark[font_size]=46
-d watermark[font_color]="#f00"
-d watermark[font_opacity]=50
-d watermark[offset_x]="center"
-d watermark[offset_y]="middle"
画像
-d watermark[image]="https://www.example.com/public/img/logo.png"
ヘッダ/フッタの指定
PDFファイルのヘッダおよびフッタに任意の文字列を挿入することができます。また組み込みの変数がいくつか用意されています。
ヘッダ
-d header[source]="<h1>{{date}}</h1>"
-d header[spacing]="150px"
フッタ
-d footer[source]="<div>Page {{page}} of {{total}}</div>"
-d footer[spacing]="150px"
補足
実際にヘッダ/フッタを挿入してみたところ、挿入した文字のサイズが極端に小さく読めない状態です。サイズを変更する方法はいまのところ見つけられていません。
PDFの保護(Protection)
user_passwordおよびowner_passwordでPDFファイルにパスワードをかけます。
user_passwordで認証するユーザーはno_print、no_copy、no_modifyでPDFの保護機能を指定できます。
- no_print=trueは印刷不可
- no_copy=trueはコピー不可(ファイルの複製の意味ではなく、文字のコピー&ペーストのコピーができません)
- no_modify=trueは編集不可
なお、owner_passwordで認証するユーザーの場合は上記の保護機能の影響は受けません。
-d protection[user_password]="user"
-d protection[owner_password]="owner"
-d protection[no_print]=true
-d protection[no_copy]=true
-d protection[no_modify]=true
カスタムCSSの指定
HTMLページにカスタムのCSSを当ててからPDF化することができます。指定するCSSは文字列かCSSファイルが利用できます。CSSファイルの場合はURLを指定するのでインターネット上に公開されている必要があります。
テキスト
-d css="h1 {color: blue;}"
CSSファイル
-d css="https://www.example.com/public/css/print.css"
Node.jsで変換する
Node.jsではpdfshiftというパッケージが用意されているのでこれを利用します。オフィシャルサイトではNode.jsの他に、Python、PHP、Ruby、Java、C#のサンプルコードが示されていますが、その言語のHTTPライブラリを使用しているようです。
プロジェクトの作成
プロジェクトディレクトリの作成
> mkdir demo-html-pdf
> cd demo-html-pdf
初期化
> npm init

name: (demo-html-pdf)
version: (1.0.0)
description: demo PDFShift application
entry point: (index.js)
test command:
git repository:
keywords:
author: rubytomato
license: (ISC) MIT
About to write to D:\dev\vsc-workspace\demo-html-pdf\package.json:

{
  "name": "demo-html-pdf",
  "version": "1.0.0",
  "description": "demo PDFShift application",
  "main": "index.js",
  "scripts": {
    "test": "echo \"Error: no test specified\" && exit 1"
  },
  "author": "rubytomato",
  "license": "MIT"
}
依存パッケージのインストール
PDFShiftのnpmパッケージをインストールします。
> npm install pdfshift --save
コンバートプログラムの実装
シンプル
'use strict';
const pdfshift = require('pdfshift')('YOUR_API_KEY');
const fs = require('fs');

const source = 'https://www.pdfshift.io/documentation';
const options = {'landscape': false, 'use_print': true};

pdfshift.convert(source, options)
  .then(binary_file => {
    fs.writeFile('result.pdf', binary_file, 'binary', () => {
      console.log('write callback');
    })
  })
  .catch(({message, code, response, errors = null}) => {
    console.error(`Message:${message}, Code:${code}`);
  });
marginを指定
marginメソッドでマージンを指定します。
const margin = {top: '5px', right: '15px', bottom: '5px', left: '15px'};

pdfshift.prepare(source, options)
  .margin(margin)
  .convert()
  .then(binary_file => {
    fs.writeFile('margin.pdf', binary_file, 'binary', () => {
      console.log('write callback');
    })
  })
  .catch(({message, code, response, errors = null}) => {
    console.error(`Message:${message}, Code:${code}`);
  });
もしくは以下のようにも書けます。この書き方は以降のwatermark、protectなどでも可能です。
const margin = {top: '5px', right: '15px', bottom: '5px', left: '15px'};
const options = {'landscape': false, 'use_print': true, margin};

pdfshift.convert(source, options)
  .then(binary_file => {
    fs.writeFile('margin.pdf', binary_file, 'binary', () => {
      console.log('write callback');
    })
  })
  .catch(({message, code, response, errors = null}) => {
    console.error(`Message:${message}, Code:${code}`);
  });
watermarkを指定
const watermark = {
  source: null,
  image: null,
  text: 'Top Secret',
  offset_x: 'center',
  offset_y: 'middle',
  rotate: 45,
  font_size: 46,
  font_color: '#f00',
  font_opacity: 50,
  font_bold: true,
  font_italic: true
};

pdfshift.prepare(source, options)
  .watermark(watermark)
  .convert()
  .then(binary_file => {
    fs.writeFile('wartermark.pdf', binary_file, 'binary', () => {
      console.log('write callback');
    })
  })
  .catch(({message, code, response, errors = null}) => {
    console.error(`Message:${message}, Code:${code}`);
  });
protectを指定
const protect = {
  user_password: 'userPass',
  owner_password: 'ownerPass',
  no_print: false,
  no_copy: true,
  no_modify: true
};

pdfshift.prepare(source, options)
  .protect(protect)
  .convert()
  .then(binary_file => {
    fs.writeFile('protect.pdf', binary_file, 'binary', () => {
      console.log('write callback');
    })
  })
  .catch(({message, code, response, errors = null}) => {
    console.error(`Message:${message}, Code:${code}`);
  });
header/footerを指定
const options = {
  'landscape': false, 'use_print': true,
  'header': {source: '<h1>{{date}}</h1>', spacing: '30px'},
  'footer': {source: '<div>Page {{page}} of {{total}}</div>', spacing: '30px'}
};

pdfshift.prepare(source, options)
  .convert()
  .then(binary_file => {
    fs.writeFile('header.pdf', binary_file, 'binary', () => {
      console.log('write callback');
    })
  })
  .catch(({message, code, response, errors = null}) => {
    console.error(`Message:${message}, Code:${code}`);
  });
GCP Cloud Functionsを利用した変換プログラムの実装
PDFShiftとGCP Cloud Functionsを利用して変換プログラムを実装しました。
- Cloud FunctionsのHTTP関数でPDF化したいHTMLページのアドレスを受け取る
- PDFShiftのAPIを呼び出して指定されたHTMLページをPDFファイルにする
- PDFファイルをCloud Storageのバケットへ保存する
事前準備
GCPにプロジェクトを作成
GCPコンソールから新しくプロジェクトを作成します。
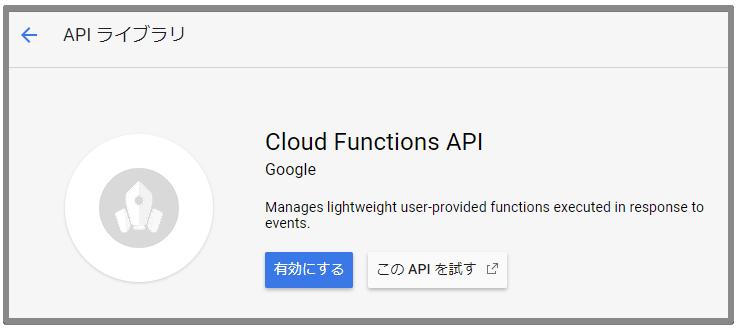
Cloud Functions APIを有効にする
作成したプロジェクトでCloud Functions APIが使えるようにします。
GCPコンソールのナビゲーションメニューから「APIとサービス」→「ライブラリ」検索フィールドに"Cloud Functions"と入力して検索します。
「有効にする」ボタンをクリックして有効にします。
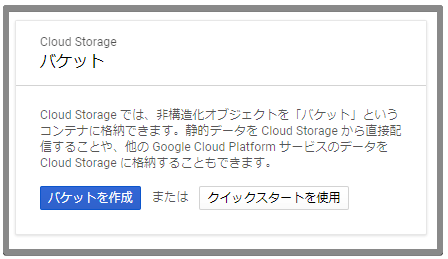
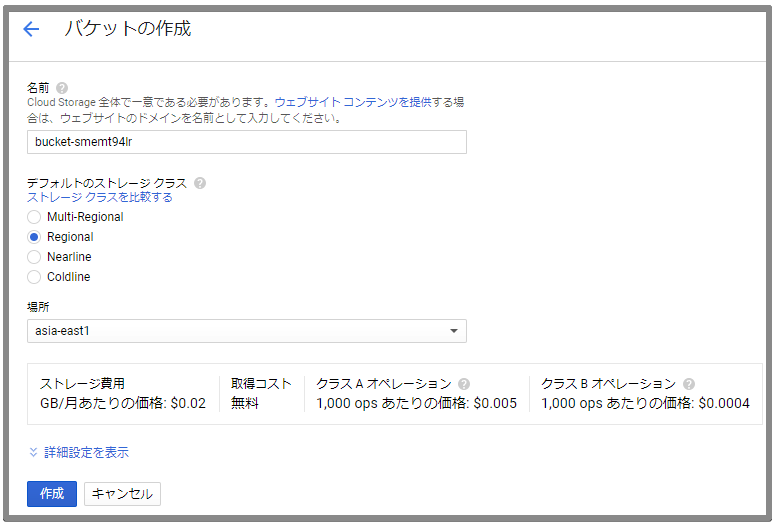
バケットの作成
GCPのコンソールからPDFファイルを保存するためのバケットを作成します。
GCPコンソールのナビゲーションメニューから「Storage」→「ブラウザ」を選択します。
Google Cloud SDKのインストール
開発するHTTP関数をデプロイするためにGoogle Cloud SDKをインストールします。インストールの方法は[Google Cloud SDK ドキュメント] (https://cloud.google.com/sdk/docs/?hl=ja)に詳しく紹介されていますので、この記事では割愛します。
すでにインストールされている場合は、下記のコマンドでアップデートを行います。
> gcloud components update
API Keyの登録
ソースコード中にAPI Keyを書き込まなくても済むように、runtime-configという機能を利用します。
最初に変数を管理するリソースを作成します。この例では"dev-config"という名前にしています。
初回は”runtimeconfig.googleapis.com”APIを有効にするか確認されるのでyで有効にします。
> gcloud beta runtime-config configs create dev-config
API [runtimeconfig.googleapis.com] not enabled on project
[************]. Would you like to enable and retry (this will take a
few minutes)? (y/N)?  y

Enabling service runtimeconfig.googleapis.com on project ************...

//...省略...

Created [https://runtimeconfig.googleapis.com/v1beta1/projects/************/configs/dev-config].
リソースにAPI Keyを登録します。
> gcloud beta runtime-config configs variables set pdfshift-api-key {API_KEY} --config-name dev-config --is-text
登録されている変数の一覧を確認するには
> gcloud beta runtime-config configs variables list --config-name dev-config
プロジェクトの作成
プロジェクトディレクトリの作成
> mkdir demo-html-pdf
> cd demo-html-pdf
初期化
> npm init

name: (demo-html-pdf)
version: (1.0.0)
description: demo PDFShift application
entry point: (index.js)
test command:
git repository:
keywords:
author: rubytomato
license: (ISC) MIT
About to write to D:\dev\vsc-workspace\demo-html-pdf\package.json:

{
  "name": "demo-html-pdf",
  "version": "1.0.0",
  "description": "demo PDFShift application",
  "main": "index.js",
  "scripts": {
    "test": "echo \"Error: no test specified\" && exit 1"
  },
  "author": "rubytomato",
  "license": "MIT"
}
package.jsonにenginesを追記してNode.jsのバージョンを指定します。
"engines": {
  "node": "^8.11.1"
}
依存パッケージのインストール
PDFShiftのnpmパッケージをインストールします。
> npm install pdfshift --save
ストレージのオブジェクトを操作するためのパッケージをインストールします。
> npm install @google-cloud/storage --save
Google Cloud RuntimeConfig APIを利用するためのパッケージをインストールします。
> npm install @google-cloud/rcloadenv --save
HTTP関数の実装
index.jsにconvertという名前のHTTP関数を実装します。
'use strict';

const config = require('./config.json');
const storage = require('@google-cloud/storage')();
const rcloadenv = require('@google-cloud/rcloadenv');
const pdfshift = require('pdfshift')();
const fs = require('fs');
const path = require('path');

exports.convert = (req, res) => {
  if (req.method !== 'GET') {
    res.status(405).end();
    return;
  }
  const uri = req.query['target'];
  if (!uri) {
    res.status(400).end();
    return;
  }

  const fileName = req.query['name'] || 'result';
  const decodeUri = decodeURIComponent(uri);
  const tmpFile = `/tmp/${fileName}.pdf`;

  getApiKey()
    .then(apiKey => {
      pdfshift.setApiKey(apiKey);
      return convertToFile(decodeUri, tmpFile);
    })
    .then(() => {
      return uploadToBucket(tmpFile, config.BUCKET_NAME);
    })
    .catch(err => {
      console.error('ERROR:', err);
      res.status(500).end();
      return;
    });

  res.status(200).send('success');
};
const getApiKey = async () => {
  console.log('[getApiKey]');
  const variables = await rcloadenv.getVariables(config.CONFIG_NAME);
  const configMap = variables.filter(v => v.name.lastIndexOf('/') !== -1 && v.text)
                             .reduce((map, obj) => {
                                  const k = obj.name.substring(obj.name.lastIndexOf('/') + 1);
                                  map[k] = obj.text;
                                  return map;
                                }, {});

  if (configMap[config.PDFSHIFT_API_KEY]) {
    return configMap[config.PDFSHIFT_API_KEY];
  }
  throw new Error('missing pdfshift api key');
};
const convertToFile = async (decodeUri, tmpFile) => {
  console.log(`[convert] '${decodeUri}' to '${tmpFile}'`);
  const binaryFile = await pdfshift.convert(decodeUri, {"landscape": false, "use_print": true});
  return fs.writeFile(tmpFile, binaryFile, "binary", err => {
    if (err) {
      console.error('write callback error:', err);
      throw err;
    }
    console.log('write callback');
  });
};
const uploadToBucket = async (tmpFile, bucketName) => {
  console.log(`[upload] '${tmpFile}' to '${bucketName}'`);
  await storage.bucket(bucketName).upload(tmpFile, {destination: `${path.parse(tmpFile).base}`});
};
デプロイ
デプロイ時に--runtime nodejs8を指定してNode.jsのバージョンを指定します。
下記のhttpsTriggerのurlがエンドポイントです。
> gcloud beta functions deploy convert --runtime nodejs8 --trigger-http
availableMemoryMb: 256
entryPoint: convert
httpsTrigger:
  url: https://us-central1-{PROJECT_ID}.cloudfunctions.net/convert

//...省略...
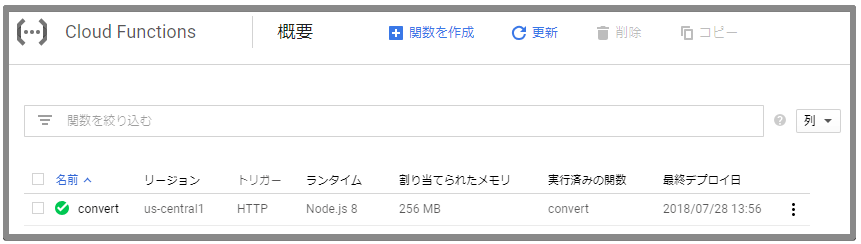
Cloud Functionsのダッシュボードでデプロイされているか確認します。
テスト
エンドポイントへアクセスしてHTTP関数を実行します。
curl -v "https://us-central1-{PROJECT_ID}.cloudfunctions.net/convert?target=https://www.pdfshift.io/documentation&name=manual"

// ...省略...

< HTTP/1.1 200 OK
< Content-Type: text/html; charset=utf-8
< Etag: W/"7-U6VofLJtxB8qtAM+l+E63v03QNY"
< Function-Execution-Id: 9gmzyam2yjpy
< X-Powered-By: Express
< X-Cloud-Trace-Context: 58b2742c0191304d32d0a79ede92239e;o=1
< Date: Sat, 28 Jul 2018 08:32:59 GMT
< Server: Google Frontend
< Content-Length: 7
< Alt-Svc: quic=":443"; ma=2592000; v="44,43,39,35"
<
success* Connection #0 to host us-central1-{PROJECT-ID}.cloudfunctions.net left intact
Cloud Functionsのダッシュボードで実行ログを確認します。
2018-07-28 17:32:59.034 JST convert 9gmzyam2yjpy Function execution started
2018-07-28 17:32:59.232 JST convert 9gmzyam2yjpy [getApiKey]
2018-07-28 17:32:59.241 JST convert 9gmzyam2yjpy Function execution took 208 ms, finished with status code: 200
2018-07-28 17:33:11.631 JST convert 9gmzyam2yjpy [convert] 'https://www.pdfshift.io/documentation' to '/tmp/manual.pdf'
2018-07-28 17:33:20.431 JST convert 9gmzyam2yjpy [upload] '/tmp/manual.pdf' to 'bucket-smemt94lr'
2018-07-28 17:33:23.832 JST convert 9gmzyam2yjpy write callback
Storageのダッシュボードで指定したバケットにPDFファイルが作成されていることを確認します。
