概要
この記事はrails newで作成したアプリケーションをAWS上で実行するために必要な最低限の作業手順をまとめたメモになります。
環境
- AWS (Amazon Linux 2)
- Ruby 2.5.7
- Rails 6.0.2.1
- Nginx 1.16.1
参考
- [Getting Started with Rails] (https://guides.rubyonrails.org/getting_started.html)
AWS編
VPCにパブリックサブネットを1つ作成し、そこにrailsアプリケーションを実行するEC2インスタンスを1つ作成します。
VPCの作成
ステップ1: VPC 設定の選択
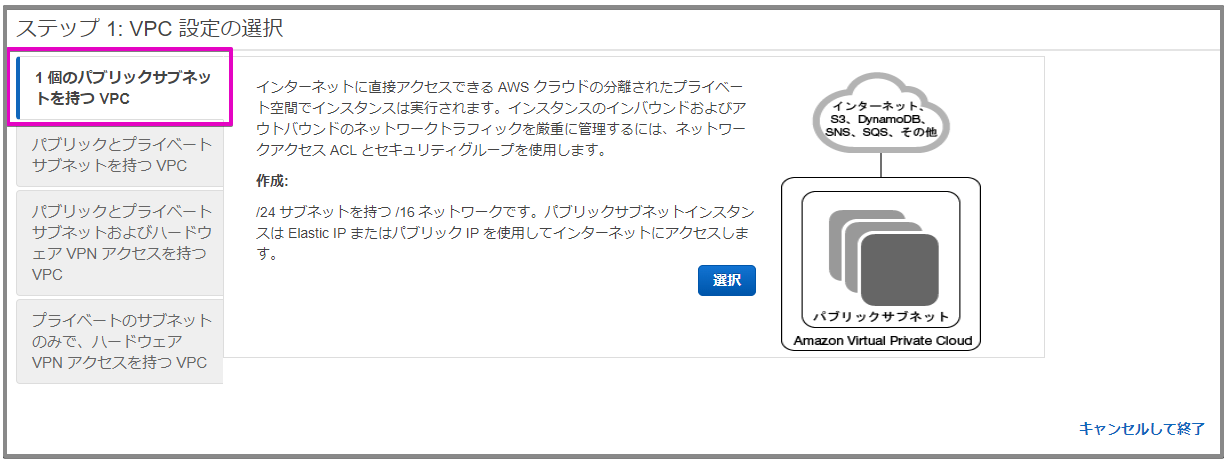
ステップ2: 1個のパブリックサブネットを持つVPC
VPC名、サブネット名を任意の名前にした以外はデフォルトのままで作成します。

パブリックサブネット
自動割り当てがいいえになっているので有効にします。
作成したパブリックサブネットを選択しアクションボタン → 自動割り当て IP 設定変更 をクリック

IPv4の自動割り当てにチェックを入れます。

セキュリティグループのインバウンドルール
SSH接続用のルールを追加します。

EC2インスタンスの作成
ステップ1: Amazon マシーンイメージ(AMI)
Amazon Linux 2を利用します。

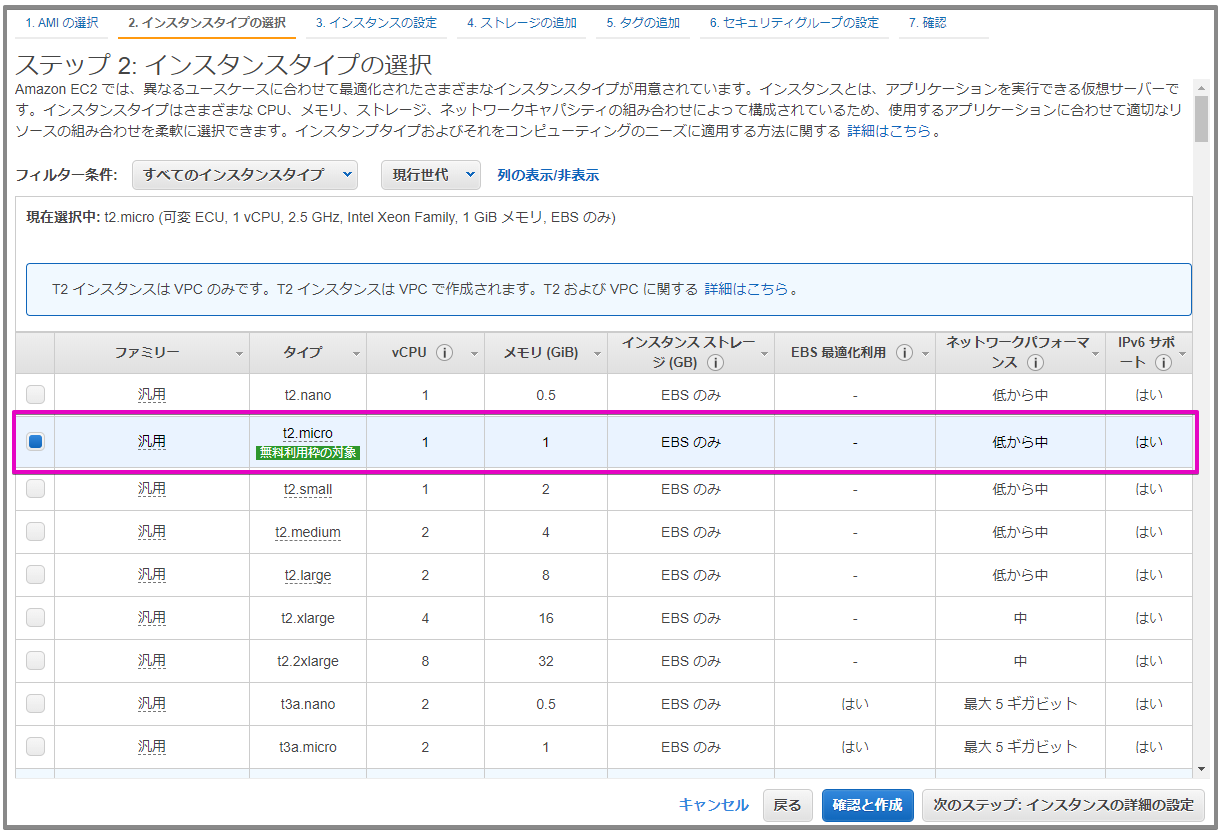
ステップ2: インスタンスタイプの選択
t2.microを利用します。
ステップ3: インスタンスの詳細の設定
VPCは先に作成していたものを利用します。

ステップ4: ストレージの追加

ステップ5: タグの追加
ステップ6: セキュリティグループの設定
VPCと共に作成したセキュリティグループを選択します。この時点ではSSHだけ許可されています。

ステップ7: インスタンス作成の確認

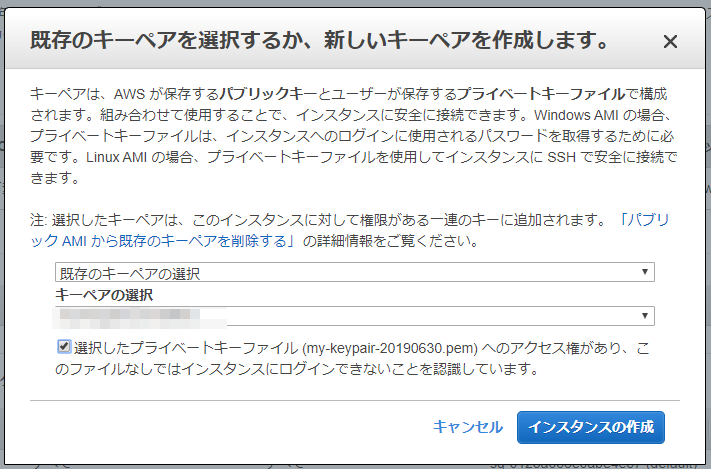
キーペアの設定
この例では作成済みのキーペアを利用しますが、ここで新規に作成しても構いません。
作成ステータス

EC2インスタンスの作成手順は以上です。EC2インスタンスの準備ができたら初期設定を行います。
初期設定
sshでログインしたら、下記のコマンドでアップデートします。
$ sudo yum update -y
railsアプリケーションの作成、実行に必要なパッケージをインストールします。
$ sudo yum install -y git
$ sudo yum install -y gcc gcc-c++ make
$ sudo yum install -y openssl-devel readline-devel zlib-devel
Nginxのインストールと起動
$ sudo amazon-linux-extras install -y nginx1

$ nginx -v
nginx version: nginx/1.16.1

$ sudo systemctl start nginx.service

$ ps aux | grep nginx | grep -v grep
root     12484  0.0  0.2 121404  2192 ?        Ss   12:27   0:00 nginx: master process /usr/sbin/nginx
nginx    12485  0.0  0.5 121848  5136 ?        S    12:27   0:00 nginx: worker process
インバウンドルールの追加
セキュリティグループのインバウンドルールにHTTP(80)を追加します。

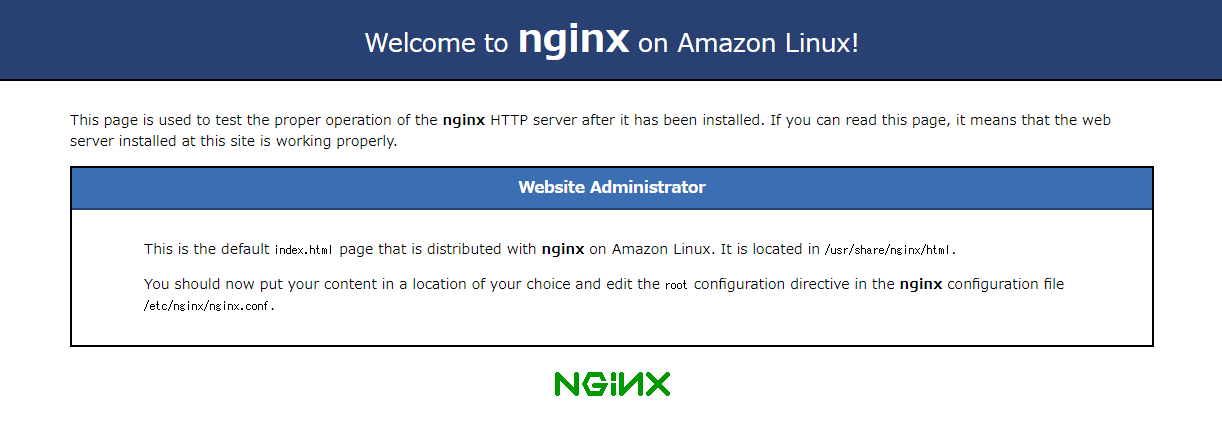
ブラウザでNginxのテストページにアクセスできることを確認します。
http://<Public_IP>
図の画面が表示されれば成功です。
確認ができたら一旦停止します。
$ sudo systemctl stop nginx.service
自己署名証明書によるSSL化
ELBを使わずNginxでSSLターミネーションを行う場合。
$ openssl version
OpenSSL 1.0.2k-fips  26 Jan 2017
自己署名証明書の作成
$ sudo mkdir /etc/pki/nginx
$ sudo mkdir /etc/pki/nginx/private

# 秘密鍵の作成
$ sudo openssl genrsa -out /etc/pki/nginx/private/server.key 2048

# 署名要求証明書(CSR)の作成
$ sudo openssl req -new -key /etc/pki/nginx/private/server.key -out /etc/pki/nginx/server.csr

# 自己署名証明書(CRT)の作成
$ sudo openssl x509 -days 365 -req -signkey /etc/pki/nginx/private/server.key -in /etc/pki/nginx/server.csr -out /etc/pki/nginx/server.crt

$ sudo chown root:root -R /etc/pki/nginx/
$ sudo chmod 600 /etc/pki/nginx/*
$ sudo chmod 700 /etc/pki/nginx
デフォルトのnginx.confでコメントアウトされているSettings for a TLS enabled server. の箇所を有効化し、下記3カ所の設定を追記・変更します。
# 追記
ssl_protocols TLSv1.2;

# 変更
# ssl_ciphers PROFILE=SYSTEM;
ssl_ciphers ECDHE-ECDSA-AES128-GCM-SHA256:ECDHE-RSA-AES128-GCM-SHA256:ECDHE-ECDSA-AES256-GCM-SHA384:ECDHE-RSA-AES256-GCM-SHA384:ECDHE-ECDSA-CHACHA20-POLY1305:ECDHE-RSA-CHACHA20-POLY1305:DHE-RSA-AES128-GCM-SHA256:DHE-RSA-AES256-GCM-SHA384;

# 変更
# ssl_prefer_server_ciphers on;
ssl_prefer_server_ciphers off;
confのシンタックスチェックを行います。
$ sudo nginx -t
nginx: the configuration file /etc/nginx/nginx.conf syntax is ok
nginx: configuration file /etc/nginx/nginx.conf test is successful
次にセキュリティグループでインバウンドルールにHTTPS(443)を追加します。

ブラウザでNginxのテストページにアクセスできることを確認します。
https://<Public_IP>
図のページが表示されますが詳細設定をクリックし、<Public IP> にアクセスする(安全ではありません)をクリックします。

Rails編
ここからは上記で構築したAWSに、railsアプリケーションを実行するための環境作りになります。
環境
- Ruby 2.5.7
- Rails 6.0.2.1
アプリケーションの実行ユーザを作成
ec2-userとは別にアプリケーション実行ユーザを作成します。この例ではrubytomatoという名前のユーザを作成しました。
$ sudo adduser rubytomato
このユーザでsudoできるように設定します。
$ sudo visudo
rubytomato ALL=(ALL) NOPASSWD:ALL
作成したユーザでログインし
$ sudo su - rubytomato
ssh接続用の設定を行います。
$ mkdir .ssh
$ chmod 700 .ssh
$ touch .ssh/authorized_keys
$ chmod 600 .ssh/authorized_keys
EC2インスタンス作成時に指定したキーペアのパブリックキーを利用します。
$ vi .ssh/authorized_keys
事前インストール
railsアプリケーションの作成、実行のために必要なパッケージをインストールします。
rbenvのインストール
$ cd ~
$ git clone git://github.com/rbenv/rbenv.git ~/.rbenv

$ echo 'export PATH="$HOME/.rbenv/bin:$PATH"' >> ~/.bashrc
$ echo 'eval "$(rbenv init -)"' >> ~/.bashrc
$ source ~/.bashrc
$ git clone git://github.com/rbenv/ruby-build.git /tmp/ruby-build
$ cd /tmp/ruby-build
$ sudo ./install.sh
rubyのインストール
rbenvでruby 2.5.7をインストールします。
$ rbenv install -l
$ rbenv install 2.5.7
$ rbenv rehash
$ rbenv global 2.5.7
$ ruby -v
ruby 2.5.7p206 (2019-10-01 revision 67816) [x86_64-linux]
$ rbenv rehash
bundlerのインストール
$ gem install bundler
Fetching: bundler-2.1.2.gem (100%)
Successfully installed bundler-2.1.2
Parsing documentation for bundler-2.1.2
Installing ri documentation for bundler-2.1.2
Done installing documentation for bundler after 4 seconds
1 gem installed
$ bundler -v
Bundler version 2.1.2
railsのインストール
$ gem install rails -v 6.0.2.1
Fetching: concurrent-ruby-1.1.5.gem (100%)
Successfully installed concurrent-ruby-1.1.5
Fetching: i18n-1.7.0.gem (100%)

// ...省略 ...

Done installing documentation for concurrent-ruby, i18n, thread_safe, tzinfo, zeitwerk, activesupport, rack, rack-test, mini_portile2, nokogiri, crass, loofah, rails-html-sanitizer, rails-dom-testing, builder, erubi, actionview, actionpack, activemodel, activerecord, globalid, activejob, mini_mime, mail, actionmailer, nio4r, websocket-extensions, websocket-driver, actioncable, mimemagic, marcel, activestorage, actionmailbox, actiontext, thor, method_source, railties, sprockets, sprockets-rails, rails after 51 seconds
40 gems installed
$ rails -v
Rails 6.0.2.1
nvmのインストール
Node.jsのインストールにnvmを使用します。
$ cd ~
$ git clone https://github.com/creationix/nvm.git ~/.nvm
$ source ~/.nvm/nvm.sh
次回のログインから自動的に反映されるように.bash_profileを編集します。
$ vi .bash_profile
if [ -f ~/.nvm/nvm.sh ]; then
        . ~/.nvm/nvm.sh
fi
Node.jsのインストール
Node.jsも必要になるのでnvmでインストールします。
$ nvm install 12.14.0
Downloading and installing node v12.14.0...
Downloading https://nodejs.org/dist/v12.14.0/node-v12.14.0-linux-x64.tar.xz...
##################################################################################################################### 100.0%
Computing checksum with sha256sum
Checksums matched!
Now using node v12.14.0 (npm v6.13.4)
Creating default alias: default -> 12.14.0 (-> v12.14.0)
$ node --version
v12.14.0

$ npm --version
6.13.4
yarnのインストール
yarnも必要になるのでnpmでインストールします。
$ npm install yarn -g
$ yarn --version
1.21.1
sqlite3のインストール
Rails 6.0では、SQLite 3.8以上が必要ですが現時点(2020年1月)ではgemでインストールできません。なので以下の方法でインストールします。
この方法は[CentOS環境でRails6.0をSQLite3 (>=3.8)で動かす] (https://qiita.com/8zca/items/175efb0612070530d186)を参考にさせて頂きました。
まず、すでにgemでインストールされていないか確認し、
$ gem list sqlite3


*** LOCAL GEMS ***
インストールされていたらアンインストールします。
$ gem uninstall sqlite3
ソースコードからビルドしインストールします。インストールするのは現時点(2020年1月)で最新バージョンの3.30.1です。
$ cd ~
$ wget https://www.sqlite.org/2019/sqlite-autoconf-3300100.tar.gz
$ tar xzvf sqlite-autoconf-3300100.tar.gz
$ cd sqlite-autoconf-3300100/
$ ./configure --prefix=/opt/sqlite/sqlite3
$ make
$ sudo make install
$ /opt/sqlite/sqlite3/bin/sqlite3 --version
3.30.1 2019-10-10 20:19:45 18db032d058f1436ce3dea84081f4ee5a0f2259ad97301d43c426bc7f3df1b0b
gemでインストールするときに、上記でビルドしたsqlite3を指定します。
$ gem install sqlite3 -- --with-sqlite3-include=/opt/sqlite/sqlite3/include --with-sqlite3-lib=/opt/sqlite/sqlite3/lib
Fetching: sqlite3-1.4.2.gem (100%)
Building native extensions with: '--with-sqlite3-include=/opt/sqlite/sqlite3/include --with-sqlite3-lib=/opt/sqlite/sqlite3/lib'
This could take a while...
Successfully installed sqlite3-1.4.2
Parsing documentation for sqlite3-1.4.2
Installing ri documentation for sqlite3-1.4.2
Done installing documentation for sqlite3 after 0 seconds
1 gem installed
インストールの確認
$ gem list sqlite3

*** LOCAL GEMS ***

sqlite3 (1.4.2)
アプリケーションのひな型
アプリケーションのひな型をrails newで/var/www/blogに作成します。
$ sudo mkdir -p /var/www
$ sudo chown rubytomato:rubytomato /var/www
$ cd /var/www
$ rails new blog
config/environments/development.rbの編集
- パブリックIPでアクセスしたときに、コンソールに下記のメッセージが表示される場合は
Cannot render console from xxx.xxx.xxx.xxx! Allowed networks: 127.0.0.0/127.255.255.255, ::1
development.rbに下記の行を追加します。
config.web_console.whitelisted_ips = '0.0.0.0/0'
- パブリックDNSでアクセスしたときに、ブラウザに下記のメッセージが表示される場合は
To allow requests to ec2-xxx-xxx-xxx-xxx.ap-northeast-1.compute.amazonaws.com, add the following to your environment configuration:
development.rbに下記の行を追加します。
config.hosts << '.amazonaws.com'
接続の構成例
- 例1) ブラウザ → Puma(port:3000) + rails
- 例2) ブラウザ → Nginx(port:80) + Puma(Unix socket) + rails
- 例3) ブラウザ → Unicorn(port:3001) + rails
- 例4) ブラウザ → Nginx(port:80) + Unicorn(Unix socket) + rails
- 例5) ブラウザ → Nginx(port:443) + Puma(Unix socket) + rails
Nginxを使わない場合の接続では、Pumaはポート3000、Unicornはポート3001を待ち受けます。そのためセキュリティグループのインバウンドルールでポート3000と3001を許可する設定を追加します。

- マスクしているソースはマイIPを指定しています。
構成例1) Puma + rails
railsの起動
Pumaはデフォルトでポート3000を待ち受けます。
$ rails server -b 0.0.0.0
=> Booting Puma
=> Rails 6.0.2.1 application starting in development
=> Run `rails server --help` for more startup options
Puma starting in single mode...
* Version 4.3.1 (ruby 2.5.7-p206), codename: Mysterious Traveller
* Min threads: 5, max threads: 5
* Environment: development
* Listening on tcp://0.0.0.0:3000
Use Ctrl-C to stop
アクセス
http://<Public IP>:3000
この画面が表示されれば成功です。

railsの停止
ターミナル上でCtrl + Cを押下。
構成例2) Nginx + Puma + Rails
Nginxの設定
railsアプリケーションへプロキシする設定ファイルを作成します。
ファイル名はblog.confとし下記の場所に作成します。
$ sudo vi /etc/nginx/conf.d/blog.conf
server_nameはEC2のパブリックIPv4アドレスを記述します。
upstream puma {
    server unix:/var/www/blog/tmp/sockets/puma.sock fail_timeout=0;
}
# upstream unicorn {
#    server unix:/var/www/blog/tmp/sockets/unicorn.sock fail_timeout=0;
# }

server {
    listen 80;
    server_name <Public IP>;

    root /var/www/blog/public;

    location = /favicon.ico {
        access_log off;
        log_not_found off;
    }

    location ~ ^/assets/ {
        gzip_static on;
        expires 1d;
    }

    location / {
        try_files $uri $uri/index.html @blog_app;
    }

    location @blog_app {
        proxy_pass http://puma;
        #proxy_pass http://unicorn;
        proxy_set_header X-Forwarded-Host $host;
        proxy_set_header X-Forwarded-For $proxy_add_x_forwarded_for;
        proxy_set_header X-Forwarded-Proto $scheme;
        proxy_set_header Host $http_host;
        proxy_redirect off;
        proxy_connect_timeout 30;
    }

    error_page 404 /404.html;
        location = /404.html {
    }
    error_page 500 502 503 504 /500.html;
        location = /500.html {
    }
}
デフォルトのnginx.confを編集します。
$ sudo vi /etc/nginx/nginx.conf
デフォルトのnginx.confのserverディレクティブ全体をコメントアウトします。
# For more information on configuration, see:
#   * Official English Documentation: http://nginx.org/en/docs/
#   * Official Russian Documentation: http://nginx.org/ru/docs/

user nginx;
worker_processes auto;
error_log /var/log/nginx/error.log;
pid /run/nginx.pid;

# Load dynamic modules. See /usr/share/doc/nginx/README.dynamic.
include /usr/share/nginx/modules/*.conf;

events {
    worker_connections 1024;
}

http {
    log_format  main  '$remote_addr - $remote_user [$time_local] "$request" '
                      '$status $body_bytes_sent "$http_referer" '
                      '"$http_user_agent" "$http_x_forwarded_for"';

    access_log  /var/log/nginx/access.log  main;

    sendfile            on;
    tcp_nopush          on;
    tcp_nodelay         on;
    keepalive_timeout   65;
    types_hash_max_size 2048;

    include             /etc/nginx/mime.types;
    default_type        application/octet-stream;

    # Load modular configuration files from the /etc/nginx/conf.d directory.
    # See http://nginx.org/en/docs/ngx_core_module.html#include
    # for more information.
    include /etc/nginx/conf.d/*.conf;

#    server {
#        listen       80 default_server;
#        listen       [::]:80 default_server;
#        server_name  _;
#        root         /usr/share/nginx/html;
#
#        # Load configuration files for the default server block.
#        include /etc/nginx/default.d/*.conf;
#
#        location / {
#        }
#
#        error_page 404 /404.html;
#            location = /40x.html {
#        }
#
#        error_page 500 502 503 504 /50x.html;
#            location = /50x.html {
#        }
#    }

# Settings for a TLS enabled server.
#
#    server {
#        listen       443 ssl http2 default_server;
#        listen       [::]:443 ssl http2 default_server;
#        server_name  _;
#        root         /usr/share/nginx/html;
#
#        ssl_certificate "/etc/pki/nginx/server.crt";
#        ssl_certificate_key "/etc/pki/nginx/private/server.key";
#        ssl_session_cache shared:SSL:1m;
#        ssl_session_timeout  10m;
#        ssl_ciphers PROFILE=SYSTEM;
#        ssl_prefer_server_ciphers on;
#
#        # Load configuration files for the default server block.
#        include /etc/nginx/default.d/*.conf;
#
#        location / {
#        }
#
#        error_page 404 /404.html;
#            location = /40x.html {
#        }
#
#        error_page 500 502 503 504 /50x.html;
#            location = /50x.html {
#        }
#    }

}
confファイルのシンタックスチェックを行います。
$ sudo nginx -t

nginx: the configuration file /etc/nginx/nginx.conf syntax is ok
nginx: configuration file /etc/nginx/nginx.conf test is successful
Nginxを起動します。
$ sudo systemctl start nginx.service
Pumaの設定
$ vi config/puma.rb
portの行をコメントアウトしbindの行を追加します。
# port        ENV.fetch("PORT") { 3000 }
bind "unix://#{Rails.root}/tmp/sockets/puma.sock"
railsの起動
$ rails server
=> Booting Puma
=> Rails 6.0.2.1 application starting in development
=> Run `rails server --help` for more startup options
Puma starting in single mode...
* Version 4.3.1 (ruby 2.5.7-p206), codename: Mysterious Traveller
* Min threads: 5, max threads: 5
* Environment: development
* Listening on unix:///var/www/blog/tmp/sockets/puma.sock
Use Ctrl-C to stop
アクセス
http://<Public IP>
railsの停止
ターミナル上でCtrl + Cを押下。
構成例3) Unicorn + Rails
Unicornのインストール
$ vi Gemfile
Gemfileに下記の行を追加します。
gem 'unicorn', '~> 5.1'
インストールします。
$ bundle install
Unicornの設定
Unicornの設定ファイルを新規に作成します。
$ vi config/unicorn.rb
$worker   = 2
$timeout  = 30
$app_root = File.expand_path('../../', __FILE__)
$listen   = 3001
# $listen   = File.expand_path 'tmp/sockets/unicorn.sock', $app_root
$pid      = File.expand_path 'tmp/pids/unicorn.pid', $app_root
$std_log  = File.expand_path 'log/unicorn.log', $app_root

worker_processes $worker
working_directory $app_root
stderr_path $std_log
stdout_path $std_log
timeout $timeout
listen $listen
pid $pid

preload_app true

before_fork do |server, worker|
  defined?(ActiveRecord::Base) and ActiveRecord::Base.connection.disconnect!
  old_pid = "#{server.config[:pid]}.oldbin"
  if old_pid != server.pid
    begin
      Process.kill "QUIT", File.read(old_pid).to_i
    rescue Errno::ENOENT, Errno::ESRCH
    end
  end
end

after_fork do |server, worker|
  defined?(ActiveRecord::Base) and ActiveRecord::Base.establish_connection
end
unicornの起動
unicorn.rbで指定した通りポート3001で待ち受けます。
$ bundle exec unicorn_rails -E development -c config/unicorn.rb -D
$ ps aux | grep unicorn
アクセス
http://<Public IP>:3001
unicornの停止
$ kill -QUIT `cat /var/www/blog/tmp/pids/unicorn.pid`
構成例4) Nginx + Unicorn + Rails
unicornの設定
設定ファイルを編集してポートからソケットに切り替えます。
$ vi config/unicorn.rb
# $listen   = 3001
$listen   = File.expand_path 'tmp/sockets/unicorn.sock', $app_root
Nginxの設定
Pumaの設定をコメントアウトし、Unicornの設定を有効にします。
$ vi /etc/nginx/conf.d/blog.conf
upstreamの箇所
# upstream puma {
#    server unix:/var/www/blog/tmp/sockets/puma.sock fail_timeout=0;
# }
upstream unicorn {
    server unix:/var/www/blog/tmp/sockets/unicorn.sock fail_timeout=0;
}
proxy_passの箇所
# proxy_pass http://puma;
proxy_pass http://unicorn;
confファイルのシンタックスチェックを行います。
$ sudo nginx -t

nginx: the configuration file /etc/nginx/nginx.conf syntax is ok
nginx: configuration file /etc/nginx/nginx.conf test is successful
Nginxを起動します。
$ sudo systemctl start nginx.service
Unicornの起動
$ bundle exec unicorn_rails -E development -c config/unicorn.rb -D
$ ps aux | grep unicorn
アクセス
http://<Public IP>
unicornの停止
$ kill -QUIT `cat /var/www/blog/tmp/pids/unicorn.pid`
構成例5) Nginx + Puma + Rails
これは構成例2)をベースに、NginxでSSLターミネートする構成になります。
Nginxの設定
事前に自己署名証明書を作成している必要があります。
$ sudo vi /etc/nginx/conf.d/blog.conf
server_nameはEC2のパブリックIPv4アドレスを記述します。
HTTPでリクエストを受けた場合はHTTPSへリダイレクトするようにします。
upstream puma {
    server unix:/var/www/blog/tmp/sockets/puma.sock fail_timeout=0;
}
# upstream unicorn {
#    server unix:/var/www/blog/tmp/sockets/unicorn.sock fail_timeout=0;
# }

server {
    listen 80 default_server;
    server_name <Public IP>;
    return 301 https://$host$request_uri;
}

server {
    listen 443 ssl http2;
    server_name <Public IP>;

    root /var/www/blog/public;

    ssl_certificate "/etc/pki/nginx/server.crt";
    ssl_certificate_key "/etc/pki/nginx/private/server.key";
    ssl_session_cache shared:SSL:1m;
    ssl_session_timeout 10m;
    ssl_protocols TLSv1.2;
    ssl_ciphers ECDHE-ECDSA-AES128-GCM-SHA256:ECDHE-RSA-AES128-GCM-SHA256:ECDHE-ECDSA-AES256-GCM-SHA384:ECDHE-RSA-AES256-GCM-SHA384:ECDHE-ECDSA-CHACHA20-POLY1305:ECDHE-RSA-CHACHA20-POLY1305:DHE-RSA-AES128-GCM-SHA256:DHE-RSA-AES256-GCM-SHA384;
    ssl_prefer_server_ciphers off;

    add_header Strict-Transport-Security "max-age=63072000" always;

    location = /favicon.ico {
        access_log off;
        log_not_found off;
    }

    location ~ ^/assets/ {
        gzip_static on;
        expires 1d;
    }

    location / {
        try_files $uri $uri/index.html @blog_app;
    }

    location @blog_app {
        proxy_pass http://puma;
        #proxy_pass http://unicorn;
        proxy_set_header X-Forwarded-Host $host;
        proxy_set_header X-Forwarded-For $proxy_add_x_forwarded_for;
        proxy_set_header X-Forwarded-Proto $scheme;
        proxy_set_header Host $http_host;
        proxy_redirect off;
        proxy_connect_timeout 30;
    }

    error_page 404 /404.html;
        location = /404.html {
    }
    error_page 500 502 503 504 /500.html;
        location = /500.html {
    }
}
confファイルのシンタックスチェックを行います。
$ sudo nginx -t

nginx: the configuration file /etc/nginx/nginx.conf syntax is ok
nginx: configuration file /etc/nginx/nginx.conf test is successful
Nginxを起動します。
$ sudo systemctl start nginx.service
railsの起動
$ rails server
=> Booting Puma
=> Rails 6.0.2.1 application starting in development
=> Run `rails server --help` for more startup options
Puma starting in single mode...
* Version 4.3.1 (ruby 2.5.7-p206), codename: Mysterious Traveller
* Min threads: 5, max threads: 5
* Environment: development
* Listening on unix:///var/www/blog/tmp/sockets/puma.sock
Use Ctrl-C to stop
アクセス
https://<Public IP>
railsの停止
ターミナル上でCtrl + Cを押下。
補足
接続できない場合の確認事項
- 参考 : [インスタンスへの接続エラー: 接続タイムアウト] (https://docs.aws.amazon.com/ja_jp/AWSEC2/latest/UserGuide/TroubleshootingInstancesConnecting.html#TroubleshootingInstancesConnectionTimeout)
セキュリティグループルールを調べます。適切なポートのパブリック IPv4 アドレスからのインバウンドトラフィックがセキュリティグループルールで許可されている必要があります。
①セキュリティグループの”インバウンドルールを表示”をクリック。

①セキュリティグループに適切なポートが許可されていることを確認。

サブネットのルートテーブルを確認します。VPC の外部あてのすべてのトラフィックを VPC のインターネットゲートウェイに送信するには、ルートが必要です。
②VPCの④インターネットゲートウェイを確認。
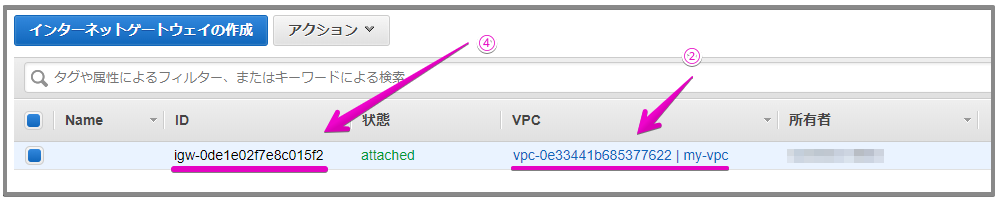
③サブネットのルートテーブルに④インターネットゲートウェイへのルートがあることを確認。

サブネットのネットワークアクセスコントロールリスト (ACL) を確認します。ネットワーク ACL が適切なポートのローカル IP アドレスからのインバウンドおよびアウトバウンドトラフィックを許可する必要があります。
③サブネットのネットワークACLを確認

インスタンスにパブリック IPv4 アドレスがあることを確認します。そうでない場合は、Elastic IP アドレスをインスタンスに関連付けることができます。
EC2に⑤パブリックIPv4アドレスがあることを確認
サーバーが過負荷になっている可能性のあるインスタンスの CPU 負荷を確認します。
EC2のモニタリングタブでCPU 使用率(%)を確認

netstat / lsof でポートを確認
$ sudo netstat -anp | grep ':80'
tcp        0      0 0.0.0.0:80              0.0.0.0:*               LISTEN      11049/nginx: master
$ sudo lsof -Pi | grep ':80'
nginx     11049     root    6u  IPv4  89121      0t0  TCP *:80 (LISTEN)
nginx     11051    nginx    6u  IPv4  89121      0t0  TCP *:80 (LISTEN)