家族のNAS(QNAP)の任意のディレクトリーをMacBook上でマウントしたい。
ただし、常にマウントするのではなく、マウント用ディレクトリーにアクセスした時に自動マウントしたい(automountで)。
ファイルのやり取りはNFS又はSMBで行いたい。
MacBookなので、Wi-Fiで接続したい。
これらの要件で調査したときのことを記述する。
NAS側(QNAP)
共有ディレクトリの編集
管理者権限のアカウントでログインし、「コントロールパネル」から「共有フォルダー」画面を開き、アクセスするディレクトリを追加・編集できる。
権限の設定(NFS)
NFSだとSMBみたいなユーザー・パスワード認証は基本的にない。
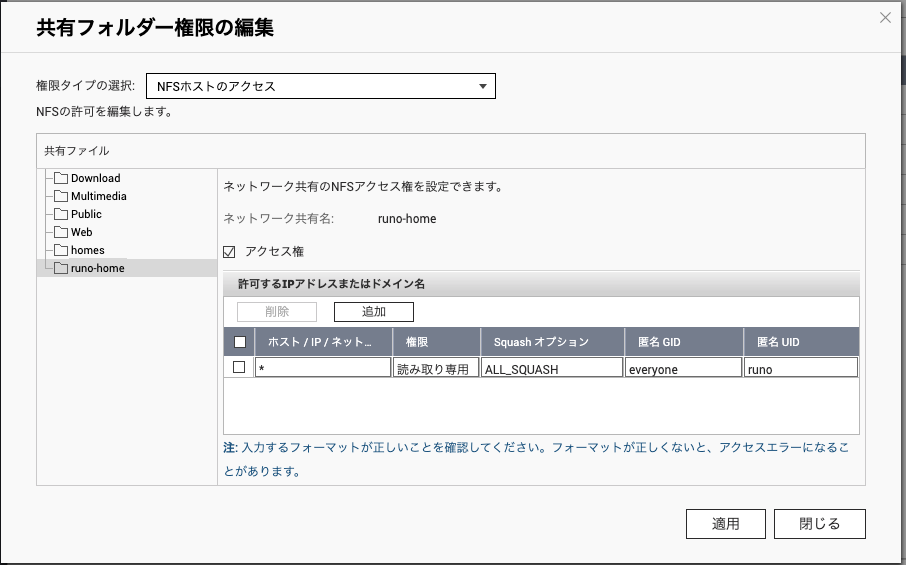
アクセスした全ユーザーを特定のユーザーとして扱う方法(ALL_SQUASH)や、読み書きの制限、IP制限で頑張る。
「共有フォルダー」の「アクション」カラムにある「共有フォルダーの権限の編集」アイコンをクリックすると、「共有フォルダーの権限の編集」画面に行ける。
「共有フォルダーの権限の編集」画面で「権限タイプの選択」を「NFSホストのアクセス」にすると、NFSの権限設定が行える。
MacBook側
マウント用のディレクトリを設定
自動マウントするディレクトリ(ここでは/mnt/*)の親ディレクトリをrootとして作成する。
sudo mkdir /mnt
/etc/auto_masterをrootとして編集し、ディレクトリと設定ファイル(例:/mntを/etc/auto_mntで設定)を追加する。
/mnt /etc/auto_mnt
#
# Automounter master map
#
+auto_master            # Use directory service
/net                    -hosts          -nobrowse,hidefromfinder,nosuid
/home                   auto_home       -nobrowse,hidefromfinder
/Network/Servers        -fstab
/-                      -static

/mnt                    /etc/auto_mnt
マウントの設定ファイルを作成(ここでは/etc/auto_mnt、NASのIPが10.0.1.4)。
# SMB
# nas-runo-home -fstype=smbfs,ro ://user:password@10.0.1.4/home

# NFS
nas-runo-home -fstype=nfs,rsize=32768,wsize=32768 10.0.1.4:/runo-home
nas-public -fstype=nfs,rsize=32768,wsize=32768 10.0.1.4:/Public
automountを再起動。
sudo umount /mnt
sudo automount -vc
マウント
FinderやTerminalで最初にアクセスしたときに、自動的にマウントされる。
cd /mnt/nas-public
ls
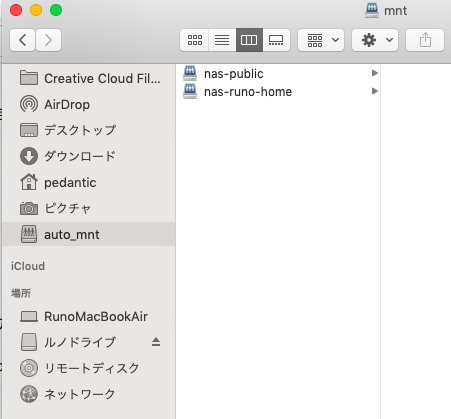
Finderのサイドバーに/mntを設定すると便利。
測定(NFS)
マウント設定のrsizeとwsizeは、環境に合わせて調整した。
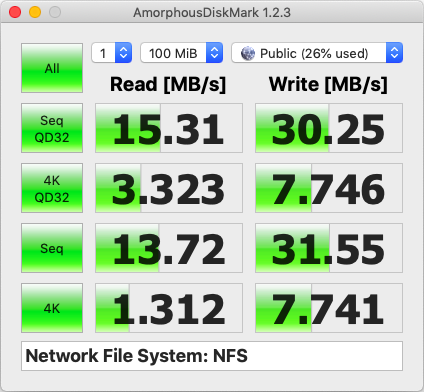
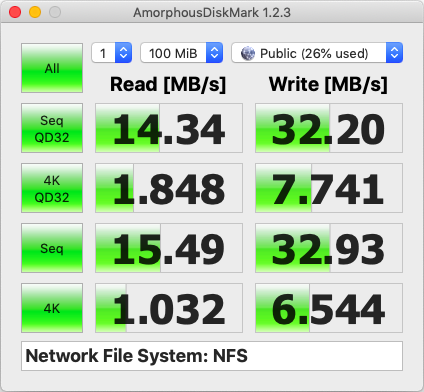
結果として自分の家では、16KB〜32KBあたりが最適であった。
AmorphousDiskMarkを使い、2箇所で測定した。
- 近い場所: MacBook -> アクセスポイント -> LAN -> NAS
- 遠い場所: MacBook -> 壁 -> 中継機 -> 壁x2 -> アクセスポイント -> LAN -> NAS
| rsize/wsize | 近い場所(ping 1.937ms) | 遠い場所(ping 2.640ms) |
|---|---|---|
| 8KB | 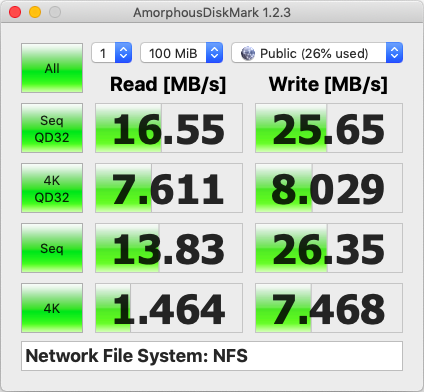 |
|
| 16KB | 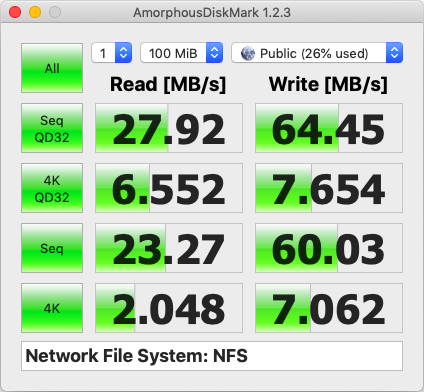 |
 |
| 32KB | 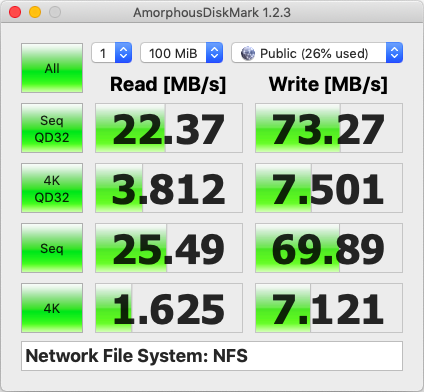 |
 |
| 256KB | 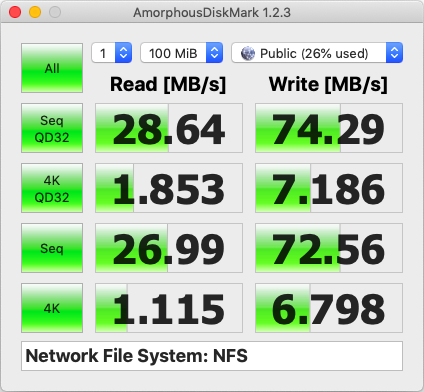 |
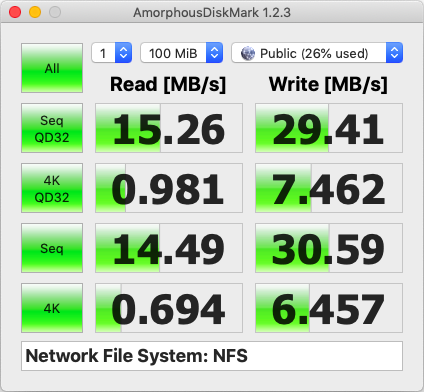 |
rsize/wsizeが高いほど、sequential read/write はある程度までは速くなるが、ある程度まで行くと誤差レベルになる。逆に random read はどんどん遅くなっていく。
調査時の環境
- MacBook:MacBook Air (11-inch, Mid 2013)
- アクセスポイント:TP-LINK RE650、802.11n/ac
- 中継機:TP-LINK RE650、802.11n/ac
- LAN:1Gbps 1本
- NAS:QNAP TS-431P、HDDを3個、RAID5
