この記事は Android Advent Calendar 23日目の記事です。
はじめに
App WidgetはAPI level 3の時に追加されたかなり古い機能です。
Androidのwidgetは端末のホーム画面の好きなところに置けて、(各widgetの対応範囲内で)大きさも自由に変えられるので、よく使うアプリがwidgetに対応していたらすごく便利ですよね。
App Widgetに関する情報は結構ありますが、今回は比較的情報の少ないStack Viewを使ったApp Widgetについて書きたいと思います。
基本的なApp WidgetやStack Viewの情報は多くあるので、今回は詰まったとこを中心に書きます。
公式ドキュメント
Andoid Developersの公式ドキュメントはこちらになります。
このドキュメントにStackViewを使用したsampleのリンクがあるのですが、リンク先にそのプロジェクトがないのが非常に残念です😭
Sample Project
今回作成したSample Projectはこちらです。
こちらのコードをベースに話していこうと思います。
今回はdribbbleのAPIを使用しています。
App Widgetの主な機能としては
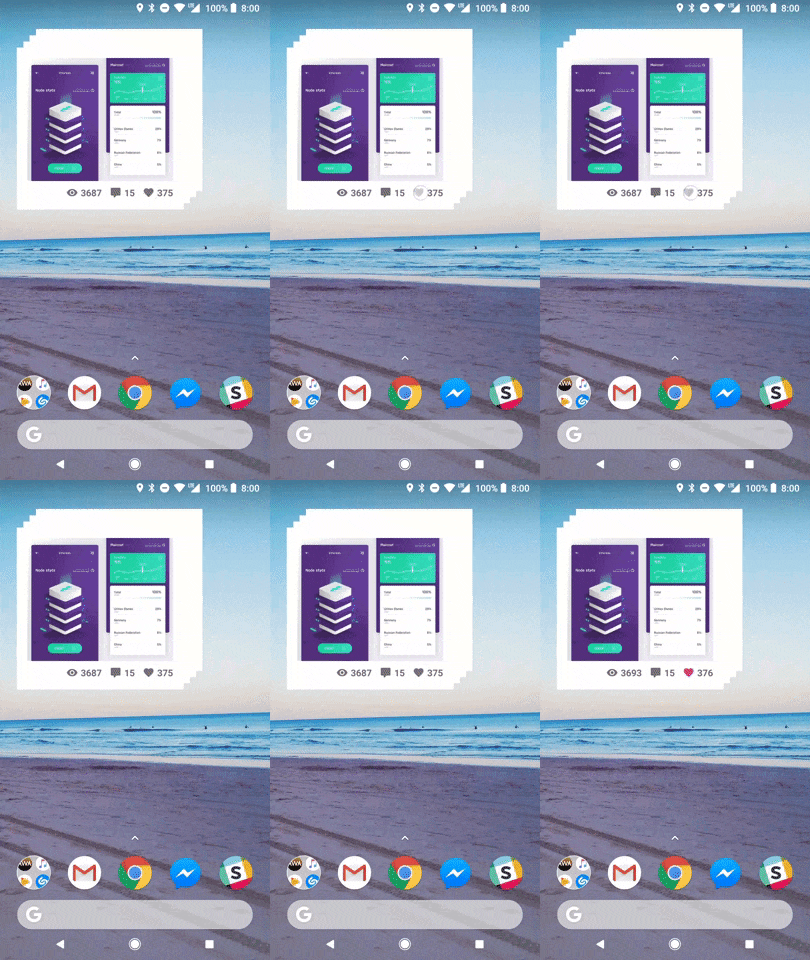
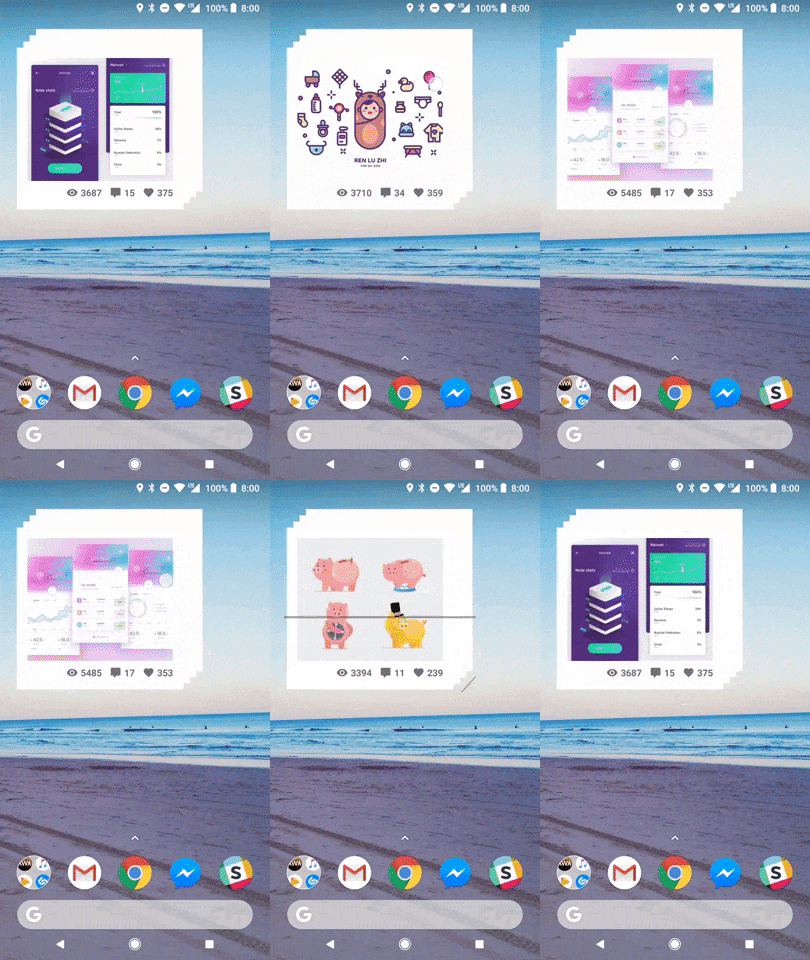
- StackViewにdribbbleのpopular shotを表示
- shotをお気に入りする(like/unlike)
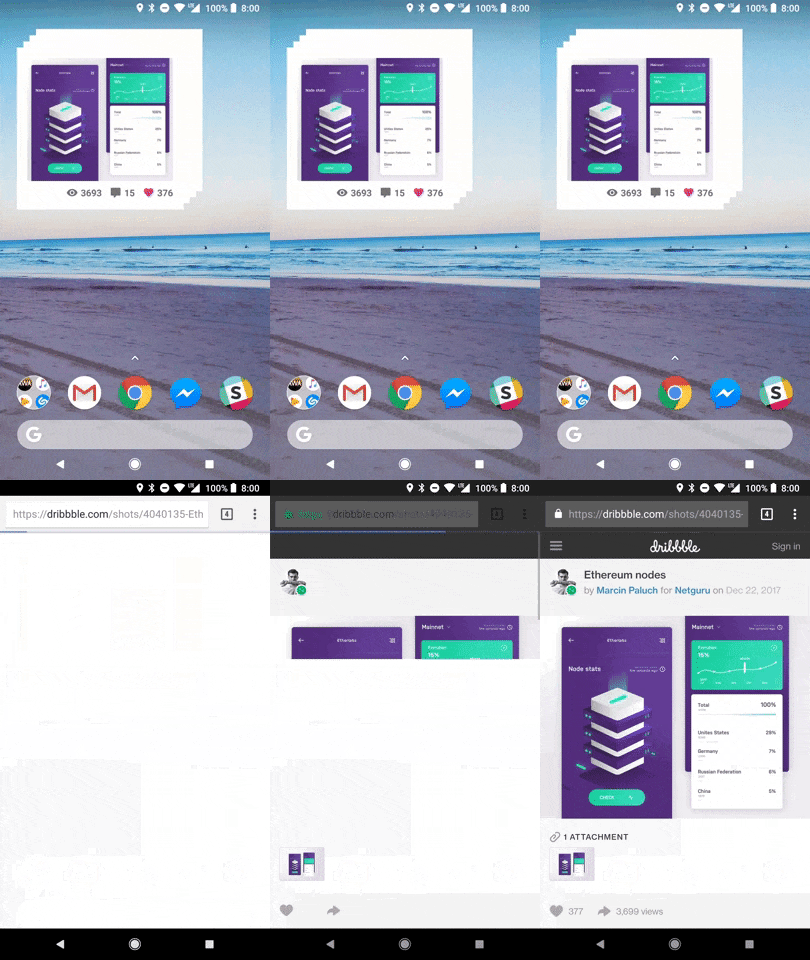
- shotのページをwebで閲覧
の3つになります。
本体のアプリ側でloginを実装していますが、この記事では言及しないので、コードを見ていただけると幸いです。
主なclassとxml
今回作成したクラスとxmlは以下の通りです。
StackViewを使用したAppW idgetを作成する場合、基本的には似たような構成になるかと思います。
class
-
StackViewAppWidgetProvider
- AppWidgetProviderを継承
- App Widgetを全般的に操作する
-
StackViewAppWidgetService
- RemoteViewsServiceを継承
- 次に出てくる
RemoteViewsFactoryを操作する
-
StackViewAppWidgetRemoteViewsFactory
- RemoteViewsFactoryを実装
- StackViewの各itemになる
RemoteViewsを生成するためのinterfaceであるRemoteViewsFactoryを実装
xml
-
app_widget_info
- App Widgetの基本的な情報を設定する
-
app_widget_stack_view
- App Widget全体のレイアウトを定義している
-
item_app_widget_stack_view
- StackViewの各itemのレイアウトを定義している
App Widgetの基本的な設定を行う
App Widgetのサイズ指定や、更新頻度などの基本的な設定はapp_widget_infoで行なっています。
このファイルをres/xmlに配置し、AndroidManifest.xmlに次のように記述します。
<receiver android:name=".appwidget.StackViewAppWidgetProvider">
    <!-- 中略 -->
    <meta-data
        android:name="android.appwidget.provider"
        android:resource="@xml/app_widget_info" />
</receiver>
それでは、このxmlファイルの中身を見ていきましょう。
<?xml version="1.0" encoding="utf-8"?>
<appwidget-provider xmlns:android="http://schemas.android.com/apk/res/android"
    android:initialLayout="@layout/app_widget_stack_view"
    android:minHeight="@dimen/appwidget_cell_size_2"
    android:minWidth="@dimen/appwidget_cell_size_4"
    android:previewImage="@mipmap/ic_launcher_round"
    android:resizeMode="horizontal|vertical"
    android:updatePeriodMillis="3600000"
    android:widgetCategory="home_screen" />
App Widgetのサイズについて
minHeightとminHeightで、App Widgetをホーム画面に配置した時に表示されるサイズを指定できます。
因みにApp Widgetのcell sizeは固定値で、以下のように定められています。
| # of Cells | Available Size (dp) |
|---|---|
| 1 | 40dp |
| 2 | 110dp |
| 3 | 180dp |
| 4 | 250dp |
| ... | ... |
| n | 70 × n − 30 |
詳しくはApp Widget Design Guidelineをご覧ください。
もしこれ以外のサイズをした場合には、最も近いcell sizeの値に丸め込まれるようです。
似たようなattributeにminResizeWidthとminResizeHeightというものがありますが、App Widgetをホーム画面に配置した時に表示されるサイズよりも小さくリサイズさせることを可能にする場合に指定します。
つまり、App Widgetをホーム画面に配置した時に表示されるサイズをリサイズ可能な最小サイズにしたい場合には、これらのattributeの指定は不要です。
リサイズについてはresizeModeattributeで指定します。
Widget Categoryについて
widgetCategoryattributeにはhome_screenとkeyguardを指定できます。
keyguardを設定すると、App Widgetをロックスクリーンに配置することができます。
しかし、Android 5.0以上の端末ではロックスクリーンにApp Widgetを配置することができなくなったため、ほとんどの場合はhome_screenを使用することになると思います。
AppWidgetのベースを作成する
AppWidgetの作成はAppWidgetProviderを継承したクラスに実装します。
今回の場合はStackViewAppWidgetProviderがそれにあたります。
基本的には、AppWidgetProvider#onUpdateをoverrideして、そこにViewの作成処理などを書いていくだけです。
StackViewを用いた今回の場合は以下のようになりました。
class StackViewAppWidgetProvider : AppWidgetProvider() {

    // 中略

    override fun onUpdate(context: Context, appWidgetManager: AppWidgetManager, appWidgetIds: IntArray) {
        super.onUpdate(context, appWidgetManager, appWidgetIds)

        appWidgetIds.forEach { appWidgetId ->
            val intent = Intent(context, StackViewAppWidgetService::class.java).apply {
                putExtra(AppWidgetManager.EXTRA_APPWIDGET_ID, appWidgetId)
                data = Uri.parse(toUri(Intent.URI_INTENT_SCHEME))
            }

            RemoteViews(context.packageName, R.layout.app_widget_stack_view).apply {
                setRemoteAdapter(R.id.stack_view, intent)
            }.let {
                // 中略

                appWidgetManager.updateAppWidget(appWidgetId, it)
            }
        }
    }

    // 以下略
}
特に難しいことはなく、RemoteViewsのインスタンスを作成し、AppWidgetManager#updateAppWidgetに渡してあげるだけです。
ただし、今回はStackViewを使用しているので、StackViewAppWidgetServiceを起動するためのintentと一緒にRemoteViews#setRemoteAdapterを呼ぶ必要があります。
StackViewのitemが空の時の実装
RemoteViewsにはRemoteViews#setEmptyViewというメソッドが用意されています。
これを使用すると、もしStackViewのitemが空の場合に表示させるViewを指定することができます。
例えば、
RemoteViews(context.packageName, R.layout.app_widget_stack_view).apply {
    setRemoteAdapter(R.id.stack_view, intent)
    setEmptyView(R.id.stack_view, R.id.empty_view)
}
のようにします。
注意点としては第二引数に与える値はlayoutではなく、viewのidだということです。
Empty ViewはStackViewと同じlayoutファイルに定義する必要があるため、このようになっているのかと思います。
StackViewをループ表示可能にする
StachViewはdefaultではループ表示がoffになっています。
これを可能にするには、StackViewのattributeのandroid:loopViewsをtrueにすれば良いです。
<?xml version="1.0" encoding="utf-8"?>
<StackView xmlns:android="http://schemas.android.com/apk/res/android"
    android:id="@+id/stack_view"
    android:layout_width="match_parent"
    android:layout_height="match_parent"
    android:loopViews="true" />
StackViewのitemを生成する
App WidgetでStackViewのitemを生成するには、RemoteViewsServiceを継承したクラスと、RemoteViewsFactoryを実装したクラスが必要になります。
今回の場合は、StackViewAppWidgetServiceとStackViewAppWidgetRemoteViewsFactoryがそれにあたります。
StackViewAppWidgetRemoteViewsFactoryで各itemのViewの挙動を実装し、StackViewAppWidgetServiceでRemoteViewsの生成処理を行なっています。
まずStackViewAppWidgetServiceから見ていきましょう。
class StackViewAppWidgetService : RemoteViewsService() {

    // 中略

    override fun onGetViewFactory(intent: Intent?): RemoteViewsFactory =
            StackViewAppWidgetRemoteViewsFactory(
                    applicationContext,
                    getPopularShots,
                    checkLike
            )

    // 以下略
}
このクラスでは、RemoteViewsService#onGetViewFactoryをoverrideし、返り値としてRemoteViewsFactoryの実装クラスであるStackViewAppWidgetRemoteViewsFactoryのインスタンスを返しています。
StackViewAppWidgetRemoteViewsFactoryの生成引数には、ApplicationContextとDIしている各種ユースケースを渡しています。
次に、StackViewのitemのViewの挙動を実装しているStackViewAppWidgetRemoteViewsFactoryを見てみましょう。
class StackViewAppWidgetRemoteViewsFactory(
        private val context: Context,
        private val getPopularShots: GetPopularShots,
        private val checkLike: CheckLike
) : RemoteViewsService.RemoteViewsFactory {

    private val remoteViewsList: ArrayList<RemoteViews> = ArrayList()
    private val compositeDisposable: CompositeDisposable = CompositeDisposable()

    override fun onCreate() {
        // no-op
    }

    override fun onDataSetChanged() {
        remoteViewsList.clear()
        fetchShotsAndCreateRemoteViews()
    }

    override fun getCount(): Int = remoteViewsList.size

    override fun getViewTypeCount(): Int = 1

    override fun hasStableIds(): Boolean = true

    override fun getLoadingView(): RemoteViews? = null

    override fun getViewAt(position: Int): RemoteViews = remoteViewsList[position]

    override fun getItemId(position: Int): Long = position.toLong()

    override fun onDestroy() {
        remoteViewsList.clear()
        compositeDisposable.clear()
    }

    // 以下略
}
データの取得とViewの作成
このクラスでは、データの取得からViewの設定までを一貫して行なっています。
一般的にはonCreate()でデータの取得からViewへの反映を行います。
しかし、onCreate()の処理に20秒以上かかってしまうと、ANR("Application Not Responding")状態になってしまいます。
そのため、重い処理を行う際にはその処理をonDataSetChanged()もしくは、getViewAt(position: Int)で行うことが推奨されています。
今回のsampleアプリではデータの取得に20秒以上かかることは基本的にないですが、念の為onDataSetChangedに処理をまとめています。
item数について
StackViewで画面内に一度に表示されるitemの数はdefaultで4つに固定されています。
RemoteViewsFactoryで定義されているgetCountで返すべき値というのは、StackViewをスライドさせて表示させるitemの総数になります。
つまり、getCountで5を返そうが、StackViewに一度に表示されるitemは4つです。スライドすると5個目のitemが表示されます。
StackViewで一度に表示するitemの数を変えるには、StackViewをカスタムするしかなさそうです。
因みに、StackViewのソースコードを覗いてみると、
    /**
     * Number of active views in the stack. One fewer view is actually visible, as one is hidden.
     */
    private static final int NUM_ACTIVE_VIEWS = 5;
と書いてありました。
itemは4つは表示されているけど、一つ余計にitemをStackViewの枠外かどこか見えないところに先読みして表示しているようですね。
読み込み中の表示について
データの取得に時間がかかる場合などには、RemoteViewsFactory#getLoadingViewで別のRemoteViewを作成しておくと、読み込み中のViewを設定してくれるようです。
defaultの読み込み画面は非常に寂しいものなので、実装しておくといいかもしれません。
Actionの設定とStackViewの更新
今回実装したActionは以下の2つです。
| shotをお気に入りする(like/unlike) | shotのページをwebで閲覧 |
|---|---|
 |
 |
RemoteViewsには通常のViewのようにlistenerをセットするメソッドが存在しません。
じゃあ、viewを押した時とかの実装をするにはどうしたらいいのーとなりますよね。
RemoteViewでは、あらかじめviewに対してActionを設定しておいて、そのviewが押された時にはBroadCastReceiverを継承しているAppWidgetProviderにactionを通知することでそれを解決します。
View側
今回のsample projectでは、View側で次のようにしてactionをあらかじめ設定しています。
class StackViewAppWidgetRemoteViewsFactory(
        private val context: Context,
        private val getPopularShots: GetPopularShots,
        private val checkLike: CheckLike
) : RemoteViewsService.RemoteViewsFactory {

    // 中略

    private fun RemoteViews.setShot(shot: Shot, isLiked: Boolean) {
        setShotImage(shot.images.normal)
        setShotBasicInfo(shot)
        setShotLikeState(isLiked)
        setClickEvent(shot, isLiked)
    }

    // 中略

    private fun RemoteViews.setClickEvent(shot: Shot, isLiked: Boolean) {
        setOnShotClicked(shot.url)
        setOnLikeClicked(shot.id, isLiked)
    }

    private fun RemoteViews.setOnShotClicked(url: String) {
        val bundle = Bundle().apply {
            putString(StackViewAppWidgetProvider.KEY_SHOT_URL, url)
        }
        val intent = Intent().apply {
            action = StackViewAppWidgetProvider.ACTION_CLICK_SHOT
            putExtras(bundle)
        }
        setOnClickFillInIntent(R.id.shot_image_view, intent)
    }

    private fun RemoteViews.setOnLikeClicked(id: String, isLiked: Boolean) {
        val bundle = Bundle().apply {
            putString(StackViewAppWidgetProvider.KEY_SHOT_ID, id)
        }
        val intent = Intent().apply {
            action = if (isLiked) StackViewAppWidgetProvider.ACTION_UNLIKE else StackViewAppWidgetProvider.ACTION_LIKE
            putExtras(bundle)
        }
        setOnClickFillInIntent(R.id.like_icon_image_view, intent)
    }
}
上を見ていただいて分かる通り、Remoteviews#setOnClickFillInIntentにactionを設定したintentを渡します。
BroadCastの受け取り側で何かしらの情報を参照したい場合には、intentにその情報を付与させればいいです。
BroadCastReceiver側
BroadCastReceiver側というのは、今回の場合StackViewAppWidgetProviderがそれにあたります。
StackViewAppWidgetProviderでは、BroadCastを受け取った時の挙動だけでなく、BroadCastReceiver自体の設定も行なっています。
class StackViewAppWidgetProvider : AppWidgetProvider() {

    companion object {
        const val KEY_SHOT_ID = "key_shot_id"
        const val KEY_SHOT_URL = "key_shot_url"

        const val ACTION_CLICK_SHOT = "com.ronnnnn.stackviewappwidgetsample.widget.CLICK_SHOT"
        const val ACTION_LIKE = "com.ronnnnn.stackviewappwidgetsample.widget.LIKE"
        const val ACTION_UNLIKE = "com.ronnnnn.stackviewappwidgetsample.widget.UNLIKE"
    }

    // 中略

    override fun onUpdate(context: Context, appWidgetManager: AppWidgetManager, appWidgetIds: IntArray) {
        super.onUpdate(context, appWidgetManager, appWidgetIds)

        appWidgetIds.forEach { appWidgetId ->
            val intent = Intent(context, StackViewAppWidgetService::class.java).apply {
                putExtra(AppWidgetManager.EXTRA_APPWIDGET_ID, appWidgetId)
                data = Uri.parse(toUri(Intent.URI_INTENT_SCHEME))
            }

            RemoteViews(context.packageName, R.layout.app_widget_stack_view).apply {
                setRemoteAdapter(R.id.stack_view, intent)
            }.let {
                val clickIntent = Intent(context, StackViewAppWidgetProvider::class.java).apply {
                    putExtra(AppWidgetManager.EXTRA_APPWIDGET_ID, appWidgetId)
                }
                val clickPendingIntent = PendingIntent.getBroadcast(context, 0, clickIntent, PendingIntent.FLAG_UPDATE_CURRENT)
                it.setPendingIntentTemplate(R.id.stack_view, clickPendingIntent)

                appWidgetManager.updateAppWidget(appWidgetId, it)
            }
        }
    }

    override fun onReceive(context: Context, intent: Intent) {
        super.onReceive(context, intent)

        // 中略

        when (intent.action) {
            ACTION_CLICK_SHOT -> {
                val shotUrl = intent.getStringExtra(KEY_SHOT_URL)
                val uri = Uri.parse(shotUrl)
                Intent(Intent.ACTION_VIEW, uri).let {
                    context.startActivity(it)
                }
            }

            ACTION_LIKE -> {
                val shotId = intent.getStringExtra(KEY_SHOT_ID)
                likeShot.execute(shotId)
                        .subscribeOn(Schedulers.io())
                        .subscribe({ updateAppWidget(context) }, Timber::e)
            }

            ACTION_UNLIKE -> {
                val shotId = intent.getStringExtra(KEY_SHOT_ID)
                unlikeShot.execute(shotId)
                        .subscribeOn(Schedulers.io())
                        .subscribe({ updateAppWidget(context) }, Timber::e)
            }
        }
    }

    private fun updateAppWidget(context: Context) {
        val appWidgetManager = AppWidgetManager.getInstance(context)
        val appWidgetComponentName = ComponentName(context.applicationContext, StackViewAppWidgetProvider::class.java)
        val appWidgetIds = appWidgetManager.getAppWidgetIds(appWidgetComponentName)
        appWidgetManager.notifyAppWidgetViewDataChanged(appWidgetIds, R.id.stack_view)
    }

    // 以下略
}
まず、BroadCastReceiver自体の設定についてですが、RemoteViews#setPendingIntentTemplateというメソッドを使用して設定を行います。
onUpdate内でupdateしたいRemoteViewに対してこの設定を行います。
BroadCastを受け取った時の挙動は、onReceiveに実装します。
Actionの種類ごとに行いたい処理を実装すればいいです。
もし、viewのクリックによって、StackViewのitemのviewを更新したい場合には、AppWidgetManager#notifyAppWidgetViewDataChangedでStackViewの各itemを更新することができます。
ただし、更新されるitemを指定することはできず、全てのitemが更新されることに注意してください。
また、StackViewが更新される際の流れは、公式ドキュメントの図がわかりやすいので、ここにも載せておきます。

おわりに
AppWidgetではRemoteViewsを使用しなければならないので、一般的なViewよりは使い勝手が悪い部分がありますが、工夫次第ではできることも多いのかなという印象を受けました!
最近はAppWidget周りのAPIが更新されていないので、今後のupdateにちょっとだけ期待しながら終わりにさせていただこうと思います。(せめて使えるView増やして...)
何かありましたら、コメント等頂けると非常に嬉しいです!!🙇
