
HTML5
<body>
<!-- ハンバーガーボタン -->
<div class="ham" id="ham">
<!-- ハンバーガーボタンのライン -->
<span class="ham_line ham_line1"></span>
<span class="ham_line ham_line2"></span>
<span class="ham_line ham_line3"></span>
</div>
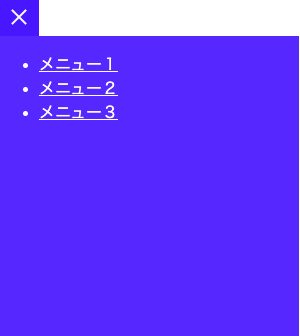
<!-- メニューの中身 -->
<div class="menu_wrapper" id="menu_wrapper">
<div class="menu">
<ul>
<li><a href="#1" style="color: #FFF;">メニュー1</a></li>
<li><a href="#2" style="color: #FFF;">メニュー2</a></li>
<li><a href="#3" style="color: #FFF;">メニュー3</a></li>
</ul>
</div>
</div>
CSS
.ham{
    position: relative;
    width: 40px;
    height: 40px;
    cursor: pointer;
    background-color: rgba(0, 0, 255, 0.911);
}
/* ハンバーガボタンのライン */
.ham_line {
    transition: all 0.3s;
	position: absolute;
	left: 10px;
	width: 20px;
	height: 2px;
    background-color: #FFF;
}
.ham_line1 {
    top: 10px;
}
.ham_line2 {
	top: 18px;
}
.ham_line3 {
	top: 26px;
}

/* Javascriptでクリックイベントが発火した後の処理 ハンバーガボタンのライン */
.clicked .ham_line1{
    transform: rotate(45deg);
    top: 20px;
}

.clicked .ham_line2{
    width: 0px;
}

.clicked .ham_line3{
    transform: rotate(-45deg);
    top: 20px;
}
/* メニューの表示 */
.menu {
    position: fixed;
    left: -400px;
    width: 300px;
	height: 300px;
    background-color: rgba(0, 0, 255, 0.849);
    transition: all 0.5s;
    color: #FFF;
}

.clicked .menu {
	left: 8px;
}
JavaScript
  const ham = document.querySelector('#ham');
  const menu_wrapper = document.querySelector('#menu_wrapper')

// addEventListener さまざまなイベント処理を実行することができるメソッド
  ham.addEventListener('click', function(){
// classListとは、対象要素に設定しているクラスを配列のように扱えるオブジェクト
    ham.classList.toggle('clicked');
    menu_wrapper.classList.toggle('clicked')
  });
addEventListener
classListとは