少し前にKickStarterでEspruinoの超絶小型版である Espruino Pico が登場して話題になりましたが、実はそのとき同時に「金額が一定額に達したら MQTT対応する 」とのアナウンスもされておりました。
その後見事に目標金額を達成したようで、EspruinoのMQTT対応が決定したらしいです。とあるトイレのドアの空き状況を超絶不安定なWifi/CC3000の上でひたすらpostリクエスト使って投げ続けてきた僕にとっては、まさに待ち望んだアップデートであったために、これは春まで待ちきれない!という具合にテンションが上がっていた訳です。
で、Espruinoの公式フォーラム見ていたら、なんとPICOのリリースに先駆けて「MQTTはもう使えるようにし始めてるよ」なんて言っているのを見つけたのでさっそく試してみました。(記事としては11月なんですがね)
目標
流れ
- パーツの調達と結線
- Espruinoのファームウェアをアップデート
- MQTTのbroker / subscriber を用意
- 実行
パーツの調達と結線
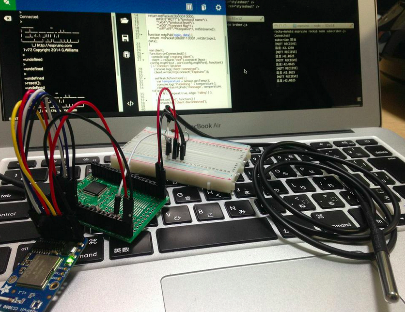
必要物品は以下。15日目の記事及び5日目の記事を参考に調達及び結線します。
- Espruino
- CC3000Wifiモジュール
- 温度センサ
Espruinoのファームウェアをアップデート
通常のファームウェアアップデートで使えるバージョンではMQTTを使えない(2014/12/21時点)ので、最新版のバイナリのURLを指定する方法でファームウェアをアップデートします。
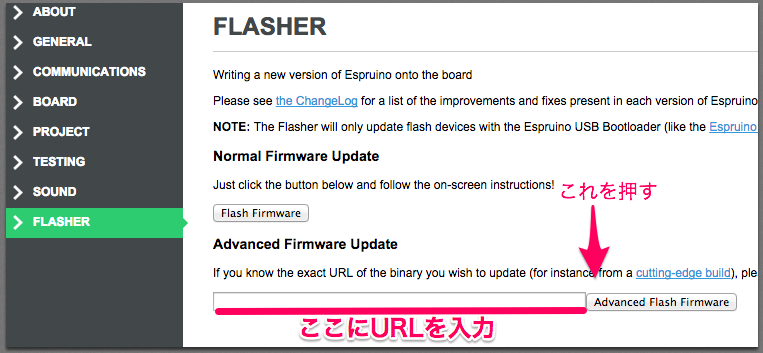
WebIDEの設定画面 > Flusher > Advanced Firmeware Updateの下にあるテキストインプットに下記URLを入力してAdvanced Flush Firmwareボタンをクリックします。その後は通常のファームウェアアップデートと同手順です。(2日目の記事を参照)
http://www.espruino.com/binaries/git/commits/1f5e0ac3cd62ff9328e3c38a03f07d7644fff3e8/espruino_1v72_espruino_1r3.bin
MQTT Broker/subscriber の準備
Espruinoメインとはいえ、MQTTのサーバ(broker)と、本当に動いているかどうかを確かめるためにsubscriberが必要です。MQTT.jsを利用したbrokerとsubscriberをGithubのリポジトリに置いたのでそれを使いましょう。中身はExampleのsubscriberとbroadcast serverを参考に書いています。
以下、node.js,npmがインストールされた環境での手順を記載します。
git clone https://github.com/rockymanobi/espruino-mqtt-sample.git
cd espruino-mqtt-sample
npm install
ターミナル2画面で以下コマンドをそれぞれ実行します。
brokerの実行
node broker.js
subscriberの実行
node subscriber.js
こんな風になっていれば準備完了です。Ctrl + cで終了する事ができます。
試しにnode publisher.jsを実行するとsubscriber.jsを実行しているウィンドウに何か出てくるので、それで疎通確認をしても良いと思います。
プログラム
下記プログラムのvar configの値を、実行する環境に合わせて編集した後に実行します。ちなみにmqttHostにはlocalhostよりも、IPアドレス(broker.js実行時に表示されます)を指定した方が良いです(Espruino、たまにlocalhost接続だとwifiモジュールが落ちたりするので)
var config = {
  wifiSSID: 'ssid',
  wifiKey: 'password',
  mqttHost: '192.168.xxx.xxx',
  mqttPort: '1883',
};

function mtStr(s) {
  return String.fromCharCode(s.length>>8,s.length&255)+s;
} function mtPacket(cmd, variable, payload) {
  return String.fromCharCode(cmd, variable.length+payload.length)+variable+payload;
}
function mtpConnect(name) {
  return mtPacket(0b00010000,
           mtStr("MQTT")/*protocol name*/+
           "\x04"/*protocol level*/+
           "\x00"/*connect flag*/+
           "\xFF\xFF"/*Keepalive*/, mtStr(name));
}
function mtpPub(topic, data) {
  return  mtPacket(0b00110001, mtStr(topic), data);
}

var client;
function onConnected() {
  console.log('creating client');
  client = require("net").connect({host : config.mqttHost , port:config.mqttPort}, function() {
    console.log('client connected');
    client.write(mtpConnect("Espruino"));

    setWatch(function() {
      var temperature = sensor.getTemp();
      console.log("Publishing " + temperature );
      client.write(mtpPub("message", temperature. toFixed(4)));
    }, BTN1, { repeat:true, edge: 'falling' } );

    client.on('end', function() {
      console.log('client disconnected');
    });
  });
}


var wlan,sensor, ow;
// main
function main(){
  // Setup Temperature Sensor
  ow = new OneWire(A1);
  sensor = require("DS18B20").connect(ow);
  sensor.getTemp();
  // WIFI
  wlan = require("CC3000").connect();
  wlan.connect( config.wifiSSID , config.wifiKey, function (s) {
    if (s=="dhcp") {
      console.log("My IP is "+wlan.getIP().ip);
      onConnected();
    }
  });
}

main();
基本的にはフォーラムのサンプルのままですが、最新ビルドにアップデートしたEspruinoで(espruino_1v72_espruino_1r3.bin)でなぜかsetInterval,setTimeoutがうまく動作しなかったのでsetWatchを使い、BTN1を押したタイミングで温度をMQTTで送信するようにしました。
実行
Espruinoの接続設定が、broker/sbscriberが動いているPCが同じネットワークであることを確認しつつ、プログラムを実行します。
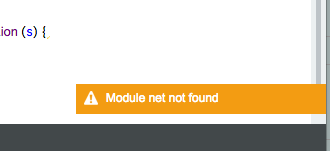
実行時にnetなんてモジュールは無いと言われますが普通に動きます。

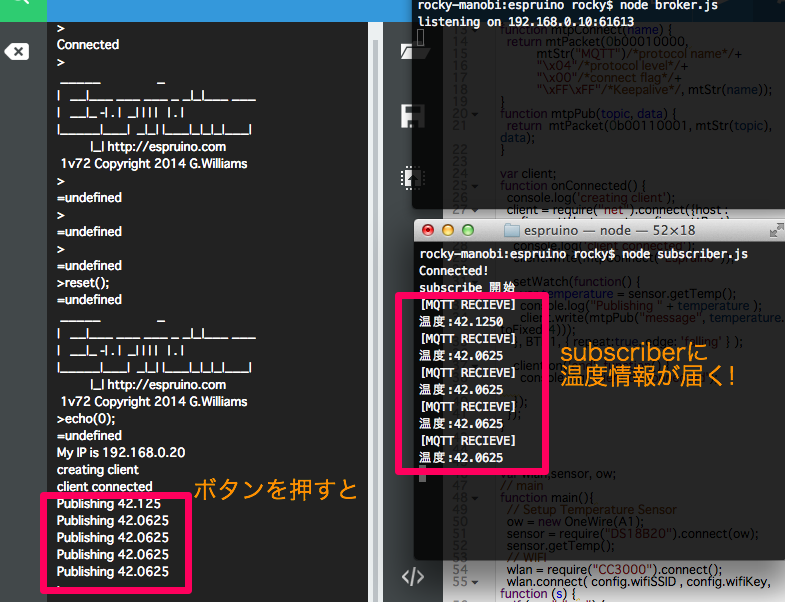
ボタンを押すたびに、EspruinoからMQTTで送信した温度が、subscriberのコンソールに表示されています。どうやら成功のようです。暖かそうですね。
まとめ
フォーラムの文章にもある通り、単純すぎるサンプルでもあるのでこのまま使える代物では無いですが、とりあえず、MQTTデキソウダ!と思える感じには動かすことに成功しました。今後は接続喪失時の再接続とか、耐久性とか、いろいろ試していけたらと思います。


