| 本シリーズのトップページ |
|---|
| [備忘録] Samba サーバおよびクライアントの実践例 |
概要
Sambaでアカウント「foo」を使って「パスワードあり」の共有フォルダを公開する.
共有フォルダは /home/foo とする.
アカウント「foo」を Linux の /etc/passwd と、Samba サーバの両方に作っておく点が
初見だと分かりにくいと思う (私はそうでした)
環境
DISTRIB_ID=Ubuntu
DISTRIB_RELEASE=18.04
DISTRIB_CODENAME=bionic
DISTRIB_DESCRIPTION="Ubuntu 18.04.4 LTS"
手順
1. Sambaサーバである Linux 上にアカウント「foo」を作成しておく
もしも細かく設定したい場合は、useradd のオプションを確認してください.
$ sudo useradd foo
2. Windows 向けのアカウント「foo」を作成する
Samba では Linux 上の /etc/passwd は使えないので、
pdbedit1を使って Windows 公開向けのアカウント「foo」を作成する.
$ sudo pdbedit -a foo
これによりアカウント「foo」を使って Samba 認証が可能になる
Windows ユーザ
 ↓
Samba サーバが管理するアカウント「foo」
 ↓
Linux の /etc/passwd のアカウント「foo」
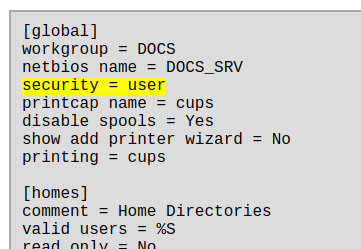
3. /etc/samba/smb.conf の [global] で「security = user」にしておく
・https://web.mit.edu/rhel-doc/4/RH-DOCS/rhel-rg-ja-4/s1-samba-servers.html

4. /etc/samba/smb.conf に [homes] セクションを作る
他のアカウントを作成した場合も /home/(アカウント) が公開できるようにしておく.
この辺りはセキュリティを考慮して調整が必要だと思う.
[homes]
    comment = Home Directories
    browseable = no
    writable = yes
5. Samba を再起動する
$ sudo systemctl restart smbd.service
以上
-
smbpasswd コマンドでも可能なはず ↩